Posts Tagged ‘SOTA’
 Yaesu FT-1DR: A Trail Friendly SOTA HT
A common topic in the QRP community is the Trail Friendly Radio (TFR) concept for backpack-style operating on the high-frequency bands. I’ve adapted the concept for the VHF/UHF bands, calling it the VHF Trail Friendly Radio (VTFR).

Strong candidates for the best VTFR include the Elecraft KX3 (with 2m option) and the Yaesu FT-817. Heck, both of these radios deliver all of the HF bands, 6m and 2m in one portable package. (The FT-817 also has 70cm.) See my blog post that compares the two rigs.
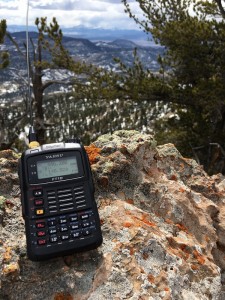
But the other set of strong contenders for the best VTFR is one of the many dualband HTs available on the market. It is hard to beat the compact, portable attributes of these great little radios for casual use on the trail. I’m not going to review them all but instead talk about my current favorite: the Yaesu FT-1DR. (Yaesu has recently replaced the FT-1DR with the newer model FT1XDR, which is the same design but with an improved GPS receiver and larger battery pack.)
My main usage of the radio is when hiking and doing Summits On The Air (SOTA) activations. This radio has a lot to offer in terms of capability and features, but the main things that stand out are 2m/70cm band coverage, two independent receivers and built-in GPS/APRS capability. Most SOTA VHF operating is on 2m fm so that band is critical, but I also make contacts on 70cm. More important is that together 2m and 70cm covers that vast majority of fm repeaters in my state, providing the best backcountry repeater coverage. The built-in APRS features allow the HT to be an effective tracking device as I move down the trail. SOTA chasers can see my position in real-time and anticipate when I’ll be on the summit. The radio has two separate receivers which turns out to be very useful when on the trail. With two receivers, I can monitor 146.52 MHz (2m fm calling frequency, often used for SOTA) while also keeping an ear on a local 2m or 70cm repeater. Another configuration is using one side of the radio to ping my location via APRS while the other side monitors 146.52 MHz.
The extended receive capability of the radio opens up lots of listening options: AM broadcast, FM broadcast, airband, shortwave and NOAA weather radio. I don’t use these very often but there are times that I want to tune to weather or news.
I am not a huge fan of Yaesu’s C4FM digital mode but do use it on occasion. The DN (digital narrow) mode supports voice and position information simultaneously, so Joyce KØJJW and have been using it to keep track of each other on the trail. The radio provides a basic indication of distance and direction to another C4FM radio.
One final note: if you buy an FT-1DR, I recommend upgrading the belt clip to the BC-102 clip from Batteries America. It is way better than the standard one from Yaesu.
73, Bob KØNR
The post Yaesu FT-1DR: A Trail Friendly SOTA HT appeared first on The KØNR Radio Site.
Winter SOTA Activation of Kaufman Ridge North
Today, Joyce KØJJW and I activated Kaufman Ridge North (W0C/SP-085) for Summits On The Air (SOTA). We’ve been on the summit before, including the first ever SOTA activation back in September of 2012. This summit is close to our cabin, so it made for a convenient hike. The mountain is not that difficult of a climb but we encountered quite a bit of snow in March, up to three feet in places, which we tromped across with snowshoes.

My blog posting about the next mountain to the south, Kaufman Ridge HP (W0C/SP-081), outlines a good way to access both summits during the summer. However, a seasonal gate closure (December to April) means we needed to find a different route. We approached the mountain from the north, parking our vehicle on Castle Court (a short side road off of Kaufman Road). We quickly crossed what appears to be private property (empty lot, no signs) to get to the US Forest Service boundary. Once we hopped the fence we were on public lands. We intentionally routed to the east to avoid some houses.
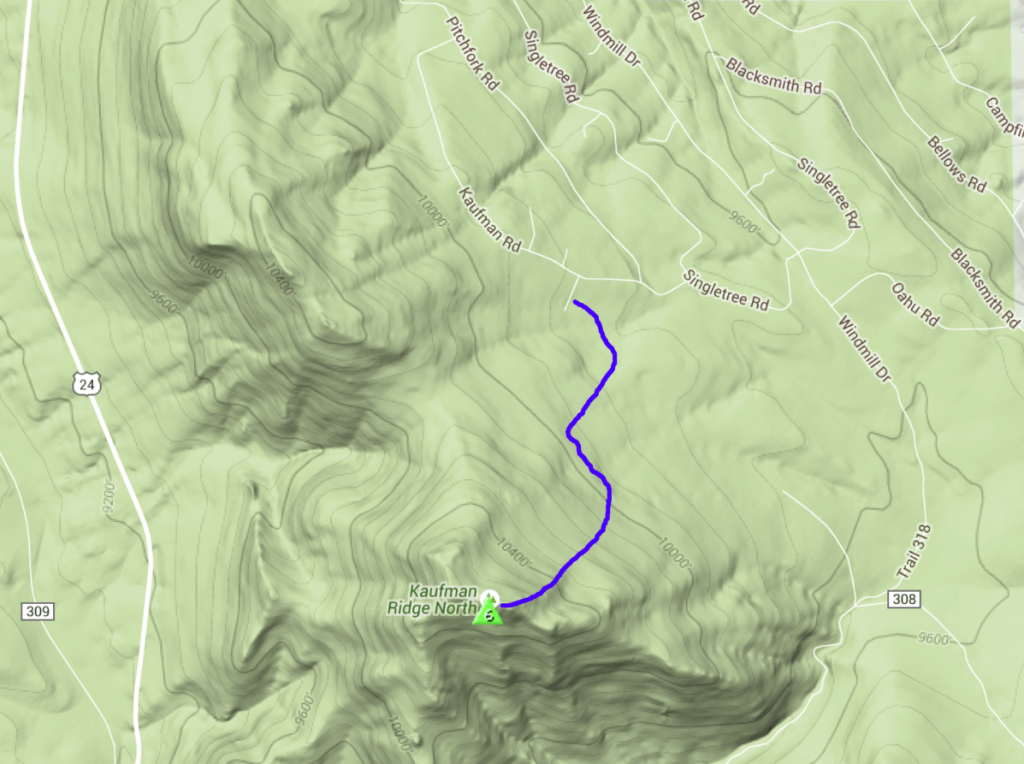
I don’t claim that this route is optimal. We had to break a lot of trail, pushing through the snow. We found a section of trail that had recent snowshoe traffic on it but it wasn’t of much use to us heading to the summit. We followed numerous game trails which appeared and disappeared on the side of the mountain. Mostly, we busted through the snow on our own. Surprisingly, the last quarter mile to the summit had little snow, so we removed our snowshoes at that point and just hiked in boots.
 My Yaesu FT-1DR has become my favorite rig for SOTA activations. It covers both 2m and 70cm with dual-receiver capability. it has a built-in GPS receiver and APRS capability that facilitates easy APRS tracking. Joyce and I have a pair of these which we’ve been using to track each other’s positions on the few occasions we get separated on the trail.
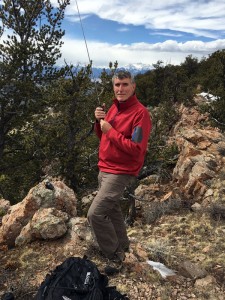
After we made the summit, I made a few contacts on 146.52 MHz. Thanks to Jim KDØMRC, Dave KØHTX, Carl K5UK and Candy KEØDMT for giving me my four required SOTA contacts.
The weather turned out to be better than predicted…partly cloudy and temps around 50 degrees F. On the way back down, we retraced our ascent path so we had more of a snowshoe trail to follow. I have to admit that this trip was a good lesson in how off-trail snowshoeing can really be a challenge. This was many times more difficult than a summer trail hike of equal length and elevation gain. Trip stats: 2.6 total miles, 1300 vertical feet.
At least, that’s my story and I’m sticking to it.
73, Bob K0NR
The post Winter SOTA Activation of Kaufman Ridge North appeared first on The KØNR Radio Site.
Chinese Kit Invasion
A few days later I stumbled upon an entry on the SOTA reflector entitled "QRPp Activation with a $3.56 Chinese Pixie..." by Manuel HB9DQM. Manuel had seen the radio on EBAy and couldn't pass up the opportunity to give it a shot. He not only built the radio, which takes the better part of an hour, but he decided to put it to the test in the field.
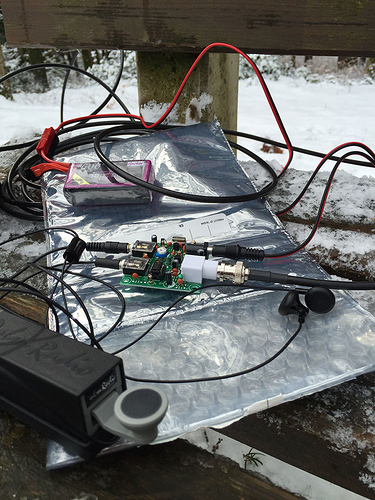 |
| HB9DQM Pixie Station |
Using the configuration above, running 300 milliwatts, he made 16 QSO's from a summit top bench. Pretty cool. 300 mw, wire antenna, battery power and a straight key, ah the magic of Ham Radio.
Of course the radio has limitations, it's crystal controlled, the radio comes with a 7.023 crystal (HB9DQM used a 7.030 crystal) and the bandwidth on receive is very wide, but as Manuel demonstrated, you can have some good, cheap fun with this little radio. He said he was listening to the world news, in English (courtesy of a BC station), while he worked the callers. An interesting diversion.
I did some further research on YouTube and found many happy campers who had purchased and assembled the kit. So I took the big plunge. I even went overboard and bought a couple of extra's as projects for my teenage grandsons who are hams.
There is one thing a little troublesome about this kit invasion however, at these prices, the other QRP kit providers can't compete. What will happen to them? Such is the world these days.
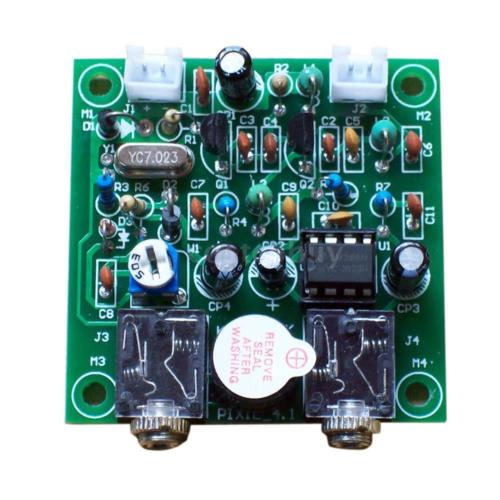 |
| Chinese version of the Pixie 2 |
Chinese Kit Invasion
A few days later I stumbled upon an entry on the SOTA reflector entitled "QRPp Activation with a $3.56 Chinese Pixie..." by Manuel HB9DQM. Manuel had seen the radio on EBAy and couldn't pass up the opportunity to give it a shot. He not only built the radio, which takes the better part of an hour, but he decided to put it to the test in the field.
|
| HB9DQM Pixie Station |
Using the configuration above, running 300 milliwatts, he made 16 QSO's from a summit top bench. Pretty cool. 300 mw, wire antenna, battery power and a straight key, ah the magic of Ham Radio.
Of course the radio has limitations, it's crystal controlled, the radio comes with a 7.023 crystal (HB9DQM used a 7.030 crystal) and the bandwidth on receive is very wide, but as Manuel demonstrated, you can have some good, cheap fun with this little radio. He said he was listening to the world news, in English (courtesy of a BC station), while he worked the callers. An interesting diversion.
I did some further research on YouTube and found many happy campers who had purchased and assembled the kit. So I took the big plunge. I even went overboard and bought a couple of extra's as projects for my teenage grandsons who are hams.
There is one thing a little troublesome about this kit invasion however, at these prices, the other QRP kit providers can't compete. What will happen to them? Such is the world these days.
|
| Chinese version of the Pixie 2 |
Mountain Goat Summit Revisited
| Time | Call | Band | Mode | Notes |
|---|---|---|---|---|
| 17:31z | W7RV | 10MHz | CW | |
| 17:31z | K0LAF | 10MHz | CW | |
| 17:32z | K6JMP | 10MHz | CW | |
| 17:33z | W7USA | 10MHz | CW | |
| 17:34z | K7JFD | 10MHz | CW | |
| 17:34z | AK5SD | 10MHz | CW | |
| 17:35z | NU7Y | 10MHz | CW | |
| 17:35z | NG6R | 10MHz | CW | |
| 17:36z | ND7PA | 10MHz | CW | |
| 17:36z | N7LP | 10MHz | CW | |
| 17:38z | K1LB | 10MHz | CW | |
| 17:41z | W4AMW | 10MHz | CW | |
| 17:41z | K0HNC | 10MHz | CW | |
| 17:42z | KG3W | 10MHz | CW | |
| 17:47z | K6EL | 14MHz | CW | |
| 17:48z | AE9F | 14MHz | CW | |
| 17:48z | KG3W | 14MHz | CW | |
| 17:49z | NA4SO | 14MHz | CW | |
| 17:51z | N9KW | 14MHz | CW | |
| 17:51z | NK6A | 14MHz | CW |
January VHF Contest Plus SOTA
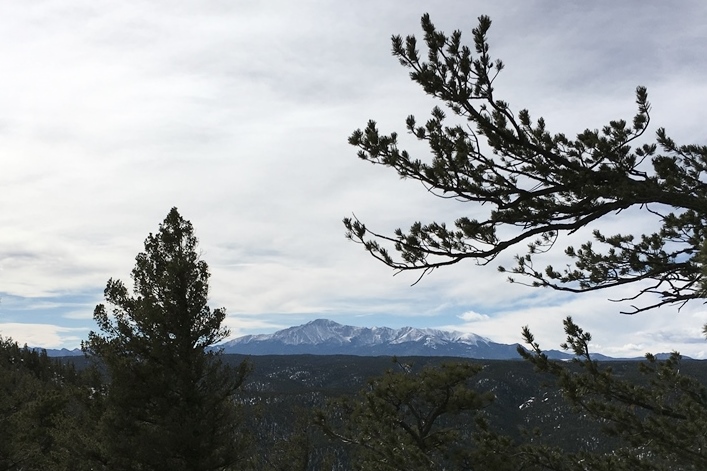
A view of Pikes Peak from Mt Herman.
It’s been a while since I’ve done a January VHF contest from a mountaintop so I decided to give it a try from Mount Herman this year. The ARRL recently changed the contest rules to allow the use of the national 2m fm calling frequency for contests. See Coming Soon: 146.52 MHz in ARRL VHF Contests. I wanted to see how this change would play out in practice when doing a combination VHF Contest plus SOTA activation. In previous attempts, I had to vector the SOTA activity to another 2m fm frequency for it to be a legal contact for the contest. The SOTA + Contest operation is attractive because it has all the elements of a fun SOTA hike coupled with the increased activity of a VHF contest. The contest brings out the weak-signal folks with very capable stations, increasing the probability of making some good DX contacts.
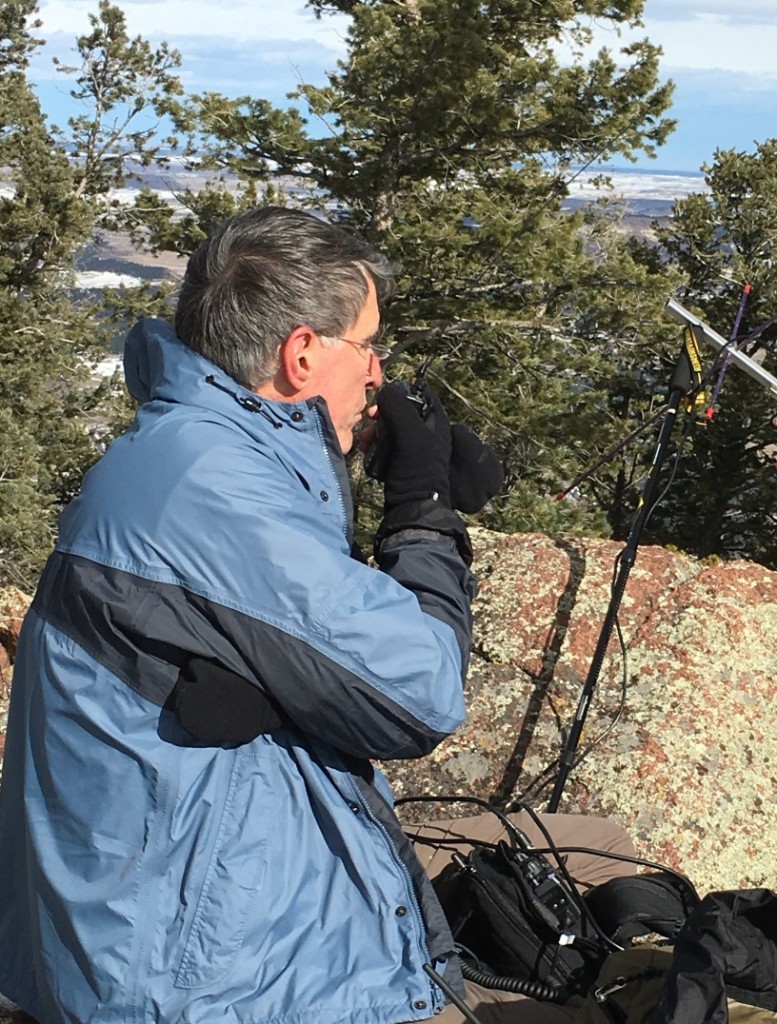
Bob K0NR using an HT to make contacts on 446.0 MHz FM.
Joyce KØJJW and I hit the trail at 10:30 AM local with the goal of being at the summit around noon (1900 UTC) for the start of the ARRL contest. The trail was icy, but manageable with the gripping devices on our boots. The weather was chilly but not bad for January. At the summit, I configured my FT-60 handheld radio for 146.52 MHz using a 2m half-wave vertical. My first call netted a QSO with Tim, KAØMWA in Castle Rock. I worked a few other stations on 2m fm and then set up the 2m ssb station (FT-817 plus Arrow II antenna). On 144.200 MHz SSB, I contacted two Wyoming stations in grid DN71, about 140 miles away. I also gave a call on 446.0 MHz fm and worked W3DHJ and KE0HBW mobile.
Freq    Mode    UTC     Call     Grid
146.52    FM    1900    KA0MWA   DM79
146.52    FM    1902    N0AXK    DM79
146.52    FM    1905    N0LP     DM79
146.52    FM    1905    K0GPA    DM79
146.52    FM    1905    WG0AT    DM79
146.52    FM    1920    N0ISB    DM78
146.52    FM    1923    N0LEA    DN70
144.2    SSB    1932    WY7KY    DN71
144.2    SSB    1935    K0ALE    DM79
144.2    SSB    1938    AB0YM/R  DM79
144.2    SSB    1939    KG0RP    DN70
144.2    SSB    1940    WA7KYM   DN71
144.2    SSB    1942    KC4YLV   DM79
446.0    FM     1948    W3DHJ    DM78
144.2    SSB    1949    WE7L     DM79
144.2    SSB    1951    N0SP     DM79
446.0    FM     2000    KE0HBW   DM79
The wind was strong at the summit and kept blowing everything around, making it difficult to operate the radio and manage the antennas. After an hour of operating, I decided to QRT and head on down. I know I missed a bunch of potential contacts, especially having not gotten on 70 cm and 6m ssb.
Except for the short operating time, the operation played out as expected. I was able to work the SOTA folks and 2m fm enthusiasts on 146.52 MHz. I made it a point to not hog the calling frequency, as there are quite a few folks that monitor there. Switching over to 2m ssb, I worked the contest crowd, typically with more capable vhf stations. My score is a whopping 114 points, in the single-op portable category.
Thanks to everyone that got on the air to play radio that day!
73, Bob KØNR
The post January VHF Contest Plus SOTA appeared first on The KØNR Radio Site.


