Posts Tagged ‘Elecraft K2’
 Winter project line ups
Now that fall is in full swing and most.....typo alert remove "and most" (thanks to Gary at rework eliminator for Elecraft K2)and soon all the leaves will have dropped from the trees. The temps already are starting to drop not yet to freezing but soon. So outdoor activities will be more limited as winter gets her firm grip on this QTH.
I find that radio conditions do improve in the winter months and there are some major CW contest to keep me busy on some of the weekends....but.....I don't know about my readers but I also like to have a few winter radio projects on the go. This winter's project is an ambitious one that satisfies my kit building hunger. I purchased another Eelecraft K2 kit, my first K2 kit was a blast to build. With this kit I want to take my time and very much enjoy the build. Another decision I made was to sell the rig once built and run through it's paces. I then can use those funds to put toward my next winters project. I try to keep what I call my well rounded approach to ham radio. This includes on air operating time for sure, reading my monthly ham radio
magazines, blogging and blog reading, interfacing computers with the hobby and of coarse kit building. I also wanted to add a CW tuning aid to my original Elecraft K2 and it just so happens that K6XX has a kit to add a CW tuning indicator to the rig. This kit has the dreaded SMD parts!!!! Now having said that I used to say that about kits that came with winding toroid's and that is not a big deal anymore. Below is a video of how the tuning light works.
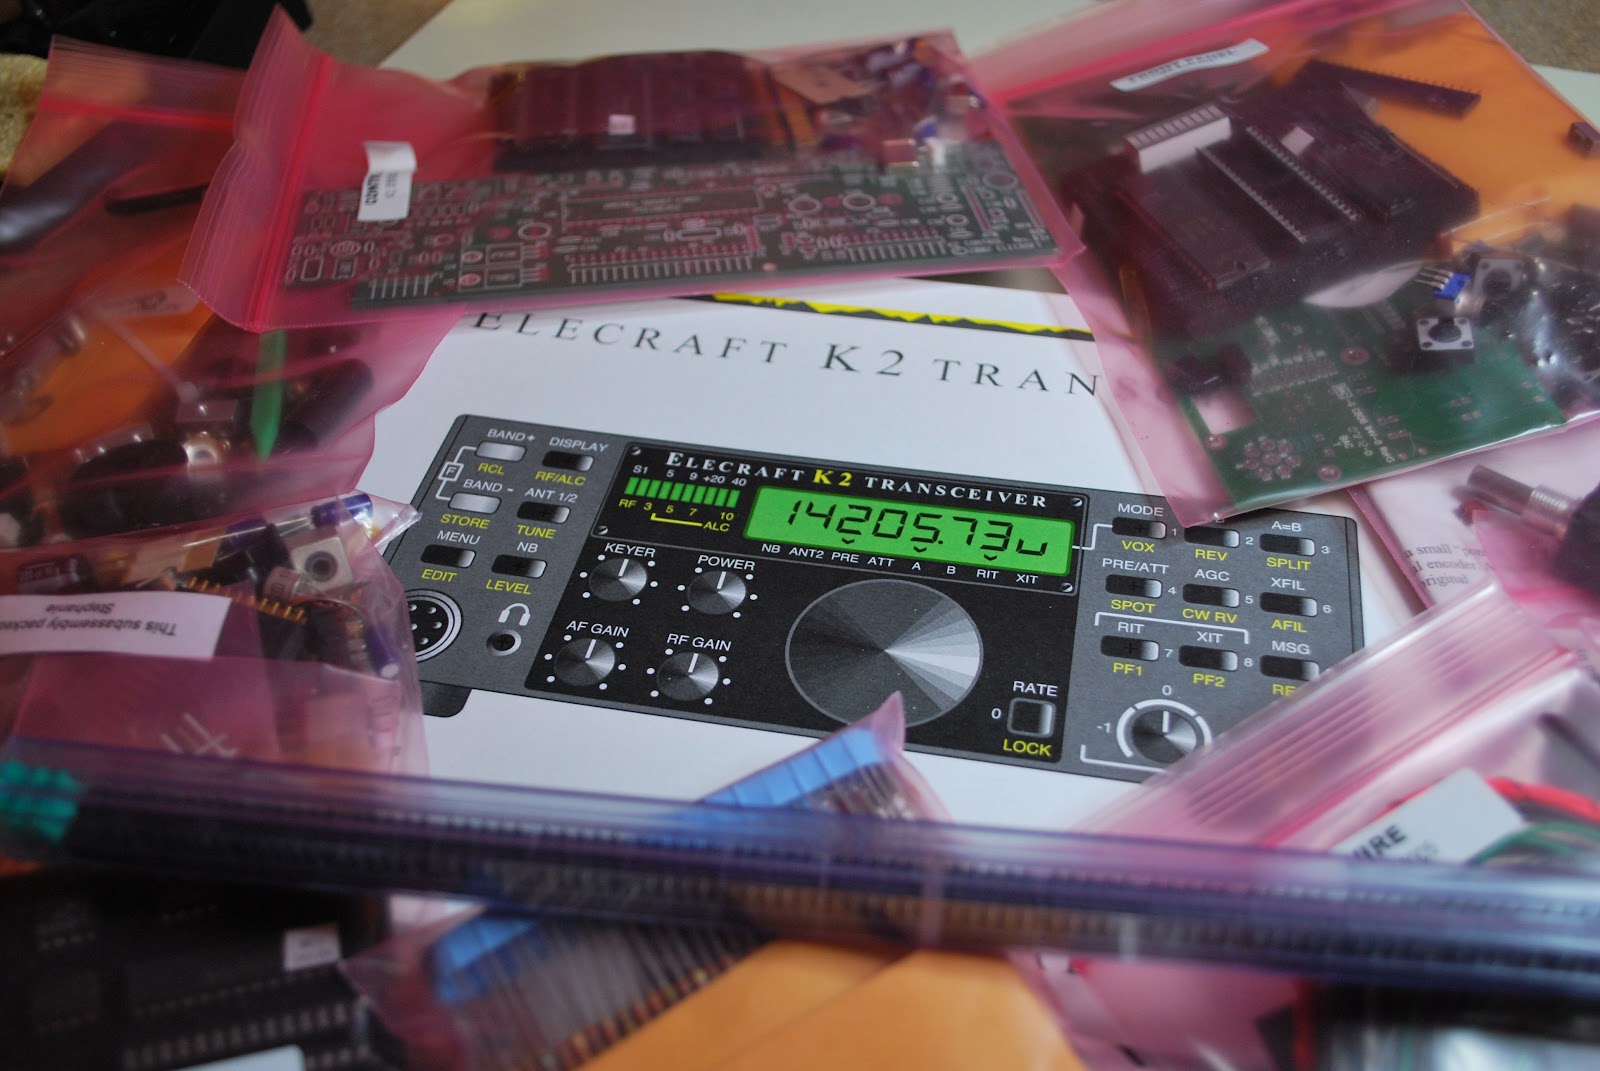 |
| Serial 7372 soon in the works |
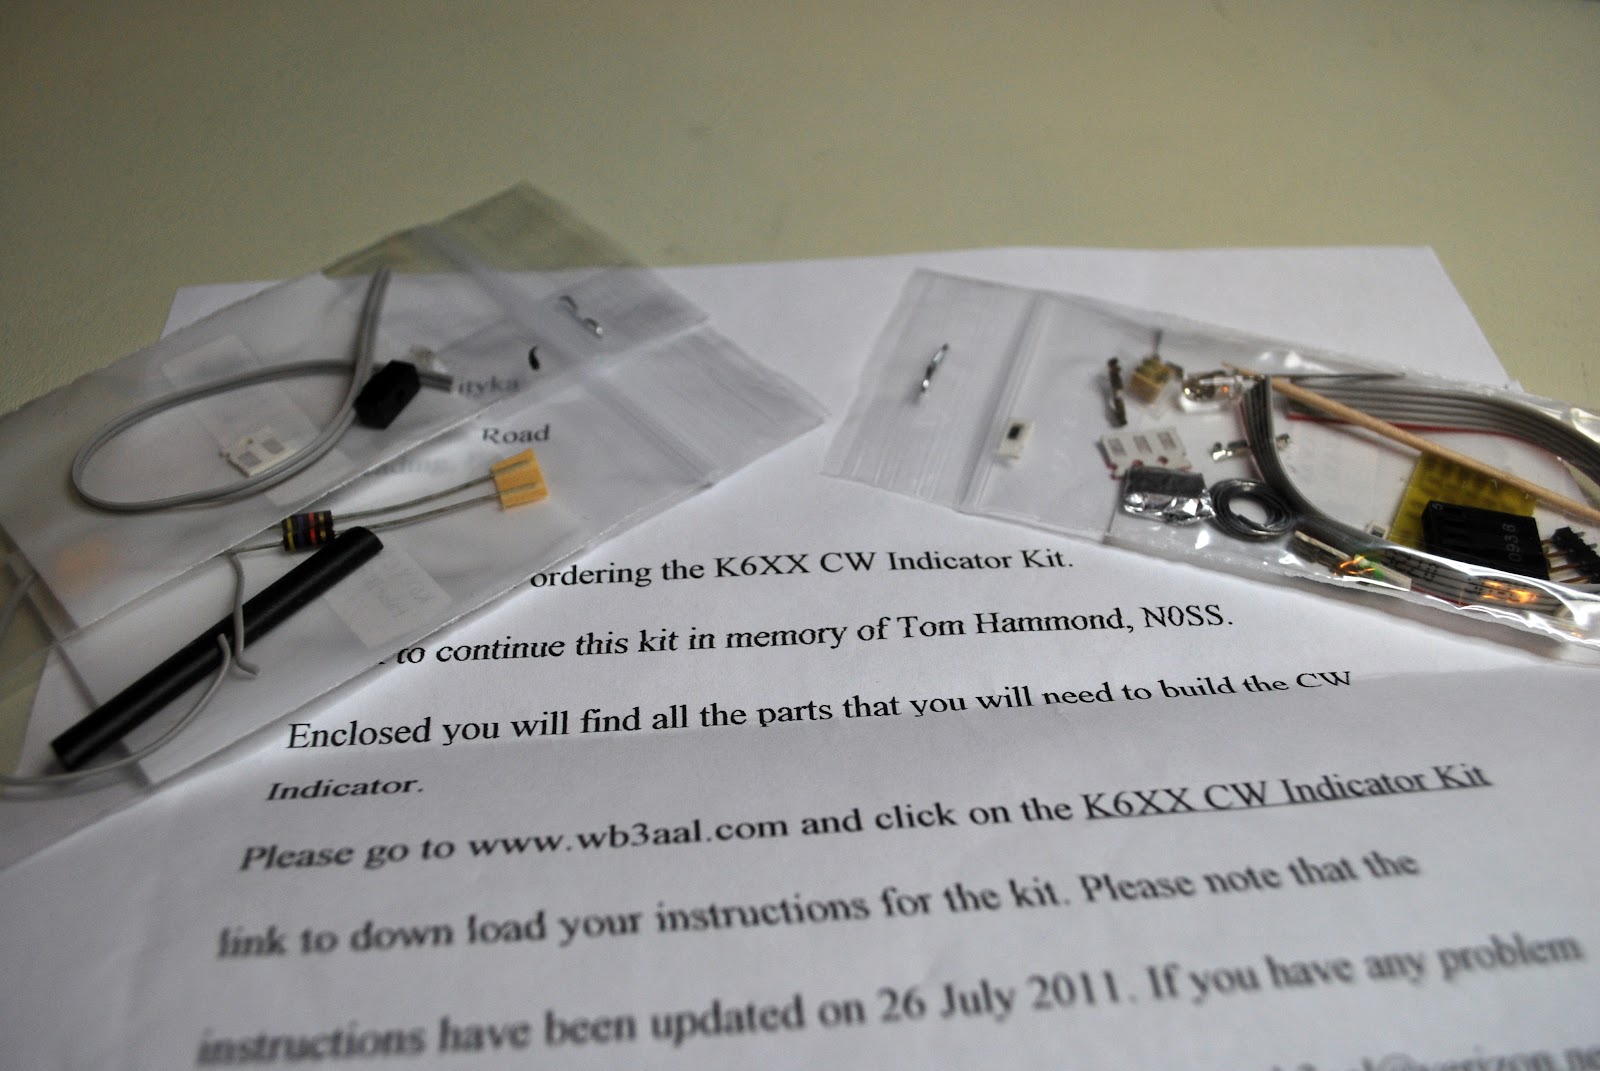 |
| K6XX's kit for the K2 |
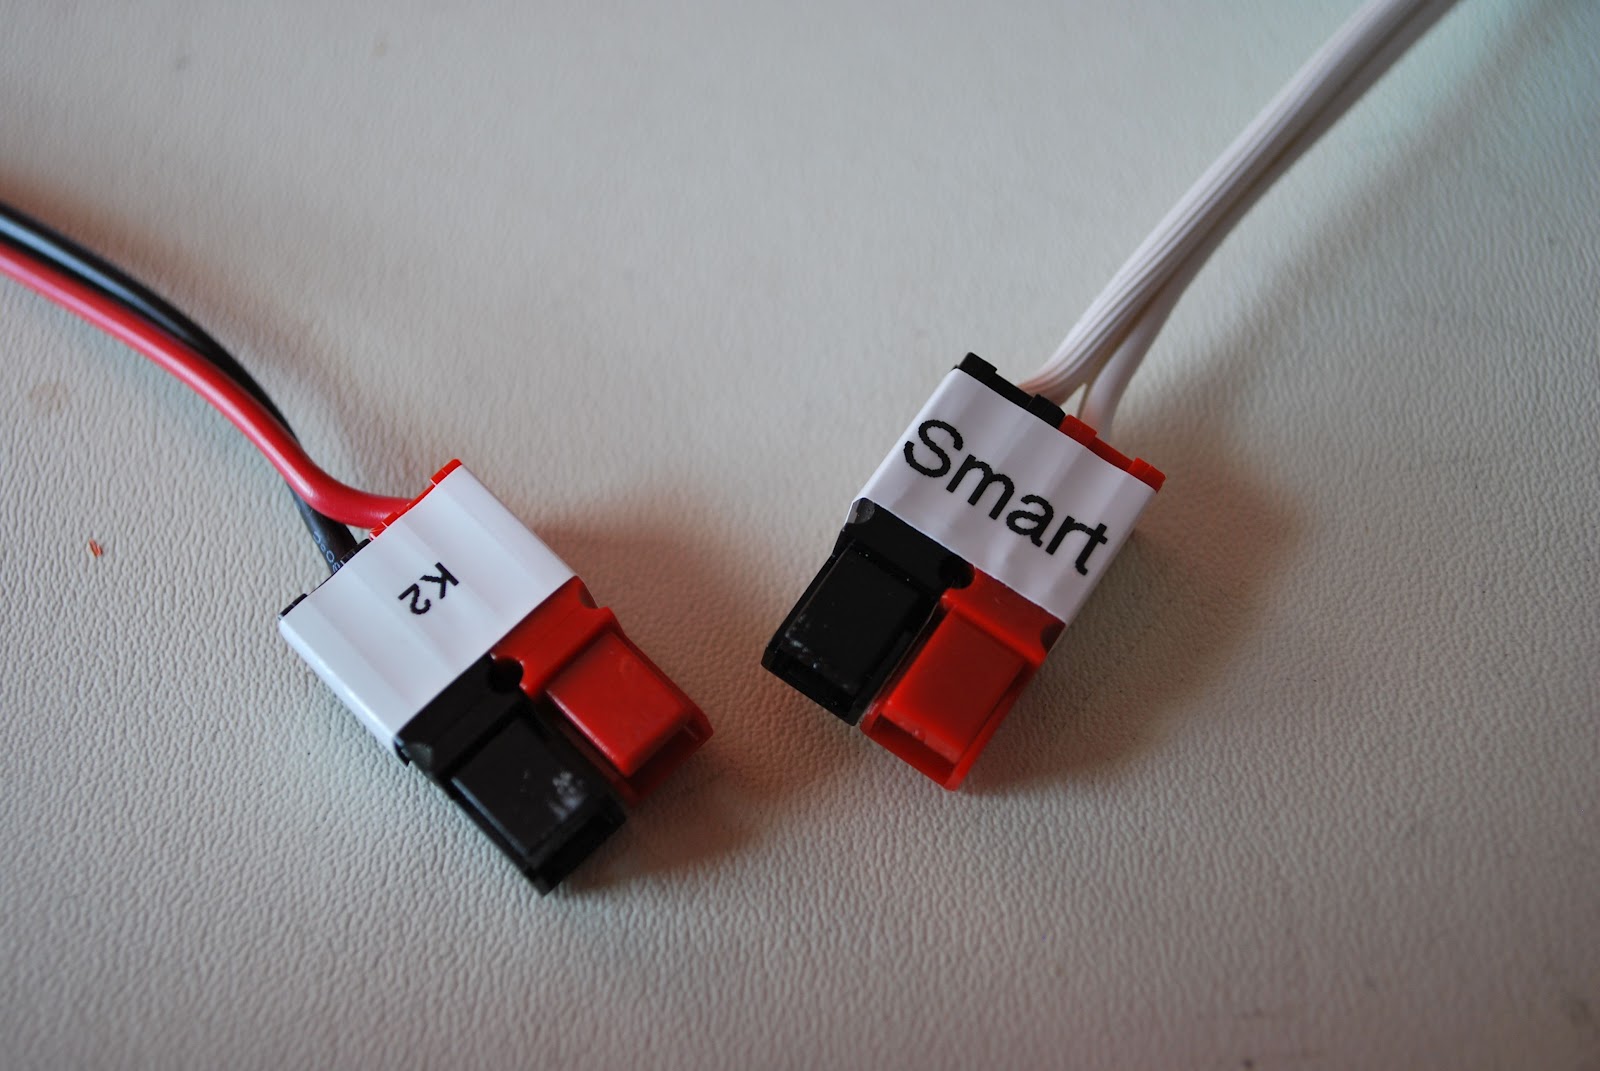
A VERY SMART charger
 |
| Charger ready for testing |
1. The charger can be connected to the battery indefinitely and no harm will come to the battery. Once the battery is fully charged the Smart charger will remain in maintenance mode delivering a float charge. Therefore the battery cannot be over charged.
2. The charger can stay hooked up to the battery while operating the radio if you so choose to do so. The charger will enter the bulk mode to help with the load of the radio operating.
3. When the charger is connected it automatically determines the type of charge the battery needs.
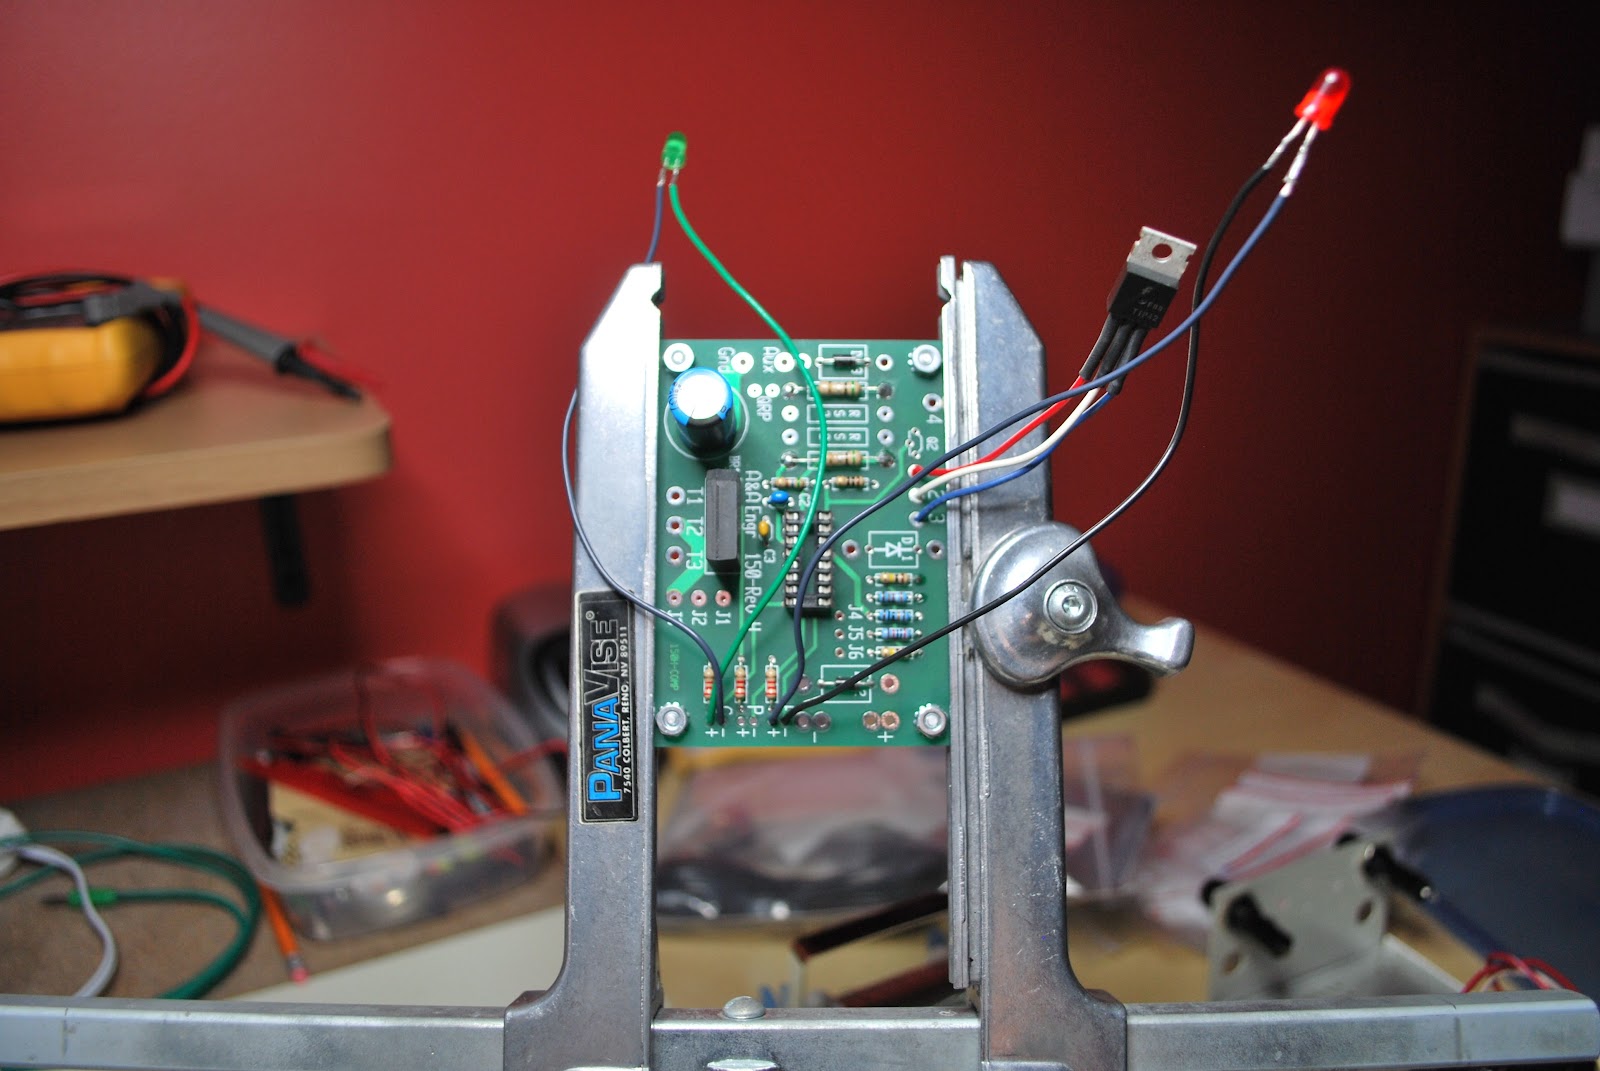 |
| Close to done but no heat shrink on LED |
 |
| Top view with no jumpers or D1 ops |
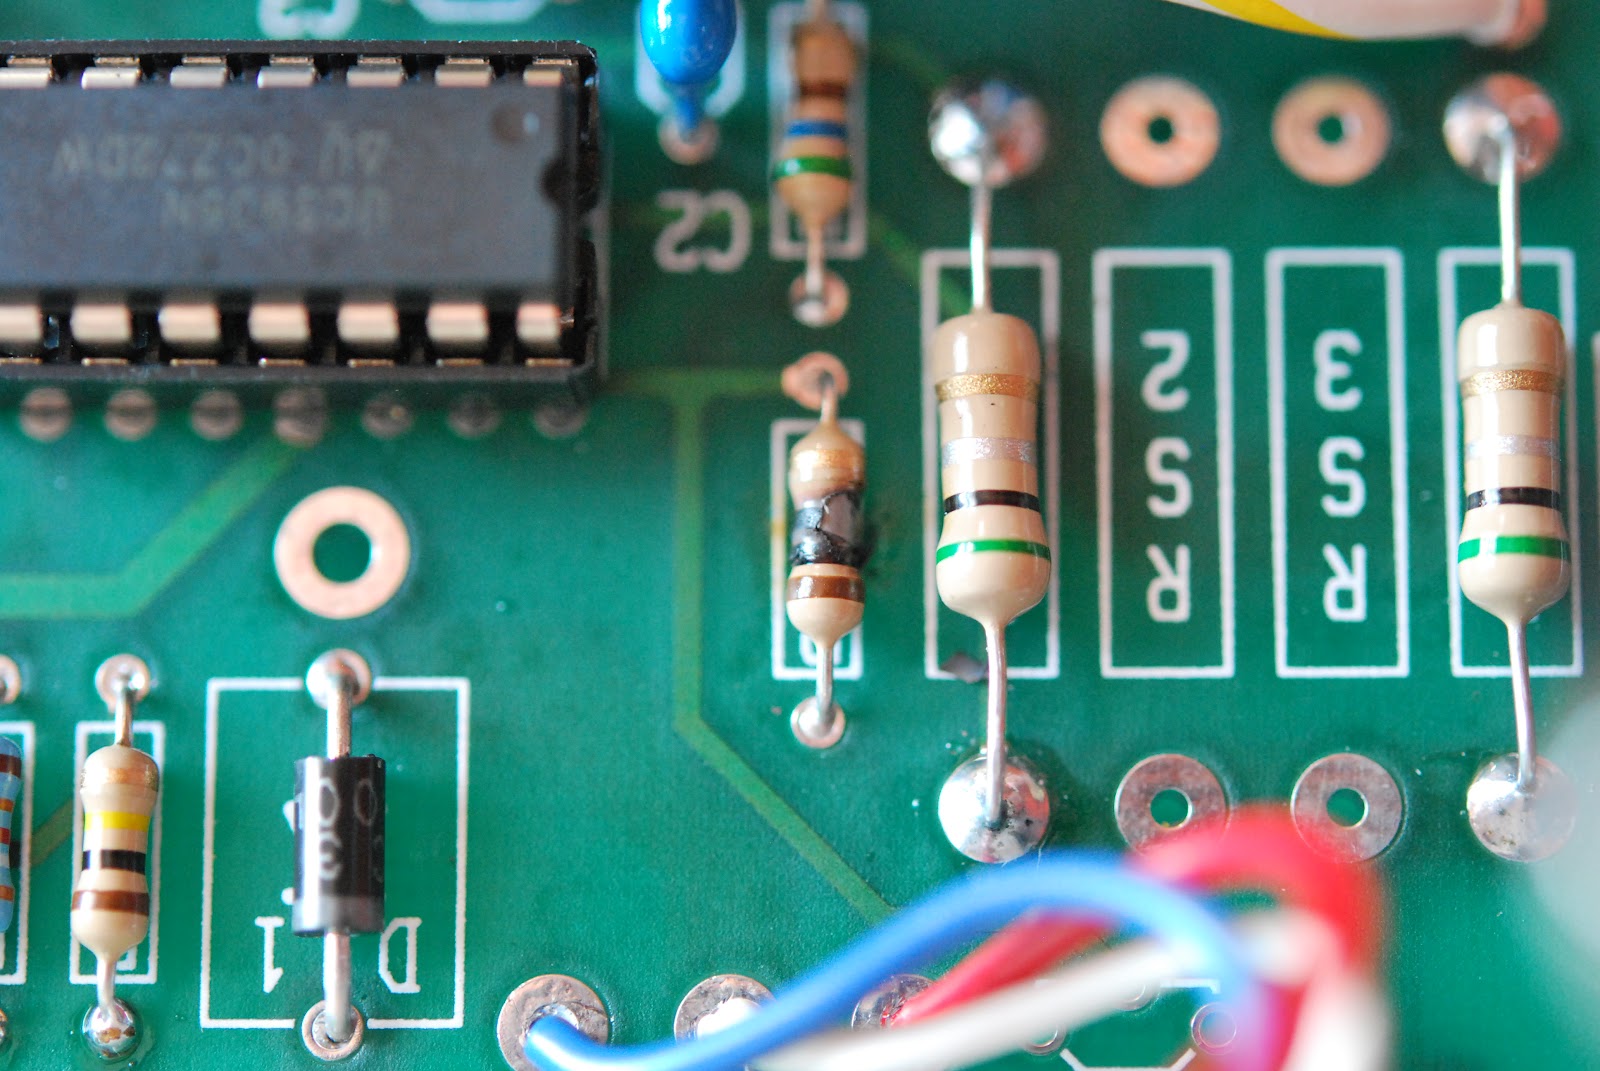 |
| Fried resistor |
 |
| Decided to use Anderson conn's |
either:
1. You are in measuring in the wrong place.
2. You have made a mistake in the assembly.
In either case nothing has been toasted
 |
| Some heat shrink fun |
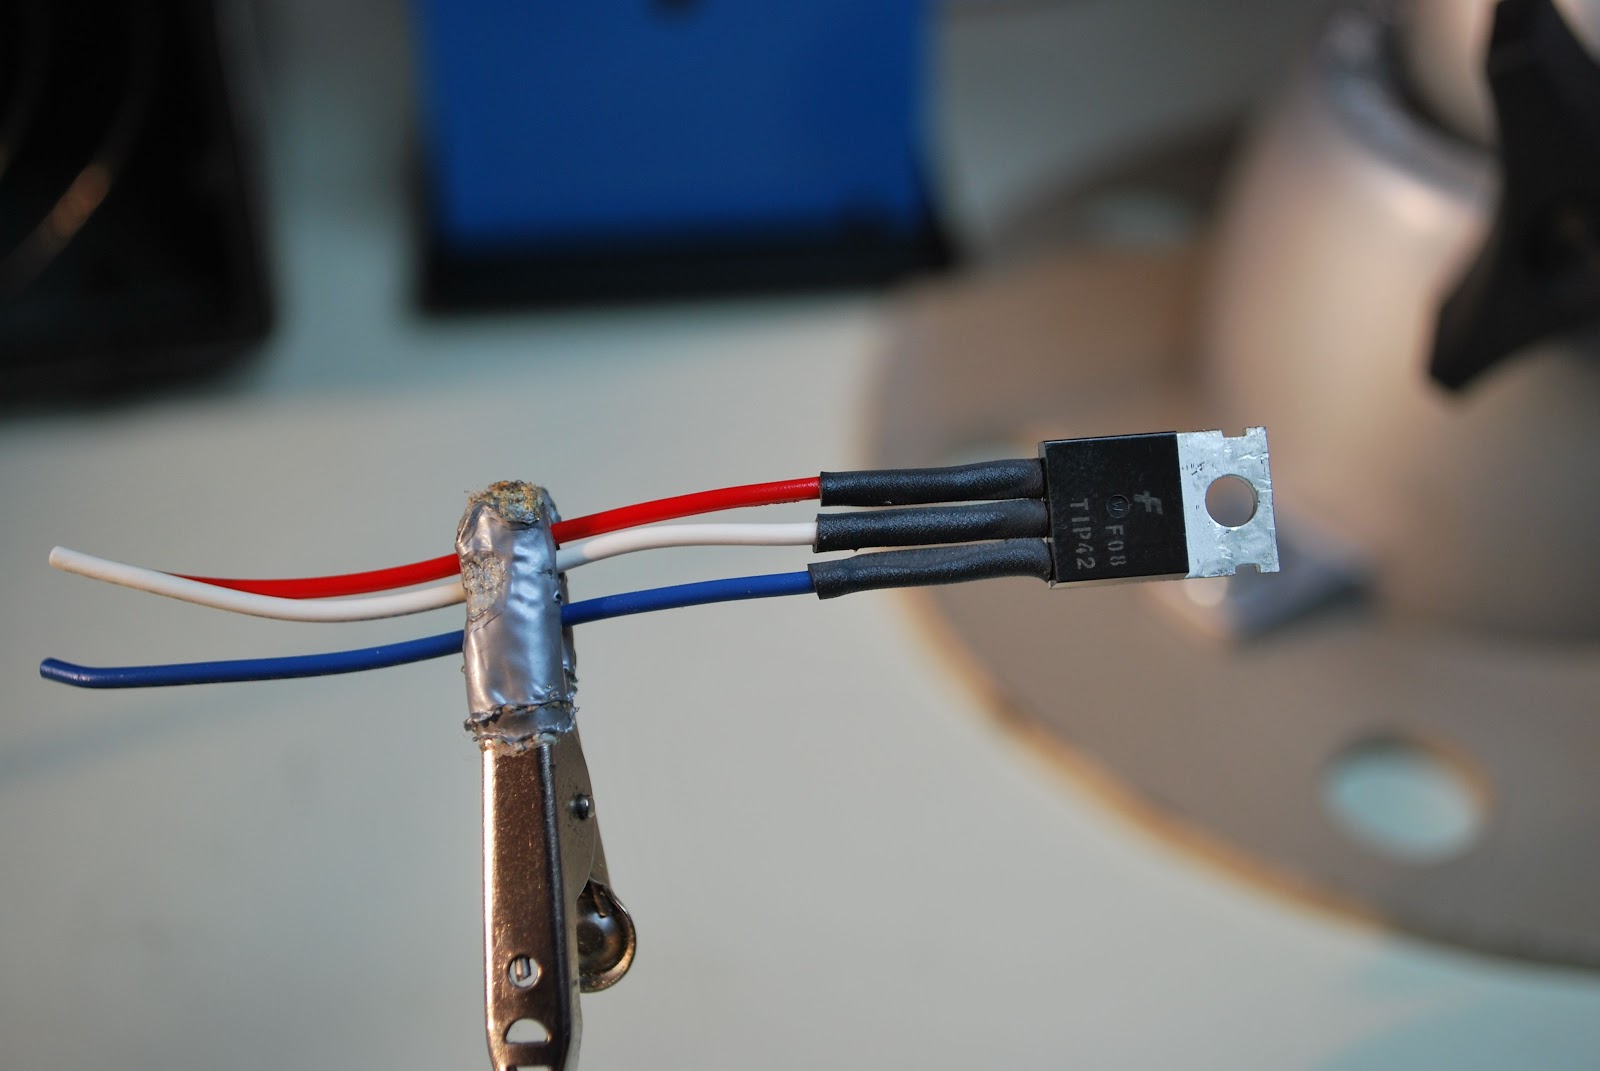
1. The heat shrink tubing is very clearly stated to go on the transistor but it also should go on the leads of the LED's...that was not so clear and I have redo the LED's.
2. Make sure you add the jumper J1 to J2 in my case it is mentioned but off to the side of the instructions
3. There is no diode to be installed in D3 position, instructions just say install parts and there are is D1, D2 and D3. Just install the diodes (both are the same diode) one in D1 the other D2.
 |
| D1 needs to have the diode not D3 |
4. If you ordered the QRP version of the charger as I did you will get a separate kit that allows the charger to switch between two charging currents. Read those instructions and install the resistors they tell you too or you will end up removing resistors if you follow the main instructions then move to the add on kit instructions as I did.
5. When done remember the output leads will SHOW NO VOLTAGE UNLESS A LOAD IS APPLIED.
6. The document required to test the unit can be found at the link above under "test procedure". BUT when you do it be very careful!!!
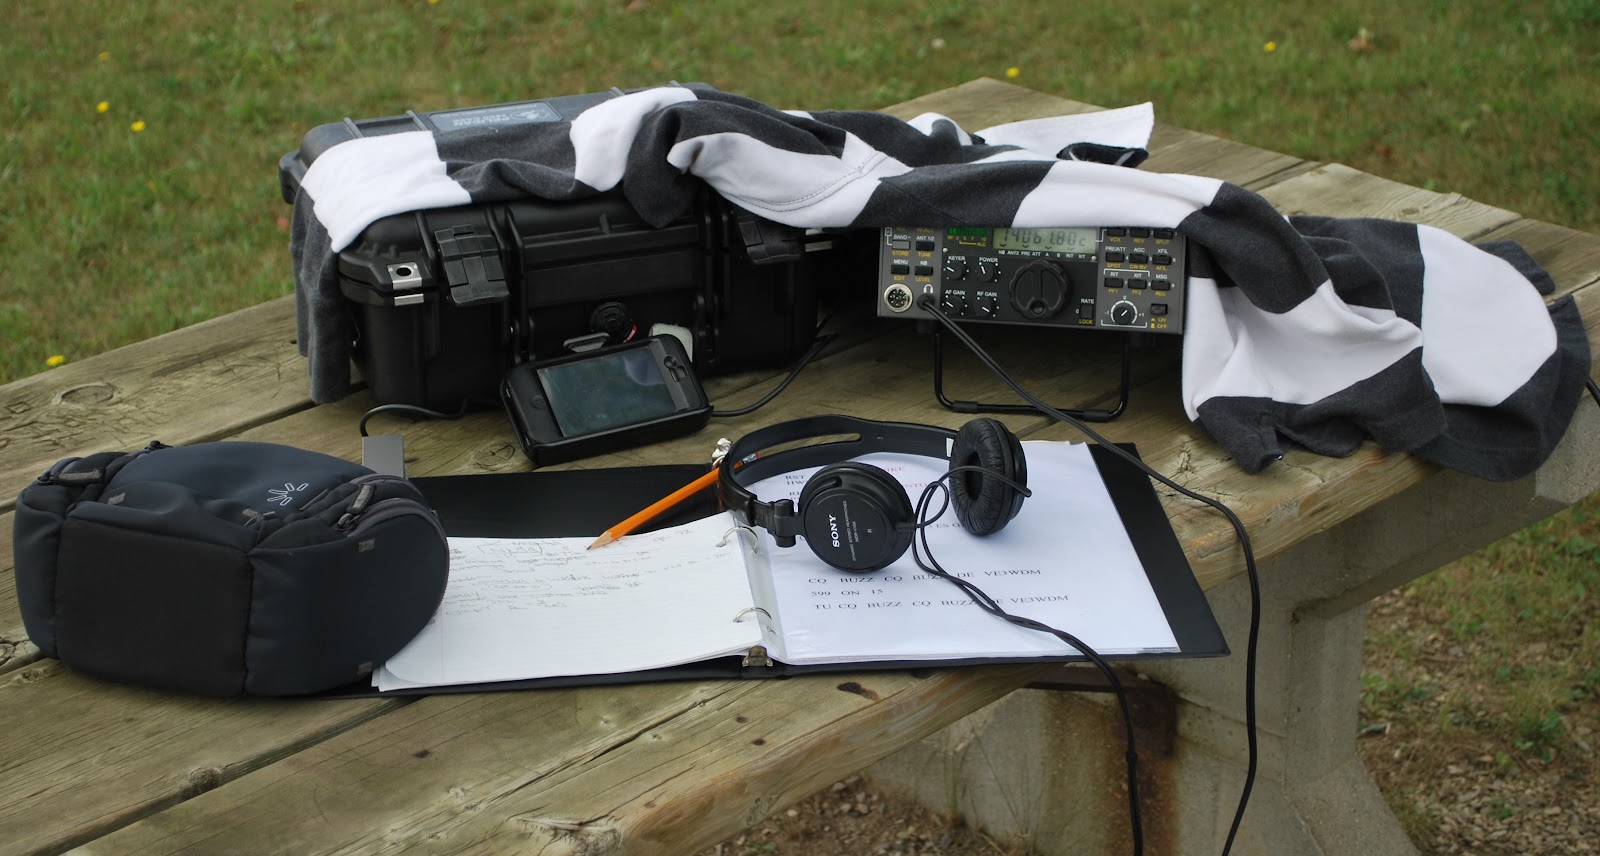
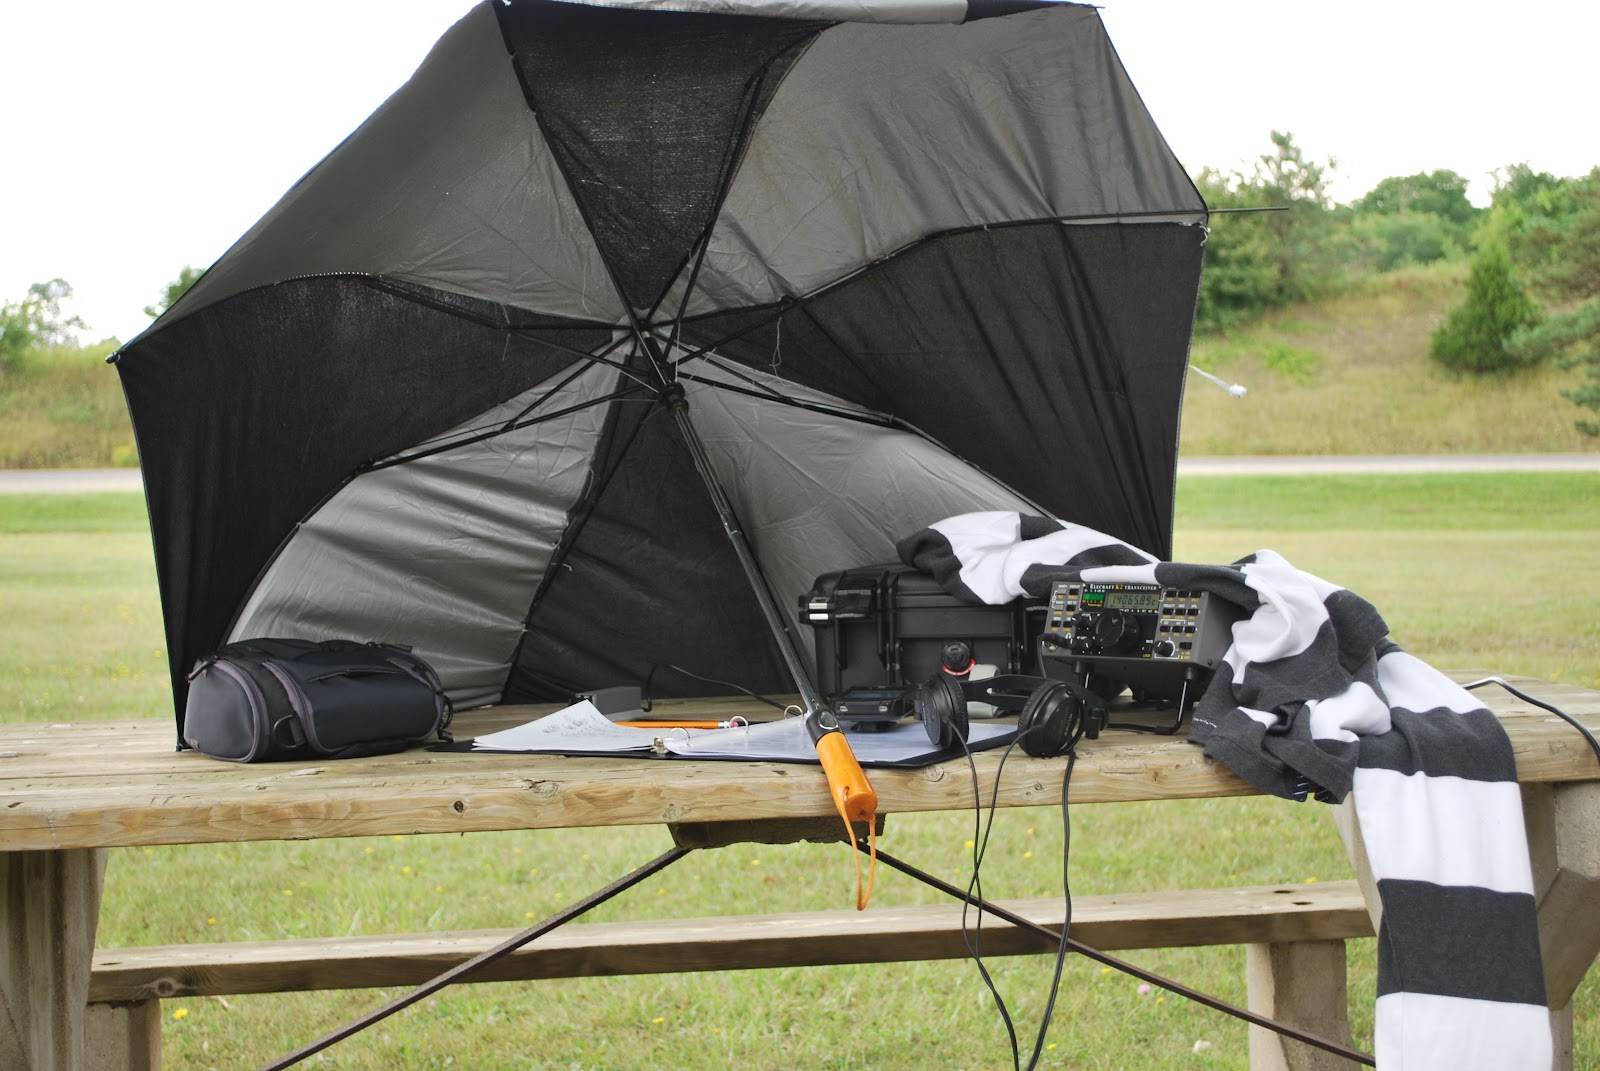
Last weekend was a contest in the park.
 |
| The setup at the park |
The first annual skeeter contest….done!!
 |
| Packing up for the contest |
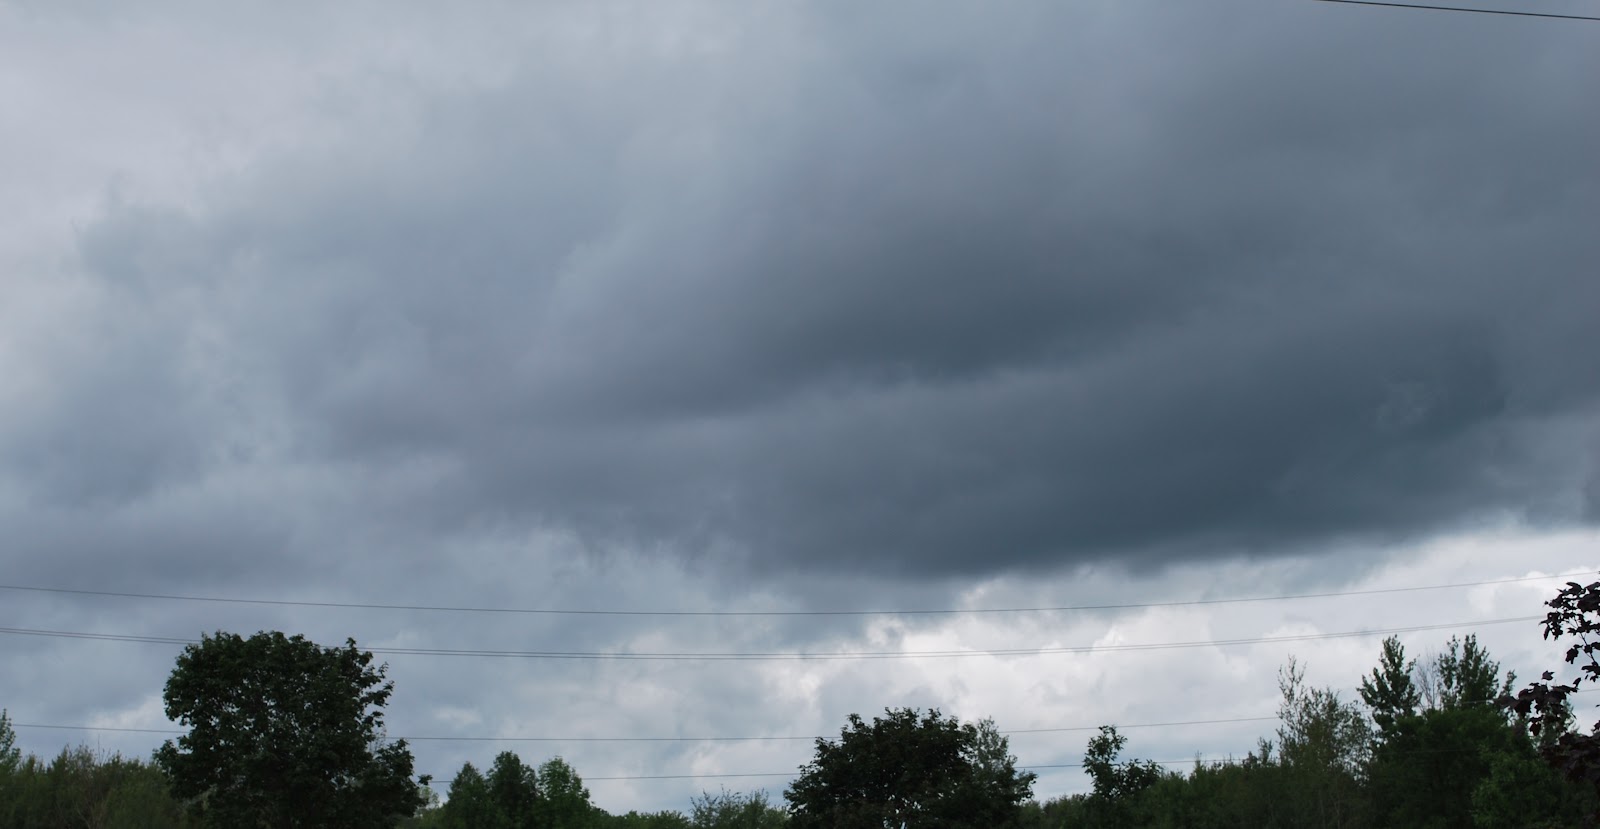 |
| The weather to look forward too |
watts with me calling CQ and not searching and pouncing.
The weather was a mixed bag from nice sunny skies (very rare) to very threatening overcast that did let go
 |
| The setup...with a bit of rare sunshine |
with rain at times.Over the last month the temperatures have been in the upper 30's and low 40C...today it was nice and cool almost to the point of putting on a long sleeve shirt (which was used to cover the rig during light rain). The location I chose was about 15 minutes from my home and offered a pic-nick table, trees and what I consider a luxury when operating out and about a portable washroom!! The bands were busy with not only the Skeeter contest but the WAE contest as well. I did have some European stations involved in the WAE contest respond to my "CQ Buzz contest" Thats ok they gave me their report and serial and I asked for their power output and then they moved on this made it a skeeter contact....I believe anyway???
 |
| Covering for rain drizzle |
 |
| When it really rained |
 |
| Finally...a must have!!! |
Soon there will be a new KX3 coming to town…
 |
| Elecraft KX3 |
To help raise the funds for the new Elecraft KX3 some items here at the shack have to go up for sale....including my beloved KX1!! I have a new page with all the "for sale" items on it have a look and see if anything there can find a home in your shack. Yes Yes there was a post on my blog regarding my Elecraft K2 and how it was just fine (and it still is) and I did not need a KX3........BUT the bug has bitten.........and it has gone from a need to a want!!!
Other goings on at VE3WDM
When I ordered my Elecraft K3 some years ago I had it outfitted with the 100 watt module....as most you know I am not a QRO op....not that there is any at all wrong with QRO but for me QRP and QRPp is the best option considering my stealth operation. So the 100 watt module (KPA3) was put up for sale and sold in 1 day to help fund my KX3. Now my Elecraft radio is what is called a K3/10 (10 for 10 watts max output). Removing the KPA3 meant taking out my Sub receiver from the rig, the NB board along with some jumper cables. When events like this come I just hate opening up a 5K rig and playing around with the "stuff" inside. All went well and it's back together and working just fine.
I tried and I tried and tried to contact CY9M but it just did not work out that DXpedition is not shut down and it just was not meant to be. This weekend is the NAQP CW contest it starts at 2pm local time and runs til late evening. I am going to give this popular contest a go considering the not so good propagation lately this local contest will be fun even with max 5 watts.
I have an Elecraft K2 with the internal battery pack and up to this point I really have not been charging the internal battery to optimize its life. Some time ago I came across A&A Engineering They offer a great charger for the Elecraft K2 internal battery. I ordered it and it arrived in no time it's waiting to be assembled because....surprise surprise.... I ordered the kit!!
As for my kit from DIY electronic kits the USB 0-500mhz USB power meter kit has been soldered and is all together BUT is seems it has to be calibrated as the output of the rig is not even close to the readings I am getting with the kit. I have emailed the DIY electronics company over and over again but nothing.......seems that was 90.00 down the drain. I am going to keep it up and if I can I want to find a phone number I will then call them and demanding a refund!!! On an up beat note I posted a short time ago about a kit that I ordered and put together call the QRPometer. This kit is a great QRP watt meter and SWR meter but it only goes done to 500mW's..........now for most of you that is just fine but not here at VE3WDM!!! I like to operate now and then at QRPp levels. This means I need a meter that will give me good and reliable wattage readings from about 10mWs up to 100mWs. This was the reason for me ordering the USB 0-500mhz USB power meter it brags of getting down to the low mW levels..........IF YOU CAN GET IT TO WORK AND GET THE DAM TECH SUPPORT TO EMAIL YOU.........take a deep breath......ahhhmmmm.........ok Im back. Talking with the 4 state qrp group (those who produce the QRPometer) I am told the meter can have it's decimal place changed!!! This would give me the QRPp readings I need. This is a project that is now in the works and I will keep the blog readers posted as to it's progress.
As for my kit from DIY electronic kits the USB 0-500mhz USB power meter kit has been soldered and is all together BUT is seems it has to be calibrated as the output of the rig is not even close to the readings I am getting with the kit. I have emailed the DIY electronics company over and over again but nothing.......seems that was 90.00 down the drain. I am going to keep it up and if I can I want to find a phone number I will then call them and demanding a refund!!! On an up beat note I posted a short time ago about a kit that I ordered and put together call the QRPometer. This kit is a great QRP watt meter and SWR meter but it only goes done to 500mW's..........now for most of you that is just fine but not here at VE3WDM!!! I like to operate now and then at QRPp levels. This means I need a meter that will give me good and reliable wattage readings from about 10mWs up to 100mWs. This was the reason for me ordering the USB 0-500mhz USB power meter it brags of getting down to the low mW levels..........IF YOU CAN GET IT TO WORK AND GET THE DAM TECH SUPPORT TO EMAIL YOU.........take a deep breath......ahhhmmmm.........ok Im back. Talking with the 4 state qrp group (those who produce the QRPometer) I am told the meter can have it's decimal place changed!!! This would give me the QRPp readings I need. This is a project that is now in the works and I will keep the blog readers posted as to it's progress.
In conclusion I always like to preview my blog post before it has goes "live" and for some reason the post is DOUBLED SPACED I have looked into this but am unable to find the answer..........keep you all posted on this one!!
A great day = portable op’s
 |
| Portable op's QTH |
 |
| VE3WDM portable in action |
stuff I really don't use anymore thus it will be sold for "ham bucks". Cleaning up the shack gave me the warm fuzzes once is was all done and long over due for sure. I just hate looking for
 |
| all packed away in trunk |
Contacts made
- NN7ZZ Mendon UT 14.047
- K7EAR Solomon AZ 14.040
- IQ0PG Italy ARI contest 14.031 880 miles per watt.
- IZ1A Italy ARI contest 14.022 QRZ.COM can't find maybe incorrect copying
- DL5AXX Germany ARI contest 14.010 810 miles per watt.
- IK2HDF Italy ARI contest 14.011 834 miles per watt. I was very happy with the how the antenna and rig worked and was surprised at the distance I was able to get. I know for sure next time I am going to lower the output and start making some 1,000 miles per watt potable contacts. Some things that have to be worked on before next time......remember all the items to bring, some bottled water, longer cable for Palm paddle key and some adjustments to the Palm paddle key are needed. Well it's time to spark up the BBQ and get some dinner...cheers!!!
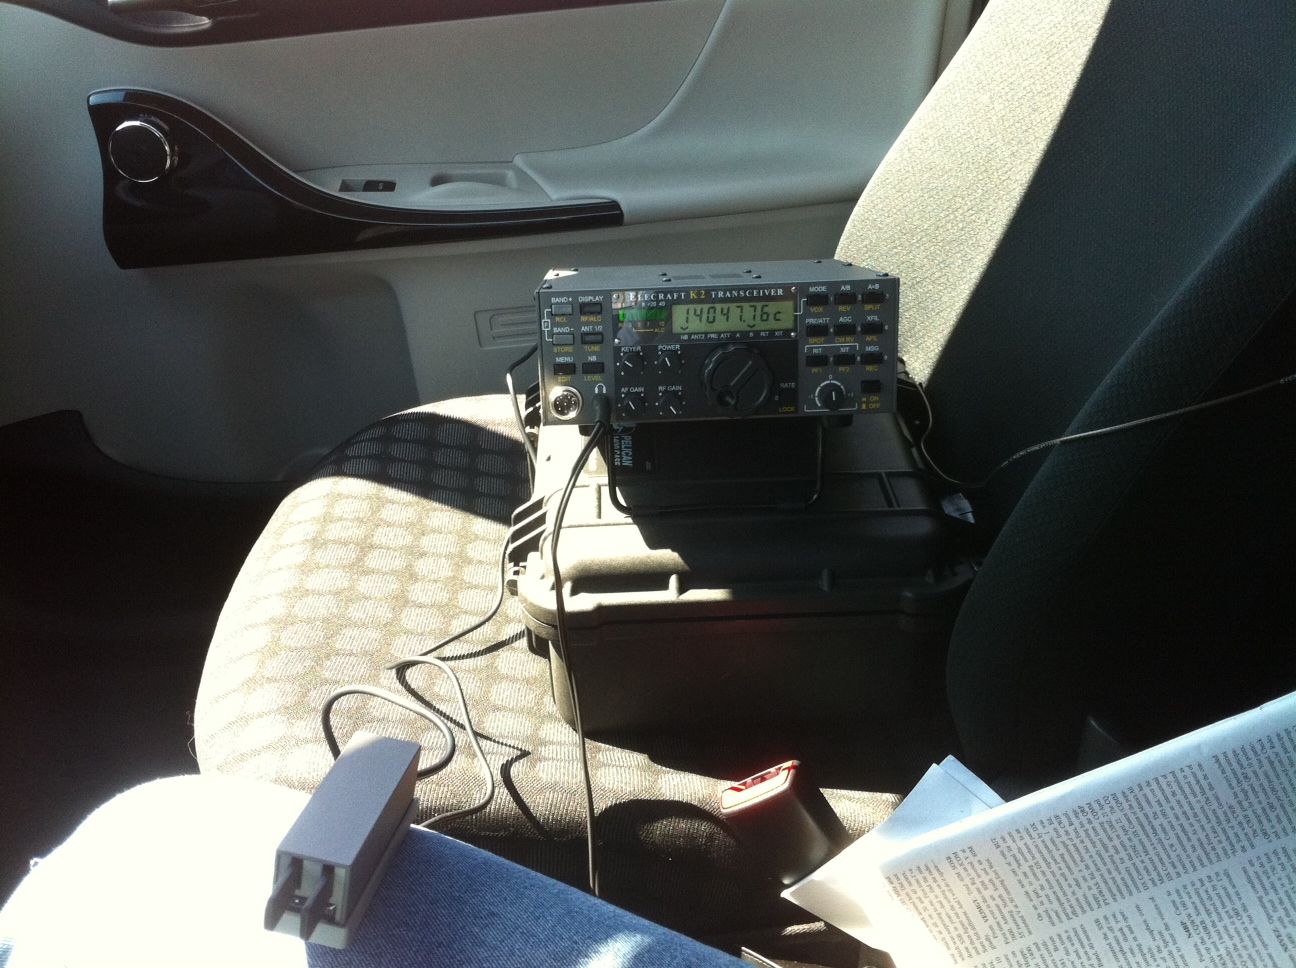
Gearing up for portable mobile op’s
 |
| The new "ham mobile" |
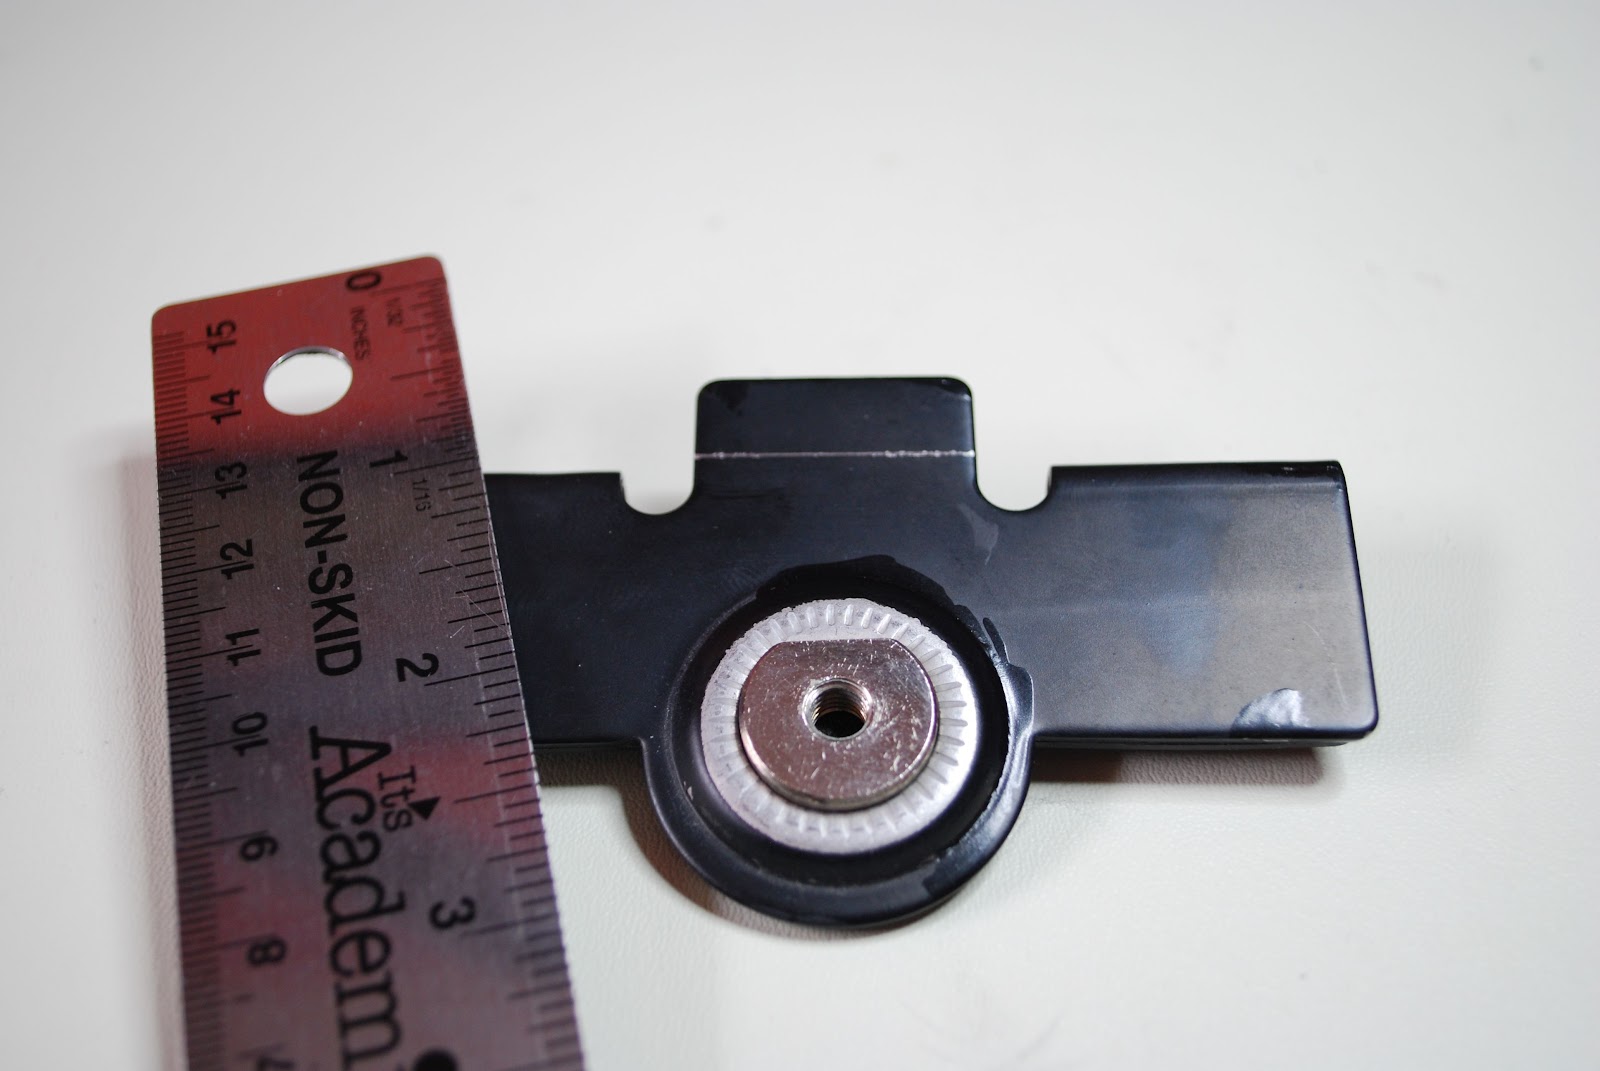 |
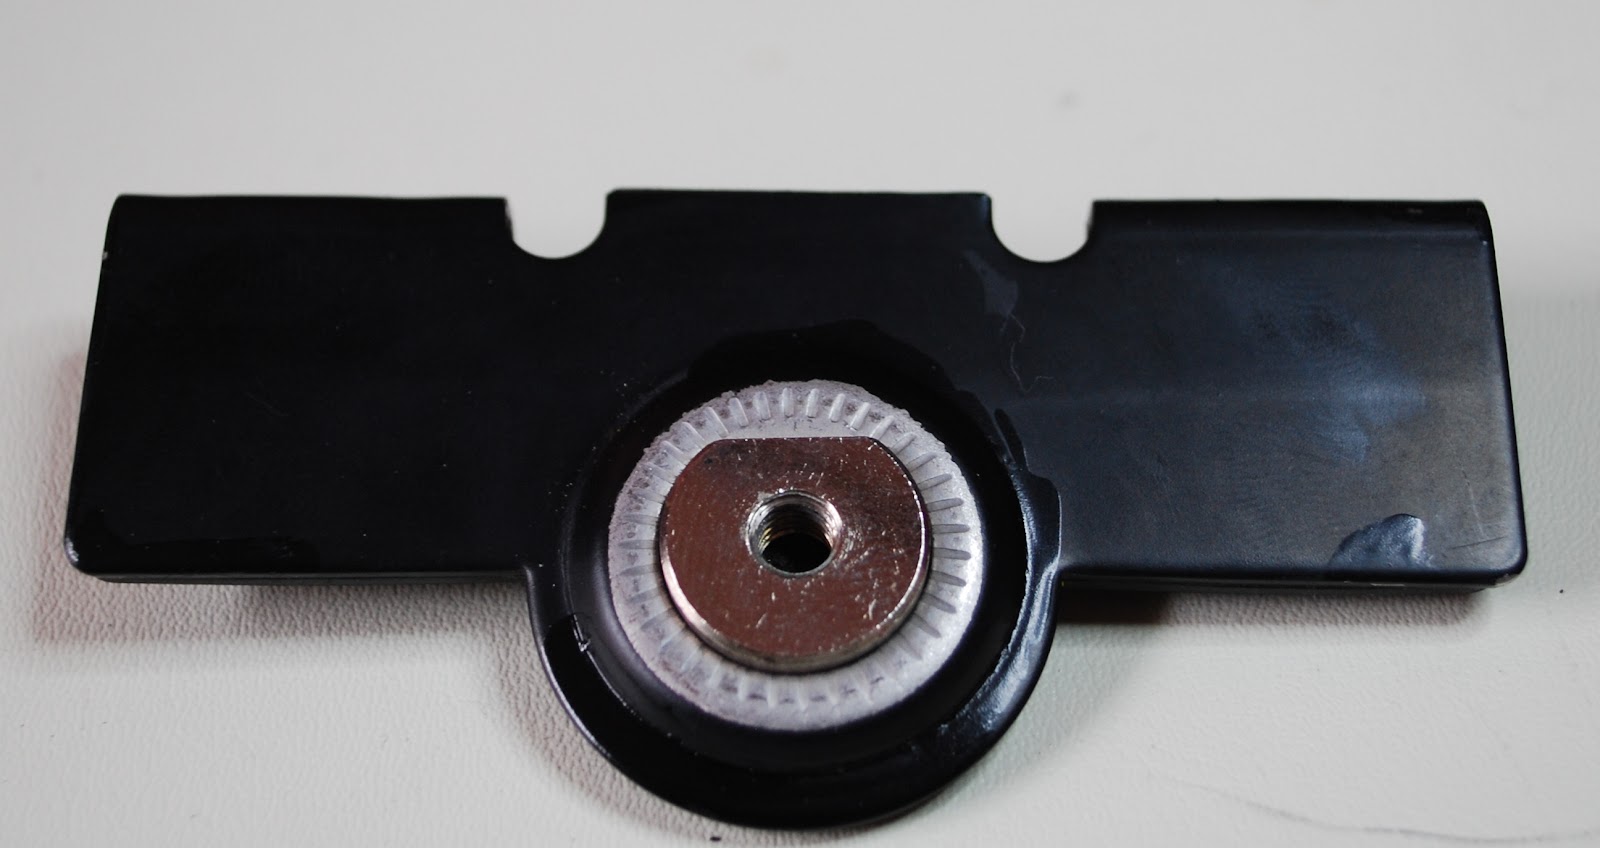
| Removing some metal from the K400 |
setting up an antenna system that was easy to deploy and worked well. Now there was a small hitch in the plans that happened about 2 weeks ago Julie and I decided to downsize our
 |
| Need another bag |
 |
| New and improved mount |
cars!! We both had large 4 door Chev Malibu's and loved them.....but so did the gas pumps! We both upgraded to the Scion IQ's half the gas and half the size. Now this meant plans had changed for my summer mobile portable operations....well not really. The Scion is a hatchback and I would just have to use my trunk mount Diamond K400 as a hatchback mount. There was just one small mod that had to be done to the mount to allow it to work on the Scion. That involved removing a small part of the flange that stopped the hatch from closing as it rubbed on the bumper. With that done the K400 fit perfectly on the Scion's hatchback. I was still going to use my faithful and reliable Palomar mono band mobile whips. With the Scion being a much smaller car I was not sure what the reduced ground plain was going to do to the SWR?? I was prepping for the worst thinking that the SWR was going to be high no matter how I adjusted the stinger on the whip but the K2 antenna tuner would fix that. Well to my pleasure the 20m whip at 14.060 is 1.5 and the 40m whip at 7.030 is 1.4. This was with some adjusting of the length of the stinger but very pleasing
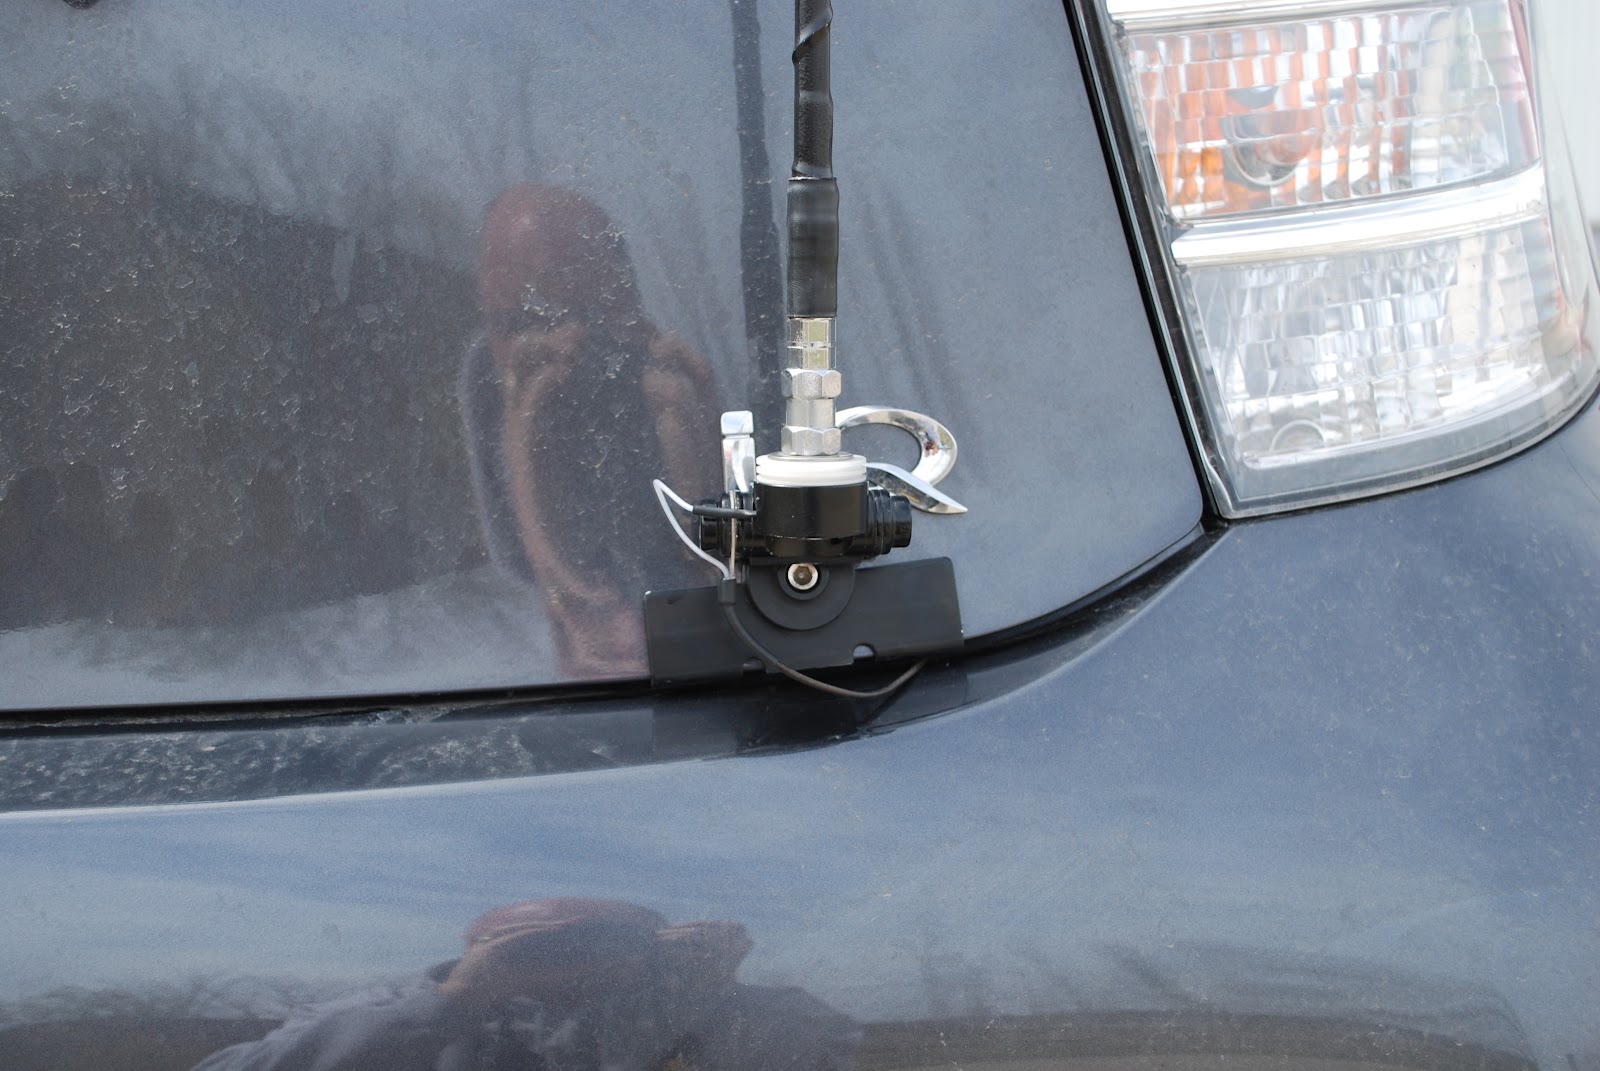 |
| K400 installed |
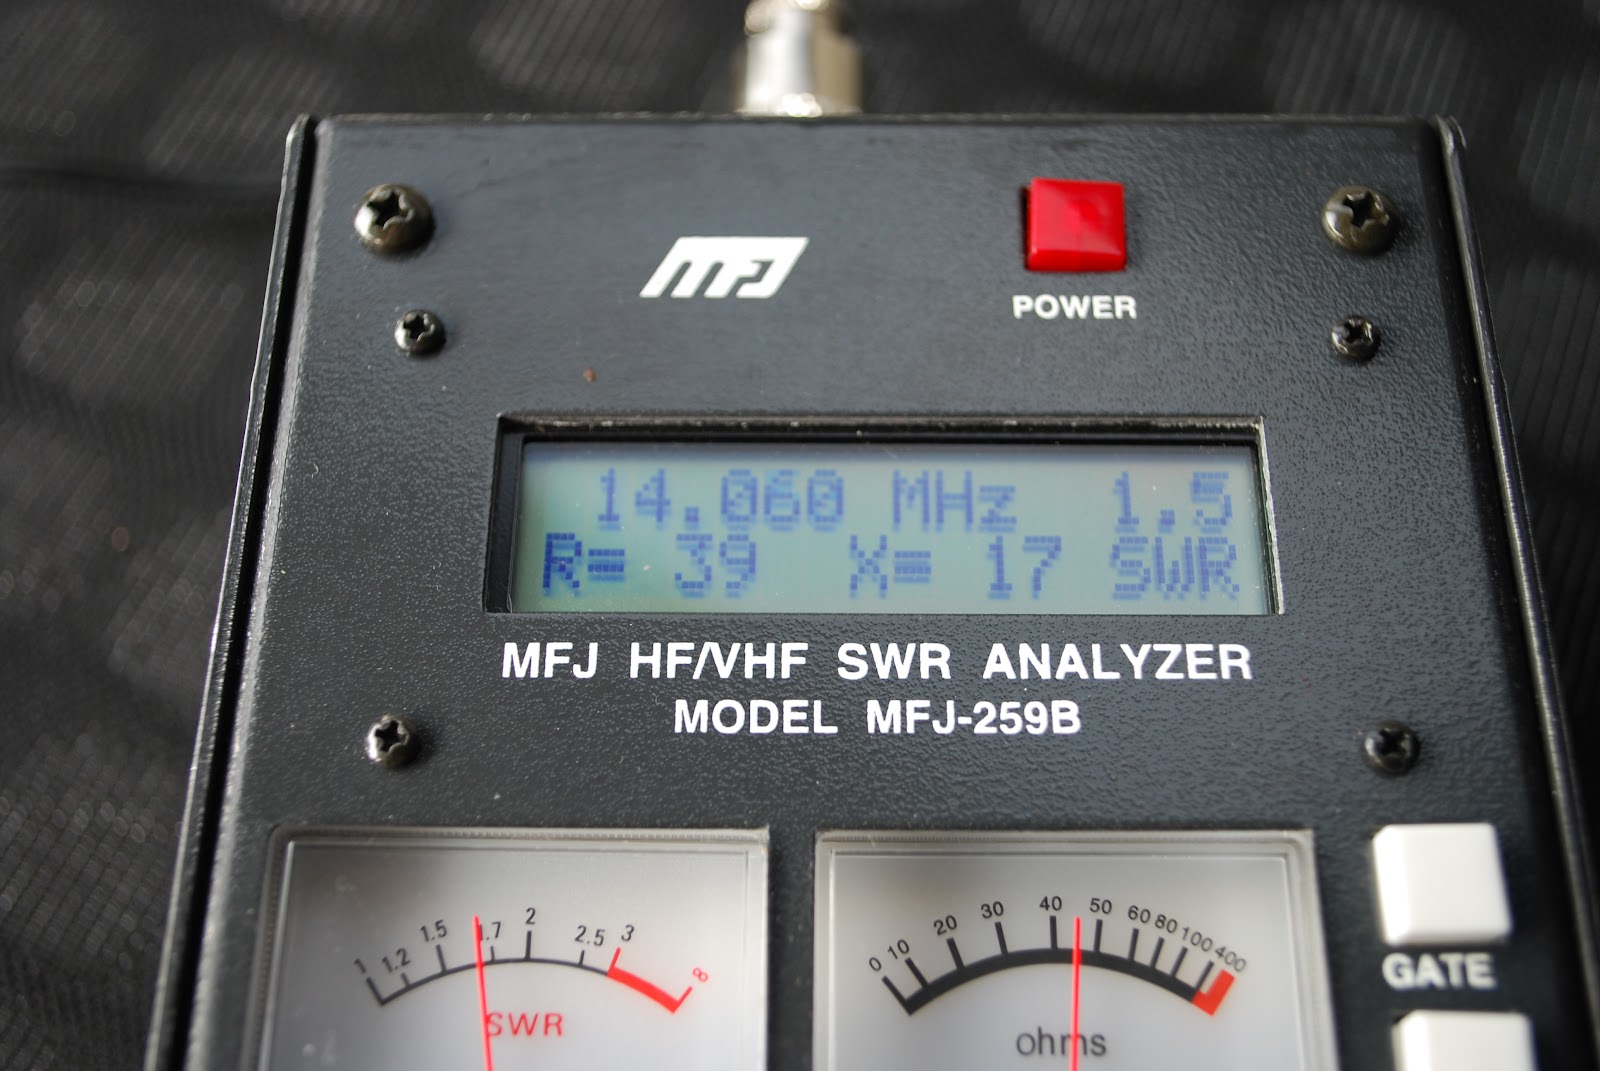 |
| SWR on 20m's |


