Posts Tagged ‘Condo ham radio’
 Part 3 Try and try again….

Attic Sidekick
In this final segment of antenna challenges, I want to take a look at some of the successes and failures. One antenna I tried was a screwdriver antenna ( High Sierra Sidekick) mounted in the attic with ground radials but for some reason, I was never able to get a good SWR.
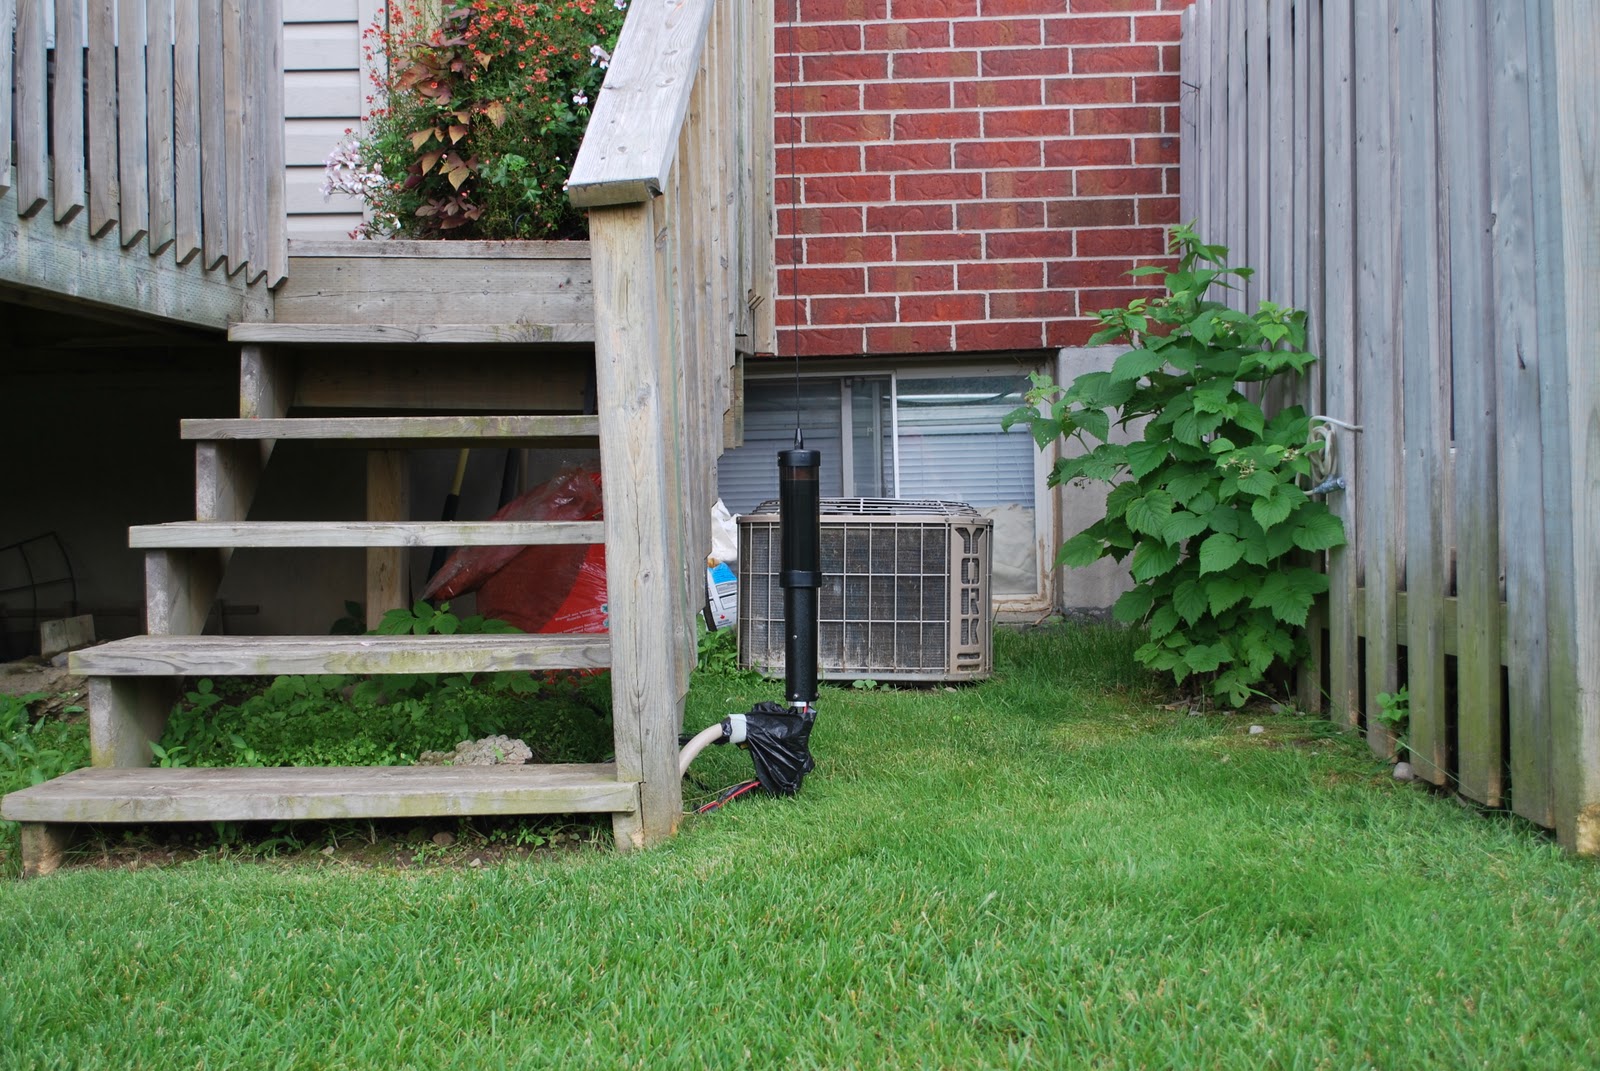
I then moved it outside at the side of our deck steps as I did not want the condo police to see it. With this setup I needed to setup and take down the antenna each time it was used. To speed things up I buried the coax to the mounting location and I had a piece of 90-degree conduit attached to the deck step and it would swing out when I wanted to mount the antenna.
Sidekick outside.
The mount I used was called a Jawmount this allow fast install and take down. I also buried the radials in the ground around the deck and out into the yard. This setup also meant I had to keep the snow cleared on the deck steps and around the antenna mounting position. In the end I wanted to have something more stealth and had better results as well as less trips out doors.
My next idea was the gutter and what I did here was used the center conductor from the coax and the braid was attached to the radials I used for the screwdriver antenna. The Elecraft K3 tuner was able to tune the gutter but I had a lot of noise and issues getting out. So it was back to the ground-mounted screwdriver antenna for now.
I also tried just plain old portable operation from home as well but that would be limited to summer time only. I set up on my deck using the Elecraft KX1 with the miracle whip antenna and also a portable mag loop. This was a nice setup with decent results but was limited to summers with nice days.
The next idea I just can't believe I even did but I did and it worked very well. In the townhouse complex we lived in our cars were parked in a common parking lot we had no garage or driveway. Our home backed onto a large green space that connected to this parking lot. The gears in my head started turning..if I could get coax from the back of the house through the field to the car parked in the parking lot I then could put an HF antenna on the car and I would be good to go! Now that I look back I just can't believe I did this but I did. I purchased a large HF mobile multi-band vertical the Valor ProAm AB-5. Now it gets really good...I was able to get free from work 3/4 inch poly pipe. I rolled it out and bury about 60 feet of it in the green space almost to the car. Now that was a lot of work and done in such a way that it did not attract attention....don't ask.....Anyway fed LMR 400 in the pipe that I purchased cheaply at a flea market. The poly pipe was connected to a plastic waterproof box and the LMR 400 was terminated to an SO-239. When I wanted to get on the air I place the antenna on the car via a trunk lip mount and ran some RG8X from the antenna to the box where the LMR was terminated. This worked great for years and I was very fast at putting it up and down.
Portable deck ops
Well as they say all good things come to an end...I came home from work one day to find the city decided to put a walking path in the green space and in the process dug up my poly pipe and LMR 400. I am guessing they had no idea what it was. They had already left for the day as I arrived home so it was time to move fast! I pulled out all the LMR 400 coax and removed from the ground about 15 feet of poly pipe that was close to the townhouse. Well, it was good while it lasted but now it was time to start thinking again.
This was when I came up with the idea of the Alpha Delta in the attic (See part 1 in this series) Well that is it for my restricted antenna adventures and I hope you enjoyed and possibly came away with some ideas.
Side note: Not sure what is going on with some of the text sizing in the post I tried to fix it and just ended up with more issues. Sorry for the sections of smaller print.
Part one: HOA antenna challenges.
 |
| Alpha Delta DX-EE |
Many Amateur radio ops now find themselves in a neighbourhood, downsizing to a condo or moving to an assisted living complex that is ham radio antenna unfriendly. I have lived in many antenna challenged, HOA and condo rules that outlaw antennas. But I have always managed to get on the air using HF and enjoy the hobby. Over the next few posts, I am going to share how I accepted the antenna challenge and kept the HOA hounds or condo cops from having their heads spin backwards. Today let's look at a situation that involves home HOA hounds or townhouse condo cops.
In the neighbourhoods I have moved to I always get a copy of the rules. (HOAs and condos have more pleasant words than rules) But let me start by saying I am not against having common understandings (rules) as it can control some funny things that can pop up in uncontrolled neighbourhoods or condos. In most of the rules I have read regarding antennas, it boils down to you can't have them due to safety, how they look and the size. The way I see it is if it's safe, no one see's it and it's small then we are good to go with an antenna!
The first big hurdle is out of sight, as with amateur radio an HF antenna can be a tough one. For 16 years I lived in a townhouse which was not antenna friendly. I found we had a very large attic and then the next challenge was what to put up there for HF operations. What I tried was 2 mobile whips configured into a dipole. This had a very narrow bandwidth and only a single band as I could not set up more than one due to space and interaction. A band change meant getting up in the attic and doing the whip change. That idea was deleted due to attic heat in the summer and just getting up and down from the attic.
 |
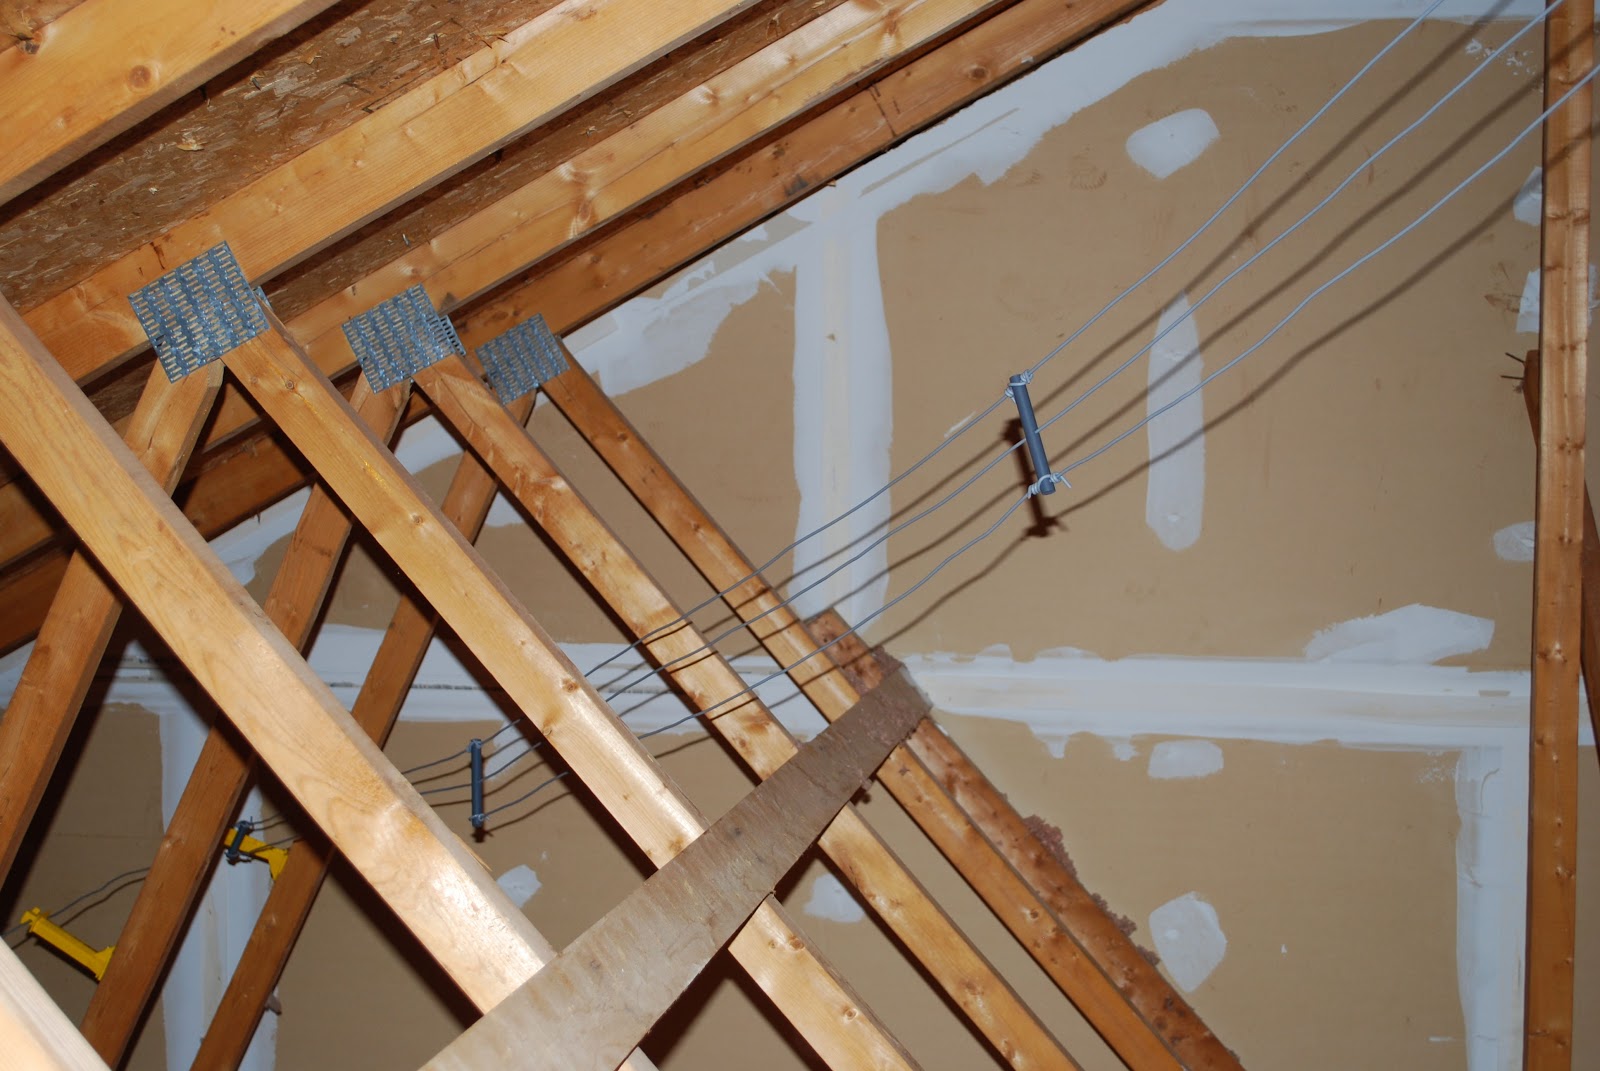
| Electric fence stand-offs |
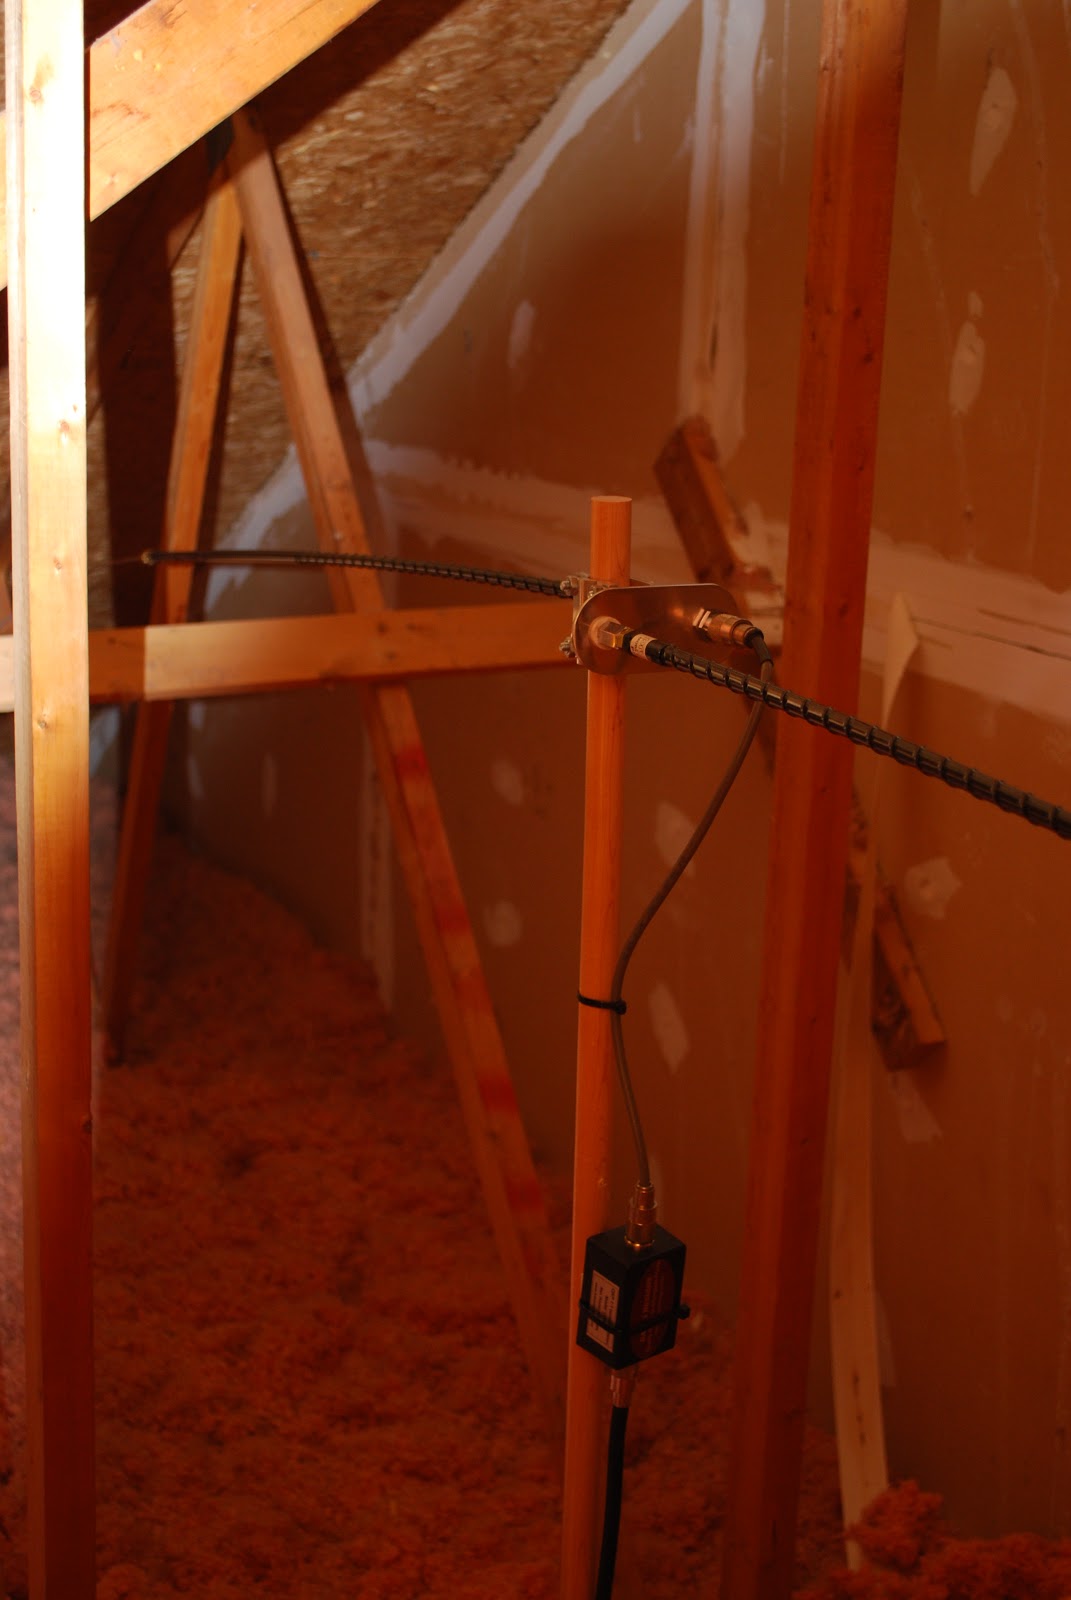
My goal was a multiband antenna that was small and could be left in the attic and forgot about. I committed to a dipole antenna from Alpha Delta the DX-EE model. This was a 10-40m antenna that was 40 feet long. Now my attic is nowhere close to being 40 feet long but I ended up installing it in a "Z" configuration. To secure the antenna in the "Z" configuration I used electric fence standoffs. Also, I added a 1:1 choke balun at the antenna feed point. This antenna served me without issue for years and it was out of the elements from the weather, out of sight and got me on the air. As a sidebar, I only transmitted at QRP levels as I did not want to have any issues with those on either side of us in the townhouse.
 |
| DX-EE |
Some of the challenges were:
The antenna had a narrow bandwidth on 40m but the Elecraft K3 tuner looked after that. As well using the Elecraft K3 tuner I was able to also use the WARC bands as well.
I picked up very bad band noise from a Plasma TV but that was fixed with an MFJ noise-cancelling unit.
Getting the coax from the attic to the radio room. The room was on the second floor and I ended up putting the coax in the wall and out in the radio room.
Securing the antenna for a "Z" configuration. As mentioned I used electric fence stand-offs.
Getting the best bang for each watt of power meant CW and not SSB. That began my journey of re-learning CW. Also fast forward to now there is also the digital modes you can use.
The next post (part 2) will be dealing with my condo apartment antenna challenges.
Part 6 of ham radio and condo life and unwanted RFI.
 |
| My son and me Back in the day without HOA, condo's an complicated city living. |
Once you have identified the RFI the trick now is to figure out where it's coming from, it is from your neighbor or from your own QTH? In my townhouse I had a crazy issue with a plasma TV and the great news was it was coming from our own TV. When you have RFI and it's your own that is easier to deal with than when from others around you. Lets have a look at some devices out there that can help out with RFI. The first item that comes to mind is made by MFJ and it's the MFJ-1026 noise canceller. It comes with an internal antenna (the antenna that picks up the noise) The best way to see how this unit works is to provide you with a link to my YouTube page were I posted a video regarding the MFJ-1026 If you have an Elecraft K3 radio I posted a second video using the MFJ-1026 plus the noise reduction on the K3 and I imagine this can work with most modern transceivers Welcome back and I hope you enjoyed the videos and I do believe there are more out there if you care to Google them.
In the condo I am in now as you know I have the MFJ mag loop and a mag loop has a great way of nulling out noise. I had a comment on one of my ham radio condo posts from a gentlemen using a loop as a receive antenna and a separate but noisy transmit antenna.
Another product out there that I personally have not tried but a reader of my blog brought to my attention is the CMC-130S-3k from My Antennas.
It's a Common Mode Choke, RF Choke and RF Isolator all in one go to the link and have a look there is also a video of the unit in action.
Well there you have it some ideas on how to reduce or illuminate issues that may be giving you some grief in regards to close quarters ham radio. This is the final segment of Ham radio and the condo life. I hope you have enjoyed it and found some useful information.
Part 5 modes for ham radio and the condo life
 |
| Multi-tasking |
Years ago when I was in a townhouse and decided to spend more time with my radio hobby. It just so happens the upcoming weekend was the Canada day SSB contest. I had a nice Yaesu FT 1000 MP radio and I was all set to dive right in. My antenna was out on my car a far distance way with coax running out to it. The first day of the contest ended and I was having a blast until my fellow neighbor asked me "did you hear "CQ contest CQ contest" from my speakers! I said no (which was the true I didn't) but knowing full well what was going on the Canada day contest came to an end and the thinking cap went on.
I could go and see them and explain it could be the poor electronics they have that is picking up my signal............not a good idea I thought as this can just open a HUGE can of worms! The plan I came up with to keep me on the air was to become a QRP (low power) operator. I very much looked forward to this and as I looked into things I also came to the understanding that you get more bang for your watt with CW than you do with SSB. My first but not only mode for ham radio in a condo is CW. Now there may be readers who are thinking "nice idea but I am morseless" funny thing so was I. Some time ago did have a basic understand but far from proficient. I set out to learn CW and it did take time and remember I did say earlier I really liked contesting so the goal was to get my CW up to contest speed in around 25-35 WPM.
Years ago I was introduced to the digital modes but found it very frustrating to get the PC to play nice with the radio and digital program. It would seem all was working fine until I turned the the rig and the PC on and for some reason something else was wrong. I found it took more time to hunt the issue down than I was operating digital. So for some time I just stuck with CW and put the digital modes off to the side.
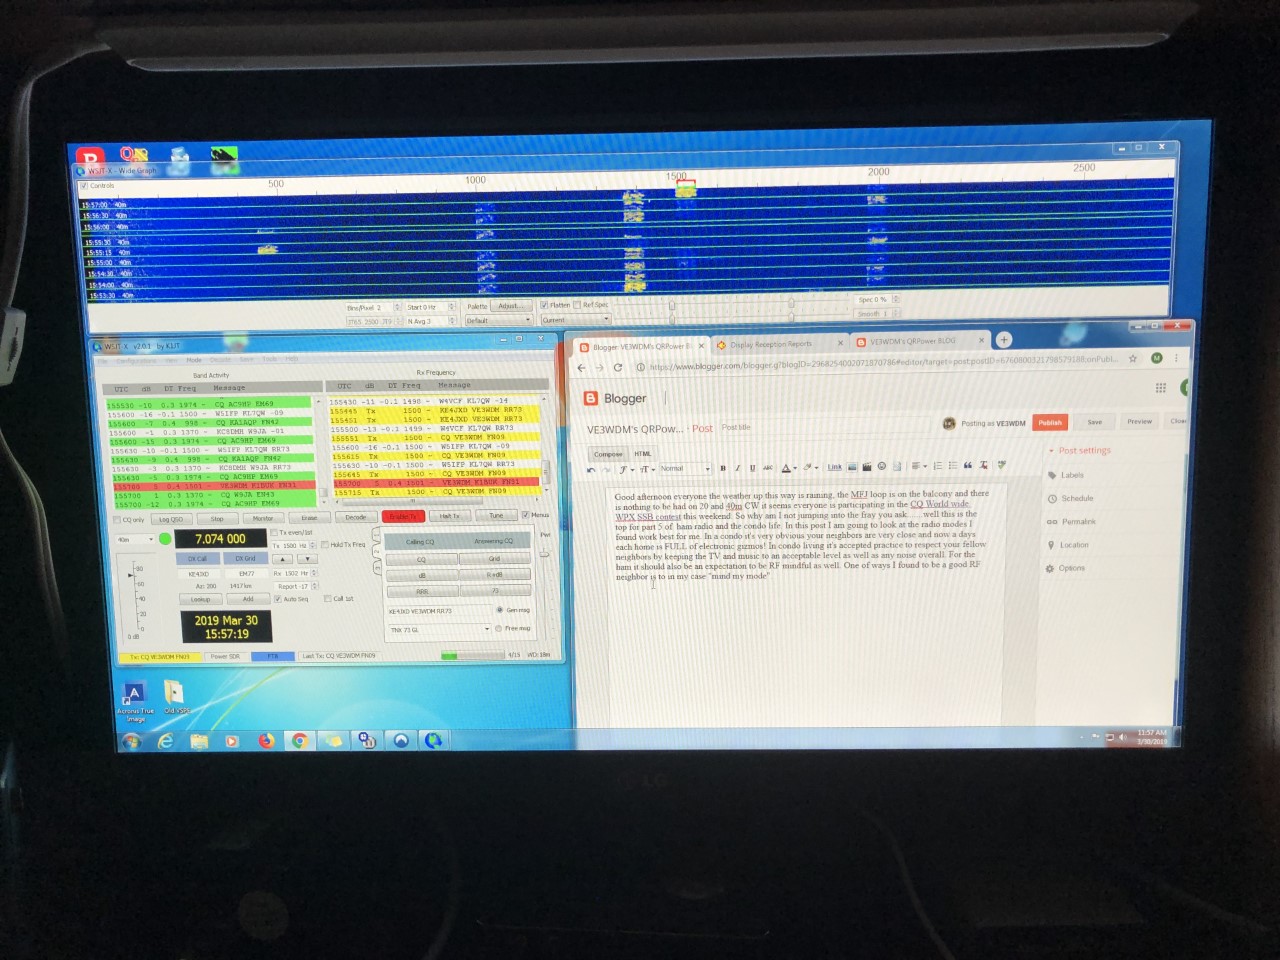
The next radio for me was the Elecraft K3 and the Elecraft reflector was booming with posts about getting your K3 up and running on the digital modes. Back then the popular modes were PSK31 and WSPR. I did still have some issues with the PC and rig talking to each other and did get frustrated at times. At present my condo modes are CW and FT8 and at the present time FT8 is very popular. While writing this post I had FT8 running in the background and was able to make 12 contacts. Having said that I do find CW more interactive but today with the SSB contest going on CW contacts were far and few to be had. The rig I have now is the Icom 7610 and it is a breeze to get working with digital.
Do give me your feedback with modes you are using in your condo. The next topic for ham radio and the condo life is dealing with close neighbors and most likely being in a city or built up urban areas is electronics causing you grief with there noise.
Part 4 Lets look at some condo antennas
 |
| At our old condo the loop loops like a covered piece of furniture. |
- most likely you are in a highly populated area with other large condo's around you.
- very small foot print for an antenna.
- In some cases the condo unit is small which limits your space for the ham radio "stuff".
Well now that I have you listing your radio on QRZ.COM for sale lets look at some of the advantages of being in a condo.
- In most cases you are high up as for me in one condo I was 60 feet up and in this one I am 160 feet up.
- Your balcony as most are made of metal make a good ground plane for some antennas.
- Your ham skills are challenged with regards to antennas, power output and mode of operation.
OK the last two points above I was really stretching for some positives but for sure height is in most cases a major advantage.
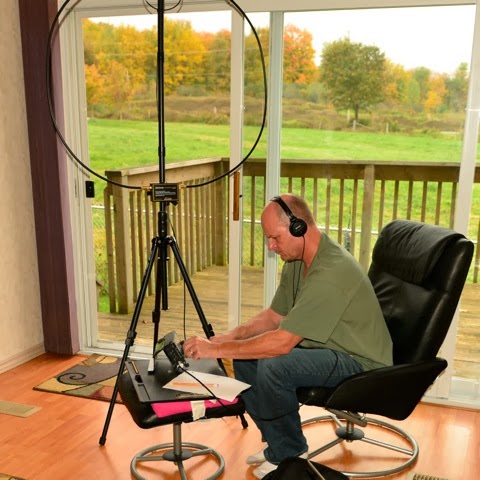
In this post lets look at some antennas that may work from a balcony. The antenna I use as you may already know if you are a regular reader of my blog is the MFJ 1788 mag loop. Now I have had many comments as well as emails saying that the mag loop is pricey. It's very true it is and most mag loops are not cheap as I also have the Chameleaon CHA P loop 2.0 mag loop for portable op's which also is a pricey antenna. I did save my pennies and spent some coin on the MFJ 1788 and not to turn this post into a review of MFJ but quality is not noted on the Eham review site with regards to most MFJ products. I did have a small issue with my loop but I repaired it and since that time (6 years ago) the loop has given me no issues at all. In no way am I saying that the mag loops are the only way to go.
A very unique looking antenna that is great for balcony operation is the Isotron antennas these antennas get a very decent review on Eham and I know of a ham who uses one and has had great success with it. These antennas are small, no ground plain needed and they can be purchased as mono band or multi band. Also they really don't look like an antenna. With antenna when you want to use it you put it out and when done take it in. In the present condo I am in this is how I use my MFJ loop it's only out when I am using it.
 |
| The loop at our new location |
Depending on the size of your balcony a wire antenna dipole antenna can be used. When we were looking at condos some balcony's were huge and could support a homemade wire dipole antenna. Two antennas I have tried that did not seem to work for me is a mono whip antenna mounted vertically with pre-cut radials...did not work at all. I also could not get the MFJ 1788 to work horizontally at my new place I had to mount it vertically. I also tried mono whip antennas in a dipole configuration and it did work but way to large for the balcony.
In my next post I am going to talk about what modes of operation I found to work best for me and how it opened a new door for me in ham radio...........oh and by the way from my condo setup as I was writing this post I was able to make contact with IK4UPB on 20m.
Part 3 of ham radio and condo life
 |
| Failed Hy-gain tape dipole |
Let me begin by saying this segment on antennas assumes you are looking for something that is either hidden or looks like something it's not.
Most (but not mine) town homes have a garage and driveway to-which you park a car in. I have found a very simple way to get on the air is to put an antenna on your car and run coax out to it. Now having said that you don't want to run around town with a huge antenna on your car (maybe you ...but not me) There are many fast connect/disconnect mounts on the market. As for the antenna I have seen and did have a multi-band HF antenna. I did operate my home HF radio with a multi-band antenna.....yes I did say I had no driveway or garage but more on that in a minute. The antenna I used was something similar to the Comet UHV-6 mounted on my car. There is also the Hustler triband adapter to allow 3 Hustler resonators to be used at the same time. With these types of antennas or similar ones you can run coax out to your car in the driveway connect to the antenna and your on the air.
In my case my townhouse at the time did not have a driveway or garage it was a common car parking lot. So what I did was I buried LMR 400 in plastic tubing out to where my car was. I terminated the coax to an SO-239 in a small plastic box. The box was in a small bush and unseen. When I wanted to go on the air I connected a small jumper of coax from the box to my car antenna. I was able to use this for about 3 years.
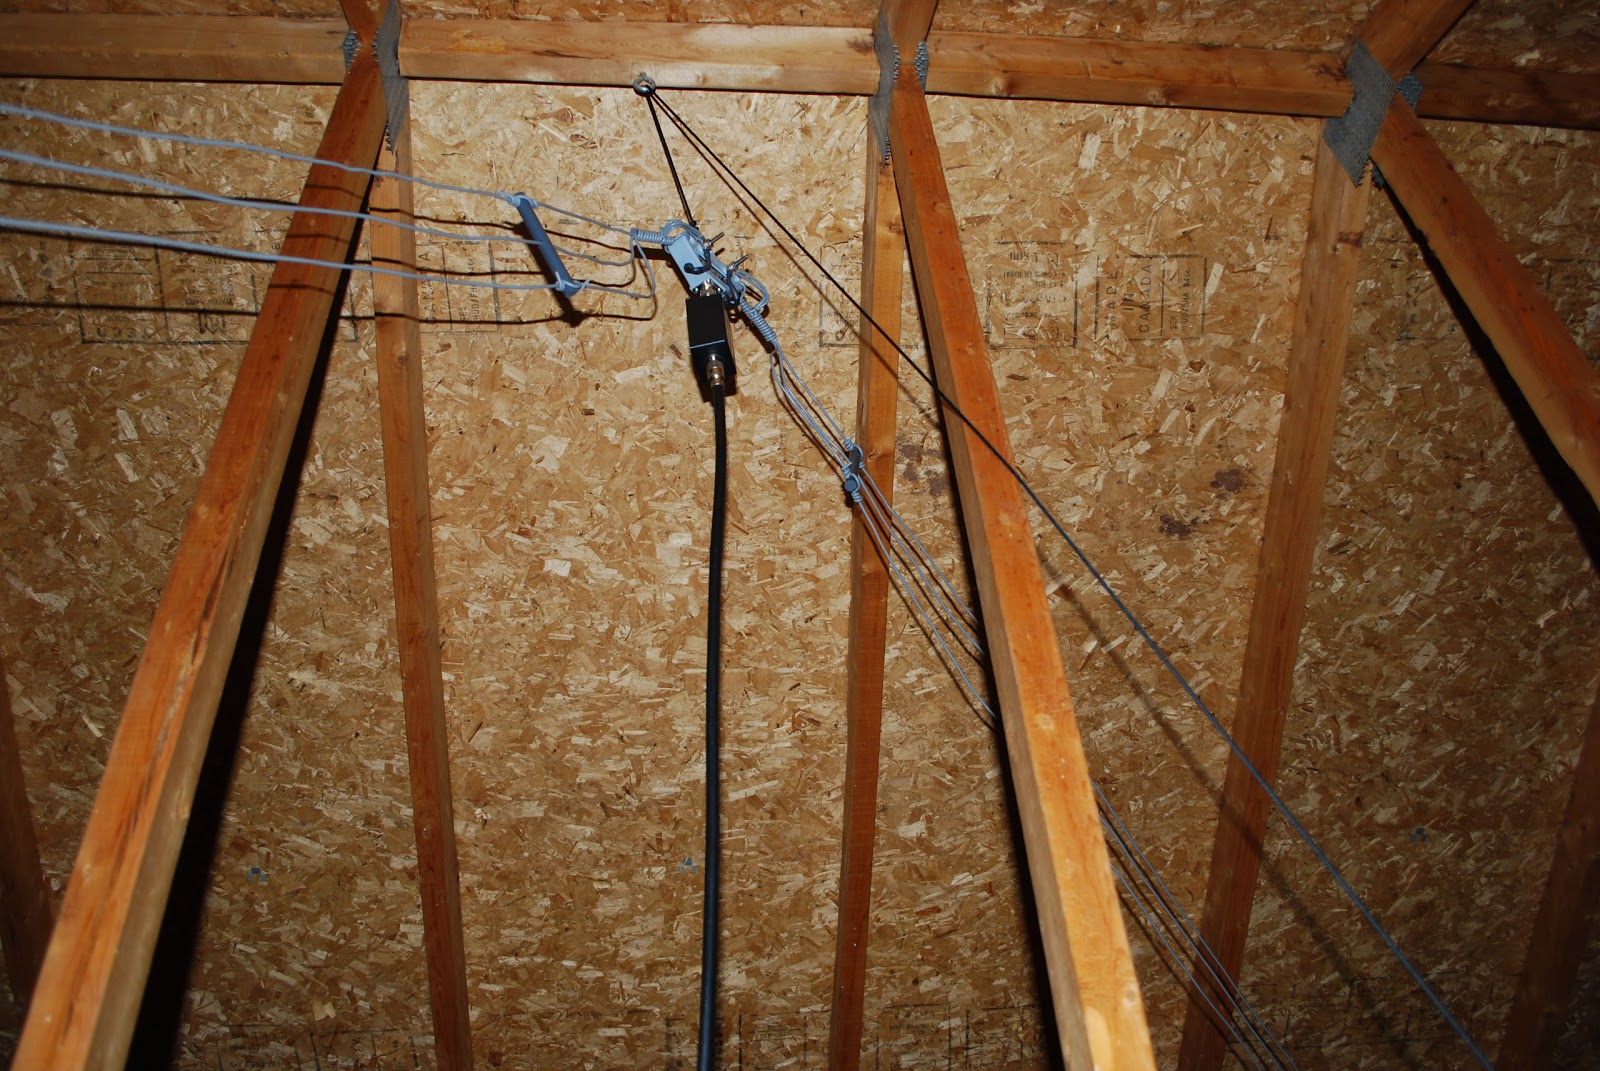 |
| Attic DX-EE |
 |
| DX-EE stand offs |
 |
| Weaving between rafters |
 |
| Backyard side kick |
I did end up mounting the High Sierra sidekick antenna in the backyard close to our deck. It was in a very hard spot to see and I was able to remove the antenna when not in use and bring it in the house. I was able to conspicuously bury some radials and was able to get a decent SWR.
 |
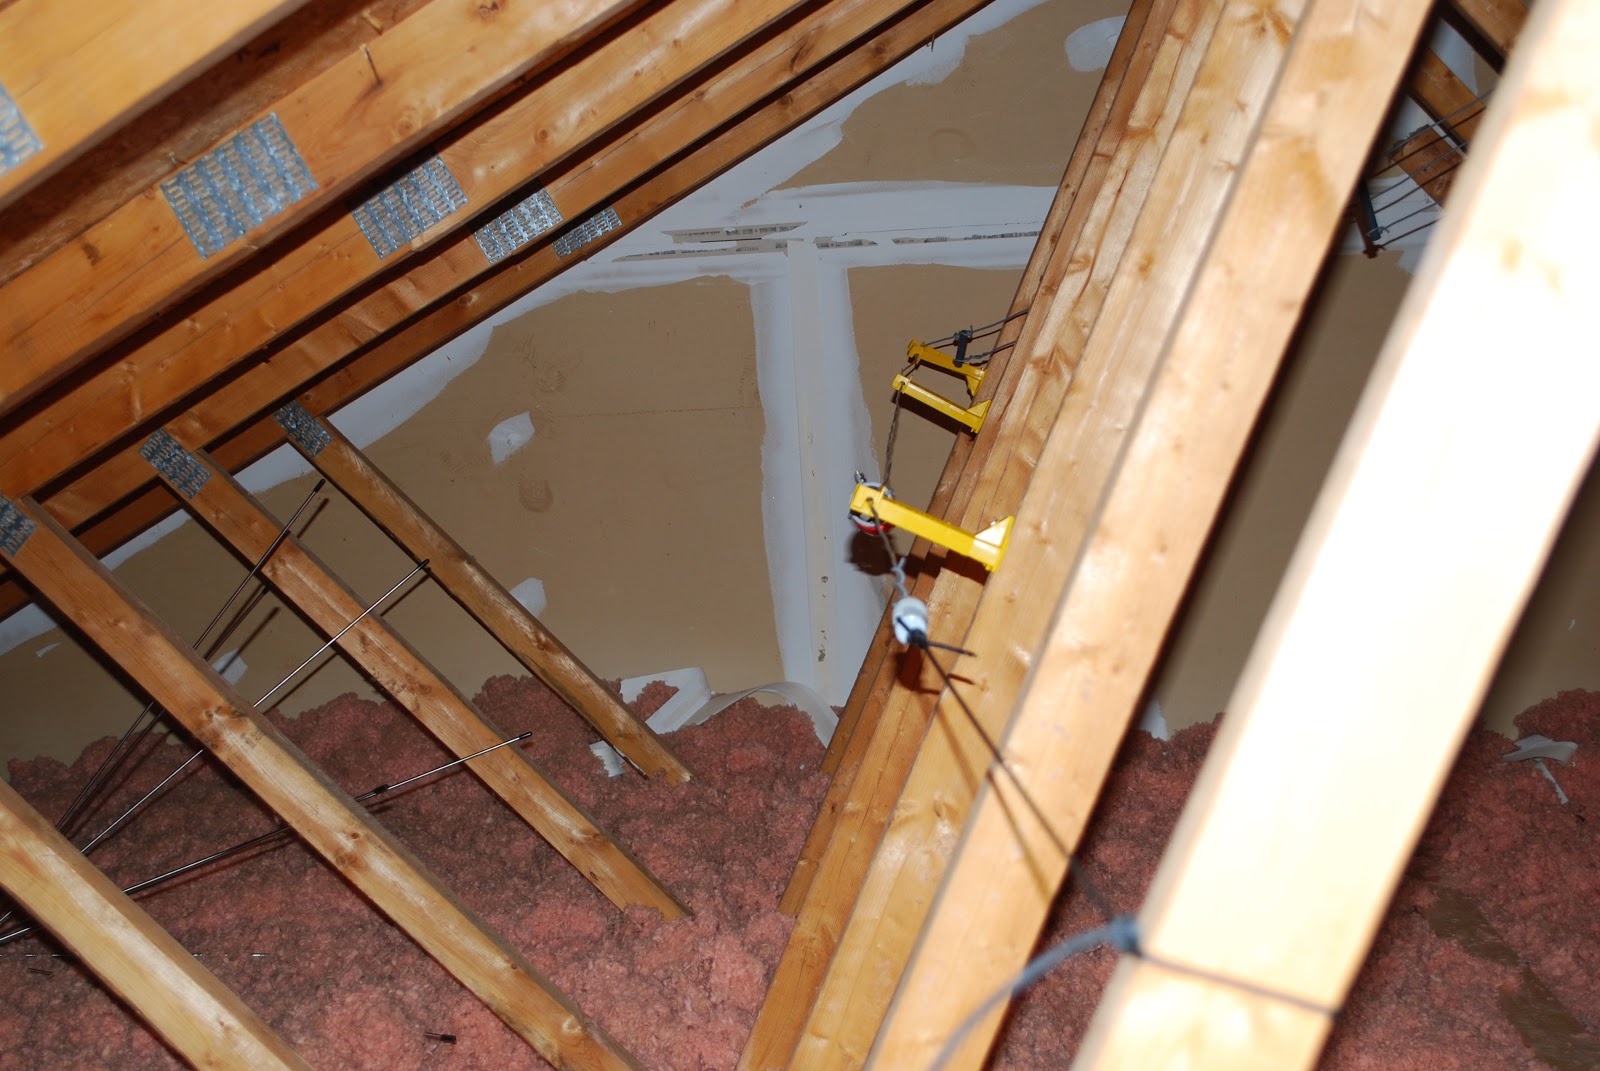
| High Sierra attic attempt |
 |
| Mobile whip dipole |
 |
| Alex loop in living room |
Ham radio and the condo life
Ham radio from a city condo…….I have been doing it for close to 7 years now and it does have it’s challenges. I have had great success with some cool world wide contacts. In Canada it’s tough to get into the housing market right out of the gate so many younger ham’s are getting their foot into the market with condo living. Then those ham’s who are retiring and want to downsize are considering condo life as well. I am here to say that in condo life there is also ham radio!!
Before we talk about the nuts and bolts of condo ham radio lets deal with some of the basics. I have always found it avoids condo board letters if you read and understand the rules and guidelines of your particular condo. Yes get used to it if you are going to move into a condo there are rules and expectations. What does this have to do with ham radio………well if you are seen as a respectful owner (or renter) of the condo board, residents and property it can go a long way.
For example most condo guidelines (nice condo word for RULES) do not allow “permanent antennas” on the balcony. This rule is yes for Amateur radio antennas but I believe the condo is concerned about the mini satellite dishes springing up or HD antennas. Just one of many challenges a condo radio op has to creatively deal with. In my case I have the MFJ 1788 mag loop and in my newest condo (6 months now) the antenna is portable and it not “permanently” mounted on the balcony. In my humble opinion having a low key antenna is important. Having whip antennas extending over the balcony or wires making their way down the side of the building just invites a letter from you know who from the office of your know where!! Like it or not we are all human and once this happens you have the microscope on you…..not a very nice situation to be in.
In a condo your fellow “condo-ites” are very close to you and that means RFI on your part but also on their part as well with all the unfiltered electronics on the market today. The positive outcome to this is you will become very knowledgeable on dealing with RFI. Oh and a word of advise…..I have read this in the past “go see your neighbor and suggest installing filters on their electronics” Up here in the land of snow and proverbial “thank you” we always say to apparently to everything……there is no thank you response from someone you are asking to tamper with their electronics. Rigs these days have excellent filtering and that are some accessories you can purchase to knock out the worst of offender.
Well that is enough for today….in posts to follow I am going to look at RFI, power output and no as a condo dweller you are not a QPRer for life………..nothing wrong with that either!! What antennas I have had that work, some of the better modes (not just digi either) to work and last but not least what happens if your in a situation were absolutely operating is possible, well I am here to say that you will still be able to get on the air in you condo on HF working DX!
Stay tuned.