Author Archive
 The WSPR Boss
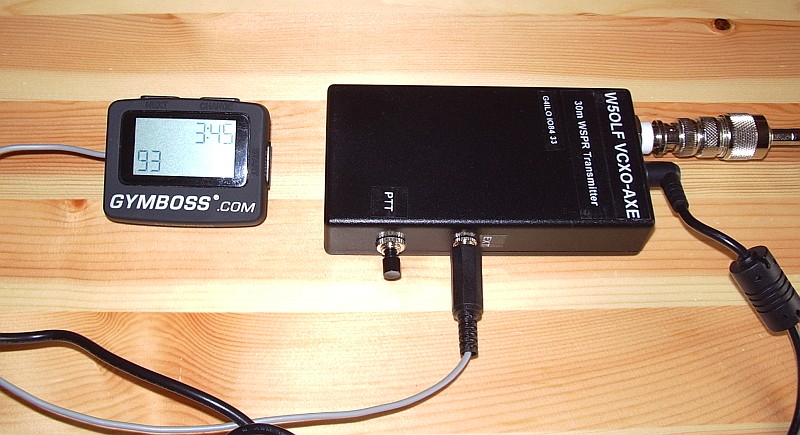
I ordered a GymBoss workout timer – not as a keep-fit aid but as a timer controller for the VCXO-AXE WSPR transmitter.
W5OLF doesn’t provide a lot of detail on how to modify the GymBoss but it isn’t difficult – especially if you don’t have fuzzy vision, shaky hands and fingers the size of Cumberland sausages. As I have all of those things I experienced an initial panic as I thought I was more likely to break the GymBoss than successfully modify it. Consequently I neglected to take any pictures of the process as I just wanted to get the job done without additional distractions.
Two screws secure the base of the GymBoss. Lift this away carefully as it is secured to the PCB by two short, flimsy and not particularly well soldered wires from the battery compartment. Once the base is clear you can remove two more smaller screws which hold the PCB to the front panel. At this point the pushbuttons will fall out – hopefully you will have made a note of exactly how they were installed so you can put it back together without too much difficulty.
The LCD display rests on the back of the PCB and can be hinged clear to reveal the bottom of the board. The beeper which has to be removed has two connections. The easiest way to remove it I found was just to grasp it between finger and thumb whilst applying the soldering iron to each of the two pins in turn, pushing the board away a bit at a time with another finger until it was clear.
I then soldered a thin screened cable to the two holes that had been used by the beeper. Using my ohmmeter I identified one hole that was at ground potential, so the braid was soldered to that one. I made a small hole in the case near to the “reboot” switch hole to allow the cable to exit. Then I carefully reassembled the GymBoss.
I attached the beeper to the end of the screened cable to check that the GymBoss still worked. To my relief, it did. I then attached a plug to match up with the socket I had already installed for P2 when I built the VCXO-AXE. The braid goes to the ground connection and the beeper signal to the Start pin. I then checked the transmitter with my power meter / dummy load to ensure that the GymBoss was turning it on at the interval I had chosen.
The timer works well and has maintained adequate accuracy for the 12 hours or so it has been running so far. It will start up to 99 transmit cycles at any interval you specify, so you can’t have it run indefinitely if you leave it unattended.
As of right now I am running a transmit cycle every 8 minutes using 2 watts into a home-made loaded whip antenna inside the shack using the central heating system as a ground. This has received plenty of spots from Europe and a few overnight from W3HH in the USA which I would not have been able to obtain if I had to key the transmitter manually.
Although manual keying is simple and fine for occasional use, I’m in no doubt that the timer makes the WCXO-AXE much more useful.
5V noise generator
An increasing number of electronic devices can be powered or charged from a USB socket. To charge them independently of the computer they usually come with a small switched mode wall-wart. Finding enough wall sockets for these broadband noise generators – in addition to all the wall-warts that already exist in the ham shack – can be a challenge. It would be nice if ham radio power supplies had a few 5V DC outputs.
When I started using my HTC Touch Pro smartphone as an APRS iGate I wanted to avoid using the HTC charger as I knew it created a few warblies on some of the HF bands. I wondered if I could power the phone from the shack supply instead. In the junk box I found a car charger for an old satnav that had the same mini-USB plug and fitted the cigar lighter type socket on my Diamond GSV3000 power supply. That seemed to do the job very well and didn’t appear to generate any RF noise (though the noise level here is now so high that the incremental difference made by one more switched mode device is hard to detect.) The only annoying thing about it was that it sticks rather a long way out of the front panel of the GSV3000, which is a bit of a nuisance on my narrow operating desk.

My next thought was that it would be nice to have more than one 5V outlet, perhaps in USB format, to occasionally charge other devices without requiring the computer to be on or plugging in another wall wart. Browsing eBay I saw a Griffin Dual Power USB Car Charger. This would give me two 5V USB outlets. And it was also designed to be flush with the top of the cigar lighter socket so it would look like an integral part of the GSV3000 once installed.
When it arrived I was quickly disappointed. As soon as I plugged a USB cable into one of the outlets, even with no load attached, broadband HF noise jumped up about 3 S-points. The device also got surprisingly hot even though nothing was drawing any current from it. I guess I should have anticipated that a device that size would use some kind of switching regulator and that this might result in noise. For the typical user wanting to power or charge two USB devices from their car, the noise is unlikely to be a problem. So I guess this particular solution to eliminating wall-warts is a non-starter.
Get the drift
Don’t you hate it when you build a project, it works, then you put it into a case and find that it is no longer working as well as it was?
I built the VCXO-AXE 30m WSPR tramsmitter and it worked perfectly. I then put it in a nice case and began testing it with various portable antennas. At the start I received several spots of my transmissions but after a while the spots became few and far between until hours would pass without any report of my signal.
At first I thought this was due to poor conditions or the fact that the antennas I was testing were inefficient. Eventually I investigated by putting the TX on a dummy load and listening for it with my K3. I found that although I had initially set the VCXO-AXE up to transmit 40Hz above the bottom of the 200Hz wide WSPR band, the frequency had drifted low so that my transmission was now right on the bottom edge and possibly below it on many receivers since I couldn’t guarantee my K3 readout was dead accurate.
It was easy enough to set the transmit frequency back to what I wanted it to be. But I still didn’t receive any spots of my signals.
I looked a bit closer and noticed that although my signal started off as a horizontal line for about the first two-thirds of the transmit cycle, the last third curved down a little. The WSPR software was reporting a drift of -3Hz, which was typically what I had been receiving from those stations that had spotted me. There is a thread in the forum section of the WSPR website which suggests that few signals which drift more than 3Hz are reported. So it seemed probable that drift of my signal was preventing it from being spotted.
Before I put the transmitter into a box the frequency had been perfectly stable after the initial warm-up period. So it was obvious what the trouble was. I drilled a small grid of ventilation holes in the back of the case just above the PA FET and attempted to increase the thermal inertia of the VCXO chip by placing a blob of Blu-Tack over the top of it. This made not the slightest difference. I was still getting -3Hz drift reported on the decodes of my transmissions.
After further investigation I found that the worst heat generating component was in fact the 5V voltage regulator, which also happens to be fairly close to the VCXO chip. So I drilled a further set of holes above that. I also fabricated a heat shield from a piece of cardboard sandwiched between the PCB and the back of the case with Blu-Tack to try to induce most of the heat to go out through the holes instead of heading in the direction of the oscillator. This did make an improvement. I’m now mostly seeing reports of -1Hz drift or even none at all. And I’m getting a lot more spots of my WSPR transmissions!
Should I or shouldn’t I?
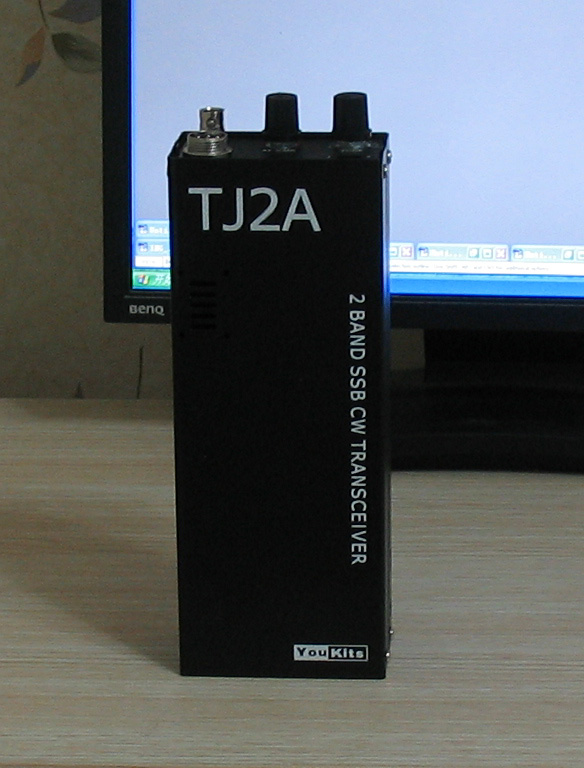
Thanks to the latest blog post from John AE5X I have the web page for a new QRP kit open in another browser tab and the pointer keeps hovering over the Buy Now button. The kit in question is the TJ2A, a two-band handheld SSB/CW transceiver for the 20m and 40m bands that has just been produced by YouKits of China.
Regular readers of my blog will know of my fondness for handheld radios. I’m finding this one very hard to resist even though I have an FT-817 and so no need for another handheld 20m/40m radio. At this point in my life I’m not even sure if building it is still within my capabilities. If I did try, it would be the most difficult kit I have attempted since my Elecraft K2, and I built that 12 years ago when my eyes were a lot sharper and I was not suffering the after effects of a brain operation. Should I or shouldn’t I?
The TJ2A looks like an updated and improved version of the Mizuho HF handhelds that were produced during the late 1970s which still fetch a tidy sum whenever they change hands on eBay. Like the Mizuhos, the TJ2A is VXO controlled and covers a portion of each of the two bands, though you can install alternative crystals if you would prefer to have full coverage of one band in two ranges. You could also choose other bands by changing the VXO crystal and bandpass filters.
The building instructions are on the web and it looks as if the kit uses mostly through hole components but there are some SMD transistors. It isn’t perfect. There is mention of warm-up drift in the first 5 minutes after switching on or changing bands. There is also a mod already to stop BFO leakthrough into the IF stages. And there doesn’t appear to be any high SWR protection for the PA so using the rig with handheld antennas – or any type of antenna that presents a mismatch prior to tune-up – might be problematic.
But it looks really cute. And it’s a kit. There are few things in ham radio more rewarding than hearing the first signals, then making the first contact, on a radio you built yourself. Should I or shouldn’t I?
A WSPR Handy-Walkie
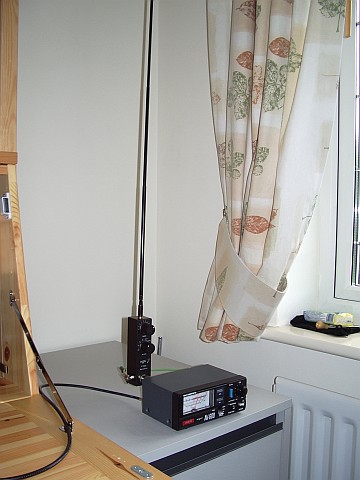
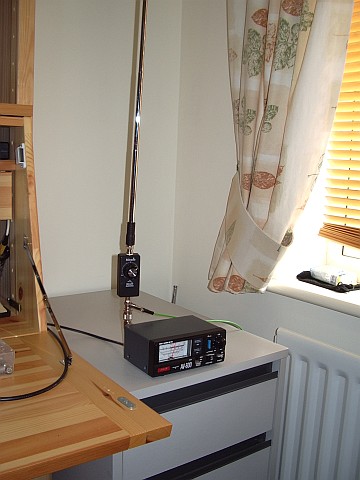
The VCXO-AXE WSPR transmitter has now been put into a plastic project box and lettered with Dymo tape. I think it looks rather smart even if I say so myself.
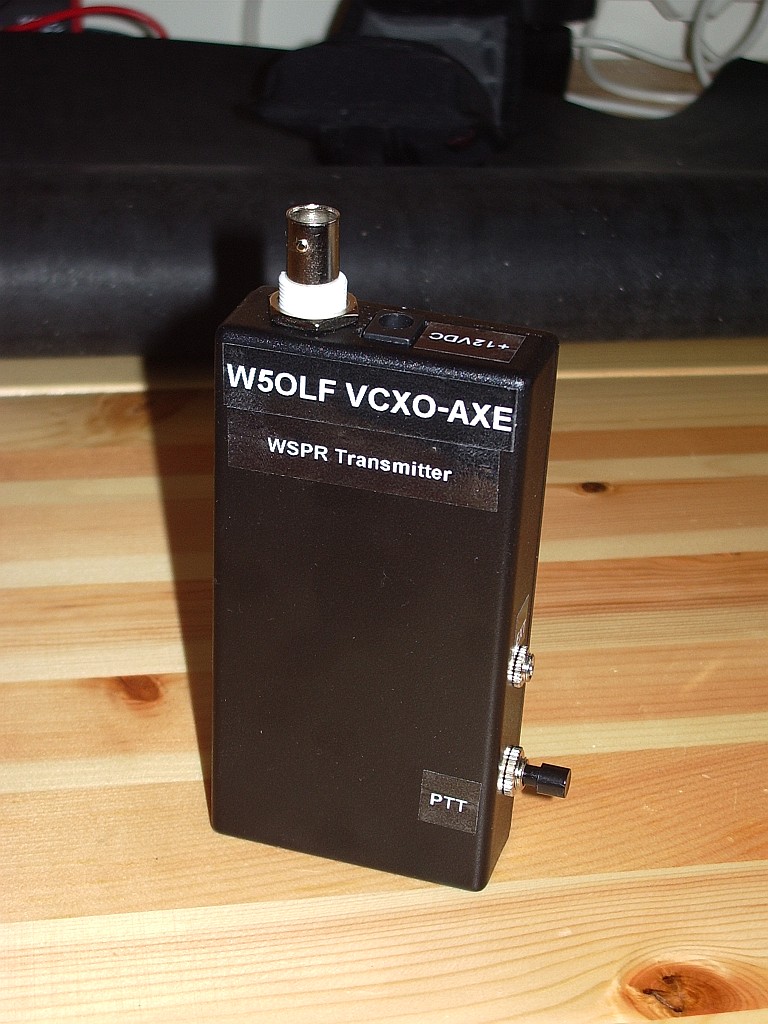
It did think about building it into a box that contained the batteries as well but that would have made it larger and prevent the batteries being used for something else. Plus I already had a box that fit the transmitter by itself. So what I now have is a pocket WSPR handy. Imagine going to the park or the beach or a hilltop and sending a signal that could be received half way round the world using a battery powered radio you can hold in your hand. How cool would that be?
Unfortunately the charger that charged my 10 AA cell NiMH QRP battery pack decided to fail and I’d exhausted the batteries during my initial tests so I couldn’t try portable operation unless I first spent a day charging the cells up 4 at a time. So I decided to see how far my 30m WSPR signals would get using a selection of hand held QRP antennas with the rig running off the bench power supply in the shack. As most of the antennas are equipped with right-angle PL-259 connectors for attachment to the back of an FT-817 I attached them to the back of my SWR/power meter with a short patch lead connecting it to the VCXO-AXE. For an RF ground I used the nearby central heating radiator.
The Wonder Wand L-Whip produced several spots from as far afield as Italy during the morning.

The Miracle Ducker with 1.4m telescopic whip was somewhat less successful, though as I tested it at a different time of day it would perhaps be wrong to draw any conclusion from that. I used the MD with the radiator counterpoise. Although it would give a reasonable SWR with no counterpoise at all the current drawn by the VCXO-AXE TX increased from around 300mA to 400mA which made me think the PA might not be happy so I decided not to test it like that.

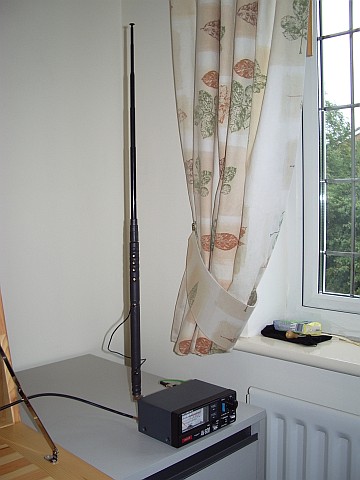
The most surprising result came from the ATX Walkabout antenna. For those unfamiliar with it, this is a small QRP antenna with a 1.4m telescopic whip and a base loading coil that is tapped for the 80m, 40m, 20m, 15m, 10m and 6m bands. To use the WARC bands with this antenna you have to use the tap for the next lower band and then obtain resonance by shortening the whip. On 30m the whip length is only about 40cm! The length of coil that is in use (not shorted out) is about 15cm.
So this antenna when used on the 30m band is effectively less than 2 feet long! Despite that it produced several spots at quite respectable SNR levels. The SWR using the radiator ground was a rather poor 3:1. I suspect that this, and overall efficiency, would have been improved if I had used a quarter wave counterpoise, but I didn’t have 7.5m of wire handy and it would not have been practical to deploy it inside the shack in any case.
Obviously with a good antenna you will get stronger reports, be heard further afield and get more spots. But from the results of these tests it appears that even with a compromise hand held antenna (and a counterpoise for grounding) some interesting results could be possible using this little WSPR transmitter. Great fun!
Whispering with a VCXO-AXE
My VCXO-AXE WSPR transmitter kit from W5OLF came this morning. It was two weeks in the post, doubtless due to Customs which had opened the package. I wasted no time in building it, though it did take me somewhat longer to complete than it took AE5X.

The kit itself has been impressively put together. The PCB is extremely high quality and the instructions are almost of Elecraft standard. If the horrible Spectrum Communications Off-Air Frequency Standard kit had been produced to this level of quality it might not have turned out to be a failure for me. If American kit makers can produce nice silk screened and solder masked boards, why do ours make us struggle with boards that look like they were made by hand on somebody’s kitchen table?
The VCXO-AXE kit uses almost all through hole components and there is plenty of space around the solder lands. I doubt that anyone would have any trouble building this. The one part that induced a feeling of terror when I saw it was the VCXO itself.
As described, it is a “larger surface mount component.” But what I didn’t expect was that it didn’t have any pins or legs that stick out to solder to. Instead, you have to solder it so the solder goes under or up the side of the chip. You need a very fine tipped soldering iron for this. I couldn’t really see if I had successfully soldered the chip or not, so I took a couple of pictures.
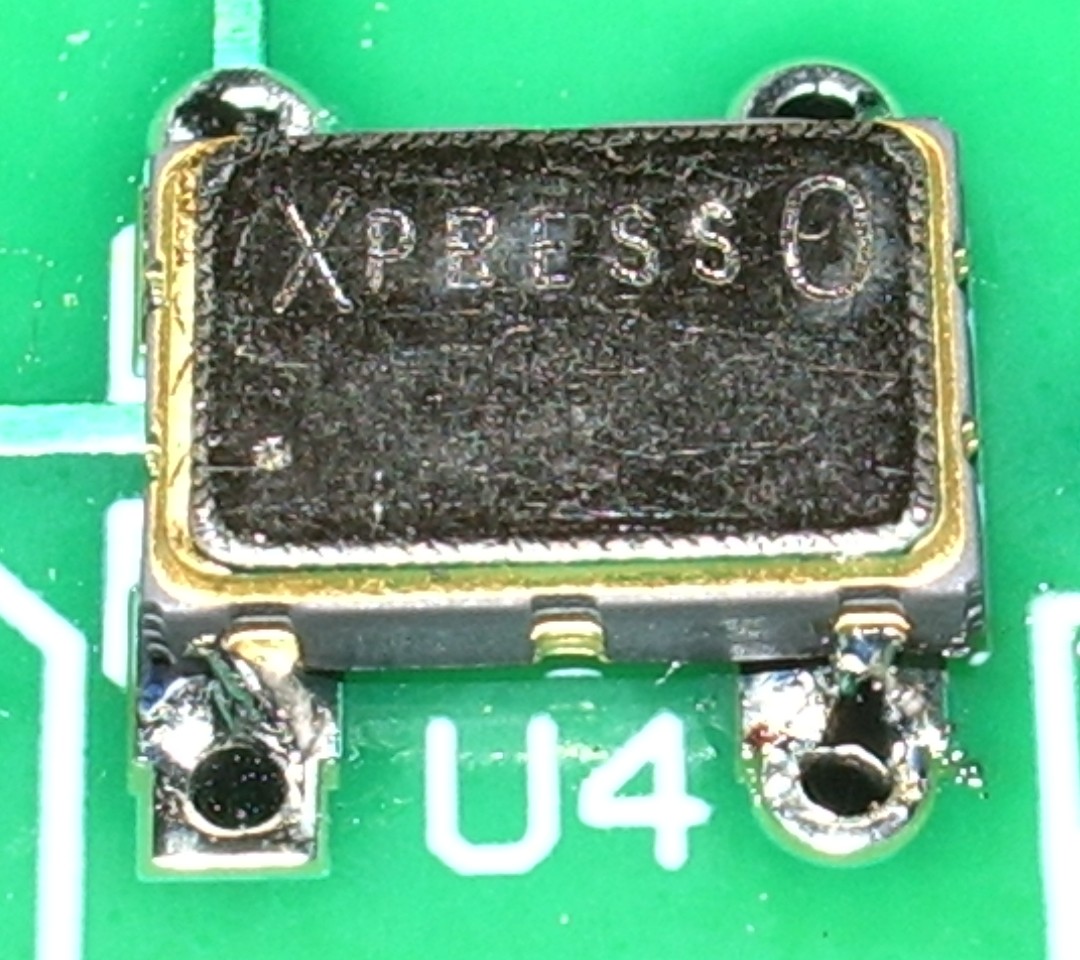
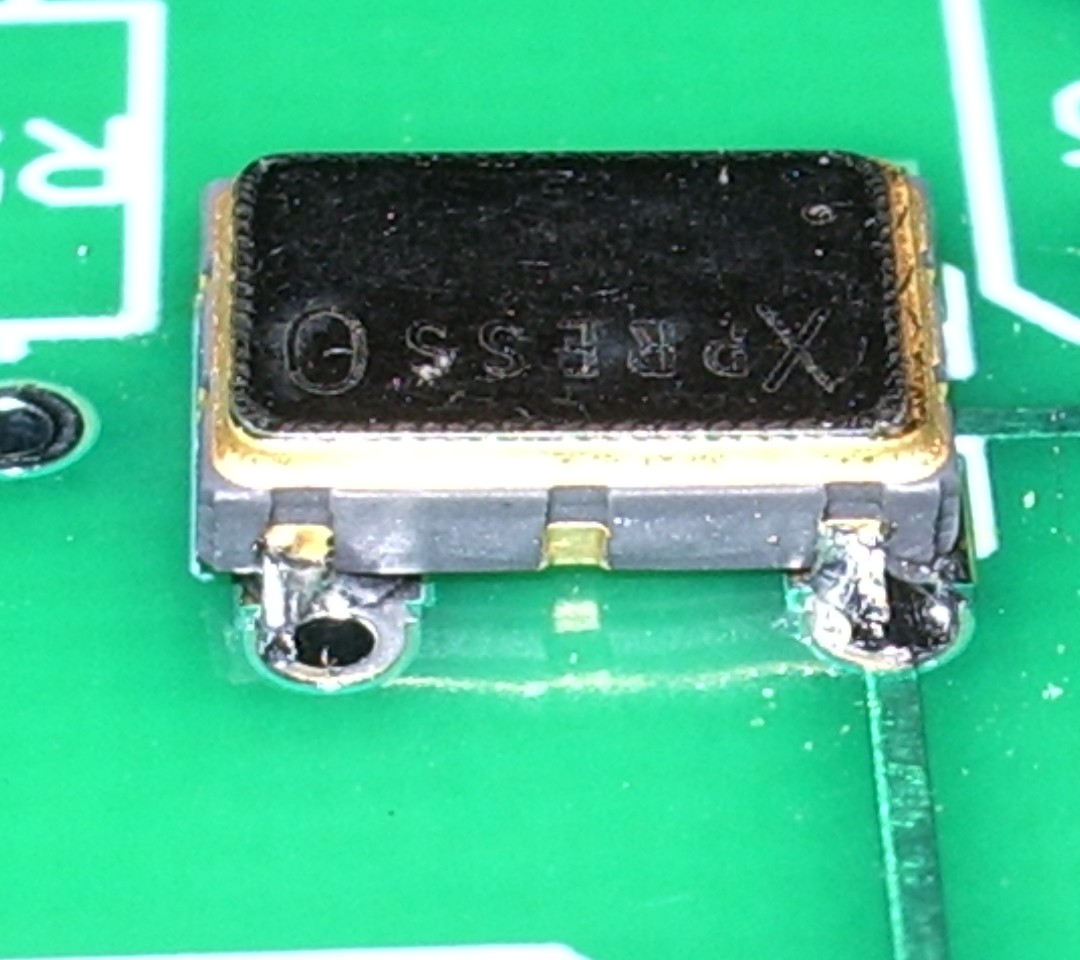
The result is not very pretty, but it must have been OK because the transmitter eventually worked!
When ordering, I specified my call, locator and the supply voltage I would be using (12V, as I planned to power the transmitter off a pack of 10 NiMH batteries.) The PICAXE controller chip came programmed with this information and a power level of 33dBm – 2 watts.

On a freshly charged battery pack I was actually getting nearer 3 watts output once the PA tuning capacitor had been peaked up, but after the first few transmissions the power did drop off a bit to become nearer the advertised 2 watts.
I hooked the VCXO-AXE up to my attic MFJ magnetic loop, watched the radio-controlled clock in the shack until it rolled over to an even minute, pressed the transmit button and a couple of minutes later had my first WSPR spots.
Soon after that I had several more. No great DX, but perhaps that is just down to conditions at the moment.
The instructions warn that second harmonic suppression of this transmitter is not great and an external low pass filter is advised. However, the magnetic loop (either the MFJ or my portable Wonder Loop) has a very high Q which I am sure does a good job of attenuating out of band harmonics on its own.
My next move will be to build the little transmitter into a plastic box and use it as a hand held portable WSPR rig. It would be fun to try making a 30m base loaded whip – which should also be fairly high Q – and see how well that works. So expect some WSPRing from various locations around Cockermouth some time soon!
This was a fun project and a good morale booster to prove to myself that I can still build stuff – and with an SMT part in it, too! Thanks to Jay W5OLF for making the kit available. A 20m version would be nice, as well!
If you want to buy one of these kits for yourself you have to look on eBay, though as of right now there doesn’t seem to be any for sale.
APRS iGate on a smartphone
Not that many will have noticed its absence, but the Cockermouth APRS internet gateway G4ILO is back on the air using APRSISCE running on a SIM-less HTC Touch Pro smartphone.

I had wished for a long time that I could run the gateway without having the shack PC on all the time running up the electricity bill. But when I looked at the documentation for things like aprs4r it looked too difficult. After I got my Android smartphone I was wondering what to do with the Windows Mobile I used previously and it occurred to me that I could use this for the gateway, since the Windows CE version of APRSISCE contains more or less the same functionality as its full-blown Windows counterpart. (Personally, most of the time I don’t consider that to be an advantage, and I had often wished that Lynn would release a cut-down version for mobile users with simplified menus, but that’s another story.)
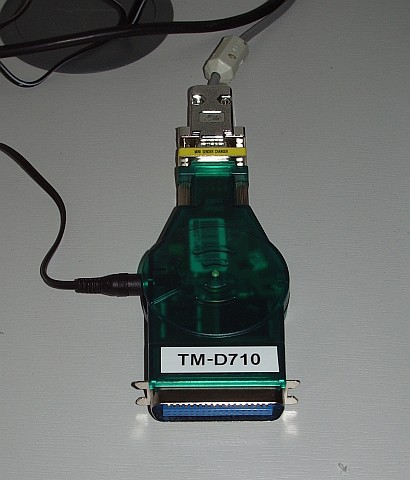
In order to use the phone as a gateway I would have to set up a Bluetooth connection to the Kenwood TM-D710 TNC as the Touch Pro doesn’t have a serial port. Achieving this was one of those things that I wish I had never started, entailing hours of wasted time, failure and frustration. It also brought upon the first bad headache I have had since my brain operation. This is probably not helpful to the state of my health, so I have vowed from now on to give up the technical stuff and use the computer only for non-stressful activities like writing and web surfing. Life is, for me, literally too short to spend fighting with computers.
My first attempt at a Bluetooth connection involved using a Pico Plug. I bought two of these a couple of years ago when I saw them cheap on eBay (where they are still available, though not as cheaply) but I had never actually used them. However this first attempt got nowhere. My netbook – the only PC that had Bluetooth on it – would only see the Pico Plug as a modem and would only allow me to try connecting to the Internet through it. The smartphone saw the device but could find no services offered by it. So that idea went nowhere.
My next thought was to try one of the cheap Bluetooth serial modules being sold on eBay, as something similar had been mentioned in a thread in the APRSISCE Yahoo group. The one I ordered was described as a small size Bluetooth TTL UART full duplex data transmission module Class 2 10 meter range(30ft), 35mm by 15mm excluding pins length nicely sleeved in transparent nylon sheath supplied with 4 wire header cable. The module is based on the BT0417C chip and has a regulator to run off 3.3 – 5V. It arrived the next day by first class post and was quickly attached to a DB9 connector and power.
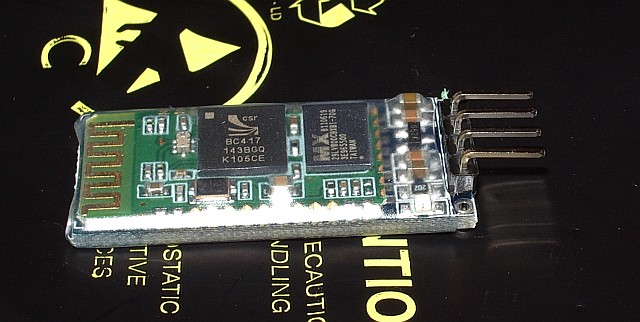
The BT0417C module was seen by the computers and advertised a serial port service. But whenever the Kenwood TNC sent any data what appeared in the terminal program was garbage. It was the same garbage for the same data, which made me think that the baud rate was wrong, though the default settings for the module were supposed to be 9600,8,N,1 just the same as the Kenwood. Try as I might – and I tried for a long time – I could not get the thing to display the proper data.
Eventually it dawned on me that changing the baud rate of the terminal program might not actually alter the baud rate used by the module to communicate with the device. I found some instructions that were supposed to describe how you could change the module’s baud rate by sending an AT command to it. This didn’t work either, after which I grasped that you were supposed to send the command by direct connection to the module, not over Bluetooth! To do this I needed to disconnect a serial cable from the back of the shack PC in order to free a gender changer that would enable me to connect a USB to serial cable to the BT module. When I disconnected the cable, one of the standoffs that the cable plug screws into decided to come off with the plug instead of stay on the PC and a nut dropped down inside the computer. So I had to disconnect the shack PC – not a simple task as it has 4 serial ports and 3 sound cards attached as well as the usual paraphernalia – in order to retrieve and replace the errant nut. Then we couldn’t get the backplane of the serial board seated back in the PC. I couldn’t see what I was doing properly so Olga had a go, and it took her half an hour of fiddling.
After all that I still couldn’t change the baud rate or get the data to be displayed correctly. I even tried connecting my Elecraft K3 to the module to see if I could send or receive commands from that, but I still got garbage at any of the K3’s available baud rates. I then wondered if I had damaged the module by doing that as I vaguely recall that the K3’s I/O module uses proper +/-12V RS232 signalling levels and the BT is a TTL module. I don’t know what the Kenwood’s serial output is either. At this point I decided to abandon the entire idea. Net result: a wasted day and a splitting headache – though at least we had taken the opportunity to vacuum all the dust out of the inside of the shack computer!
This morning, feeling a little calmer, I decided to have one last try with the Pico Plug. It suddenly occurred to me that perhaps there was some newer software or firmware for it. Sure enough, there was, though not a lot newer. I upgraded the firmware in the Plug, then installed the newer configuration utility. The result: still no advertised serial port service. 🙁
However, the new configuration utility had a few more options. By trying them at random I finally got a serial port to appear in Bluetooth on the smartphone! I connected to it with Pocket Putty, and the whoop of joy when the Kenwood packet TNC sign-on message appeared could probably have been heard five miles away. I quickly created an RF port in APRSISCE using the Kenwood(D710) APRS configuration and it put the radio into APRS mode just as it was supposed to. Stations started appearing on the display as “heard over RF.” So, finally, I was on the way to running an APRS iGate on my smartphone!
In case it is helpful to anyone else who wants to use a Pico Plug to connect a Kenwood APRS radio to another device using Bluetooth, here is a screenshot of the configuration utility showing the settings that worked. (Yes, I know, I set the device name to TM-D72 instead of TM-D710 as I intended. Believe me, by this point I was tired!)
Here is one showing the RS232 settings. The important bit seems to be to set it as a Modem.
If you know what to do then that’s all there is to it. But my goodness what a frustrating nightmarish day or so it took getting there. I hate computers – and it would seem that the feeling is mutual!


