Posts Tagged ‘Filter’
 Deteriorating ceramic filters due to DC
 |
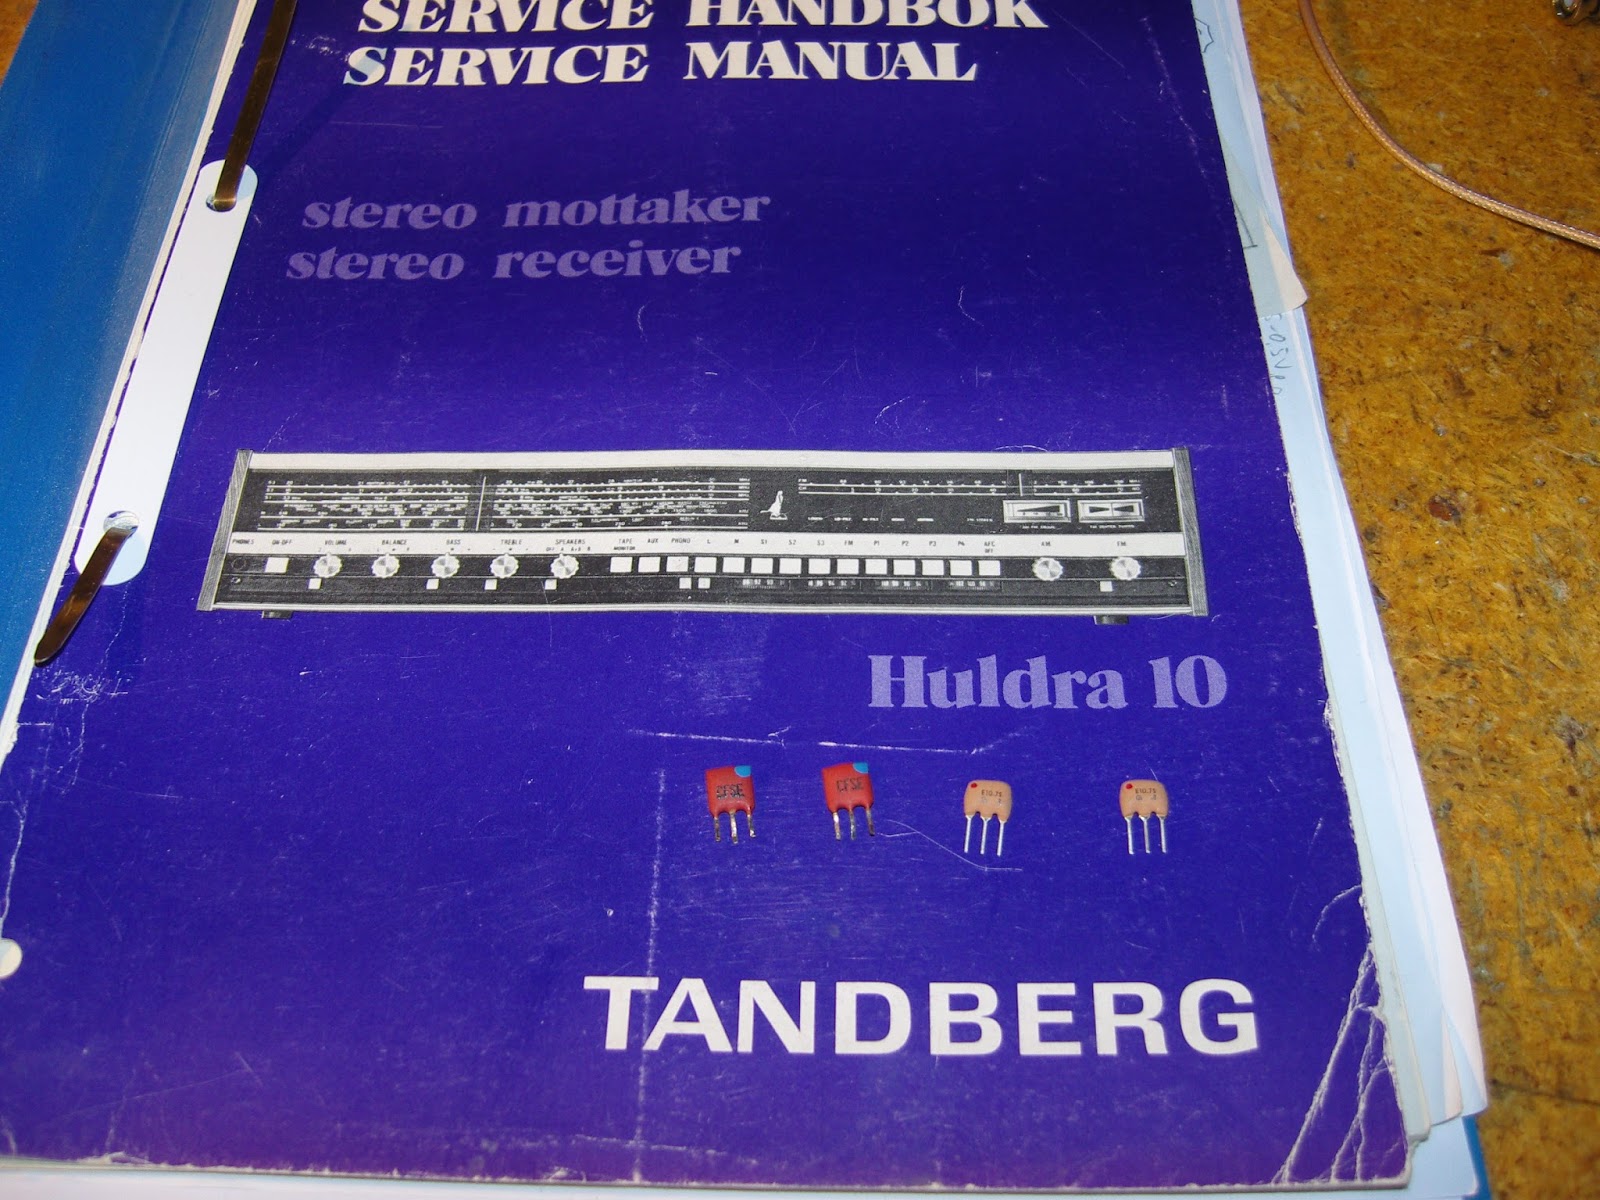
| Tandberg Huldra 10 |
Tasos, SV8YM, has written about “The Mysterious Case of the Withering Filters“. This seems to affect not only ham radio transceivers, but FM stereo receivers as well.
Tandberg from the 70’s are collectors items and since I actually worked one summer at Tandberg in the early 70’s they bring back good memories for me. The latest generation of receivers (2nd version of Huldra 10, Huldra 11, and Huldra 12) had ceramic filters for the 10.7 MHz intermediate frequency for FM. It is also known that these filters deteriorate leading to reduced sensitivity over time.
SV8YM has pointed out that ceramic filters deteriorate due to DC on the terminals, especially the output terminal and that this leads to electromigration. In the Huldra 10, both filters have 7.1 V DC on the input. Filter F1 has 0 V DC on the output, while F2 has 2.1 V on the output.
 |
| Old filters (left) and new filters |
As I got ready to replace mine with new Murata filters (SFELF10M7GA00-B0, 230 kHz bandwidth), I read the same warning in their specifications, which says: “For safety purposes, connect the output of filters to the IF amplifier through a D.C. blocking capacitor. Avoid applying a direct current to the output of ceramic filters.“
I also noticed that the filters had been replaced before. To be sure, I added three coupling capacitors (10 nF – 0.01 uF). This value has a reactance of 1/(2 pi 10.7e6 0.01 e-6) = 1.5 ohms which is negligible compared to the 330 ohm termination impedance. They were surface mount capacitors which is quite some upgrade as they perhaps were not even invented when this receiver was designed. They were fitted under the PCB by cutting the appropriate trace. Whether this has any long-term effect I don’t know, as the Huldra 10 at the age of 40 years is beyond its design life anyway.
My somewhat inaccurate oscilloscope measurements indicated that the passband attenuation in F1 was reduced from 7 to 4 dB and in F2 from 9 to 2 dB, in total maybe as much as 10 dB gain. FM sensitivity seems to have been restored to normal value after this replacement, so it was well worth the effort.
 |
| The three new 10 nF coupling capacitors, circled in red |
 |
| The two filters, circled in red |
Sotabeams Laserbeam DSP Filter
I’ve bought a few odds and sods from Richard, G3CWI at Sotabeams in the past. Stuff like a super cheap End Fed Half Wave tuner for my MT5B that took about 30 minutes to make, a SB270 dual band 2m and 70cm yagi which is my favoured UKAC antenna and things like antenna winders. But, I ventured into DSP and bought a Laserbeam CW DSP filter on a whim at the NARSA Norbreck rally and to my shame haven’t really used it too much. The complaint was that I didn’t get round to boxing it up. Now all that has changed. There’s a kit! not just a box but an amplifier as well.

Richard now sells plenty of different types of filter from single SSB and CW types as well as a variable version and even one for the ft817 (next stop I think). He also sells a neat little box and audio amplifier kit. Something that was clearly missing from the original line up. I paid my money and a few days later mine arrived. Some downloaded instructions from the website were used and within 30 minutes the very good quality PCB was populated and they enclosure being prepared. Here is a small niggle, the case is an aluminium extruded type that follows the Hammond 1455 style but is an alternative that is no doubt cheaper. The end pieces are laser cut and engraved acrylic that don’t quite fit flush with the holes and the self tapping screws are driving int thick aluminium and as such are prone to slipping and potentially able to fowl the front panel. There is a very minor issue with fit and in my case the audio jacks sit ever so slightly too far out and as such force the thin acrylic to bow. Lesson learnt is that fit those parts more conservatively to avoid the bowing. That being said its a small gripe.

Powering up is straightforward. Anything from 5-15v works and so my standard 12v ‘checking stuff’ battery powered it up first time and I soon noticed that the audio was quite loud with my headphones. The front panel has a volume control and a handy LED reminder if you drive it too much. The sweet spot is just below the level LED ‘light up’. A second LED shows the incoming signal and a wide / narrow switch chooses between wide and narrow settings of course. The website shows lots of graphs and technical guff but using it is clearly what I’m after and it certainly doesn’t disappoint. The ability to remove unwanted signals is just brilliant. For such a cheap unit I can’t think why I didn’t get my backside in gear earlier.
The minor mechanical niggle aside, I would recommend this as a simple and effective filter. It is cheap, simple, razor sharp and a really useful add on. Long may it carry on filtering!


