 Portable Station Build – Part 1
I have been working on putting my radios and gear into a portable box. My goal is a single station that is portable which I can use at home or outside the home. I wanted this setup to be able to be used at things like: Field Day, Communications volunteering for local events, or simply operating at a local park. I don’t want portable gear and fixed station gear at home. I think for me, having a single station that I know inside and out, that could be used in multiple locations suits me just fine. A few guys in our club have talked about doing an informal get together at a fellow member’s farm and spend the afternoon operating. An informal “Field Day” just for fun. I finally have enough done to put up the first post describing my efforts.
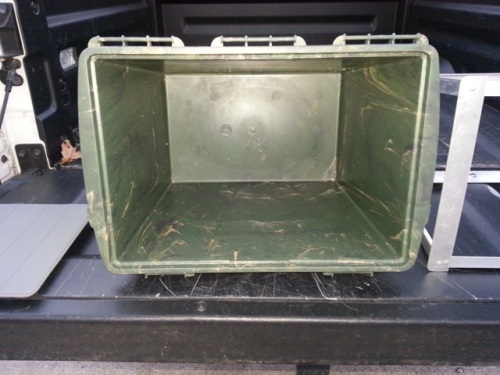
For the box that will old the radio gear, I chose a MTM Sportsmen Dry Box called the Spud 7.
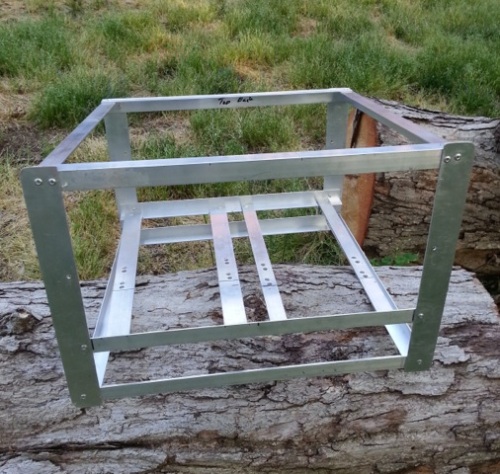
Inside the box, I am building an aluminum frame to hold the gear. I am using 3/4″ aluminum angle from my local bog box home store. Also used is some flat aluminum pieces where I did not feel the angle would work well.
Here is the outer portion of the frame.
There will be two shelves. The bottom one will hold both radios, a Yaesu FT-857D and a Paesu FT-8800R. Here is the frame with the radio shelf installed.
The frame is assembled with 1/8″ aluminum pop rivets. I find these easy to work with and they can be easily drilled out if I have to remove and replace something. Some joints have two rivets and other places have one.
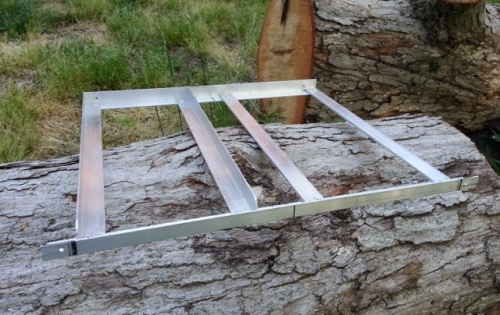
The upper of the two shelves, will hold a LDG tuner, a SignaLink USB device and a PowerWerx power supply. Here is the upper shelf. I had it installed but had to take it out to drill the holes for mounting the power supply. The radios will be installed with the mobile mounting brackets that same with them. I ordered the optional mounting brackets for the power supply. So all these things will be held in bolts, nuts, and lock washers. The tuner will be held in with double-sided tape and plastic tie wraps. The tuner is lightweight enough to not move when I tested that solution.
Here is the upper shelf not installed . . . .
The tuner will be on the left, and the power supply on the right.
Once I get the upper shelf in, I plan on painting the frame with a black hammered spray paint. But that’s subject to change . .
The lower part of the frame will be covered with a plate. Mounted on the lower opening, will be a face plate which will have antenna connectors for each radio, power connectors, a power meter and a few other things. I am finalizing the plans for that now. I have it drawn out and designed, I just have to review it again and start ordering the electrical and antenna components.
I will write a Part 2 as I make more progress. I am also going to work on a solar solution for power in the field. That will come later as well.


