 |
 The NA-034 operation that almost wasn’t: Epilogue
Well, I was wrong. Or was I?
When I got home after my NA-034 operation, I wanted to try to understand what happened. I was sure that I’d operated solely off a car battery in the past and as long as I was connected directly to the battery I hadn’t had any problems. Based on some testing that I did, I discovered that I may have been mistaken. The short version is that I discovered that by using the battery in my car without the engine running, I was able to reproduce the “strange noise in headset” that I recently wrote about, and that by running the car engine, that problem went away. There’s a bit more to it though. Read on if you’re interested.
I needed to have some way to measure the voltage from the battery and the amount of current  that it was drawing while the radio was transmitting. While I could do this with a couple of meters when I was home, based on some recommendations that I got from W3FF, K8EAB, and NE1RD, I picked up a Super Whattmeter from Astroflight for around $50 plus shipping. These devices are used by folks who fly electric model airplanes because you really don’t want your battery to die when it’s up in the air. As it turns out, they are well-suited for monitoring your power when operating portable. Of course, they work fine too in the home shack, though my power supply has meters so it’s not needed. The picture here shows it hooked up that way for testing, and you can see that the Astron supply is supplying 13.8v.
 As a side note, I started using quick-disconnect connectors made by Workman Electronic quite a number of years ago, before Anderson Powerpoles became popular. I was looking for some kind of quick disconnect power connector and found patch cables similar to the ones in the picture at a hamfest. I typically cut them in half and crimp them onto whatever I need to, be it battery clamps, the power cord for a radio, and so on. The good part is that I’ve been able to find them surplus at hamfests (though I’ve seen from a number of places online that they are now discontinued) but the bad news is that they don’t match what most other folks use. I keep meaning to make myself a set of adapters to connect to Powerpoles.
I crimped a set of the quick disconnects onto the Whattmeter and did a test with the power supply and radio in the shack to ensure that the meter was working and found that it worked perfectly. The shack power supply was putting out just over 13.8 volts with the Icom 756 Pro II drawing around 3 amps while receiving. (Interestingly, this is about 0.6A below what the ARRL reported in their testing, but I’ve had some repair work done on the radio and it’s possible that some of the newer components draw less than the originals.) The next step was to reproduce what I’d set up while in Florida.
As luck would have it, the weather was beautiful this weekend, and as we had no plans on Sunday, I took the 706, the Buddistick, the Whattmeter, the antenna analyzer, and a length of coax outside. I set up the Buddistick on the front lawn (I just had it on the mini-tripod sitting on the lawn, though I did put the radial over a couple of plastic lawn chairs to keep it off the ground) which while not optimal for DX, took me all of 5 minutes to set up with a good match to the radio, as verified by the antenna analyzer. I connected the radio to the antenna then connected the power cables to the car battery, with the Whattmeter in-line. My thoughts were to do a few tests with the engine off, fully expecting that I wouldn’t have any issues, then turn the engine on to see what kind of difference it made. I found an empty frequency on 20m and started testing. As soon as I transmitted, without looking at the meter, I knew that, to my surprise, I’d reproduced the problem: That nasty noise in the headphones was back.
What I figured I’d do was to collect data using various levels of transmit power to see the effect on the voltage and current draw. The meter itself also shows power in watts, though of course that’s trivial to calculate if you already have current and voltage. (From Ohm’s law, P=I×E). I quickly discovered that the car battery wasn’t able to supply sufficient voltage unless I was transmitting with about 10 watts or less. The specification for the 706 MkIIG is that it requires 13.8vdc ± 15% meaning the minimum allowable voltage is 11.73vdc. With the car engine turned off, I measured 11.68v with the radio drawing 5.79A when transmitting using 10w. At 40w (the next step I measured; when I was in Florida I was able to “get away” with 40w when testing with KH6ITY), I measured 11.52v while drawing 8.23A. At 60w transmit power and up, the voltage dropped to about 11.4v but the radio was simply unable to draw the current needed.
 With the car running, it was a completely different situation. Even at full transmit power (100w), the voltage supplied to the radio was 13.24volts at 14.77A. (I’m not sure why my current draw measurement at that power was different from the specifications for the radio, which were also pretty close to what the ARRL measured). I took the results and plotted it out in transmit power vs. watts consumed for both the case with the engine on and the engine off, and it’s pretty clear that with the engine off, the battery simply isn’t able to supply the required power. (You may need to click on that chart to have it display in a readable size. If you’re reading this via email and that doesn’t work for you, go to the web version of this post at k2dbk.blogspot.com and it should work from there.)
You can see from the chart that not only couldn’t the battery supply sufficient power for the transmit needs, it was only able to supply less as the radio tried to use more, presumably because the battery simply couldn’t “keep up”. So all my empirical testing seemed to prove that with the setup that I was using, I simply couldn’t operation at full power using just a car battery with the engine running.
However, similar to bees who simply don’t know that they can’t fly, so they do, apparently my radio didn’t know that it didn’t have enough power to operate, at least during my 2004 and 2006 operations from NA-034, so it worked just fine. During those operations I know that I did not have the car running, yet I had no issues with power. The key for me know will be to find out what has changed. I am using the same power cables and the same radio (the antenna was different, but that shouldn’t matter), yet something has changed. The next thing I am going to do is to see if perhaps there is a problem with the power cables that may have occurred over the years.
Although I attempted to measure the resistance in the power cables and came up with a measured 0.1 Ohms, my meter is probably fairly inaccurate at such low resistance, so I did a calculation instead assuming that I’ve got all 12 AWG wire in place. (Part of it is actually 10AWG, but I’m using 12 to account for any losses due to connectors and splices.) Using a 12v supply with a load of 15A (matching what I saw when the engine was running) and a length of 20 feet, the voltage drop calculator that I used shows an estimated voltage drop of around 8%. Allowing a bit of wiggle room for the length, it appears that the voltage drop would be somewhere between around 6% and 10% which corresponds to a voltage at the load (radio) of between 11.3v and 10.8v. Even the highest end of that range is too low for the radio to operate properly. Dropping the transmit power to 40w results in the voltage to the radio of about 11.5v which is a bit below spec but probably would allow operation, with some minor distortion. That seems to match what I had experienced.
The other factor that I haven’t played around with much is temperature, and I’ll leave that as an exercise for the reader. At this point, I think the best thing to do is to shorten the power cable as much as I reasonably can, replacing the section that is currently 12AWG wire with 10AWG wire. I suspect that will help ensure sufficient current flow while minimizing voltage drop.
I would be very interested in any feedback from anyone who can shed a bit more light on these issues, as I know that there are other factors that may come into play, such as the battery chemistry and perhaps other parts of the car’s electrical system.
David Kozinn, K2DBK, is a regular contributor to AmateurRadio.com and writes from New Jersey, USA. Contact him at [email protected].
Ham Radio Odyssey | XR0Y The Journey Begins…
Unfolding Of An Odyssey?
A journey is an explanation of one’s imagination, perhaps Stan, SQ8X has embarked on something extraordinary that is more than a journey? His DXpedition to Rapa Nui with another planned in the distant future to a distant land is moreso reminiscent of an odyssey that is a long, eventful wandering.
Perhaps, it is not unlike Homer’s Illiad, a timeless mythological story where spirit and character is tested again, again?
Rapa Nui evoked powerful images from our distant past as well Jan Mayen a volcanic island located 950km west of Norway in the cold Atlantic tantalizes the adventuresome spirit that speaks too many of us.
His Odyssey Begins.
Take a moment, while reading the sub-titles, and imagine adventurers past and future who dared the odds. Stan’s story is compelling like many DXpeditions who risk much in the face of danger.
It is why, given SQ8X’s youth, that something extraordinary is underway, one that I believe, is an odyssey for ham radio.
Believe in your signal.
Scot Morrison, KA3DRR, is a regular contributor to AmateurRadio.com and writes from California, USA.
Hontoon Island Qualification Report
Great weather, great site, and despite so-so band conditions but we made over 25 contacts to be able to submit our qualification of Hontoon Island, Deland, Florida as an official island to be listed and activated as a US Island On the Air.

The main picnic area near the ferry landing
The team consisted of Wally Crew, KG4LAL, Jim Diggs, K4AHO and Kelly, K4UPG. We used the special event callsign K4T on operated on 20m cw and ssb, 30m cw and a few unsuccessful attempts at 40m & 15m cw. Jim was our secret weapon on 20m with his good cw, K-1 and a Par End Fed antenna in vertical configuration on a 33 ft MFJ telescoping mast. Without his contribution we would not have been successful! So a big thank you Jim for your good operating skills and equipment that made it happen in less than 8 hours at QRP levels.
FL481 is ready for future activations!
Thanks to the Polar Bear QRP group, QRP-L members, 4 States QRP Group, GORC, QRP Spots, US Islands organization and HF Packers that helped out by listening and attempting to connect with our effort on Hontoon Island. It was fun to work as a team!


Kelly McClelland, K4UPG, is a regular contributor to AmateurRadio.com and writes from Florida, USA. Contact him at [email protected].
Tallentire Hill
By the time I had finished repairing the TH-205E the sky had cleared and the sun had come out so after tea I thought I should go for a bit of fresh air and exercise. Olga is still suffering from a chesty cough and didn’t want to come so I decided to drive over to Tallentire village and walk to the top of Tallentire Hill. A couple of weeks ago I had spent a couple of hours parked near the top making some contacts from my HF mobile station. But it isn’t possible to get right to the top by car unless you have a 4 wheel drive vehicle, because the track is rather stony. Even if you had a 4×4, there is nowhere to park off the road right at the top. The actual summit is in a small field and accessible through an unlocked gate from the track, but it is presumably private land so whilst walkers enjoying the view may be welcome, hams setting up a portable station would probably be accused of trespassing.
 But on a day like today it is worth going just for the view. The picture above shows the trigonometrical point (a reference point for measuring height used by the Ordnance Survey) looking south east towards the Skiddaw range. On the larger version (click on the small one to see it) you can see snow-covered mountains beyond Keswick in the background.
 The next picture shows the view south west and on the large version you can see some of the buildings of Cockermouth nestling in its valley. The big mountain on the left is Grasmoor with its steep drop towards Crummock Water. In the distance you can see the Buttermere fells.
 The last picture shows the view north across the Solway to Dumfries and Galloway in Scotland. I don’t know the names of the Scottish mountains.
I would love to own the field containing this summit so I could use it as a portable site whenever I wanted, even if it meant buying a 4×4 vehicle! With the take-offs shown in the pictures the site might be quite good for VHF, so I will have to take the MFD and the FT-817 up there one day when there is a 2m contest in progress.
Today I didn’t manage to raise anyone with the TH-F7E I took with me. But despite the sun it was pretty cold up there with a stiff breeze so after a few calls on 145.500 I headed back down again.
Julian Moss, G4ILO, is a regular contributor to AmateurRadio.com and writes from Cumbria, England. Contact him at [email protected].
Kenwood de-gunked
It’s probably a character weakness, but I have always had a tendency to push my luck a bit too far and end up regretting it. That thought was in my mind when thinking about what to do with the Trio / Kenwood TH-205E that I got for a song on eBay. The rig worked well enough already to do what I thought I would do with it if it worked. But I was finding it hard to resist the temptation to see if I could restore it to full working order even though there was a risk that I might end up breaking it completely.
 In the end, the temptation to try to restore it won. The radio came apart quite easily – it is a big radio, and fairly easy to work on, though surprisingly for 1986 vintage equipment it uses a lot of SMT parts. The back half is a solid cast metal chassis containing the IF and RF boards, and the front half is plastic and contains the front panel with the control logic. The two halves are linked by two ribbon cables and one had been inserted a bit crooked, which led me to hope that repositioning it might solve the problem of the inoperable buttons, but that proved not to be the case, so the front panel board had to come out.
The front panel board is secured to the front panel itself with a large number of small self-tapping screws. Once they were removed and the wires to the speaker and mic unsoldered, the board came out to reveal the sight shown above. The front panel buttons were not sealed units but capacitive switches operated by contact with the rubber buttons, and they were covered by a sticky mess of gunk – presumably the same stuff I had found on the outside of the case which a couple of readers informed me was a cleaning agent used to spruce plastic items up prior to sale. This hadn’t just distributed itself over the switch area, it had even penetrated through some of the vias to reach the other side of the board. What a mess!
Olga found me a few small pieces of rag and I went to work with some white spirit from the garage. I eventually managed to clean most of it off. My fears about causing even worse damage were raised when the LCD display fell off. It didn’t seem to be attached to the board and had perhaps become stuck to it with some of the gunk. However when I reassembled the radio I just rested it in place while I fixed the PCB in place and it still worked.
There was no way I could test if the switch contacts were clean enough without reassembling so eventually I decided that it looked good enough and back it all went. I applied power with trepidation. The display lit up and I could hear hiss in the speaker. I then pressed the Offset button and was able to select repeater shift! The Scan function set the receiver scrolling slowly through the entire 2m band in 5KHz steps – very useful that! I was also able to program and recall frequencies in the three memories, although the memory buttons still need a bit of persistence to get them to work. It isn’t worth taking it all apart again just to try to improve that.
While I had the rig apart I took the opportunity to reset the power levels to give 5W on High power with a 13.8V supply and 0.5W on low power. Some previous owner had probably tweaked the power controls to give 7W out. No point in stressing the probably irreplaceable power transistor for a barely detectable 1dB or so of extra power. Then I put it all back together. Job done, and the TH-205E restored to full working order. I was feeling pretty chuffed.
As usual, there was no-one around on any of the simplex channels to do a test with but I was able to access the GB3DG repeater and even GB3LA on 145.7125 (a 12.5kHz channel) by tuning to 145.715.
I’m starting to feel a bit of affection for this big old radio now that I’ve made it as good as new. I’m thinking that it would be worth trying to resurrect the NiCad battery pack, which at the moment is showing a dead short. But there I’m really stumped, as I can’t see a way in. Clearly the plastic case is made in two halves, but sticking a screwdriver in the crack and twisting is just going to chew up the plastic. Anyone know if it’s possible?
Julian Moss, G4ILO, is a regular contributor to AmateurRadio.com and writes from Cumbria, England. Contact him at [email protected].
Droid
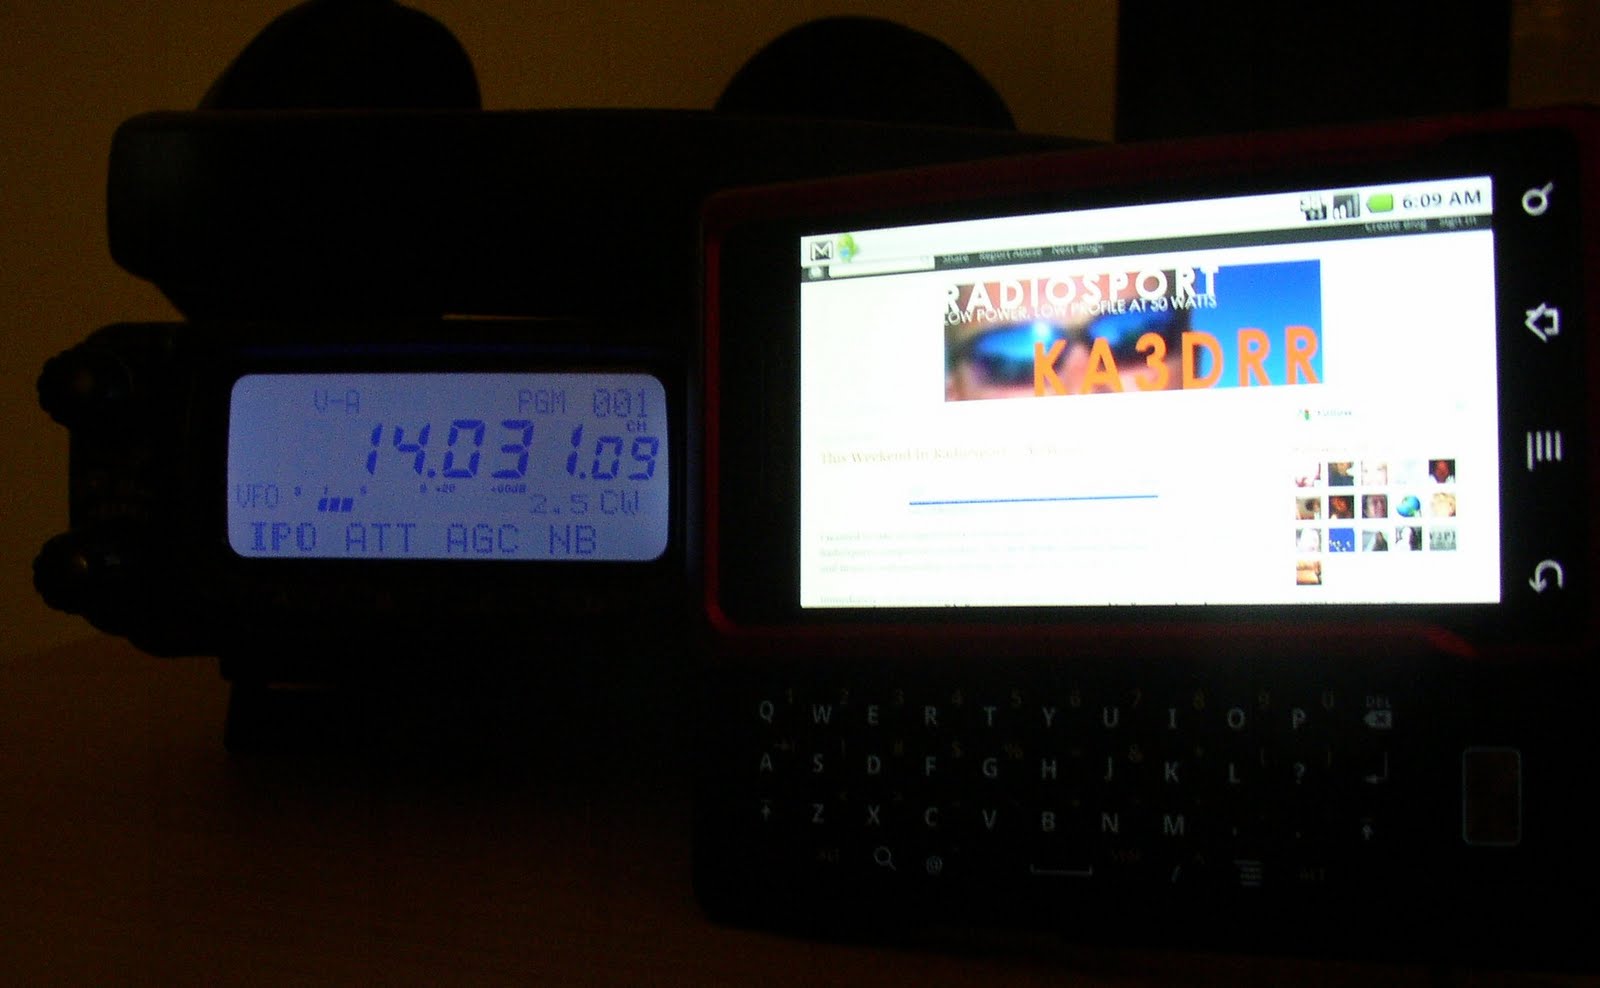 Mobile device disruption of current social and/or business models is a brave new future, perhaps, ultimately displacing one’s desktop computer. Frankly, in comparison, my Droid can accomplish most tasks albeit with a much smaller screen and miniaturized QWERTY keyboard.
I’m impressed with my Droid thus far and can’t help drawing parallels between it and Issac Asimov’s iRobot in addition to Star Trek communicators.
Reviews.
- Engadget Motorola DROID review (link).
- Gizmodo Motorola Droid review (link).
- Ubergizmo Motorola Droid review (link).
The last thing needed in my life is a device that drains scarce time from the mortal hourglass. I want my Droid to accomplish the following tasks —
- Synchronize email.
- Content production.
- Integration with recreational activities specifically ham radio and surfing.
- Social network integration when mobile.
- Decision data such as product and/or service(s) review.
I’m observing a mobile device viewing trend using Google analytics. I recommend thinking about one’s blog layout through the lens of Droid-like devices. Likewise, the presentation of one’s introduction, body, and conclusion as viewed on these screens.
Additionally, when producing video for YouTube, compare it against a desktop monitor and a mobile device screen.
Overall, with 24-hours of experience, I’m pleased with Droid’s near intuitive Google operating system, connectivity to the Internet, its baseline package of applications, and industrial design.
73 from the shack relaxation zone.
Scot Morrison, KA3DRR, is a regular contributor to AmateurRadio.com and writes from California, USA.
March 2010 Wrap-Up
All | 80m | 40m | 30m | 20m | 17m | 15m | Ph | CW | Dig | |
DXCC | 83 | 2 | 43 | 10 | 67 | 13 | 38 | 59 | 5 | 63 |
WAS | 50 | 28 | 49 | 7 | 48 | 19 | 21 | 43 | 1 | 50 |
WAZ | 26 | 3 | 21 | 8 | 23 | 9 | 18 | 22 | 5 | 22 |
 Ham Radio Deluxe |
 W5SWL Electronics |
 Ham Radio Prep |
 KB3IFH QSL Cards  Hip Ham Shirts  HamRadioAuctions HamRadioAuctions Reliance Antennas Reliance Antennas Enigma Shop Enigma Shop |  morseDX  Ni4L Antennas  R&L Electronics R&L Electronics antennas.us antennas.us QRV QRV |
- Matt W1MST, Managing Editor
