 |
 Done!
Done!
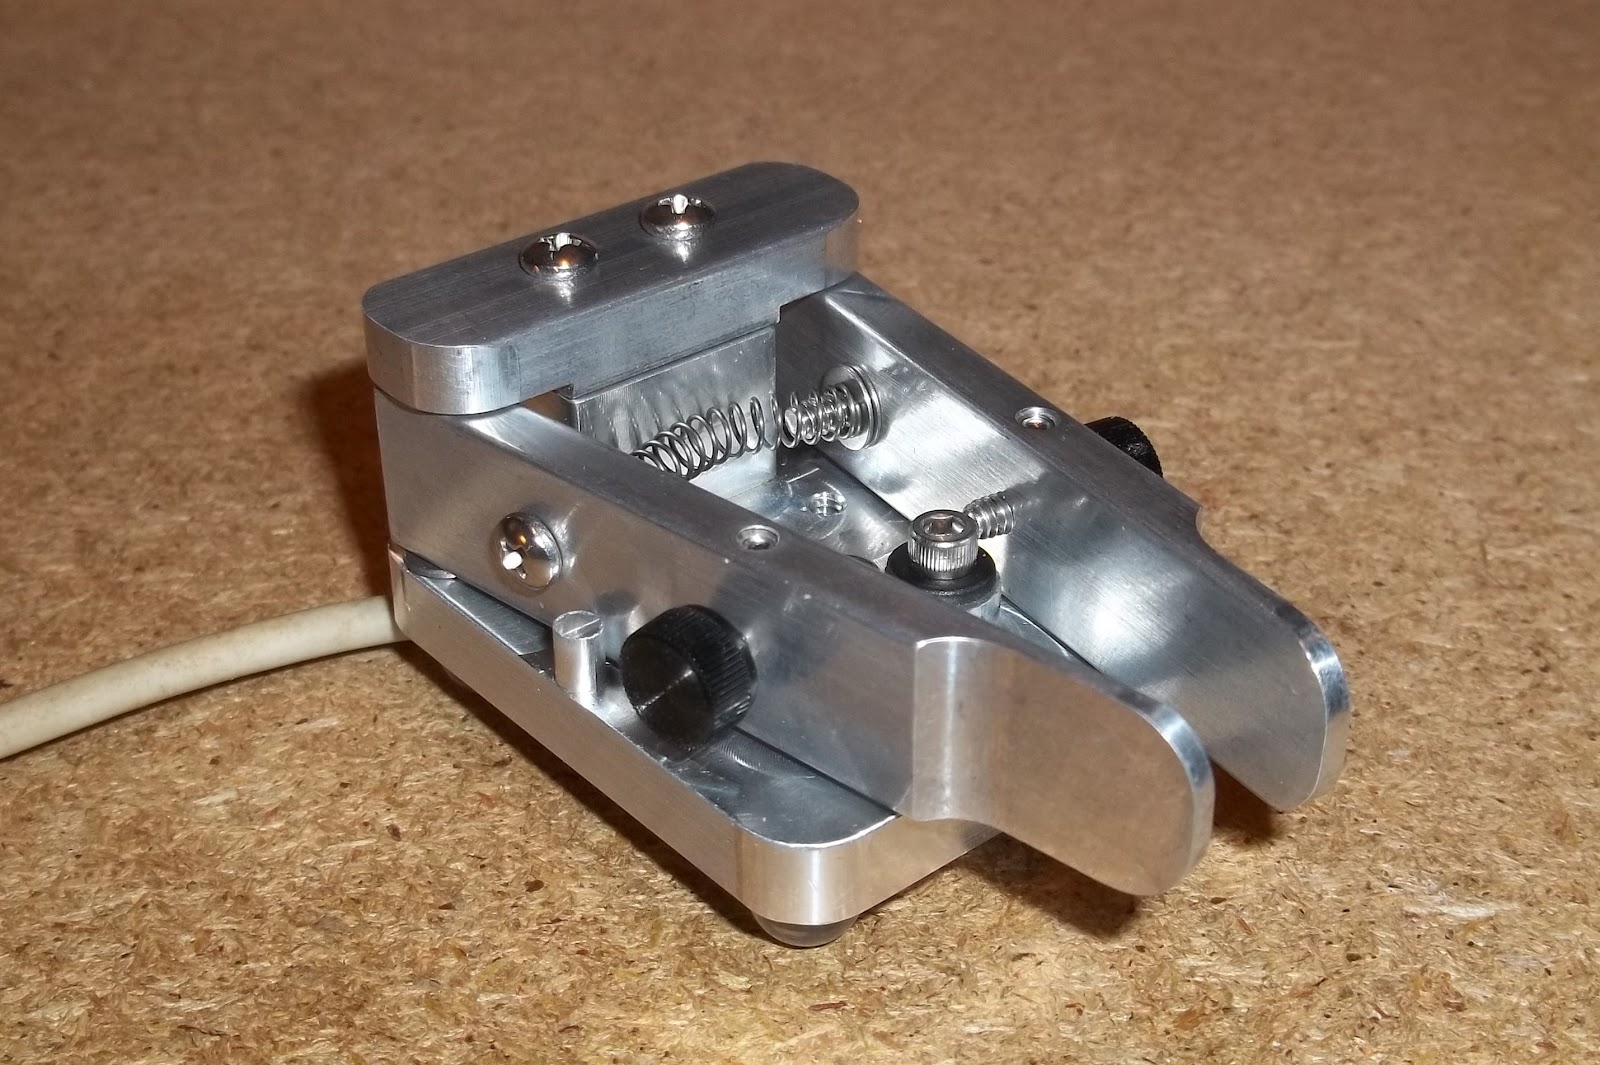
The paddles are done. The assembly was in the class of “Easy-peasy-lemon-squeezy” territory. And assembly time was all of about a 1/2 hour or so.
The instructions provided by Doug Hauff were superb and easy to follow. The hardest part, installing the compression spring was no big deal at all. Slipped one end of the spring over one of the spring retainer screws and used a tweezer to finagle the other end over the other screw. No launching into orbit or getting lost. Viola!
What I like most about these are:
1) Materials – nice grade of aluminum.
2) Weight – minscule.
3) Size – Super small; but yet not to the point where these are difficult to use. And I can be ham fisted, at times.
4) Ease of adjustment – Here’s the best part. I like my paddles to have MINIMUM arm movement. There should be no “clacking” and the closer I can get the feel to compare to a touch keyer the better. I succeeded here with the DCP. The adjustment screws have a fine enough thread pitch where this was easy to attain.
The only thing that I have to say that is negative, is that when you have the paddles attached to your radio (and it is on), you have to be careful about how you pick these up if you want to move them. Your first inclination will be to reach down (or over) and just grab the key with your hand. If you do it that way, you will most likely start inadvertently sending dits and dahs. Like I did – several times. Oops!
That minor inconvenience being noted, I would give these paddles a 5 out of 5 star rating. For their intended use, these paddles will more than fit the bill. Now all I have to do is figure out some kind of leg mounting scheme.
72 de Larry W2LJ
QRP – When you care to send the very least!
4 Responses to “Done!”
 Ham Radio Deluxe |
 W5SWL Electronics |
 Ham Radio Prep |
 KB3IFH QSL Cards  Hip Ham Shirts  HamRadioAuctions HamRadioAuctions Reliance Antennas Reliance Antennas Enigma Shop Enigma Shop |  morseDX  Ni4L Antennas  R&L Electronics R&L Electronics antennas.us antennas.us QRV QRV |
- Matt W1MST, Managing Editor

I mounted my DCP on the lid of an Altoids tin for easy removal. The tin is weighted for less movement on the desk. It’s a great paddle!
Ron W8VZM
W8VZM.com
Ron,
Thanks for the tip! That is a super idea.
Larry W2LJ
1. How did you end up polishing yours?
2. I mounted mine on a 4″ x 6″ piece of 3/8″ plywood, with vinyl pads underneath to keep it from skidding. Wiring (canabilized stereo cord)is clamped by the base and #4-40 machine screw that attaches it to the wood base. Piece of heat-shrink tube to secure the ends of the cable and make it look pretty.
I am using mine with my base station. Might get another for portable use.
73 /paul W3FIS
Paul,
I pre-rubbed the aluminum parts with a Chore Boy copper scrubby pad. Then I used some Noxon polish with a paper towel and some elbow grease. Finished up with a short session with a buffing wheel on my Dremel.
Larry W2LJ