Archive for the ‘hf’ Category
 1939 Film: Morse Code on HF in New Zealand (Historical)
Before modern radio broadcasting, the trails were being blazed both in public broadcast, but also critical links out of the local area. Here’s a side-look back in time…. in this 1939 Film: New Zealand Shortwave Communications; Morse code (CW)
The romance of the radiotelegraph service (in this video, the service in New Zealand) is a fascinating aspect of communication history. The use of shortwave, longwave, and medium frequency spectrum for communication, particularly through Morse code, played a significant role in connecting people across vast distances. This service utilized the high-frequency spectrum known as “shortwave” (from 3 MHz up to 30 MHz) as well as the longwave (30 kHz to 300 kHz) and medium frequency spectrum (300 kHz to 3 MHz).
This short film is from 1939, and captures the essence of communication at that time in history, to and from New Zealand using shortwaves and Morse code. It showcases the importance of the radiotelegraph service in enabling long-distance communication during that era. The transition from Morse code via spark-gap communications to continuous wave (CW) modulation marked a significant advancement in the technology and efficiency of radio communication.
It’s incredible to see how technology has evolved over the years, transforming the way we communicate and connect with each other globally. Films like these provide a glimpse into the past and remind us of the ingenuity and dedication of those who worked in the radiotelegraph service to ensure effective communication across the seas.
[embedyt] https://www.youtube.com/watch?v=H-KUat5WEkU[/embedyt]
This film is a 1939 Government film scanned to 2K from a 16mm combined B/W reduction print.
Marine Radiofax Weather Charts Via Shortwave Radio – WEFAX
Weather out over oceans? That, and more.
More than international broadcast stations and amateur radio operators exist on the shortwave radio spectrum. For instance, any non-broadcast signal that is not amateur radio is often lumped together into a category known as Utility Radio, abbreviated, UTE. To dig deeper into UTE activity, you could check out the UDXF – the Utility DX Forum, located here: https://www.udxf.nl/
Utility stations (UTE) are quite common, from marine (ships, fishing vessels, etc.), transoceanic air traffic (international passenger or cargo jets and other aeronautical trans-oceanic radio traffic), to military radio (weather, coordination, and much more). UTE is a rich subdomain of the radio experience.
As an amateur radio operator, I listen to and monitor utility stations on shortwave, at times when not operating as an amateur radio station. I check weather for air traffic or for marine traffic, because it helps me see the larger-scale weather patterns.

One of the captured weather images via shortwave radio.
Here is a video I made of my reception of weather charts via shortwave radio from radio station NMC, at Point Reyes, CA, using FLdigi software to receive these weather fax transmissions:
WEFAX 22.527 MHz on 2024 JUNE 14
[embedyt] https://www.youtube.com/watch?v=9N66y9HFX_Q[/embedyt]
This video is a screen and sound capture of my reception of weather charts and images by shortwave radio, from a station in California running about 4 kilowatts of RF power. This HF WEFAX (Weather Facsimile) service is on every day for ship (marine) weather dissemination so that ships out on the ocean can get weather charts and images not by satellite, but by receiving shortwave signals.
Below is a snippet from the published schedule from Point Reyes WEFAX Radio, callsign NMC, as follows:
22527 kHz – tune offset 1.9 kHz (see note, below)
UTC   WHICH CHART
----- --------------------------------
19:13 TROPICAL GOES IR SATELLITE IMAGE
19:23 WIND / WAVE ANALYSIS
19:33 96HR SURFACE FORECAST
19:43 96HR WIND/WAVE FORECAST
19:53 96HR 500MB FORECAST
20:03 96HR WAVE PERIOD / DIRECTION
-------------------------------------
The above snippet of the NMC chart transmission list is from the page, “NMC Point Reyes, Marine Radiofax Broadcast Schedule” found at:
https://weatherfax.com/nmc-point-reyes/

One of the captured weather images via shortwave radio.
Here is a detailed description of the weather charts, and online access is at:
https://www.weather.gov/marine/radiofax_charts
Note: In the video, you see that I am tuned to 22.526 USB thus I was tuned to 22526 kHz USB, based on this: “Unless otherwise stated, assigned frequencies are shown, for carrier frequency subtract 1.9 kHz. Typically dedicated radiofax receivers use assigned frequencies, while receivers or transceivers, connected to external recorders or PC’s, are operated in the upper sideband (USB) mode using carrier frequencies.”
==================================
Source:
WORLDWIDE MARINE RADIOFACSIMILE
BROADCAST SCHEDULES
U.S. DEPARTMENT OF COMMERCE
NATIONAL OCEANIC and ATMOSPHERIC ADMINISTRATION
NATIONAL WEATHER SERVICE
April 12, 2024
https://www.weather.gov/media/marine/rfax.pdf
The May-June 2024 SARC Communicator Journal
Heading into summer...
With another big issue. The May-June 2024 Communicator, digital periodical of Surrey Amateur Radio Communications is now available for viewing or download.
Read in over 150 countries, we bring you 120 pages of Amateur Radio content from the Southwest corner of Canada and elsewhere. With less fluff and ads than other Amateur Radio publications, you will find Amateur Radio related articles, projects, profiles, news, tips and how-to's for all levels of the hobby.
You can view or download it as a .PDF file:
Previous Communicator issues are at:
Search for past Communicator issues
and a full index is HERE.
As always, thank you to our contributors, and your feedback is always welcome.
The deadline for the next edition is June 15th.
If you have news or events from your club or photos, stories, projects or other items of interest from BC or elsewhere, please contact us at [email protected]
73,
John VE7TI
'The Communicator' Editor
Common Ham Shack Radio Configurations
Amateur radio transceivers have improved dramatically over the decades and they pack a lot of capability into relatively compact radios. In this post, we will take a look at the typical configurations and how they may impact setting up a flexible amateur radio station today. This discussion is focused on currently available new gear, with 50 to 100 watts of RF power.

The most common HF radio configuration used to be a 5-band model that offered CW, AM, and SSB on 80 meters, 40 meters, 20 meters, 15 meters, and 10 meters. In the early 1980s, the WARC bands were added (named for the World Administrative Radio Conference of 1979) that authorized these new bands. The WARC bands are 30 meters, 17 meters, and 12 meters. These attractive new bands were soon added to the standard HF rig. Most HF radios include 160 meters (actually a Medium Frequency or MF band) on the low end and a general coverage receiver for 150 kHz to 30 MHz. So these days, the typical HF transceiver handles 9 bands and many different modes. (Actually, most of these rigs now include 6 meters, more on that later.)
Dominant Design
In the world of product development, the concept of a dominant design often emerges. This generally accepted approach dominates a particular market and is considered the standard way of doing things in a particular product category.
From Wikipedia:
Dominant design is a technology management concept introduced by James M. Utterback and William J. Abernathy in 1975, identifying key technological features that become a de facto standard. A dominant design is the one that wins the allegiance of the marketplace, the one to which competitors and innovators must adhere if they hope to command significant market following.
We will see that most ham radio gear conforms to the concept of a dominant design. That is, certain product configurations become standard, especially in terms of frequency bands and modes. Manufacturers still innovate by adding new features in an attempt to differentiate and obtain competitive advantage but the basic capabilities are standard. The dominant design for HF transceivers is the 100-watt radio that covers 160m through 6m.
VHF/UHF Radios
For VHF/UHF, the situation is a bit more scattered. 2-meter FM is the most popular band and back in the olden days, it was common to just have a single-band 2m FM rig in the shack. To cover 70 cm FM, a radio ham needed a second radio but later dual-band radios showed up that covered 2m and 70 cm. Today, the dominant design for VHF/UHF is the dual-band FM transceiver (typically 50 watts of output power) and there are so many of these available I won’t attempt to list them.

VHF FM is the utility mode for amateur radio and many hams are just fine using FM (or one of the digital voice modes) on VHF/UHF. Those who want to stretch the limits of VHF/UHF operating usually go for all-mode rigs that offer CW, SSB, FM and various WSJT digital modes. Again, back in the olden days, a VHF+ enthusiast would acquire single-band all-mode radios for the bands of interest. A ham really into VHF/UHF might have single-band radios for 6m, 2m, 1.25m, and 70 cm stacked up in the ham shack. The 1.25-meter band has always been a bit neglected in terms of equipment availability because that band is not available worldwide. Transverters are another option to get all-mode capability on these bands using an HF transceiver to transvert to a single VHF or UHF band.
HF Plus 6 Meters
One important addition to the standard HF rig is that the 6m band is often included. Now this may not sound quite right because we all know that 6 meters is a VHF band, so what is it doing in an HF radio? It actually makes a lot of sense because a lot of 6-meter operating is similar to HF. (6 meters is the VHF band that often emulates HF.) There is FM activity on 6 meters but most of the action is on SSB, CW, and, yes, FT8. In fact, FT8 is seeing a lot of action on the band, so if you want to participate on 6m, you should consider that mode. Anyway, this all means you probably need an all-mode radio for 6 meters, and having it as a bonus band on an HF radio without a huge increase in cost is a good approach. (These radios usually support FM for the 10m and 6m bands.)

All-Band All-Mode Rigs
Another common transceiver configuration is the All-Band All-Mode radio available from several manufacturers. A great example of this type of radio is the Yaesu FT-991A, which includes 160m through 10m plus 6m, 2m, and 70cm. Once again, 1.25m is passed over. This radio configuration has a lot of appeal because it covers pretty much everything with all-mode capability. (It also has a built-in sound card and USB connection which is handy for the WSJT digital modes.)

The FT-991A is a good choice for the ham shack or operating portable but it is a bit large for a mobile installation. Icom offers the IC-7100 in a mobile form factor, with a novel sloping detachable front panel. Yaesu used to offer mobile products in this space such as the very popular FT-857D transceiver. However, the FT-857D is no longer made and its apparent replacement is the FT-981 which has only the HF + 6m bands.

The main disadvantage of this type of radio is that it can only do one frequency at a time. Often, I want to be able to work HF while still monitoring the local 2m FM repeater and simplex channels. Or maybe I’d like to keep listening for 6 meter activity while working 2m SSB, especially during a contest. However, this type of radio is my first choice for portable operating for Parks On The Air because it covers all the bands and modes. This article is focused on 100-watt radios but note that there are all-mode all-band QRP radios such as the IC-705.
All Mode VHF/UHF Radios
One interesting and disappointing trend that has emerged is the distinct lack of VHF/UHF all-mode transceivers. There is only one such radio on the market today, the Icom IC-9700 which does all modes on 2m, 70cm, and 23 cm (1.2 GHz). It seems that Icom decided that if they are going to offer a VHF/UHF radio, they would go full-featured and include 23 cm. Note that if you pair this radio with an HF plus 6m radio, you can cover all the popular bands with all modes using two radios. This radio is not inexpensive, currently selling new for about $1800.

I suppose we can declare this the dominant design for VHF/UHF but it is a lone product in this space. I have written previously about an all-mode dual-band portable radio for 2m/70cm that I desire. I own an IC-9700 and like it a lot but I would give up the 23 cm band to have a radio that is more portable and less expensive. I suspect that Icom is happily making good profit margins on the IC-9700 given that they have essentially no competition in this space. Yaesu has the technology to do something here but has been content to let the FT-991A cover the all-mode 2m/70cm space for them.
Common Ham Shack Setups
Now let’s take a look at some common ham shack configurations that consider these different radio configurations. When I say “ham shack” that may include your mobile or portable station, too.
Setup 1: FM VHF/UHF Only A Technician might decide they want to focus on 2m and 70cm, with FM being just fine for working simplex and repeaters on those bands. A basic dual-band FM transceiver will handle this nicely, see A VHF FM Station at Home. For some hams, their dual-band handheld radio serves this purpose.
Setup 2: All-Band All-Mode Transceiver As mentioned earlier, All-Band All-Mode radios cover the most popular ham bands and modes with one rig. They are a good way to get one radio that does everything. The disadvantage is not being able to monitor VHF/UHF at the same time as working HF.
Setup 3: HF/6m radio plus 2m/70cm FM radio This is a very common configuration for a ham shack because it separates the HF bands (and 6m) from the 2m/70cm FM operating. The FM rig can be left monitoring your favorite repeater or simplex frequency while you chase DX on 15 meters. If your 2m/70cm needs are basic, the FM radio might even be a handheld transceiver.
Setup 4: HF/6m radio plus all-mode VHF/UHF radio This is the setup for the ham that wants to cover all the bands and be able to do all modes on VHF/UHF. The band/mode coverage is similar to Setup 2 but we have two radios available which provides the monitoring flexibility associated with Setup 3. This configuration allows for having a really good HF/6m radio and a really good VHF/UHF radio.
Conclusions
The ham radio transceivers being offered tend to follow certain patterns consistent with the dominant design theory. If you buy a modern HF transceiver, you will get all of the HF bands plus the 6m bonus band. These radios vary in features and performance but they all have good band/mode coverage. The VHF/UHF situation is perhaps not quite as simple. The standard 2m/70cm FM rig is a popular option but is limited to FM only. The VHF/UHF weak-signal enthusiast does not have many choices beyond the IC-9700, which may represent an opportunity for another manufacturer to jump in with a more cost-effective 2m/70cm all-mode radio. The 1.25m band continues to be neglected and may be a good additional band to add to 2m/70cm radios.
That’s my analysis. What do you think?
73 Bob K0NR
The post Common Ham Shack Radio Configurations appeared first on The KØNR Radio Site.
Fraser Does Pikes Peak
Pikes Peak is a great summit for a SOTA activation. You can hike up, drive up, or take the cog railway to get to the top. Pikes towers over eastern Colorado and has an excellent radio horizon in all directions. It is easy to work a bunch of stations on 2m FM. With a bit of effort, you can work Kansas, Nebraska, Wyoming, and New Mexico on VHF.
Fraser/MM0EFI was visiting from Scotland, operating here in the US as W0/M0EFI. Here’s his HF operating experience, with cameo appearances by Carey/KX0R, Christian/F4WBN, Elliot/K6EL, and Steve/WG0AT.
Now for the VHF fun on 2m FM. I happened to be on South Monarch Ridge (W0C/SP-058) that day and we completed a Summit-to-Summit contact on 146.52 MHz, at a distance of about 80 miles—easy contact using just HT’s on both ends.
Fraser, thanks for the fun videos from America’s Mountain.
73 Bob K0NR
The post Fraser Does Pikes Peak appeared first on The KØNR Radio Site.
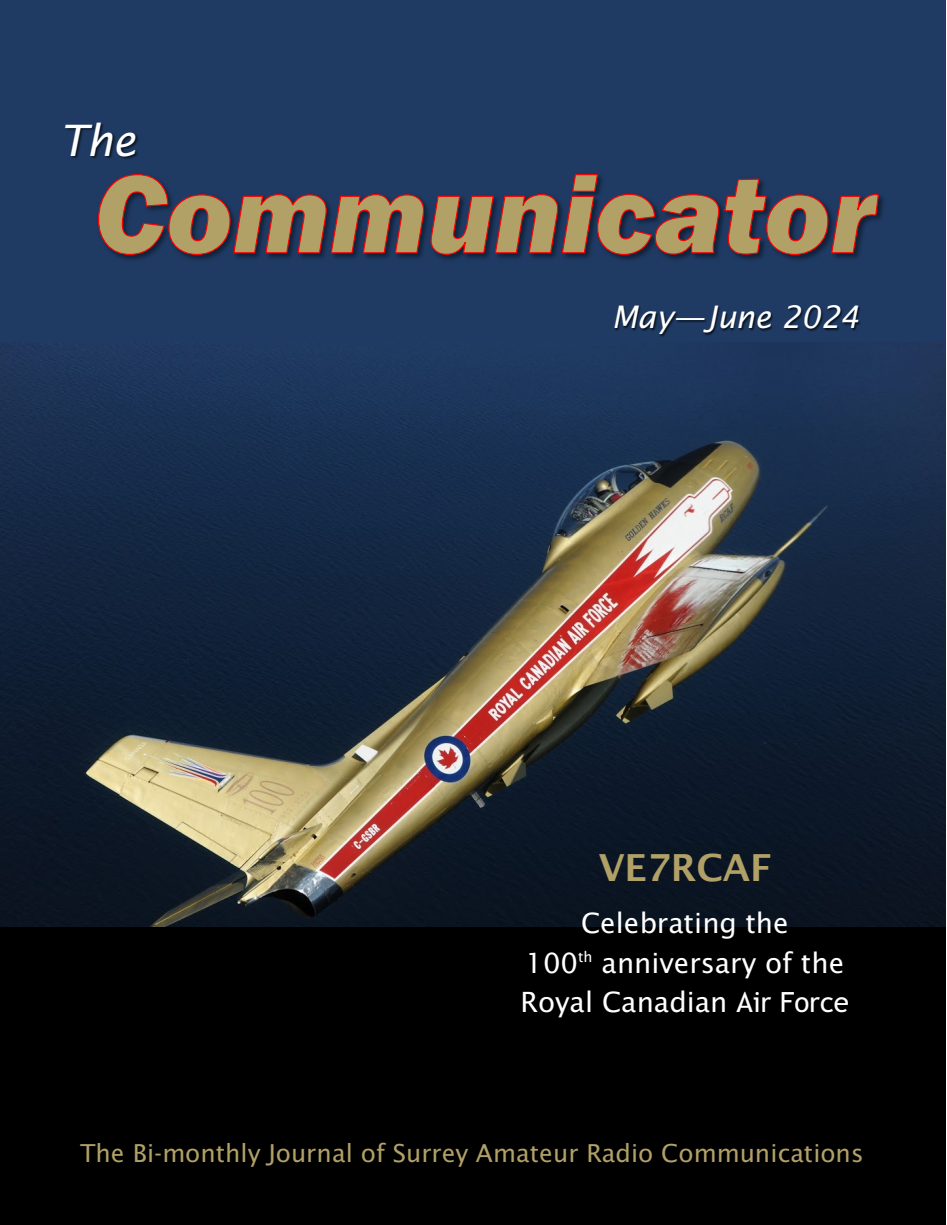
Commemorating the RCAF Centennial
The Royal Canadian Air Force celebrates 100 years of service and Amateur Radio marks the occasion with special event stations
Surrey, BC – The Royal Canadian Air Force (RCAF) is celebrating 100 years of service this
April, marking a significant milestone in Canada’s military history. This
centennial event offers a unique opportunity to honour the RCAF’s rich
heritage, recognize its dedicated personnel, and generate enthusiasm for its
promising future.
Throughout
2024, the RCAF will be showcased in a past, present, and future context,
emphasizing its contributions to national safety and security, international
peace, and global stability. The RCAF 2024 Team is curating a year-long program
that includes international, national, and regional events. These events
include the RCAF Run, RCAF Gala, Legends of the Sky, and participation of
allied air demonstration teams in Air Shows across Canada. The program also
includes initiatives to inspire future generations of Canadians through Science, Technology, Engineering and Mathematics (STEM) activities.

We're hoping to have all bands and modes worked, including GOTA, POTA, and whatever else you can activate. If you are a VE7 or VA7, you can reserve a time slot. Go to the direct calendar link which is now live at: https://bit.ly/VE7RCAF and look for April 2024. The operating rules are at: https://drive.google.com/file/d/1_fkPdYJ7DDDSLRVGY6822hJ_gd0nEfy6/view?usp=drive_link. Please use your own callsign as the operator, but VE7RCAF as the station callsign for the log.
The VE7RCAF and several other provincial QRZ pages are also active now. QSL cards and awards will be available to commemorate contacts, and special recognition will be provided to those who contact all the RCAF special event stations across Canada during the month.
The RCAF
Centennial is more than a celebration; it’s an opportunity to showcase Air
Force personnel and their accomplishments, demonstrate air and space power,
enhance the reputation of the RCAF, and proudly honour its distinguished
history and heritage.
For more information on the RCAF 2024 Centennial, please visit the official website at RCAF 2024 Centennial: https://rcaf2024arc.ca/
Contact Information: [email protected]
~ VE7SAR
An Easy HF Antenna
When radio amateurs get ready to put an HF station on the air, they often have questions about what antenna to use. The good news is that there are many options to choose from. The bad news is that there are too many options to choose from. It can be overwhelming. This post describes an antenna I just installed that is easy to put up and works well.

Having 30-foot tall pine trees on our property, my usual approach for HF antennas is “wires in the trees.” I have several ropes strung up over these tall trees so that I can raise and lower wire antennas as needed. These ropes were installed using a slingshot to launch a fishing line over the top of the tree, and then pull up a lightweight rope.

End Fed Long Wire
The antenna is the EFLW-1K from MyAntennas.com, which is an End Fed Long Wire Antenna. (This should not be confused with an End Fed Half Wave antenna.) This antenna is intentionally cut to not be a resonant length on any of the bands. The 9:1 UNUN transforms the high impedance at the end of the wire down to something closer to 50 ohms. The match is not perfect so an antenna tuner is required to cover all of the bands. MyAntennas offers this antenna with different lengths of wire, with longer wires required to support the lower HF bands. I purchased the 53-foot version but decided to shorten the wire. My interest is working 20 meters and higher and I wanted the antenna to be mostly vertical, so I shortened the wire to about 30 feet. The MyAntennas products are good but any 9:1 UNUN on the end of a wire will work.
An endfed antenna like this needs some kind of counterpoise to balance out the antenna operation. Many people have written about this and there are many different approaches. The MyAntenna UNUN has a connector intended to support adding a short length of counterpoise wire. A decent length of coaxial cable lying on the ground can function as this counterpoise and that’s what I decided to use. I have a 50-foot length of LMR 400 connected to this antenna, lying on the ground.
I also added an inline isolation transformer to minimize the common mode currents getting back to the transceiver. I don’t know that this is required but I had one available so I used it. The antenna has 50 feet of LMR coax to the inline transformer and then another 25 feet of RG-8X to the transceiver. The internal antenna tuner in my Icom IC-7610 handles this antenna quite well, tuning up on 20m, 17m, 15m, 12m and 10m. This means I can instantly switch between the bands and be ready to go.
I’ve been running SSB, FT8 and FT4 on this antenna, working many stations in all regions: Europe, Asia, Oceania, Africa, North and South America. Conditions are great and I keep telling newer folks: now is the time to be on HF! This basic antenna is a great way to get on the air and work some DX.
73 Bob K0NR
The post An Easy HF Antenna appeared first on The KØNR Radio Site.


