Posts Tagged ‘BLT Plus’
 BLT+ Balanced line tuner at Excalibur
Another portable test of the BLT+ tuner
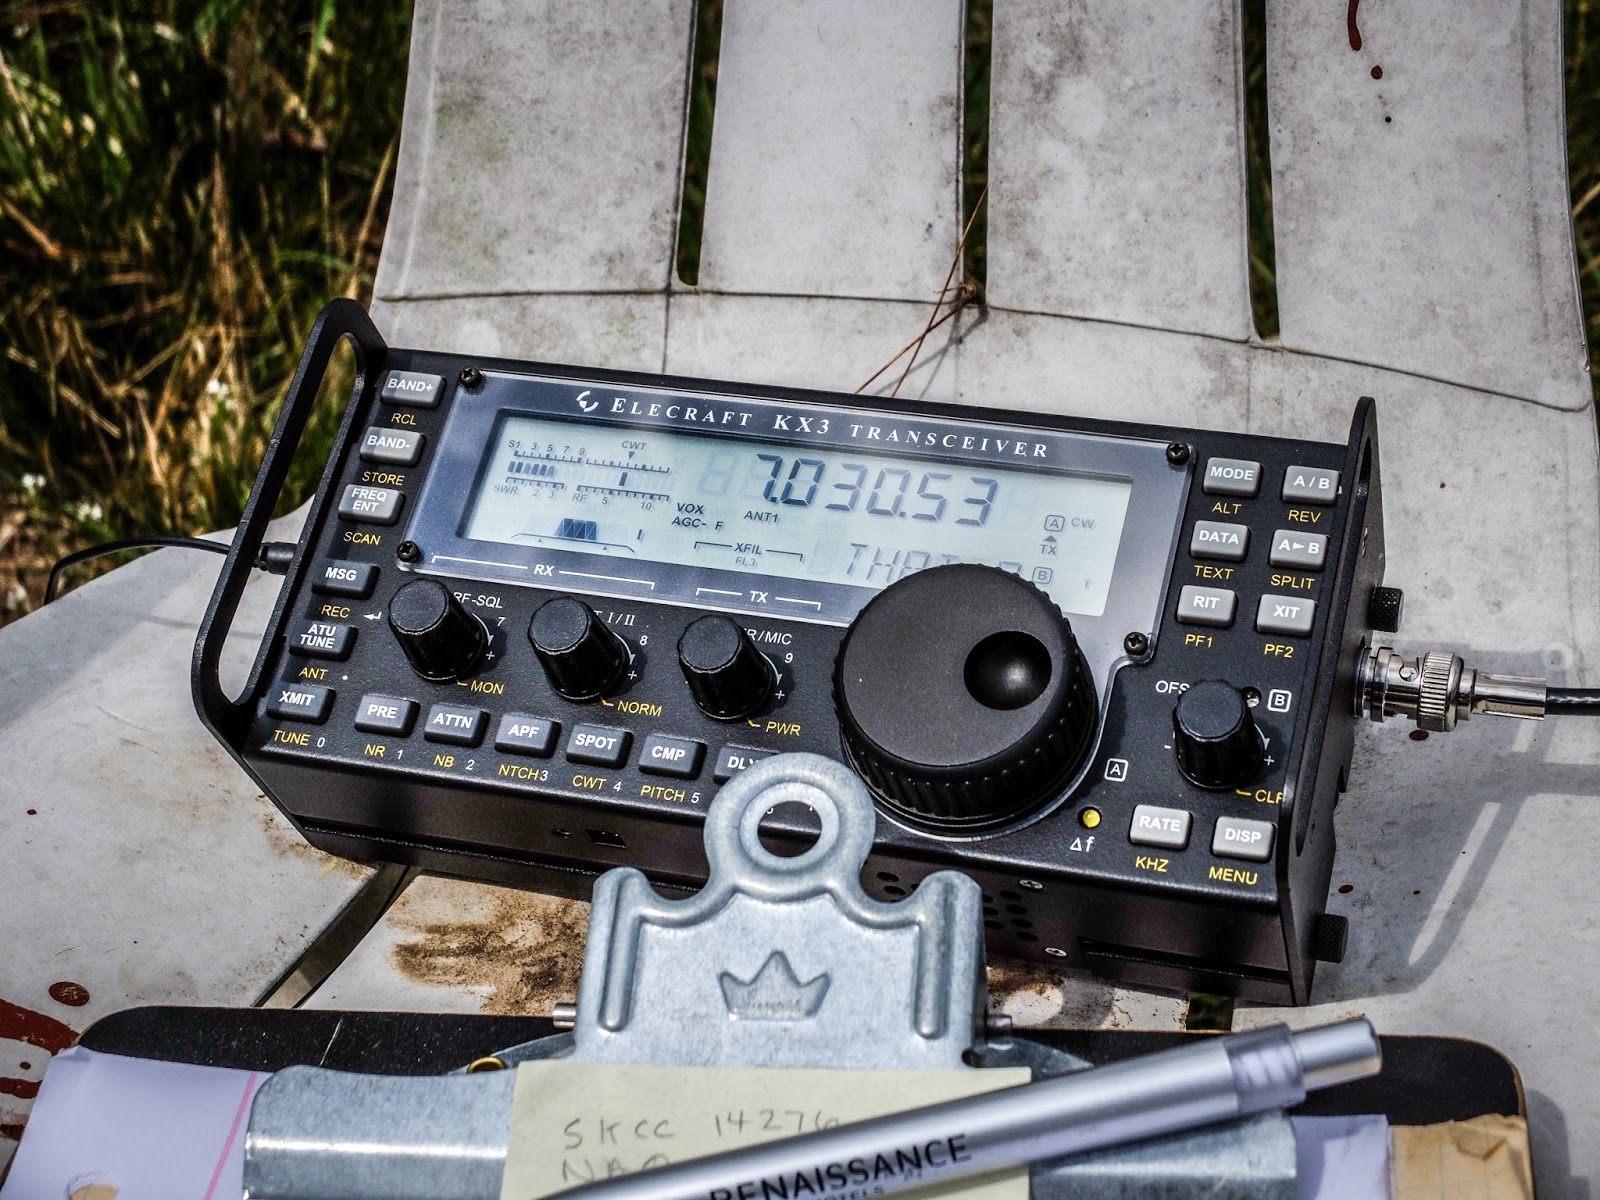 |
| KX3 operating on internal battery. What a fantastic portable rig. |
I took the BLT+ balanced line tuner out to the Excalibur antenna site to try it out on the doublet antenna that we put up last Saturday. This was the first test of that antenna (40m and 80m using a common feedpoint).
I didn't have much time today and after the first QSO it started to rain so I packed up and left before getting as much documented as I would have liked. I apologize for not recording the actual tuning process and the subsequent QSO.
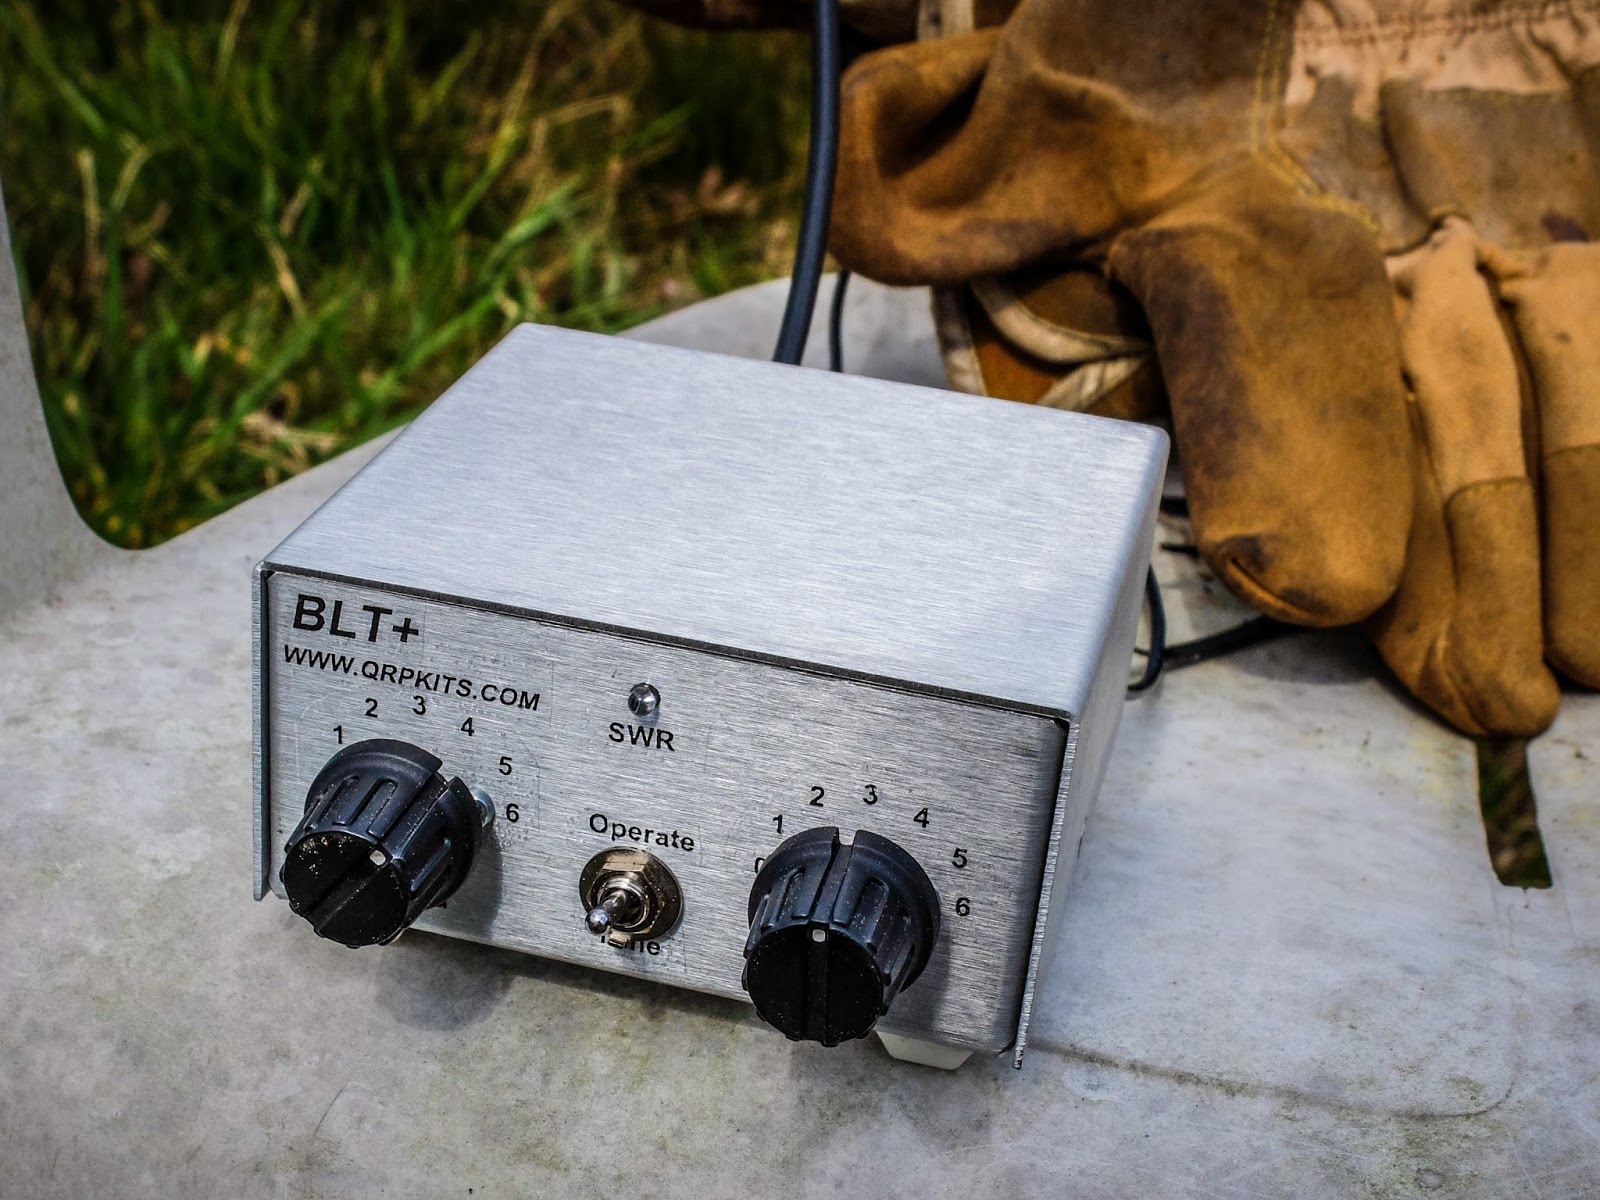 |
| BLT+ connected to open wire line (under the gloves) going to ta 40m Doublet at 65ft |
I had the KX3 operating using its internal batteries and outputting 2w. I was running 2 watts because that is the most efficient PA mode for the KX3.
I used the BLT+ to tune the 40m/80m doublet. Balanced line antennas perform better with a tuner designed for balanced line and this was a good test for both the tuner and the new antenna.
I used the BLT+ to tune the 40m/80m doublet. Balanced line antennas perform better with a tuner designed for balanced line and this was a good test for both the tuner and the new antenna.
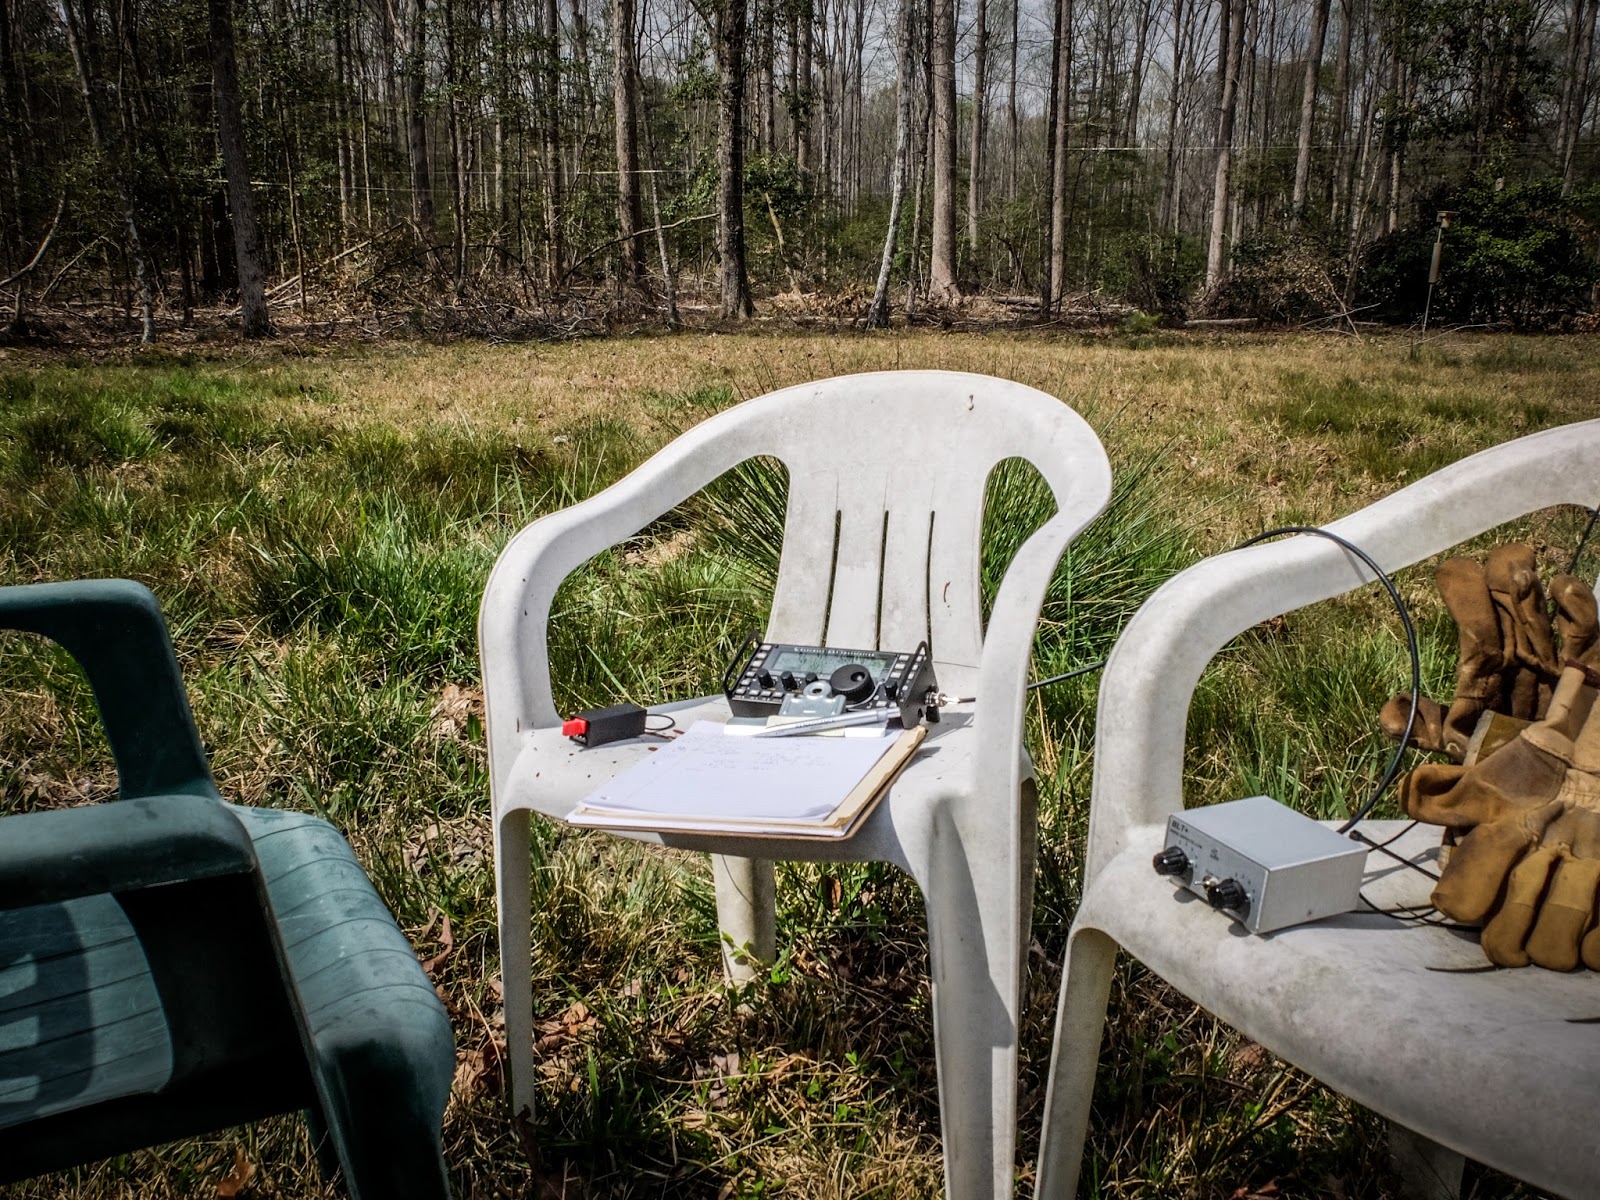 |
| Portable shack, courtesy of three plastic chairs |
I quickly matched the doublet using the BLT+ using the lowest impedance setting which is also the most efficient. I was glad to see that the BLT SWR LED indicator is bright enough to be seen in direct sunlight. I was wondering about that but you can definitely tell when it dims even in direct sunlight.
Performance
After quickly tuning up I sent my call two times and was promptly answered. The other station was running a Flex 6500 into a KPA500 and a OCF Windom at 50 feet.
He reported me as 559, while he was a 599. He was running a new KPA500 amp at 500w so we were a bit mismatched on power.
Interestingly the difference in 2w and 500w exactly matches the 4 S-Unit difference in our reports if you do the math (each increase in an S-unit requires quadruple the power).
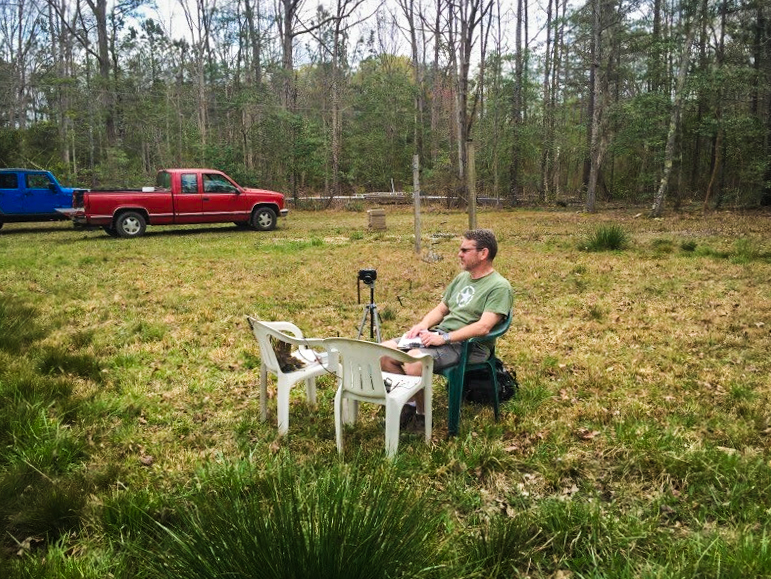
AA4OO sitting back and listening to the QSO
Paul AA4XX kindly snapped some pictures while I was listening to the other operator. This is the Excalibur antenna site but the shack is outside the photo.
The Doublet's feed line has not been brought to the shack yet so I was just sitting under the antenna. The open feed line is running along the ground for a bit which certainly didn't help the signal but we haven't installed the posts to carry the feed line over to the shack and I was too lazy to move the chairs far enough away to keep the feed line in the air.
In the foreground is some saw-grass common on the NC coast. I'm not sure why it's growing this far inland.
 |
| Portable shack at the Excalibur antenna site... The Doublet is 65 feet above my head |
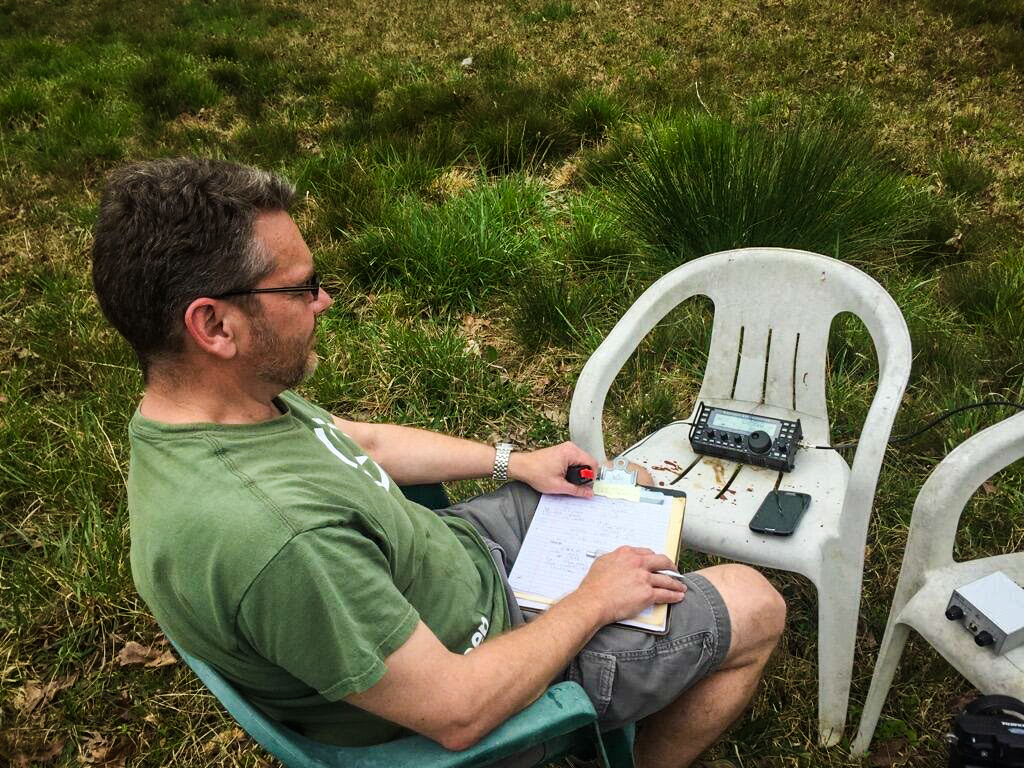 |
| Waiting my turn in the QSO... holding the Palm Single Paddle. BLT+ tuner in the chair to the right |
Video
Here is a brief video showing how the BLT+ is connected to the Doublet...
Summary
The little BLT+ performed great with both balanced line antennas I've tried. It is easy to use and allows me to use my KX3 with balanced feed line antennas now. I encourage you to build the kit from Pacific Antenna / QRPKits.com .
That's all for now
So lower your power and raise your expectations
72/73
Richard, AA4OO
I will have a BLT please
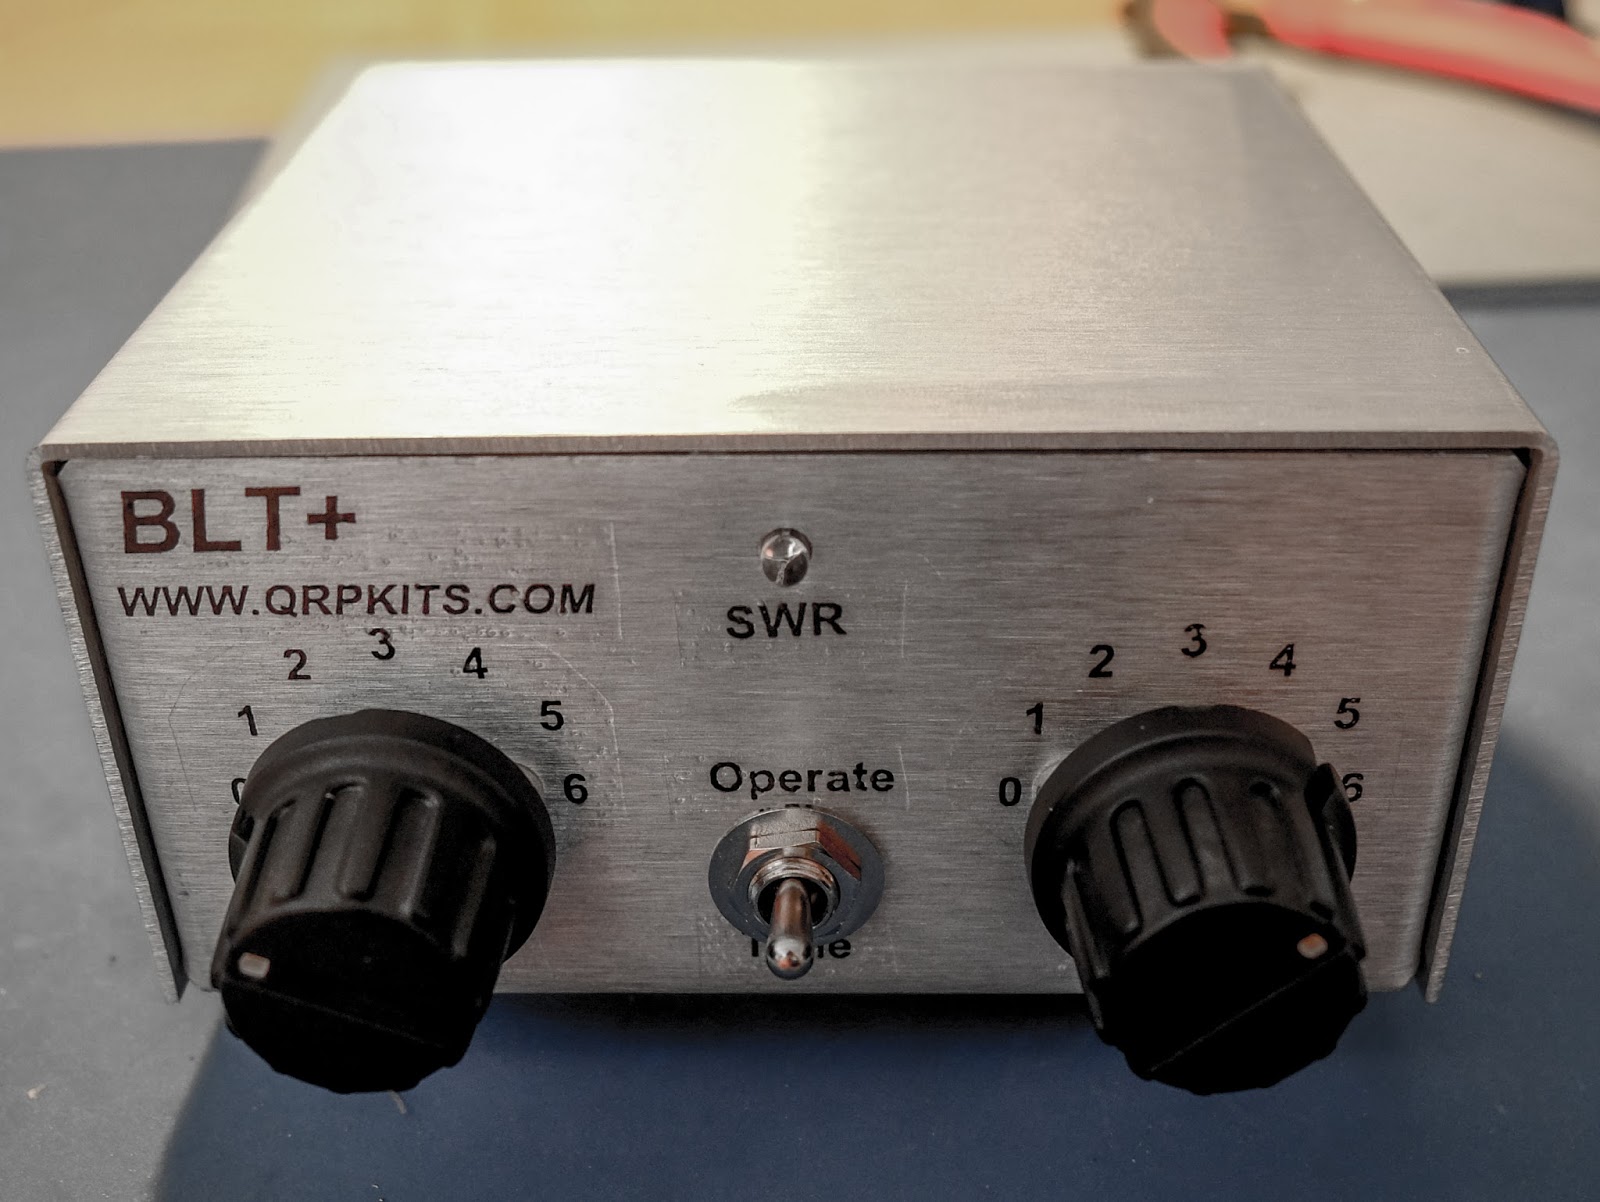
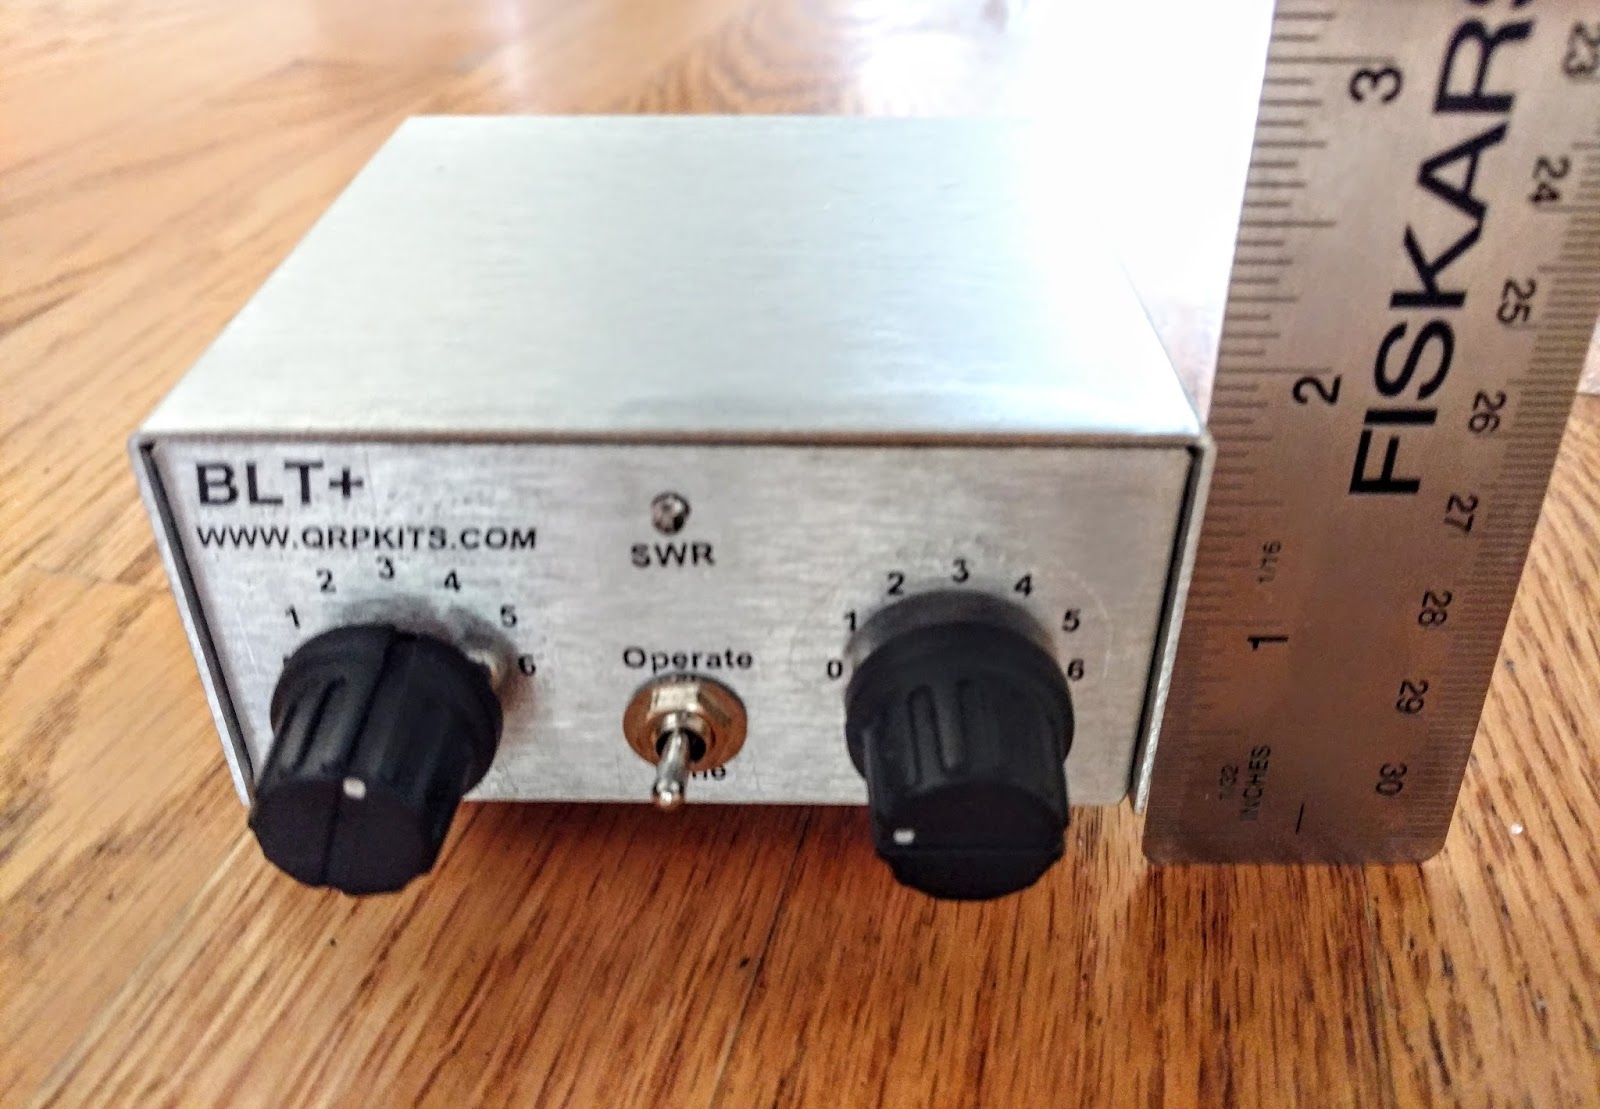
The BLT-Plus Balanced line QRP tuner
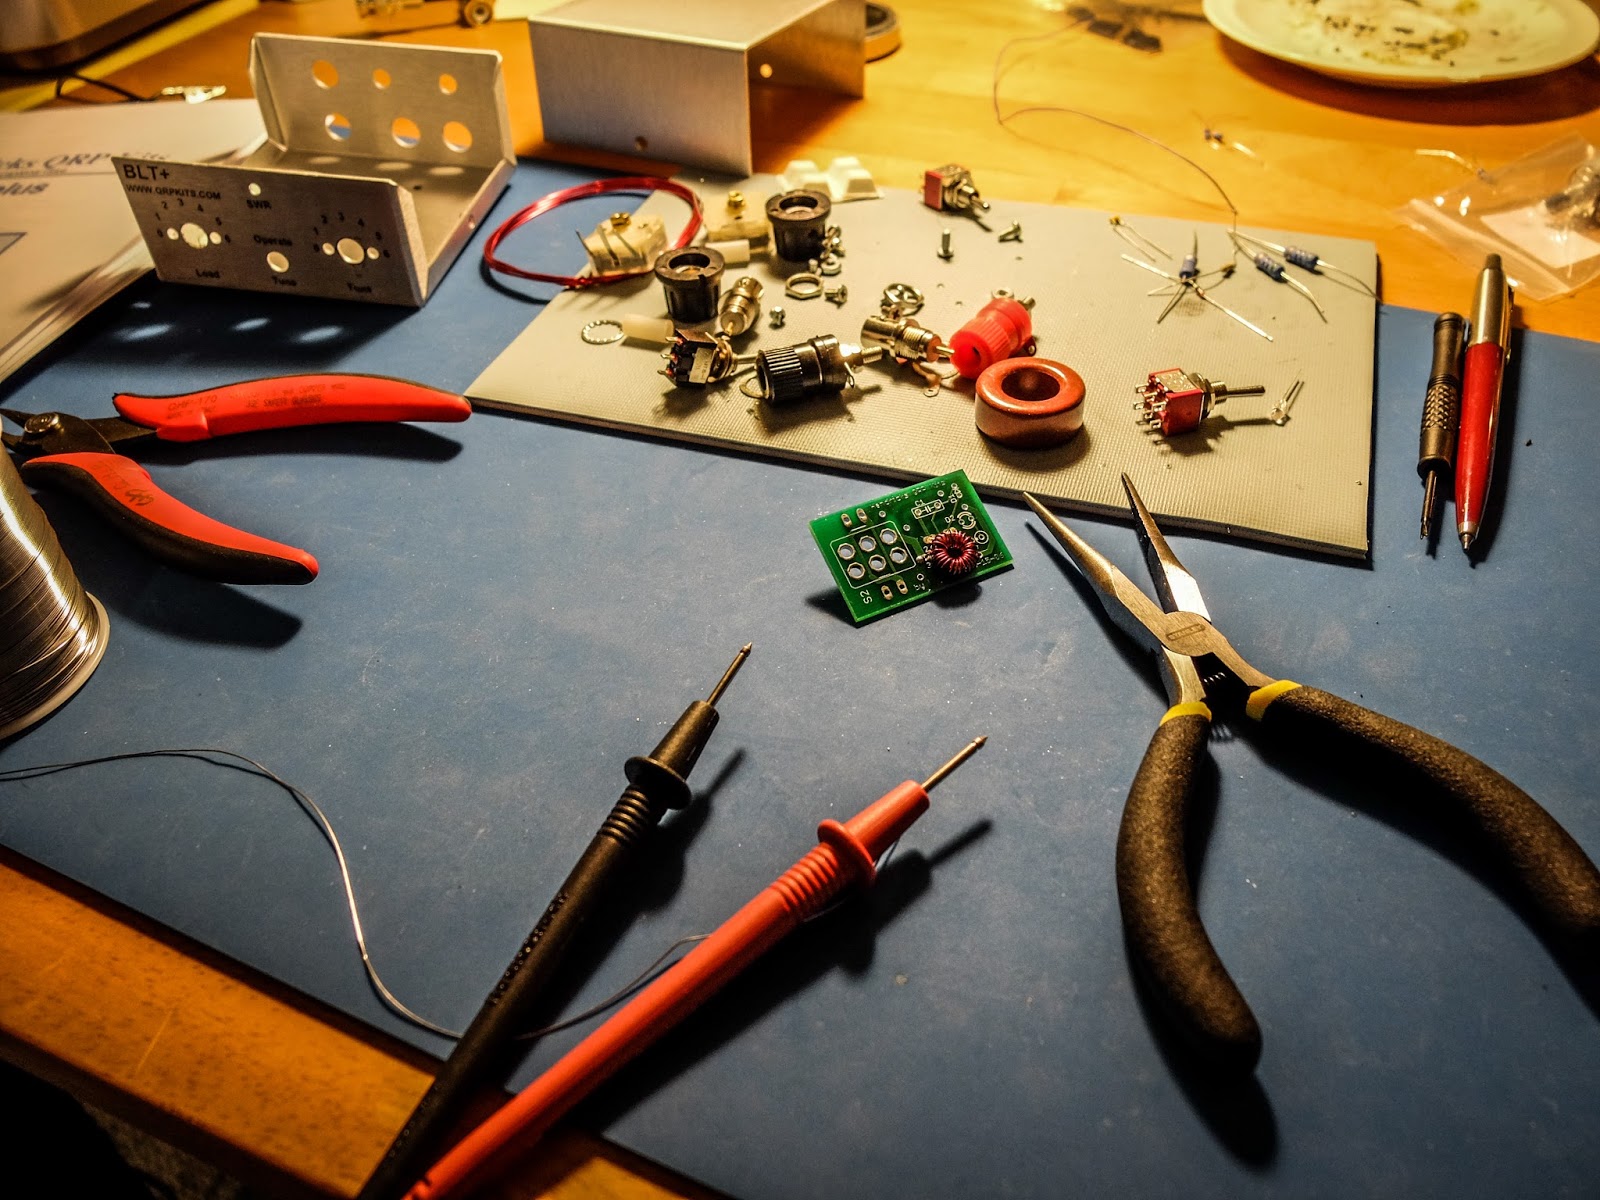
I was looking for a QRP tuner for the 1Watter 40m transceiver I am building that would work with both balanced feedline antennas as well as coax feedline. The traditional Z-Match tuner is quite efficient at tuning balanced line antennas and the built-in SWR bridge gives you an all-in-one tuner and SWR indicator without having to take a separate SWR meter along with its inherent mess of cabling a separate SWR meter. The BLT in the name stands for "Balanced Line Tuner".This tuner kit is available from the fine folks at Pacific Antenna.
 |
| The Kit as it comes out of the bag |
The kit comes with everything you need except for hookup wire and your soldering equipment. Instructions are downloaded from the qrpkits website.
Why use a z-match ?
Here are some advantages that the Z-match design offers:
- Matches balanced loads without the use of lossy baluns.
- Being a parallel resonant circuit, the Z-match can provide some band-pass filtering for your receiver and harmonic attenuation for your transmitter.
- A well-designed Z-match tuner has a high Q and is more efficient (less lossy) than other types of tuners.
- The fixed inductor simplifies construction (no taps or rollers needed).
The secret sauce
Matching balanced line fed antennas is sometimes problematic for a traditional balun and tuner as the antenna can present impedances that are far outside of the balun's design. The Z-Match uses a center tapped coil to keep the complex impedance balanced across the inductor (at least that's how I understand it). I have measured my Elecraft BL2 balun getting appreciably warm at QRP levels when connected to my doublet indicating loss I'd prefer to avoid. The Z-Match design supposedly results in less loss.
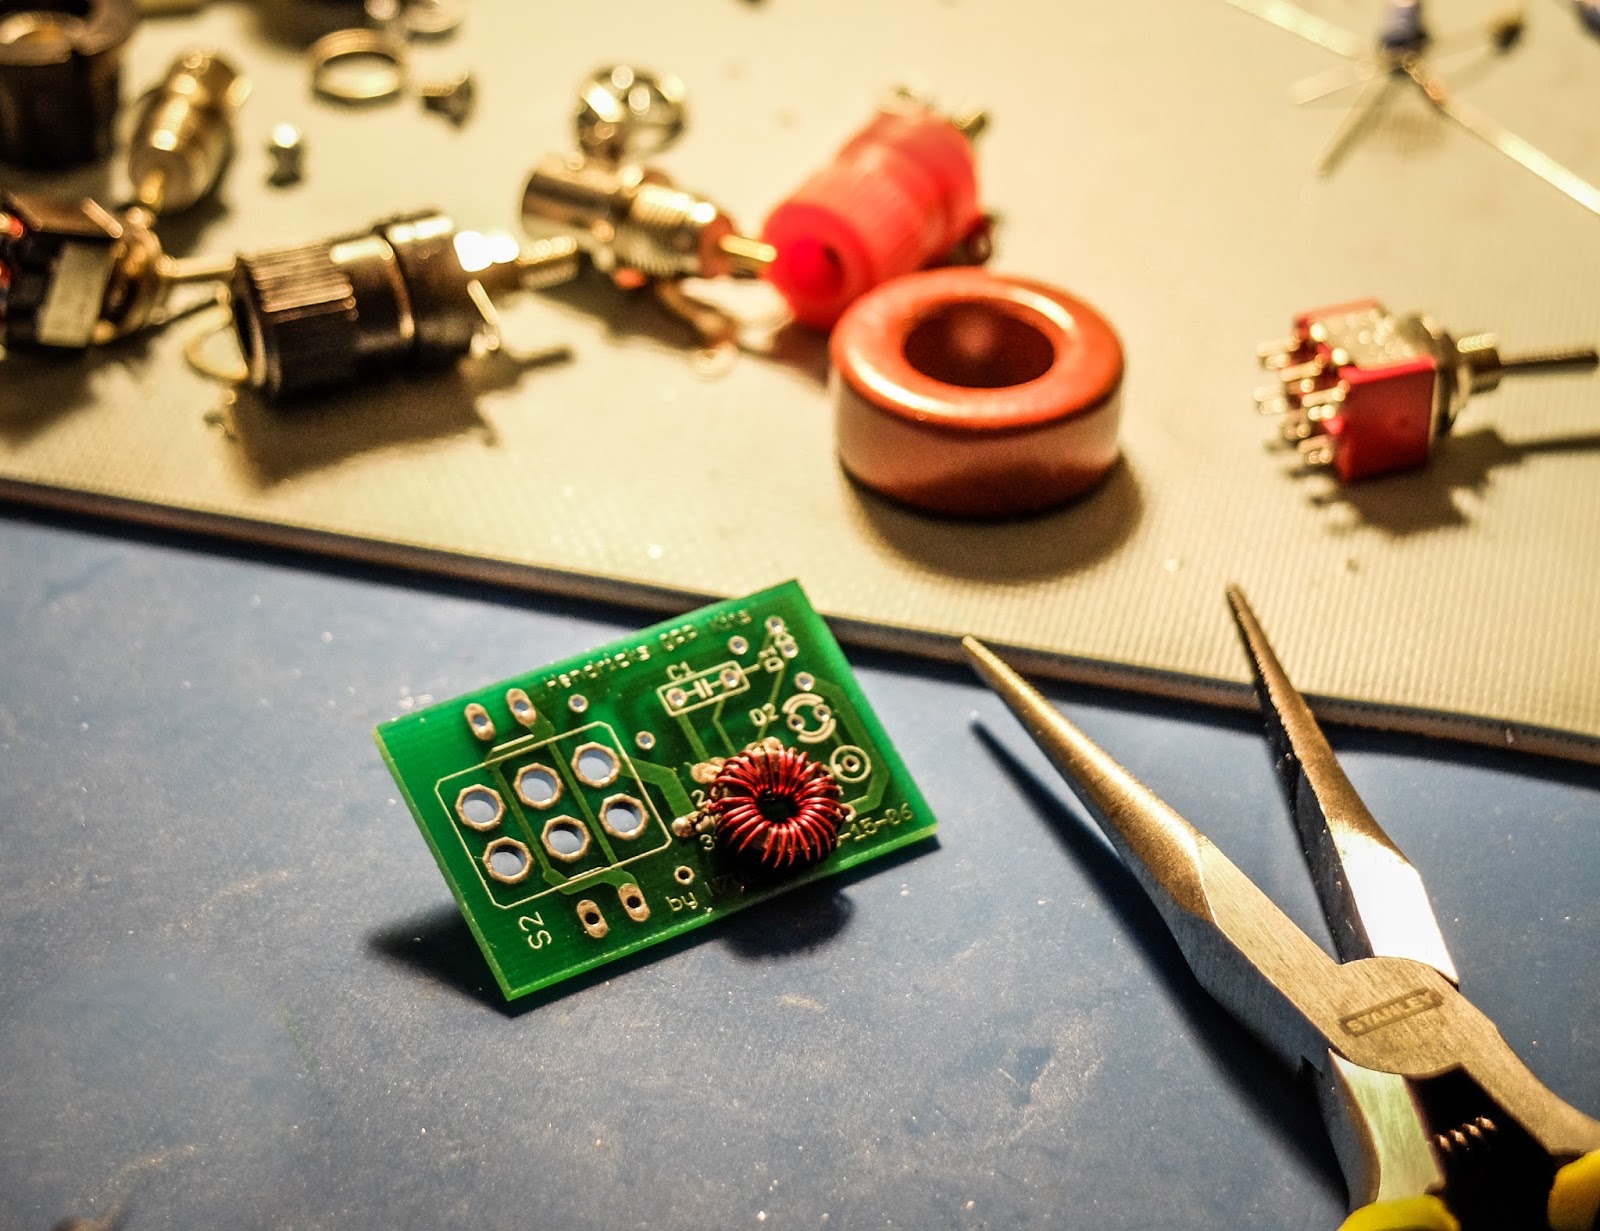
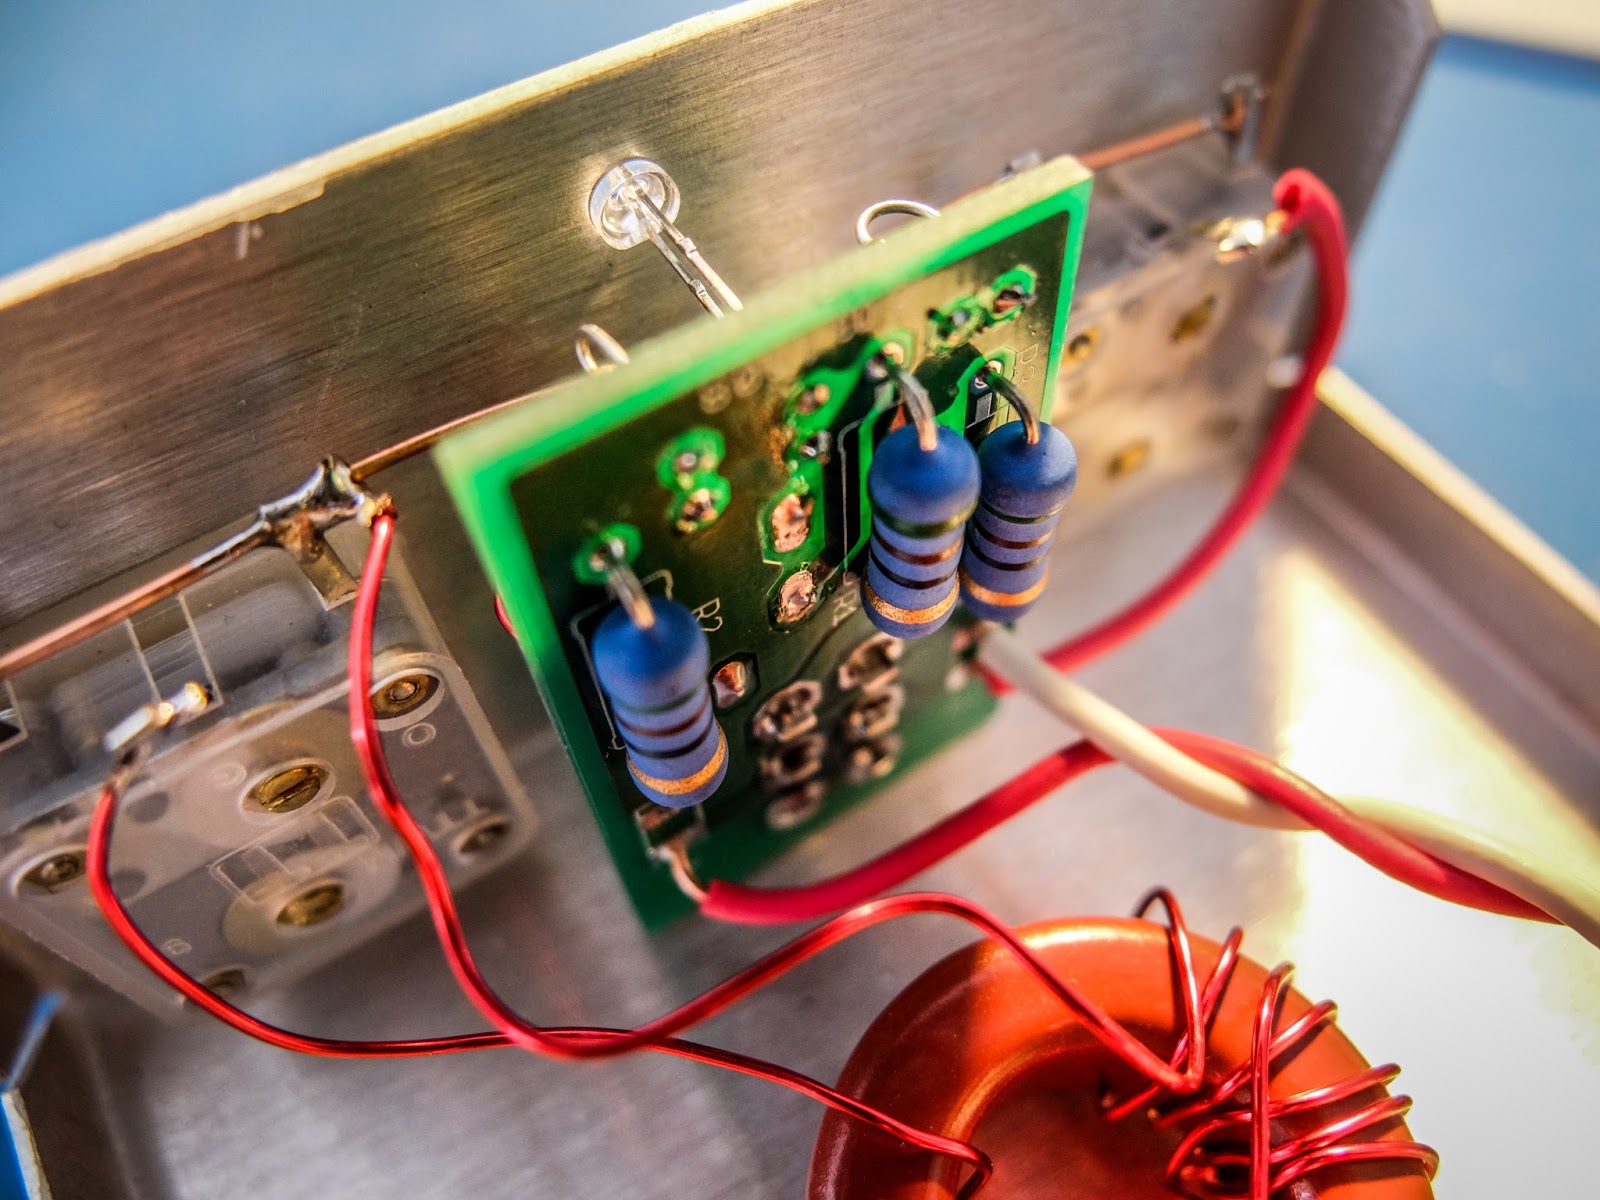
Built in SWR indicator
The BLT plus includes a Dan Tayloe N7VE LED SWR indicator which eliminates the need to carry a separate SWR meter. The concept is beautiful. The SWR bridge is switched into "Tune" mode and presents a 50 Ohm impedance to your transmitter while you are tuning so that you don't risk damaging sensitive home-brew finals. The LED lights when the SWR is too high and dims and then goes out as the match is made. It is simple and fast to use. The instructions for the bridge are not with the BLT instructions. Download them from this link.
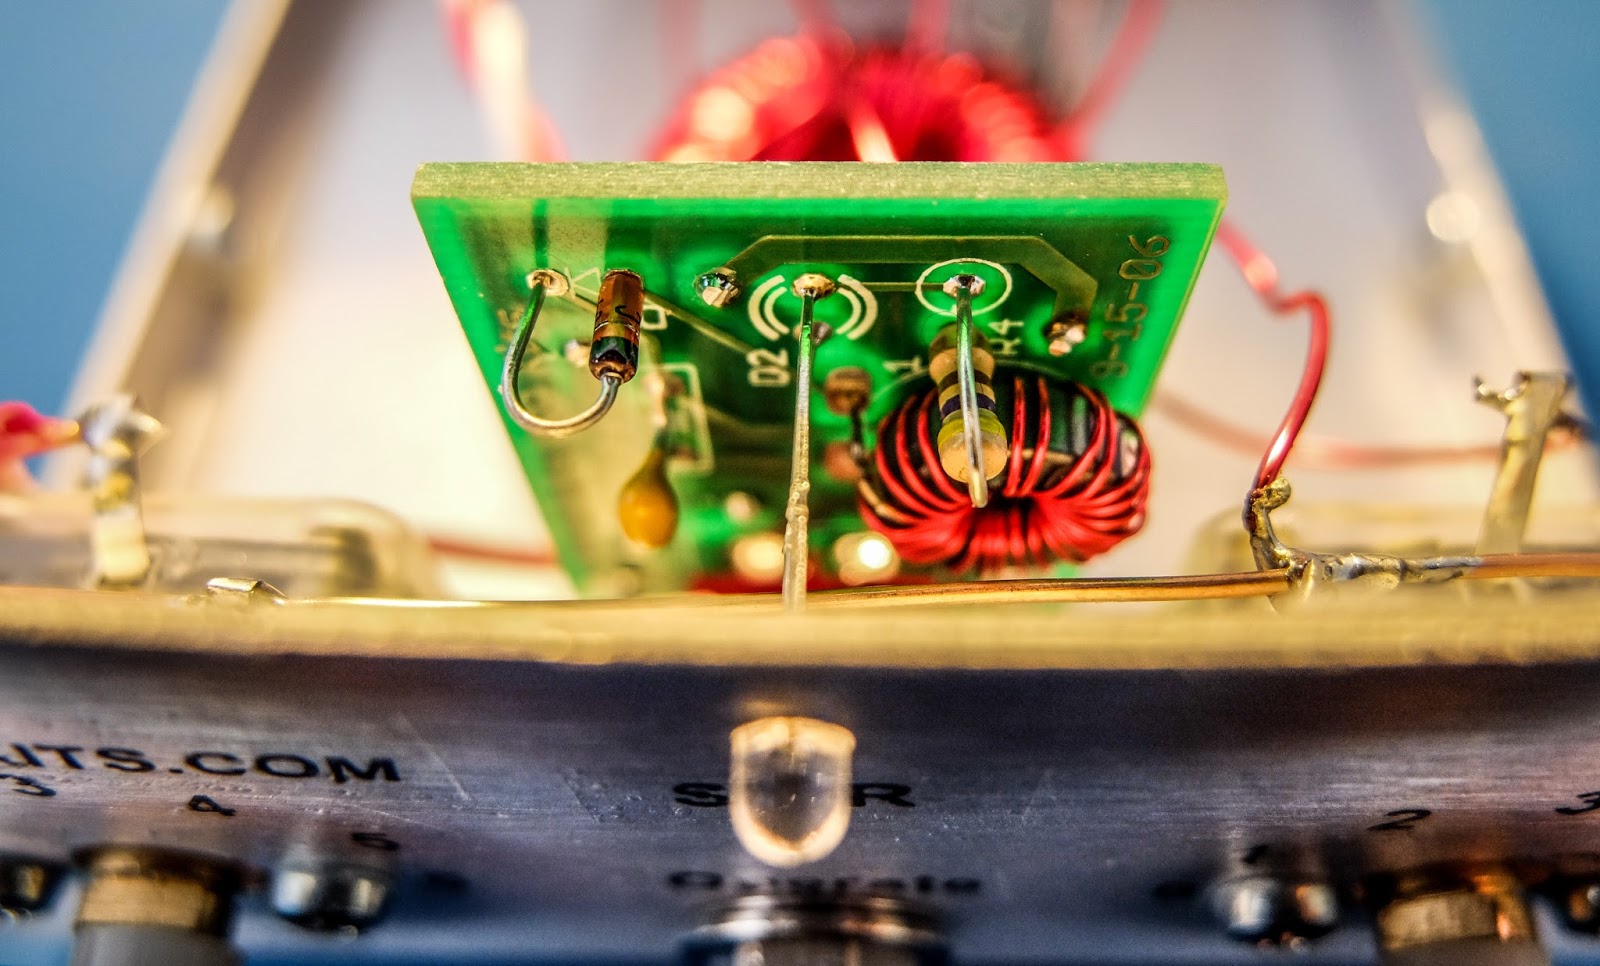 |
| SWR bridge with LED indicator |
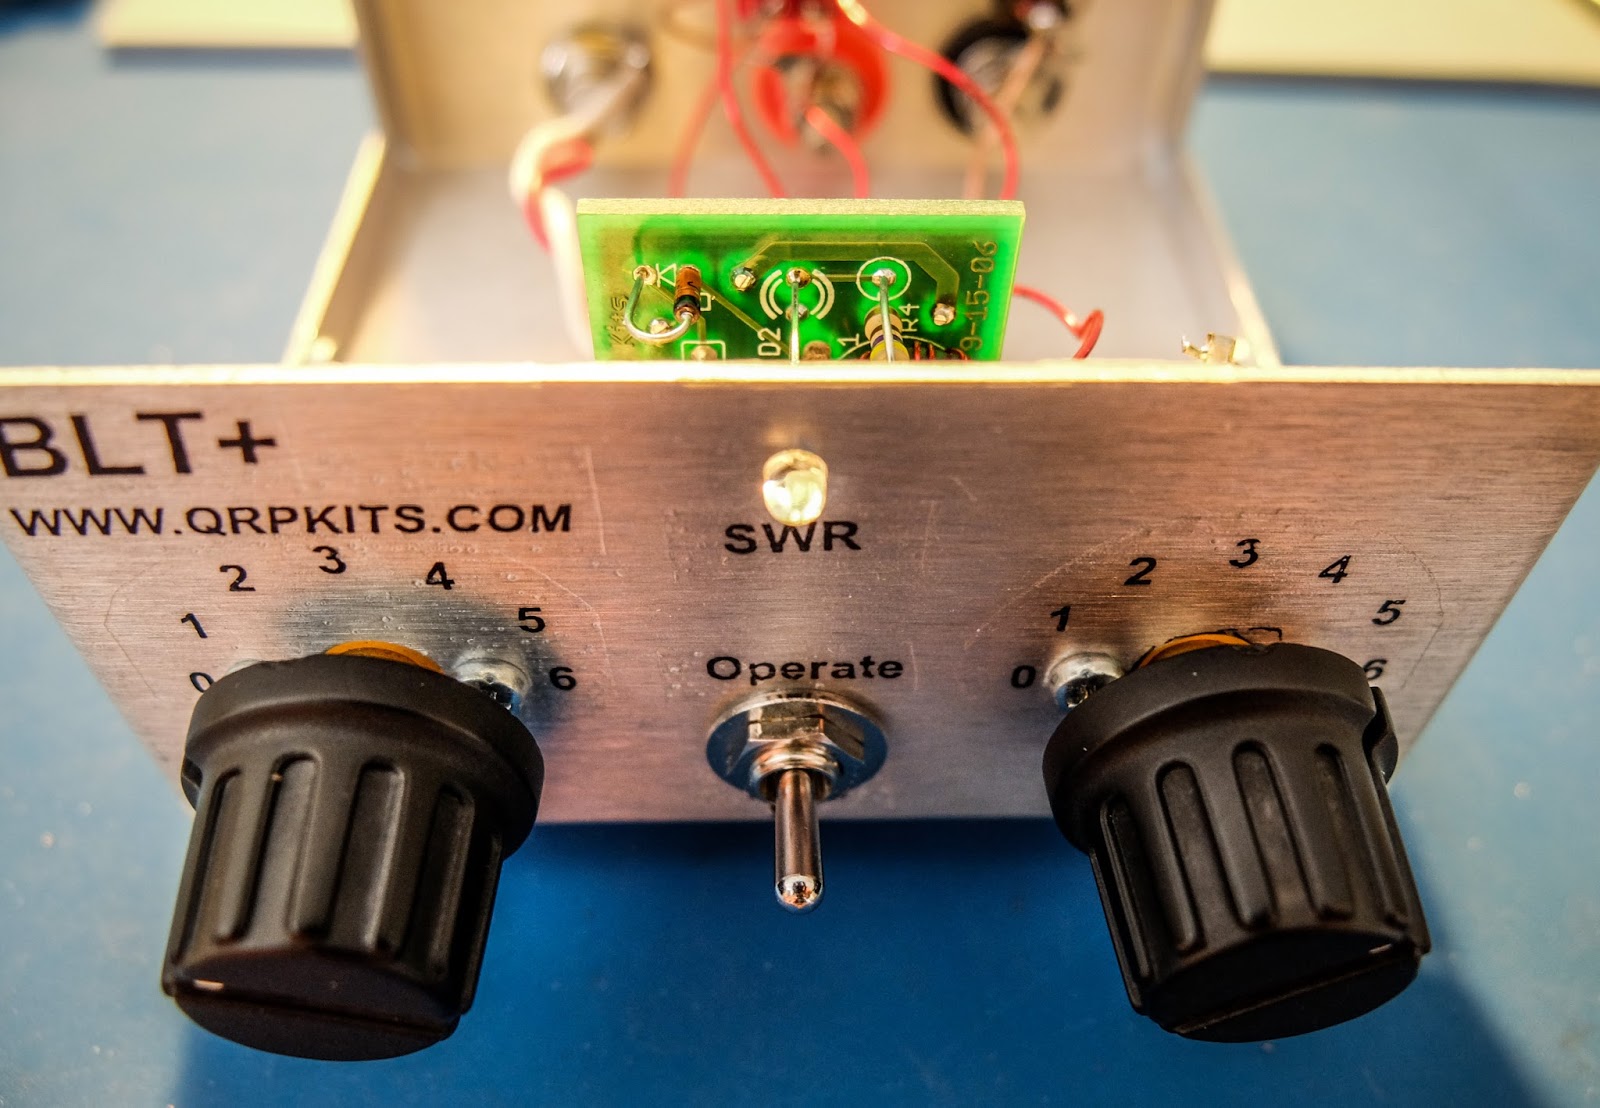 |
| Switch to Tune to present a low SWR to the transmitter while matching, switch to Operate when finished |
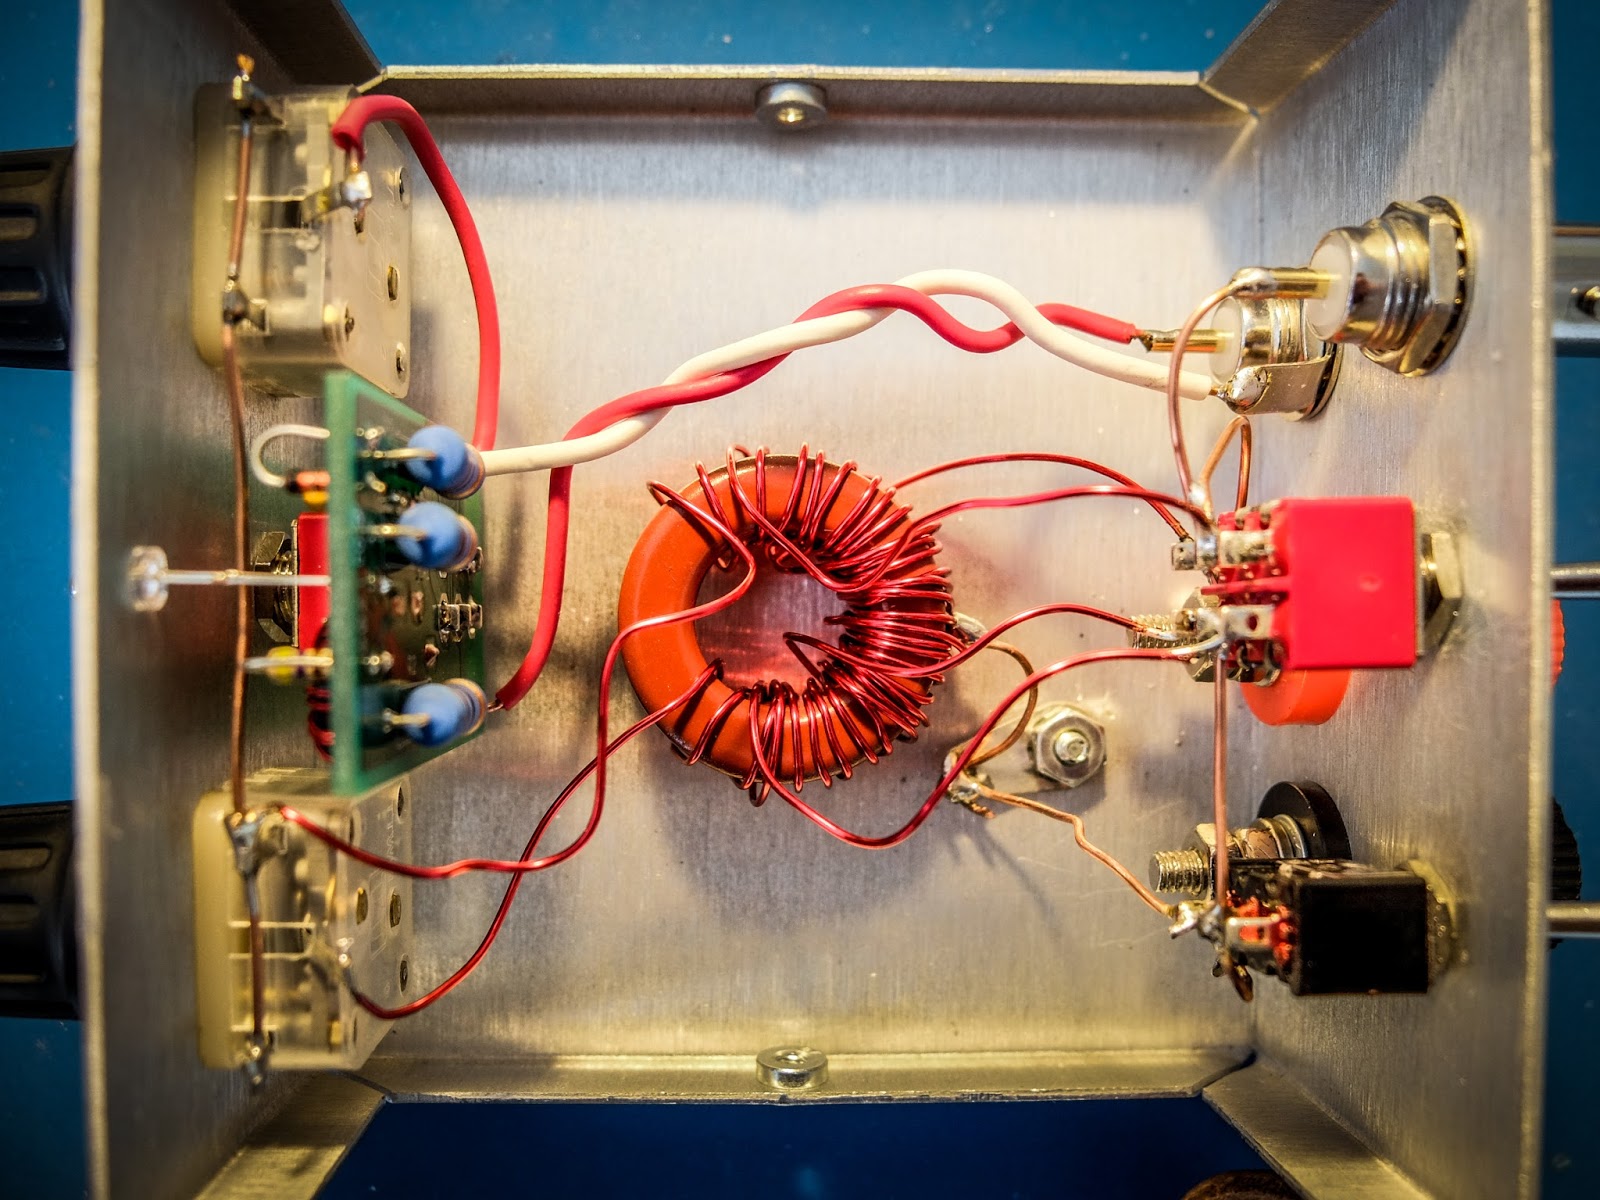
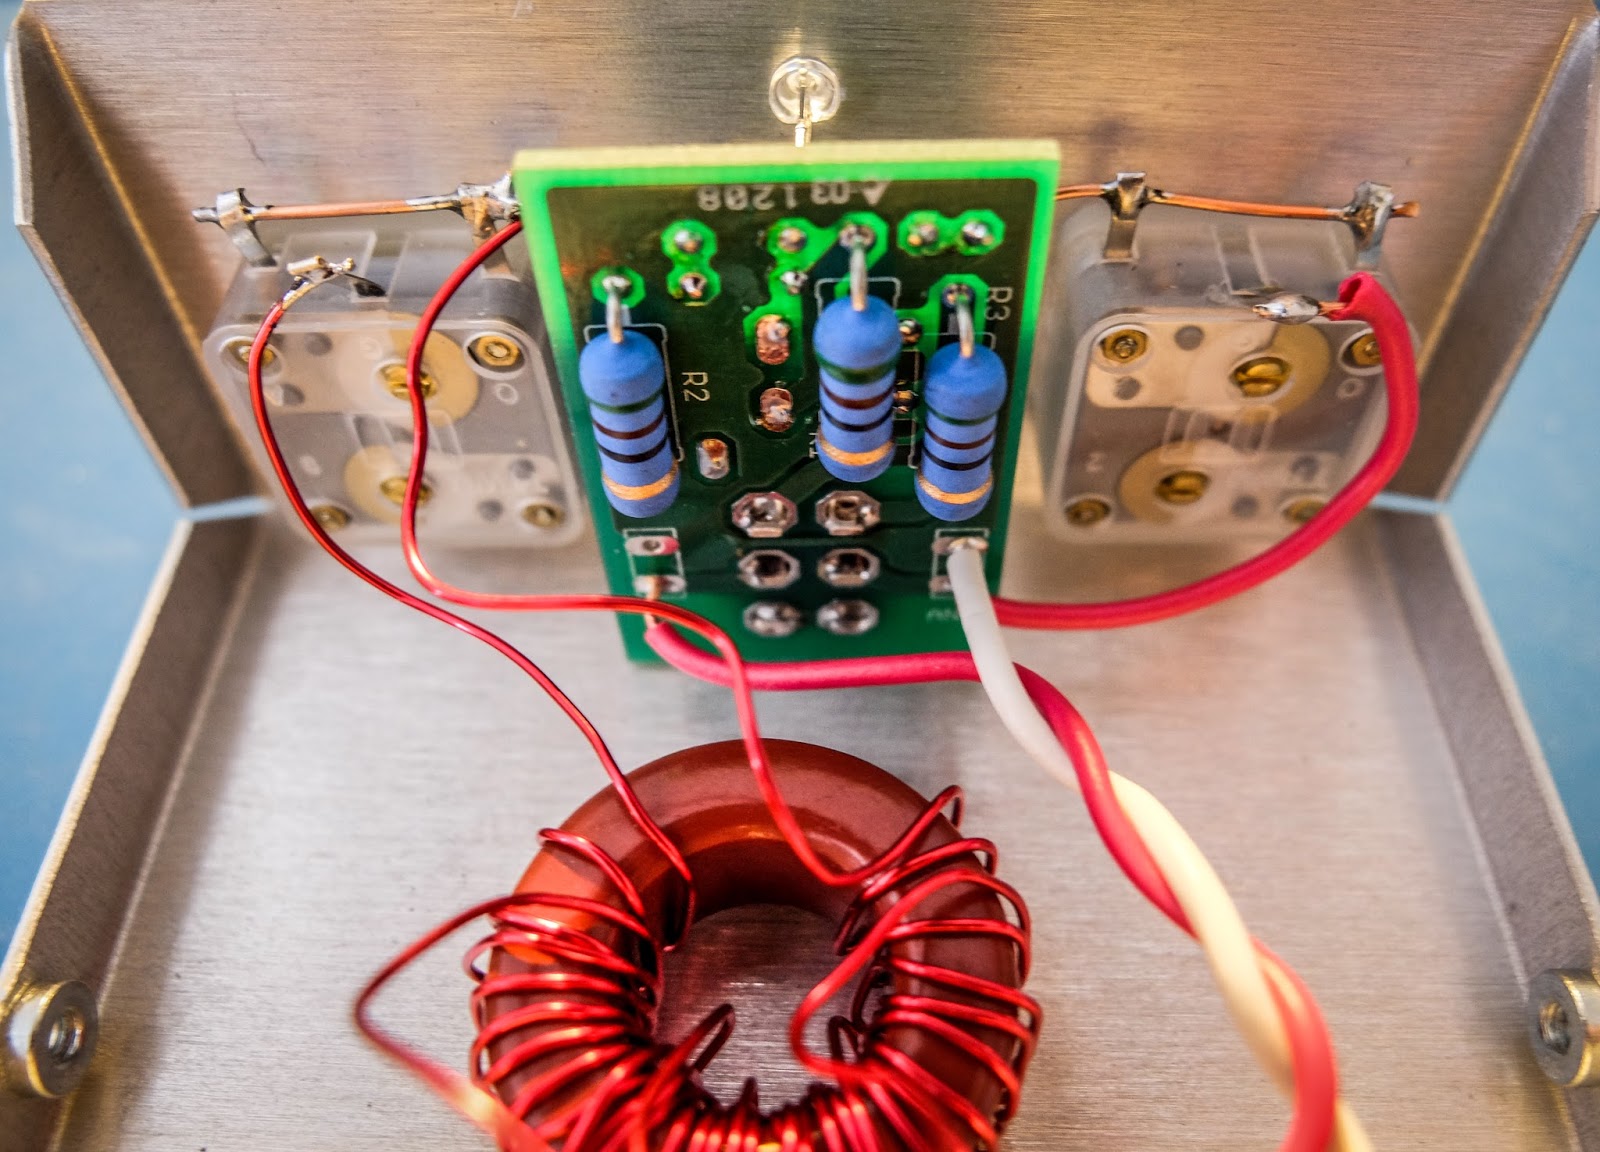
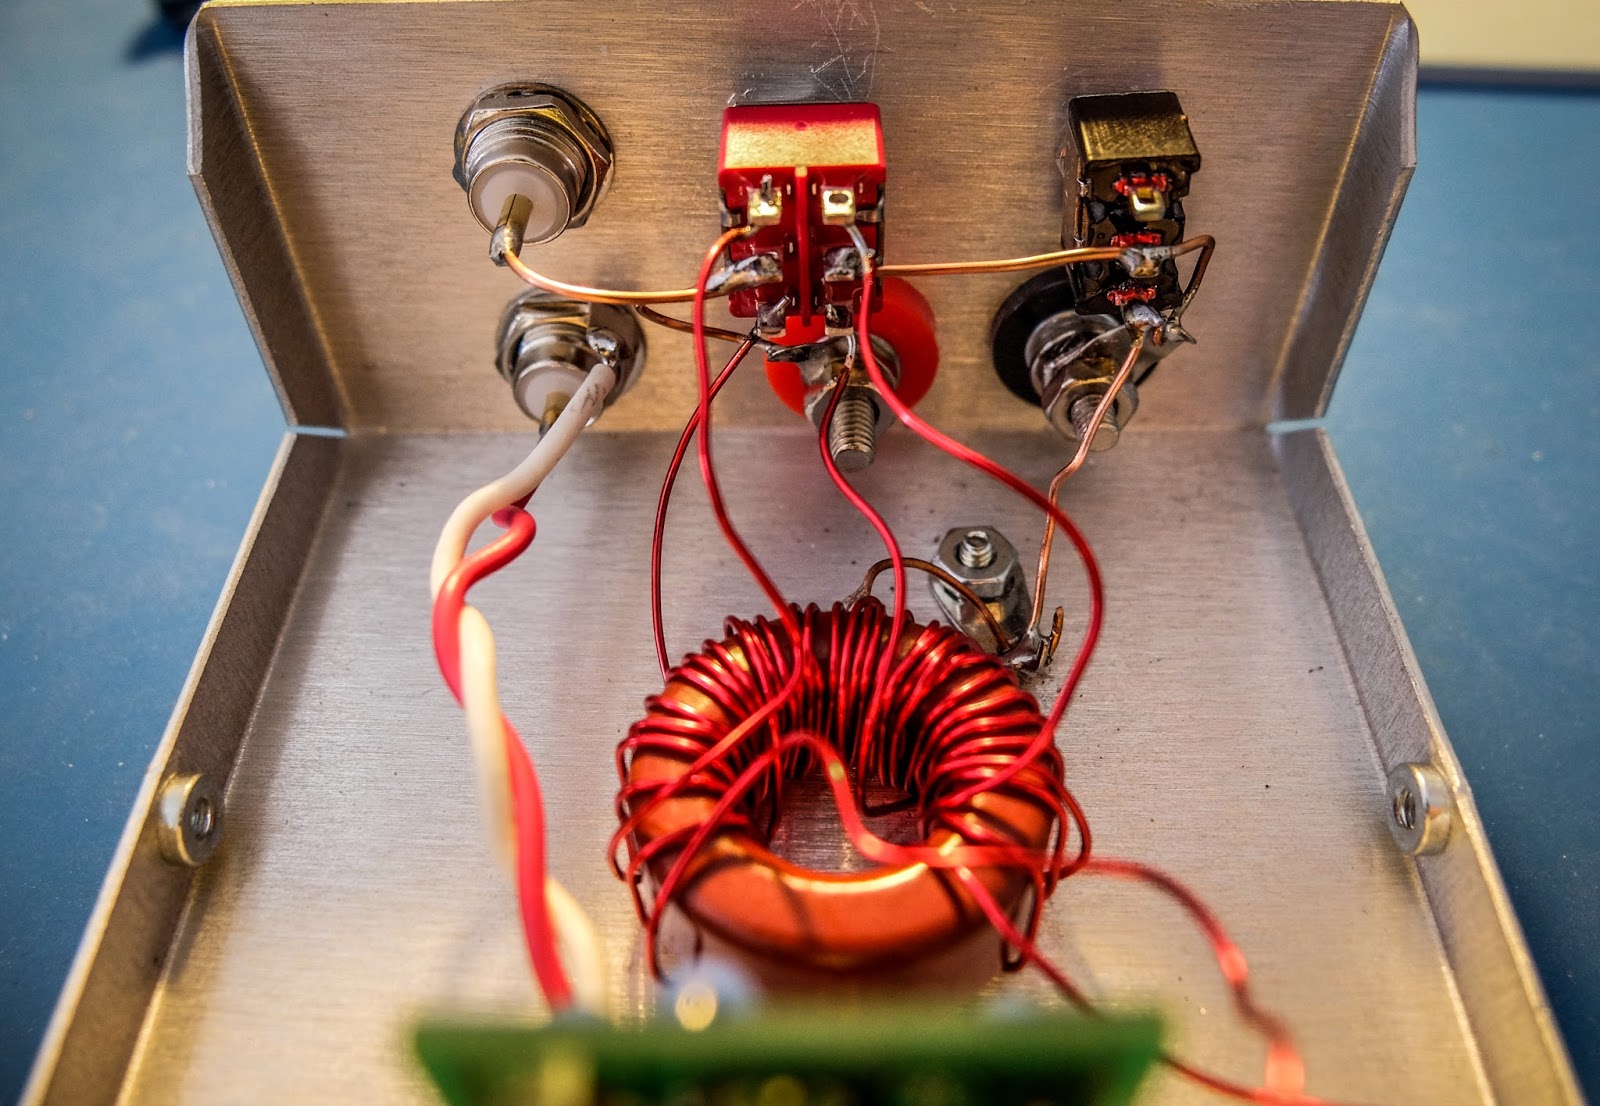
Building
The kit is relatively easy to build with one tapped toroid to wind for the SWR bridge and one 3 winding toroid for the tuner. I faced a few issues that you might avoid:
- The kit is provided with really nice water slide decals that give it a commercial look (if you don't ruin them like I did). The instructions recommend applying a clear coat to the decals after they are applied. I used a Krylon matte finish clear coat which indicated it was fine for metals and plastics but it partially melted the decals and caused them to bubble. I'd suggest testing whatever you are going to clear coat them with first.
- Don't over tighten the plastic tuner shafts or you won't be able to slide the knobs on (yes I did).
- The binding posts have little plastic spacers that separate and it isn't obvious. If you install them and wonder how they don't ground themselves (like I did) you've done it wrong and will have to go back after it's together and try to remove them with all the wiring in place.
- The bolts for the binding posts are very soft metal and the nuts can strip them if you apply too much force (yep I did that too).
- The main toroid has three sets of windings and they overlap. Pay attention to the instructions about winding them all in the same manner (clockwise or counter clockwise) or you will have to rewind them (yep, I did that too).
- The 3 windings on the main toroid overlap so you won't be able to go back and verify your turns when doing the 2nd and 3rd winding so count carefully (ask me how I know).
- Temporarily attach the SWR bridge to the front panel to get the spacing correct to solder the LED leads.
My tuner toroid ended up being a bit messier than I'd like because I had to rewind it and my resulting leads aren't as short as they could be. I may go back and trim the leads to make it tidier but my least favorite part of winding toroids is heat stripping the insulated magnet wire so I'll probably leave it as is. Initial tests indicate it's working great.
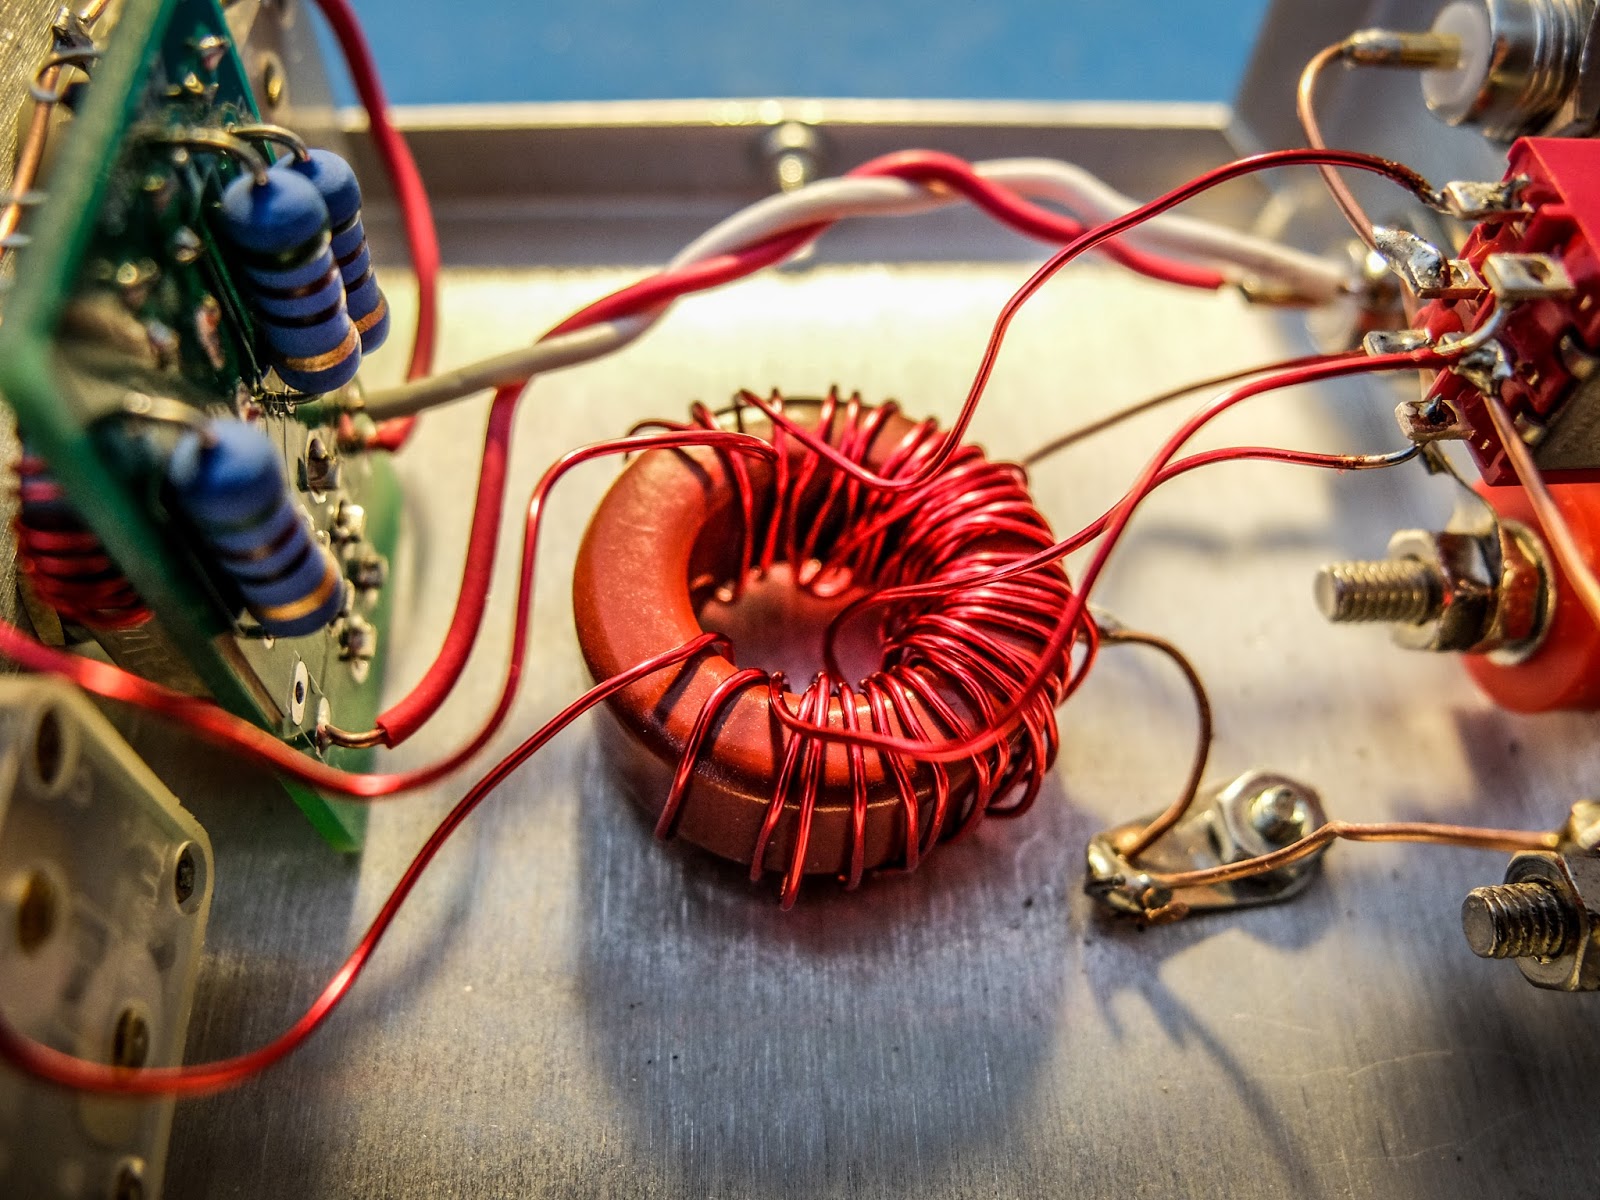 |
| My messy toroid winding... but it's working fine |
Operation
- Connect your transmitter and antenna.
- Choose the appropriate switch in the back for coax or balanced line antenna (Up for coax, Down for balanced line).
- Start with the inductance switch on the back set to low-impedance (Low-Z) because it is the most efficient. It uses the 6 turn secondary rather than the 12.
- Switch the front switch to "Tune"
- Key the transmitter and be sure you are using 5 watts or less
- Turn the "Load" knob first until you see a dimming of the LED then the "Tune" knob to make it go out completely
- The knobs interact so you'll need to go back and forth between them to achieve best match
- If you can't get a good match switch the inductance switch on the back to "High Z" and try again
- Don't apply power too long at a time during tune because the 50 Ohm resistors are heating up in there during the Tune process
- When the LED goes out or gets very dim you have a very good match. Switch to "Operate" and enjoy a well matched antenna
Photos
 |
| Result of having to rewind the secondaries made it messier than I'd like |

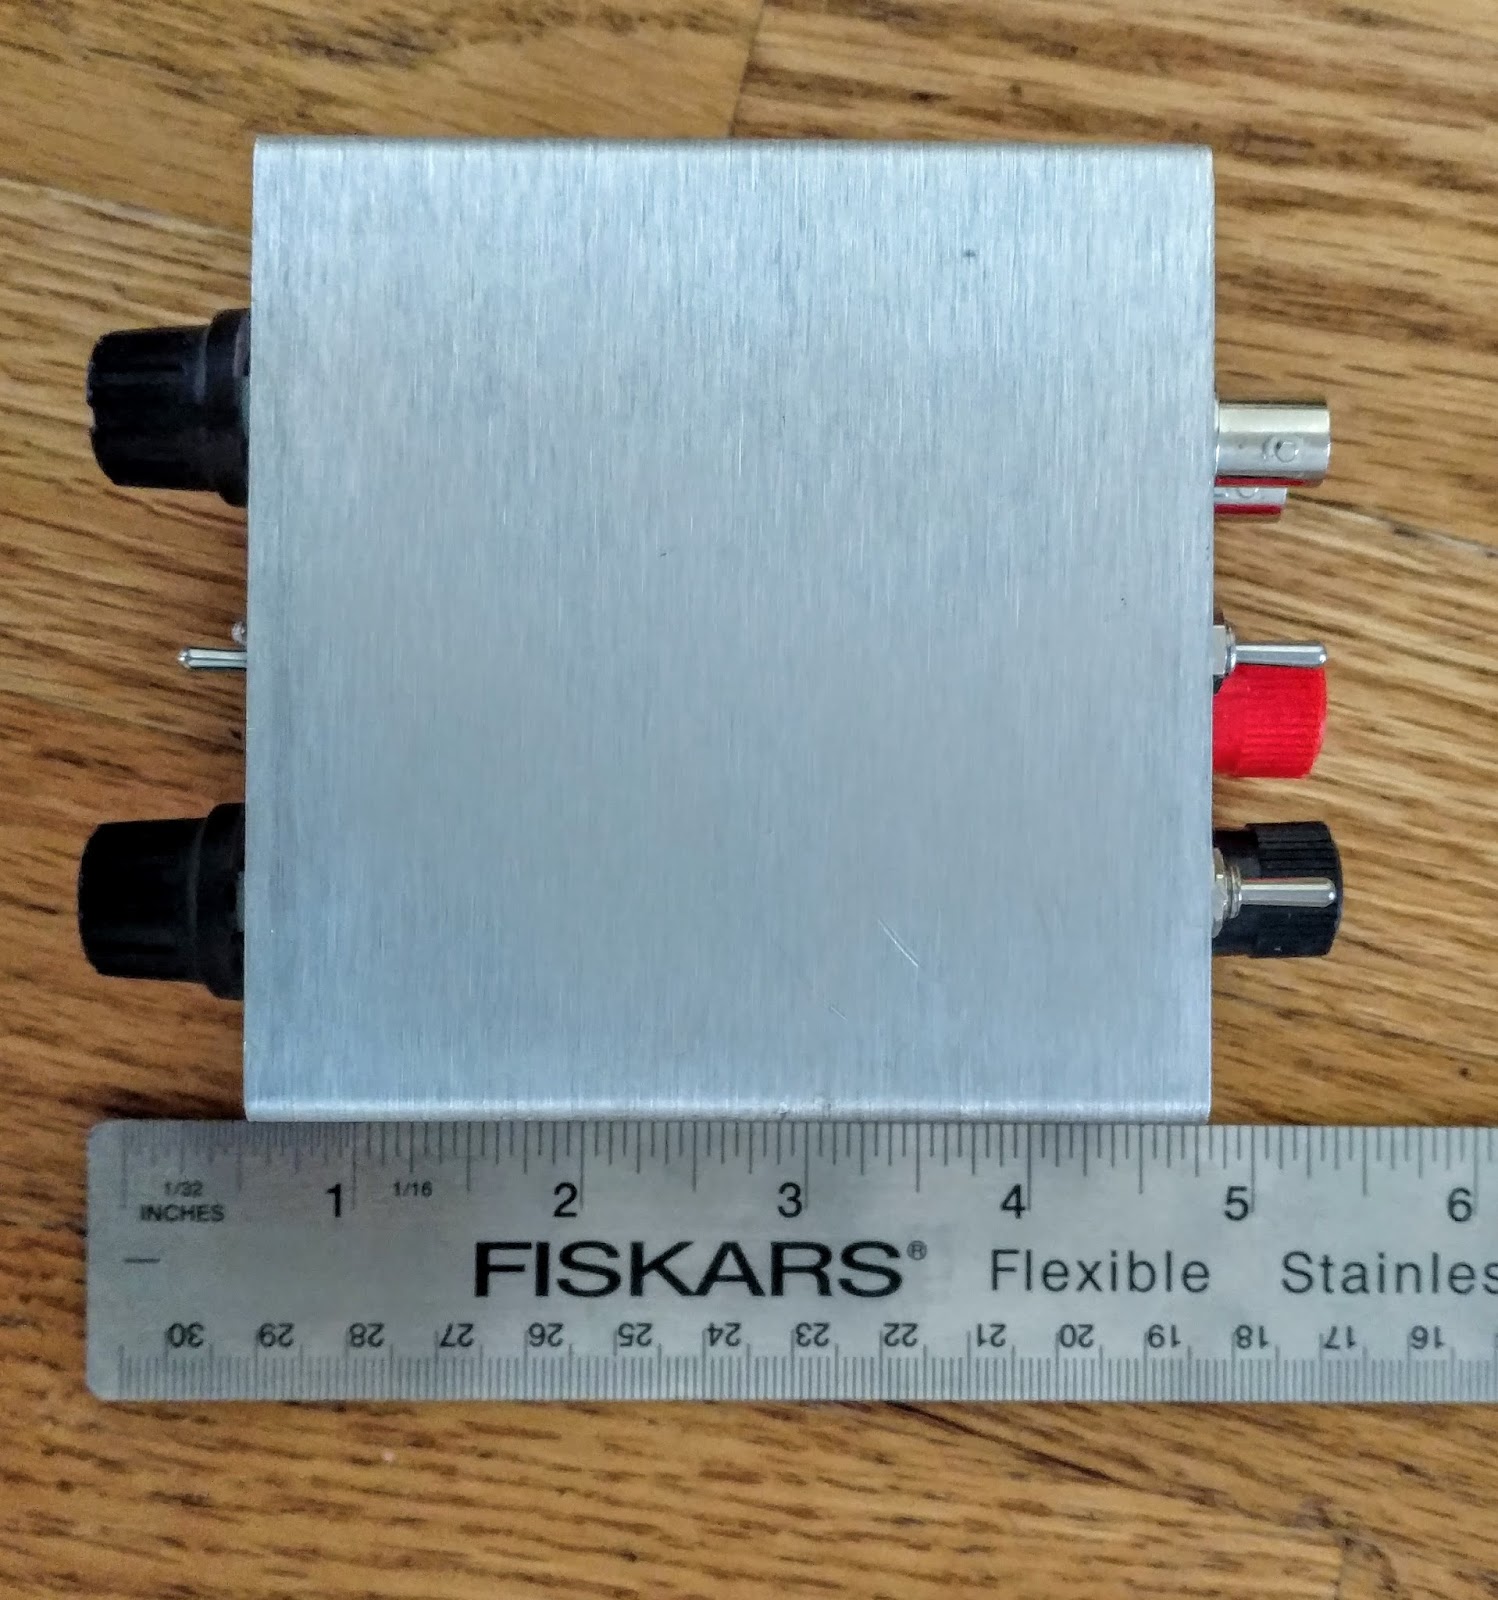
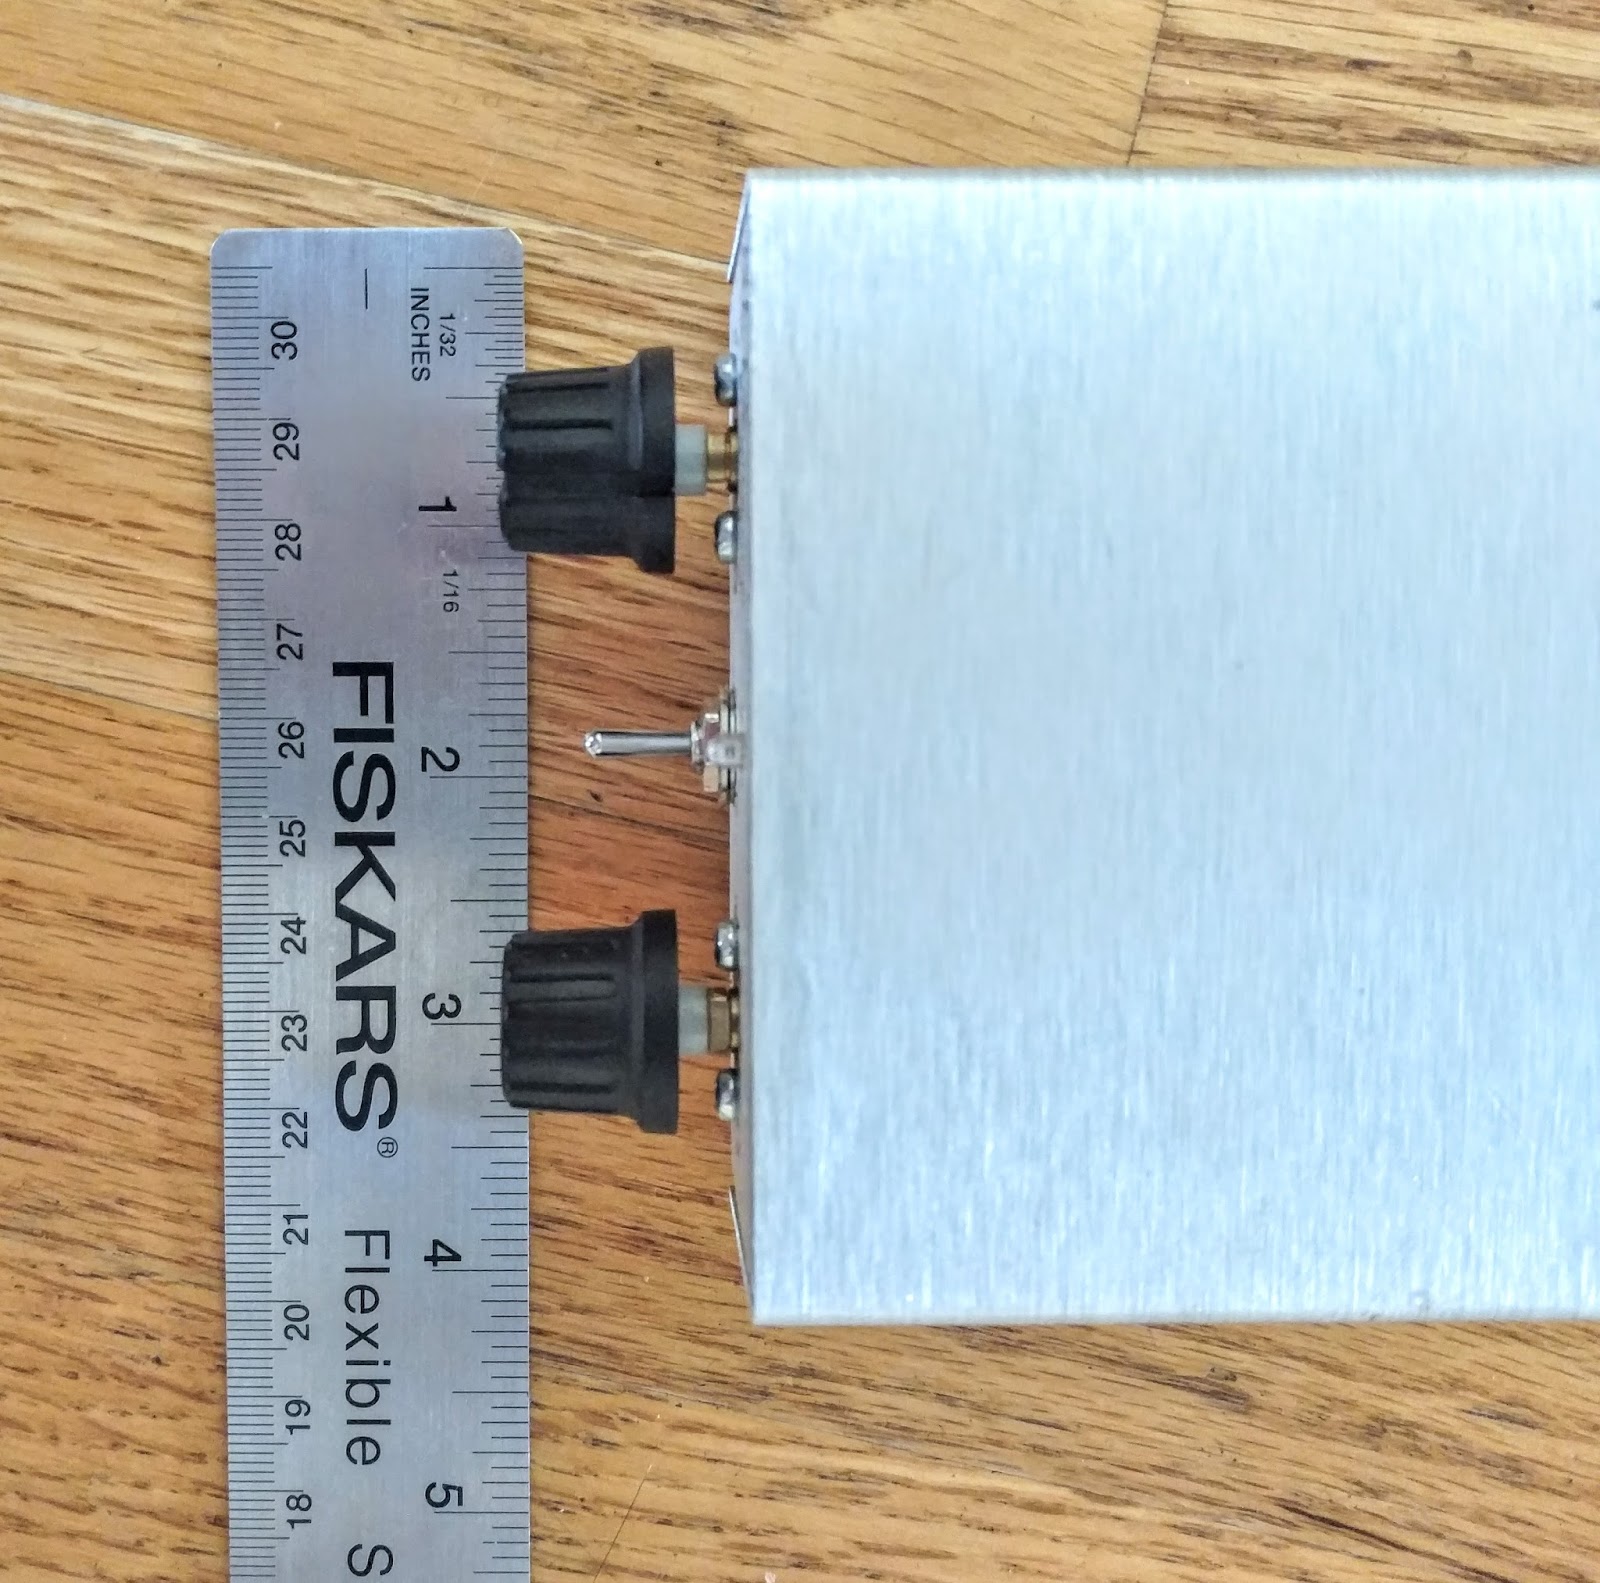
Dimensions
Remarks
Qrpkits offers a great little kit that results in a commercial looking product. You end up with a small portable tuner plus SWR indicator that reduces the complexity of your portable operation. Pacific Antenna is very responsive to questions. I sent a question concerning the incorrect instructions I'd downloaded for the antenna bridge and James answered me the same day with a different link (included above).
So if you have a QRP radio that needs an antenna tuner I recommend this kit. It's well thought out and works well.
That's all for now
So lower your power and raise your expectations
72/73
Richard, AA4OO


