Posts Tagged ‘Backpacking’
 Activating SOTA’s at Philmont Scout Ranch
Philmont Scout Ranch belongs to the Boy Scouts of America and is located near Cimarron, NM. Philmont consists of some 136,000 acres of rugged back country ideal for backpacking and any number of other outdoor activities. (www.philmontscoutranch.org) Philmont offers a variety of backpacking itineraries that cover 10 days of hiking ranging in distance from 56 miles to 106 miles.
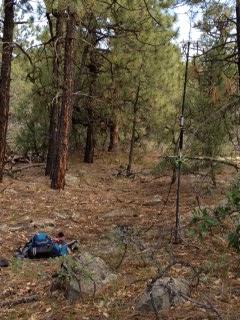
I was fortunate to be able to do a 84 mile backpacking trek with my son, AB5EB, and my grandson, KF5GYD, at Philmont Scout Ranch near Cimarron, NM. It was 25 years ago to the day, July 5th, 1991 that I started a trek with my two sons, the second, KB5SKN, to July 5th, 2016 that I started this trek. Pretty cool from a grandfather perspective. Aside from the trek experience I had in mind to activate a couple of SOTA peaks, within the Philmont boundries, that we would climb on our trek. Neither had every been activated for SOTA.
Philmont rates their treks by the magnitude of difficulty from Challenging, Rugged, Strenuous and Super Strenuous. The trek I was on was in the Super Strenuous category, for those familiar with the system, our Trek was # 31. I have been training for this trek for over a year and would need all that accumulated fitness to make the trip. We had a crew of eight, two adults and six teenage boys. What you learn, or maybe remember, is that youth covers lots of physical ills, in other words, they recover quickly.
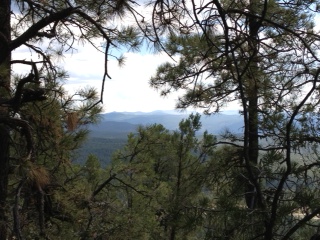
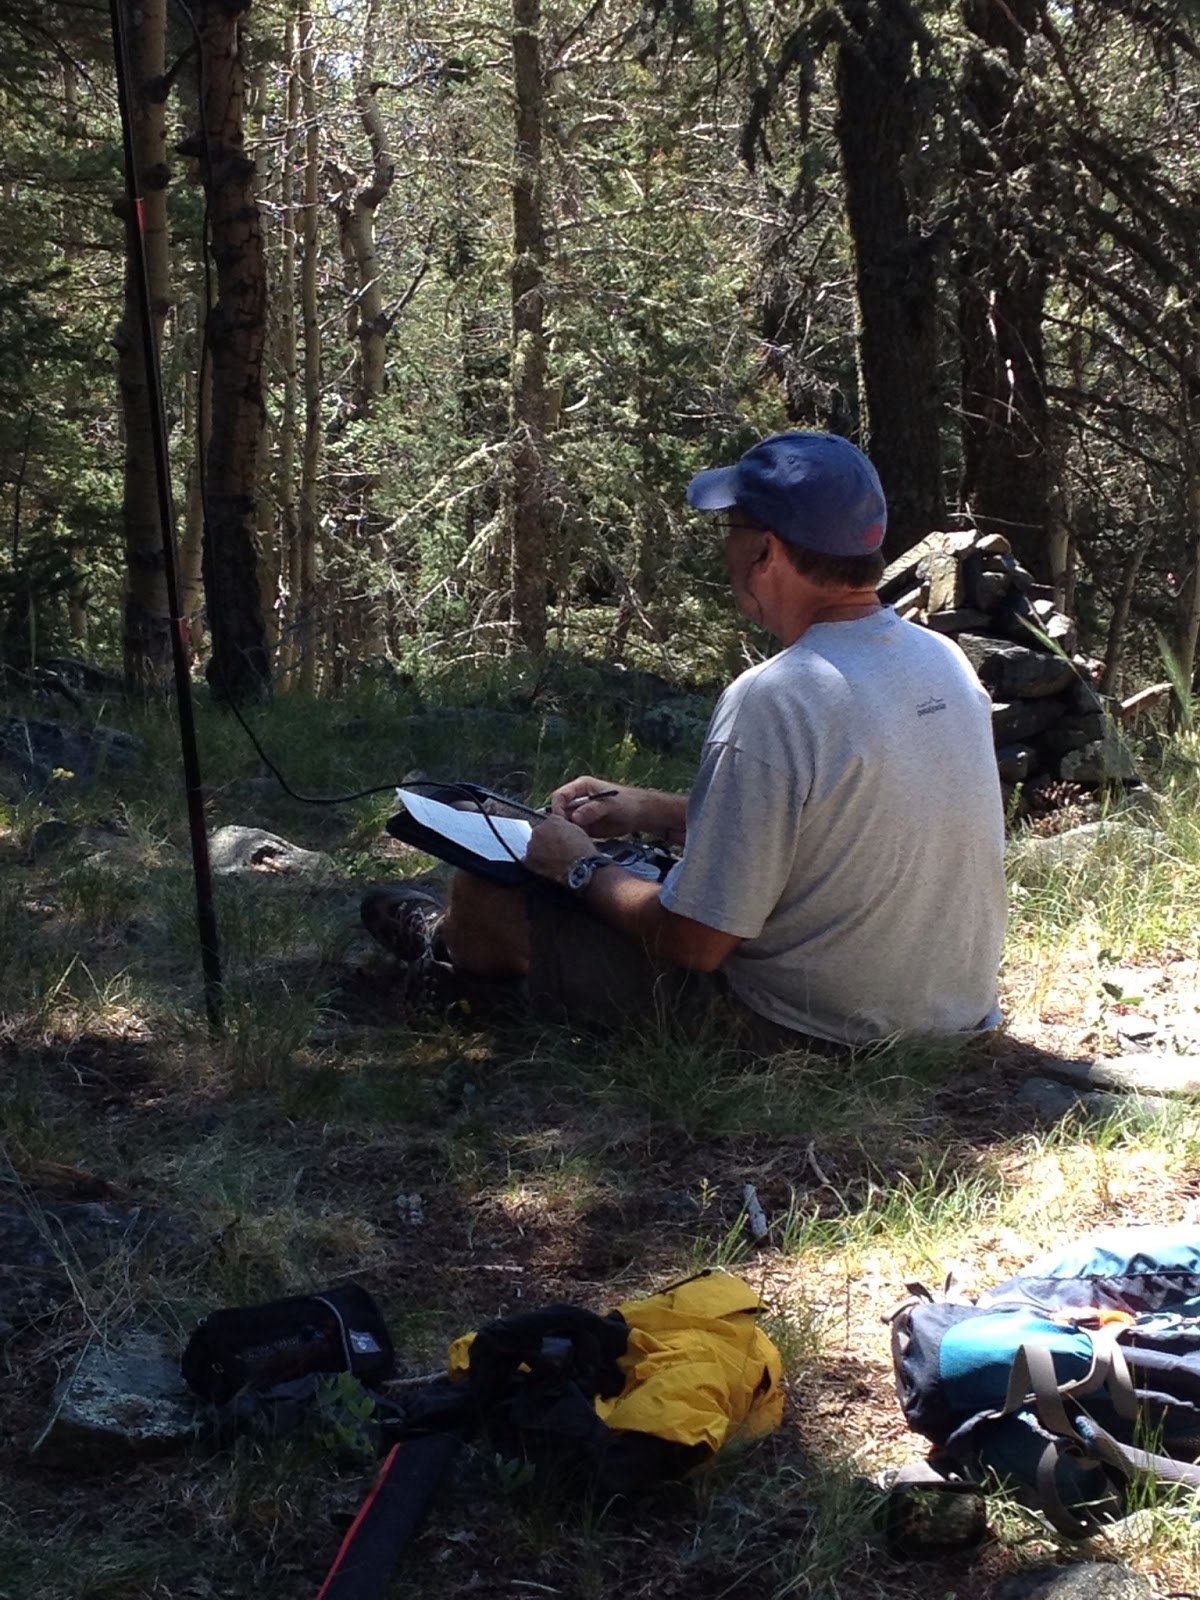
The first summit on our trek was Baldy Mountain, W5N/CM-002, 12,441 ft. ASL. We would summit the mountain on the 4thday of our trek. Trek #31 started at ~ 6,500 ASL, so we would spend 4 days climbing with 50 lb packs on our back toward the summit of Baldy Mountain. There were a multitude of other activities on the way, but the trail was always going up. The day of the final ascent, we arose and 3:30 am, was on the trail by 5:00 am and we climbed ~2,300 vertical feet over four miles of trail from 9,200 ASL to 11,500 ASL with full backpacks to the shoulder of Baldy and hiked the final 1,200 feet with day packs. It was a full day.
 |
| Baldy Mountain getting closer |
 |
| Operating from Baldy Mountain AD5A In The Middle and AB5EB On The Right |
 |
| Baldy Mountain From Scheaffers Peak Yes, We Hiked That Distance |
 |
| My Grandson, KF5GYD Operating From Scheaffer's Peak |
After the activation of Scheaffer's Peak, we had to put our packs back on and finish the last nine miles of the trek. Another long day, but at the end, what a sense of accomplishment. Hiking 84 miles in rugged back country and activating two new SOTA summits.
What a great hobby.
FT-817 Radio Pack
When I do long SOTA hikes at high elevation, I usually take along a very light weight radio, that is, on the order of 6 -7 ozs. Usually that means my Steve Weber, KD1JV, designed ATS-4 or an MTR. The radios are CW only and have limited band selections. These radios light and efficient. However, there are times when I don't mind carrying a slightly heavier load if I want more flexibility with bands/modes. While I have a KX-3, I find the FT-817 to be my radio of choice. It's easier to pack, takes less space than the KX-3, even with a T1 Tuner, and just feels a little more rugged.
There is a company called AMP-3 that has developed a very nice pack/bag to efficiently transport the FT-817, power supply, cables, connectors, log, etc.. I used this bag in a recent activation in New Mexico and was impressed with it's practicality. I have no financial interest in AMP-3, other than I've sent them a lot of money for their products.
Below is a link to a video of how the pack works.
http://www.youtube.com/watch?v=c_pUIzlqzKU
Also he web site address is:
http://stores.amp-3.net/-strse-73/Custom-Made-Yaesu-817/Detail.bok
Four Days, Four Summits
I spent a long Labor Day weekend at my new QTH in Santa Fe, New Mexico. From a flatlander's point of view, Santa Fe is SOTA heaven. Lots of nice peaks to climb and now with a place to lay my head, I can go back home and not to a hotel room. From my home QTH in Boerne, TX it is 380 miles to the nearest accessible peak. As I would discover, there is a nice 8 pointer 11 miles from my front door.
Day 1 Peak 8409 W5N/PW-027 (8 pts)
We are still setting up house in Santa Fe and so on this Friday morning there were deliveries scheduled for 9:30. So I needed a quick hit summit that I could get on and off of quickly and get back home. Peak 8409 fit the bill. The summit is 11 miles from my house and isn't a particularly difficult summit as you can drive to within a few hundred feet of the summit. So I left the house early and found a pull-out on the road to the summit and scrambled up ~200 feet to my eventual operating position. Quickly the antenna was in place and I was calling CQ within 5 minutes. A chaser pile quickly ensued and in 25 or so minutes of operation I made 23 QSO's. After a few unanswered CQ's, I quickly tore down the station was back home in time to meet the delivery man. Cool, 8 activator points and back home in time to get something done.
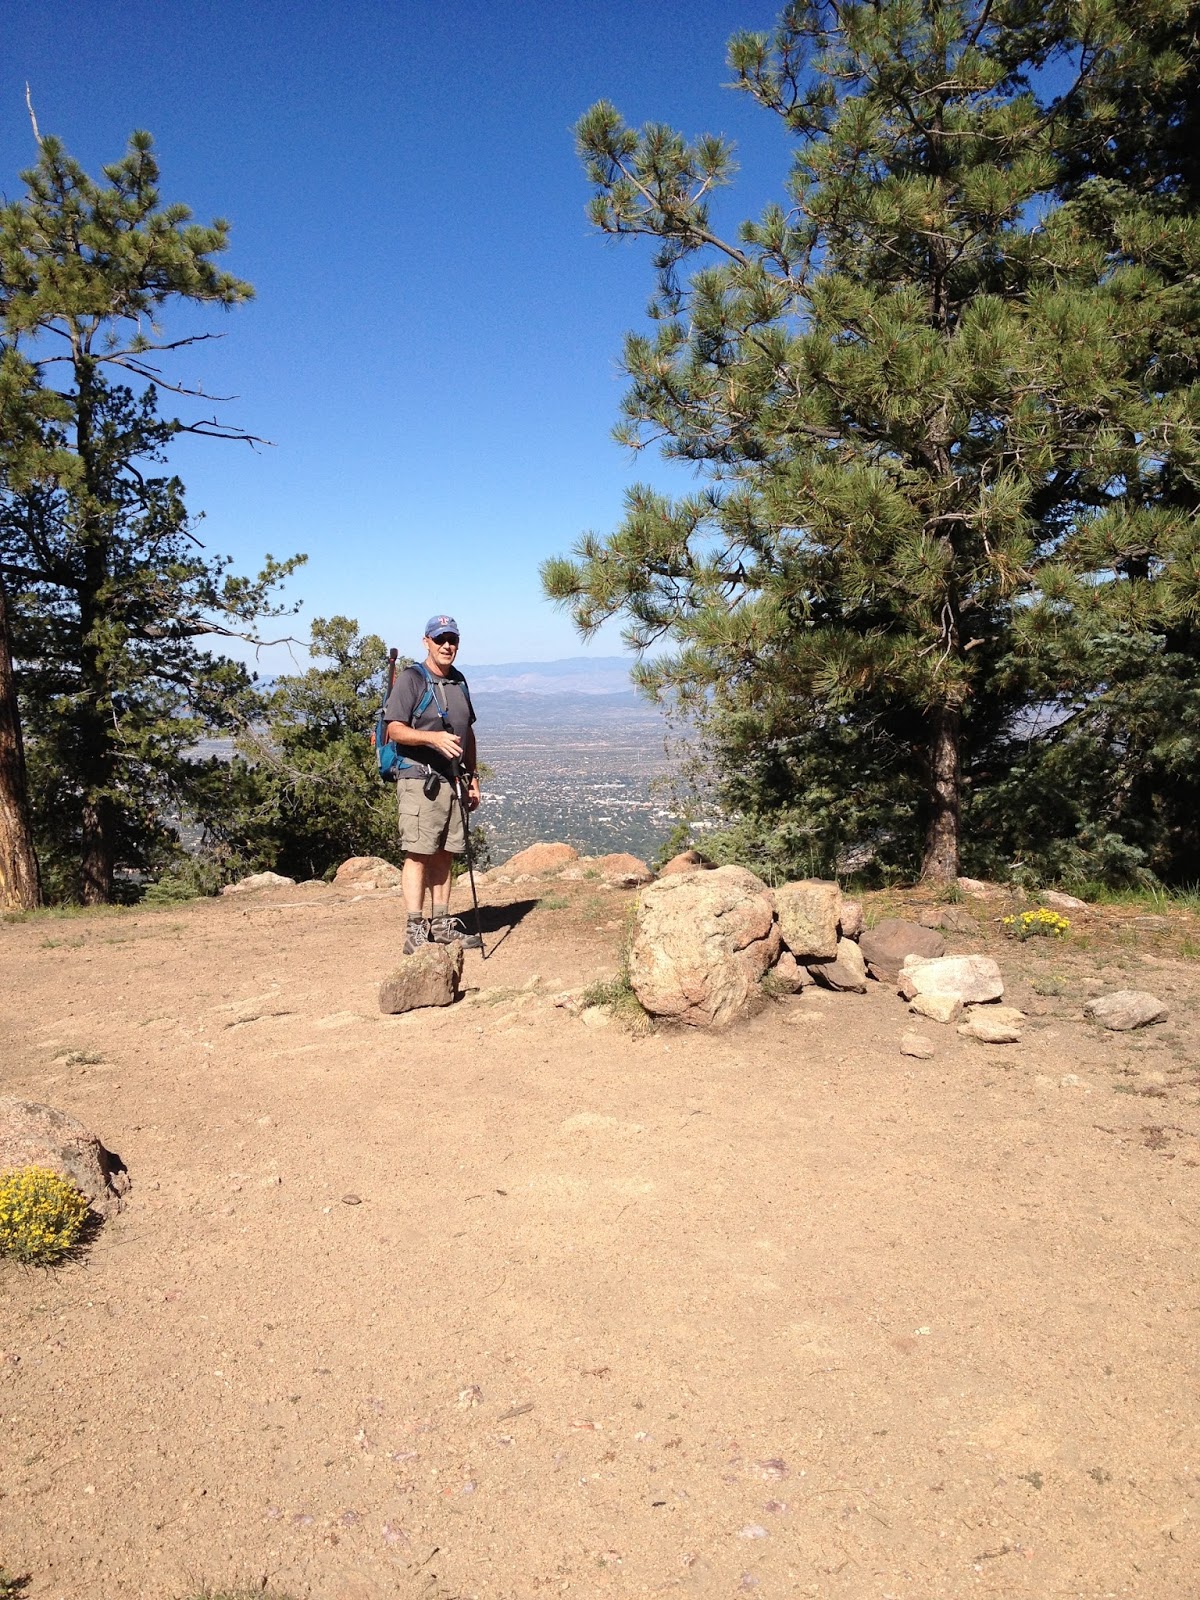
Day 2 Atalaya Mountain W5N/PW-023 (8 pts)
Atalaya is not in the easy ascent category. The hike isn't too long, ~5.6 miles round trip depending on where you start (we took Trail #170), but it is relatively steep. I wouldn't call it a hard hike, so moderate is probably the best description. My son Jake, KB5SKN, who flew in the day before, would join me on this one. Jake isn't that active as a ham but when asked if he wanted to operate from the summit, he said he would rather operate than just watch me. So, in addition to my ATS-4, cw only rig, I made Jake carry the FT-817 so he could operate SSB. This is a nice hike and the views of Santa Fe are outstanding. It took us 90 minutes to get to the summit, with Jake having to adjust a little to the altitude, but we make relatively decent time.
Jake was new to mountain portable operation and he was surprised how quickly we were on the air. We set up the EFHW, stringing it in the trees to my carbon fiber collapsible pole. We received good reports, I made 21 QSO's on CW and Jake made 12 on SSB. He was surprised at how effective this antenna was. It was a nice walk down and a good day for father and son.
Sandia Crest is the big mountain that dominates the Albuquerque landscape. I decided to take a chance on a Sunday afternoon activation. Thunderstorms are always an issue in this part of the world, but there is a tram that takes you up the mountain, so I decided to risk it.
Sure enough when we arrived at the tram there was a light rain on the summit. Actually I thought the tram landing was within the activation zone. When we arrived, in the rain, I realized we need to ascend another 200 feet before I was high enough on the summit. A favorite activation location on this mountain is Kiwanis Cabin; it was a short 1.5 miles away. So my XYL and I set off in the light rain for the cabin. While the rain was light, thunder was echoing through the valley as there were widespread thunderstorms. Upon reaching the cabin, the rain had stopped, so I set up my station. On crowded summits I use the Alexloop antenna. It has a small footprint and actually works pretty well. After tuning it and calling CQ, I didn't get any immediate responses. Little did I know there had been a CME just a few hours before and conditions were not good. Over about a 15 minute time span I made 8 QSO's. Then the wind came up and the thunder got louder, so I shut down. We hiked back to the tram to find a 90 minute wait to go down. This was a holiday weekend after all. So rain, a CME and tram delay turned this into a little more adventurous and time consuming outing than planned, but I made the QSO's to qualify the activation and enjoyed some magnificent views.
Day 4 Santa Fe Baldy W5N/PW-006 (10 pts)
John, K1JD, sent me an email asking if during my stay in Santa Fe I would be interested in doing Santa Fe Baldy, the tallest mountain in the Santa Fe area at 12,622 ft. It is a 10 point summit and I had already done a fourteener this year, (Sherman 14,036), so I knew I could handle the altitude. “Of course” was my response. The kicker on this hike is that it is a 15 mile round-trip. The hike is not 7.5 miles up and then 7.5 miles down, it is a rolling hike for several miles until you get to the trail up to the saddle that leads to the summit. We both knew there were easier 10 pointers around, but activating Santa Fe Baldy is a badge of honor; it looks good on the resume. So as you talk among other activators, you can always ask what their longest hike was and odds are, at 15 miles, not many can best that. So some bragging rights are at risk here and that’s important. We appropriately planned the hike for Labor Day.
The weather forecast wasn’t favorable for a Labor Day activation, 50% chance of rain, which translated during monsoon season in the New Mexico mountains, it’s gonna rain. We toyed with idea of doing it on the Sunday before Labor Day, but my son was in town and I couldn’t get away. So we took our chances on Monday.
The trip down was uneventful, just long. As always a nice walk through the forest is better that most anything else you may want to do to relax, so John and I enjoyed the walk and had several good, long conversations on numerous topics. There was lots of thunder and rain clouds around us, but not a single drop of rain fell on us. It was a grand time. We got back to the truck at 3:23 pm, 8 hrs 11 mins on the trail, including the activation, but 10 points in our pocket.
Day 1 Peak 8409 W5N/PW-027 (8 pts)
We are still setting up house in Santa Fe and so on this Friday morning there were deliveries scheduled for 9:30. So I needed a quick hit summit that I could get on and off of quickly and get back home. Peak 8409 fit the bill. The summit is 11 miles from my house and isn't a particularly difficult summit as you can drive to within a few hundred feet of the summit. So I left the house early and found a pull-out on the road to the summit and scrambled up ~200 feet to my eventual operating position. Quickly the antenna was in place and I was calling CQ within 5 minutes. A chaser pile quickly ensued and in 25 or so minutes of operation I made 23 QSO's. After a few unanswered CQ's, I quickly tore down the station was back home in time to meet the delivery man. Cool, 8 activator points and back home in time to get something done.
Day 2 Atalaya Mountain W5N/PW-023 (8 pts)
Atalaya is not in the easy ascent category. The hike isn't too long, ~5.6 miles round trip depending on where you start (we took Trail #170), but it is relatively steep. I wouldn't call it a hard hike, so moderate is probably the best description. My son Jake, KB5SKN, who flew in the day before, would join me on this one. Jake isn't that active as a ham but when asked if he wanted to operate from the summit, he said he would rather operate than just watch me. So, in addition to my ATS-4, cw only rig, I made Jake carry the FT-817 so he could operate SSB. This is a nice hike and the views of Santa Fe are outstanding. It took us 90 minutes to get to the summit, with Jake having to adjust a little to the altitude, but we make relatively decent time.
Jake was new to mountain portable operation and he was surprised how quickly we were on the air. We set up the EFHW, stringing it in the trees to my carbon fiber collapsible pole. We received good reports, I made 21 QSO's on CW and Jake made 12 on SSB. He was surprised at how effective this antenna was. It was a nice walk down and a good day for father and son.
 |
| KB5SKN Logging His First Activation |
 |
| AD5A on Summit of Atalaya :Mountain |
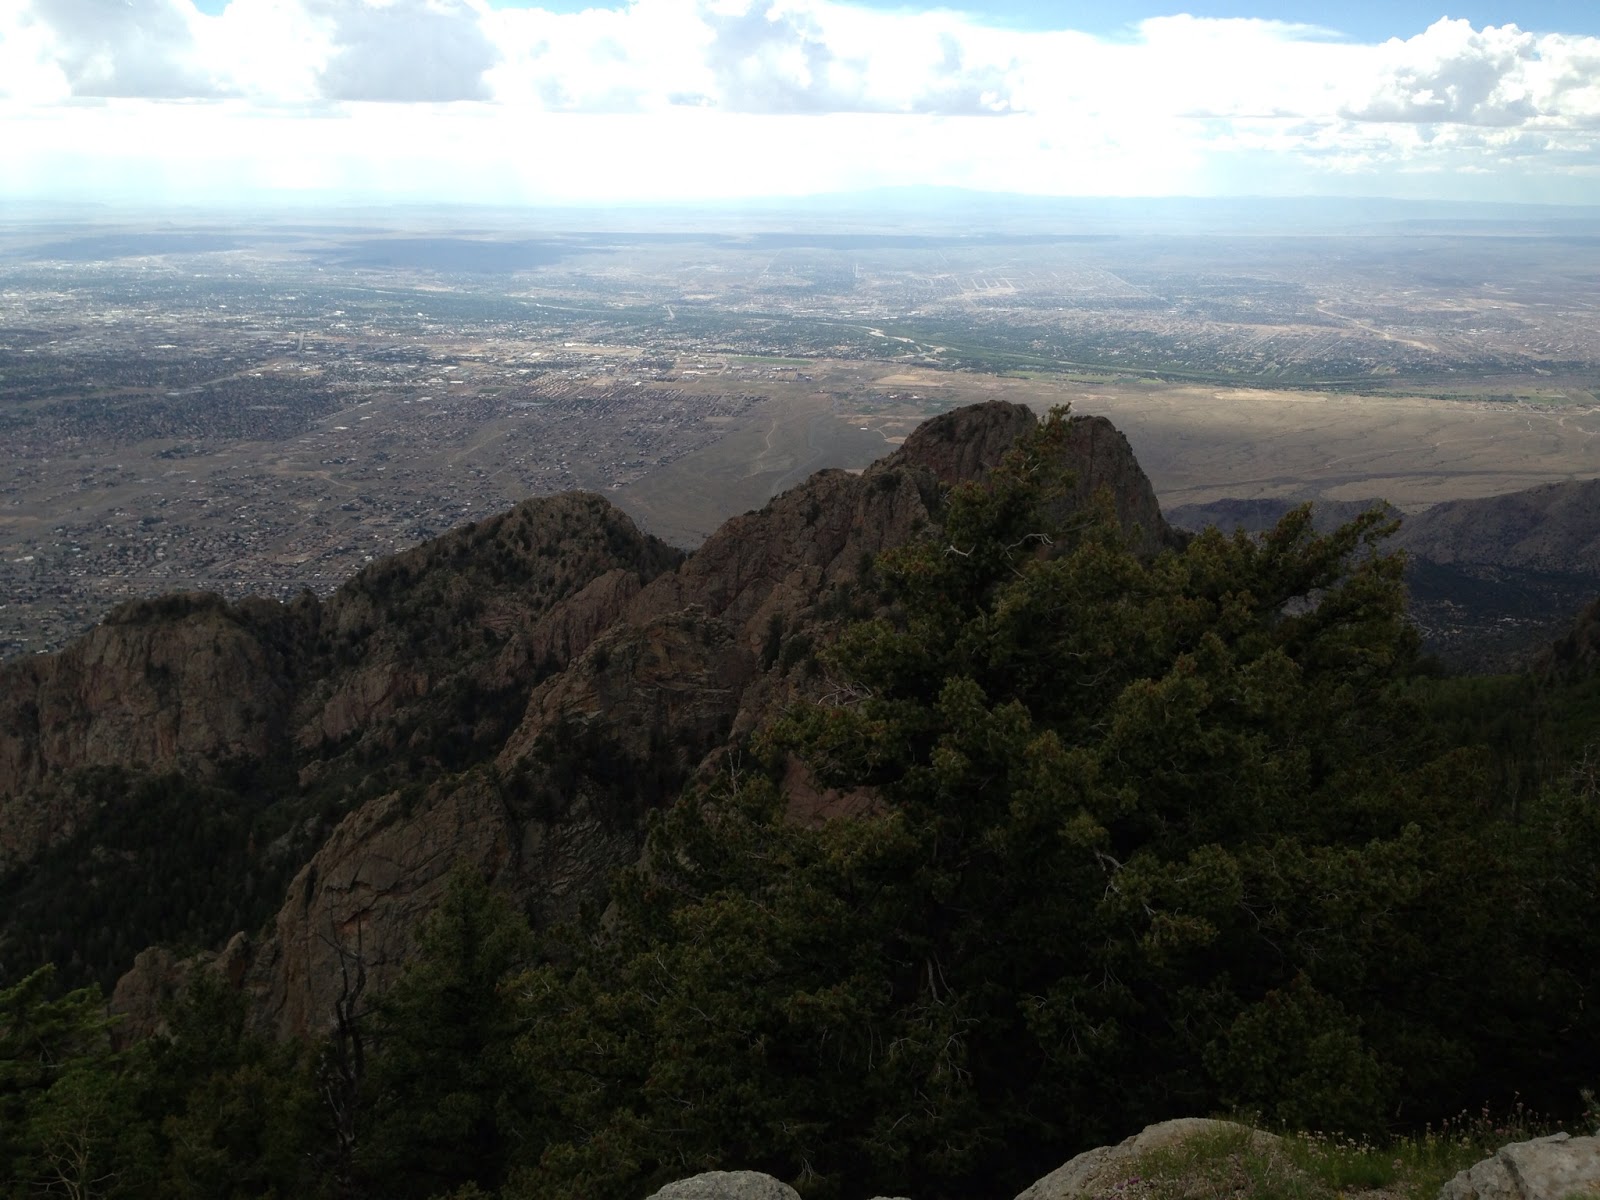
Day 3 Sandia Crest W5N/SI-001 (10 pts)
Sandia Crest is the big mountain that dominates the Albuquerque landscape. I decided to take a chance on a Sunday afternoon activation. Thunderstorms are always an issue in this part of the world, but there is a tram that takes you up the mountain, so I decided to risk it.
Sure enough when we arrived at the tram there was a light rain on the summit. Actually I thought the tram landing was within the activation zone. When we arrived, in the rain, I realized we need to ascend another 200 feet before I was high enough on the summit. A favorite activation location on this mountain is Kiwanis Cabin; it was a short 1.5 miles away. So my XYL and I set off in the light rain for the cabin. While the rain was light, thunder was echoing through the valley as there were widespread thunderstorms. Upon reaching the cabin, the rain had stopped, so I set up my station. On crowded summits I use the Alexloop antenna. It has a small footprint and actually works pretty well. After tuning it and calling CQ, I didn't get any immediate responses. Little did I know there had been a CME just a few hours before and conditions were not good. Over about a 15 minute time span I made 8 QSO's. Then the wind came up and the thunder got louder, so I shut down. We hiked back to the tram to find a 90 minute wait to go down. This was a holiday weekend after all. So rain, a CME and tram delay turned this into a little more adventurous and time consuming outing than planned, but I made the QSO's to qualify the activation and enjoyed some magnificent views.
 |
| AD5A on Sandia Peak |
 |
| View from Sandia Peak |
Day 4 Santa Fe Baldy W5N/PW-006 (10 pts)
John, K1JD, sent me an email asking if during my stay in Santa Fe I would be interested in doing Santa Fe Baldy, the tallest mountain in the Santa Fe area at 12,622 ft. It is a 10 point summit and I had already done a fourteener this year, (Sherman 14,036), so I knew I could handle the altitude. “Of course” was my response. The kicker on this hike is that it is a 15 mile round-trip. The hike is not 7.5 miles up and then 7.5 miles down, it is a rolling hike for several miles until you get to the trail up to the saddle that leads to the summit. We both knew there were easier 10 pointers around, but activating Santa Fe Baldy is a badge of honor; it looks good on the resume. So as you talk among other activators, you can always ask what their longest hike was and odds are, at 15 miles, not many can best that. So some bragging rights are at risk here and that’s important. We appropriately planned the hike for Labor Day.
The weather forecast wasn’t favorable for a Labor Day activation, 50% chance of rain, which translated during monsoon season in the New Mexico mountains, it’s gonna rain. We toyed with idea of doing it on the Sunday before Labor Day, but my son was in town and I couldn’t get away. So we took our chances on Monday.
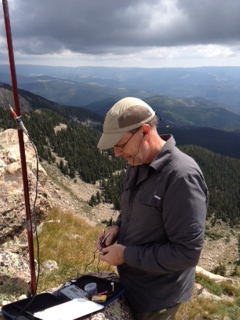
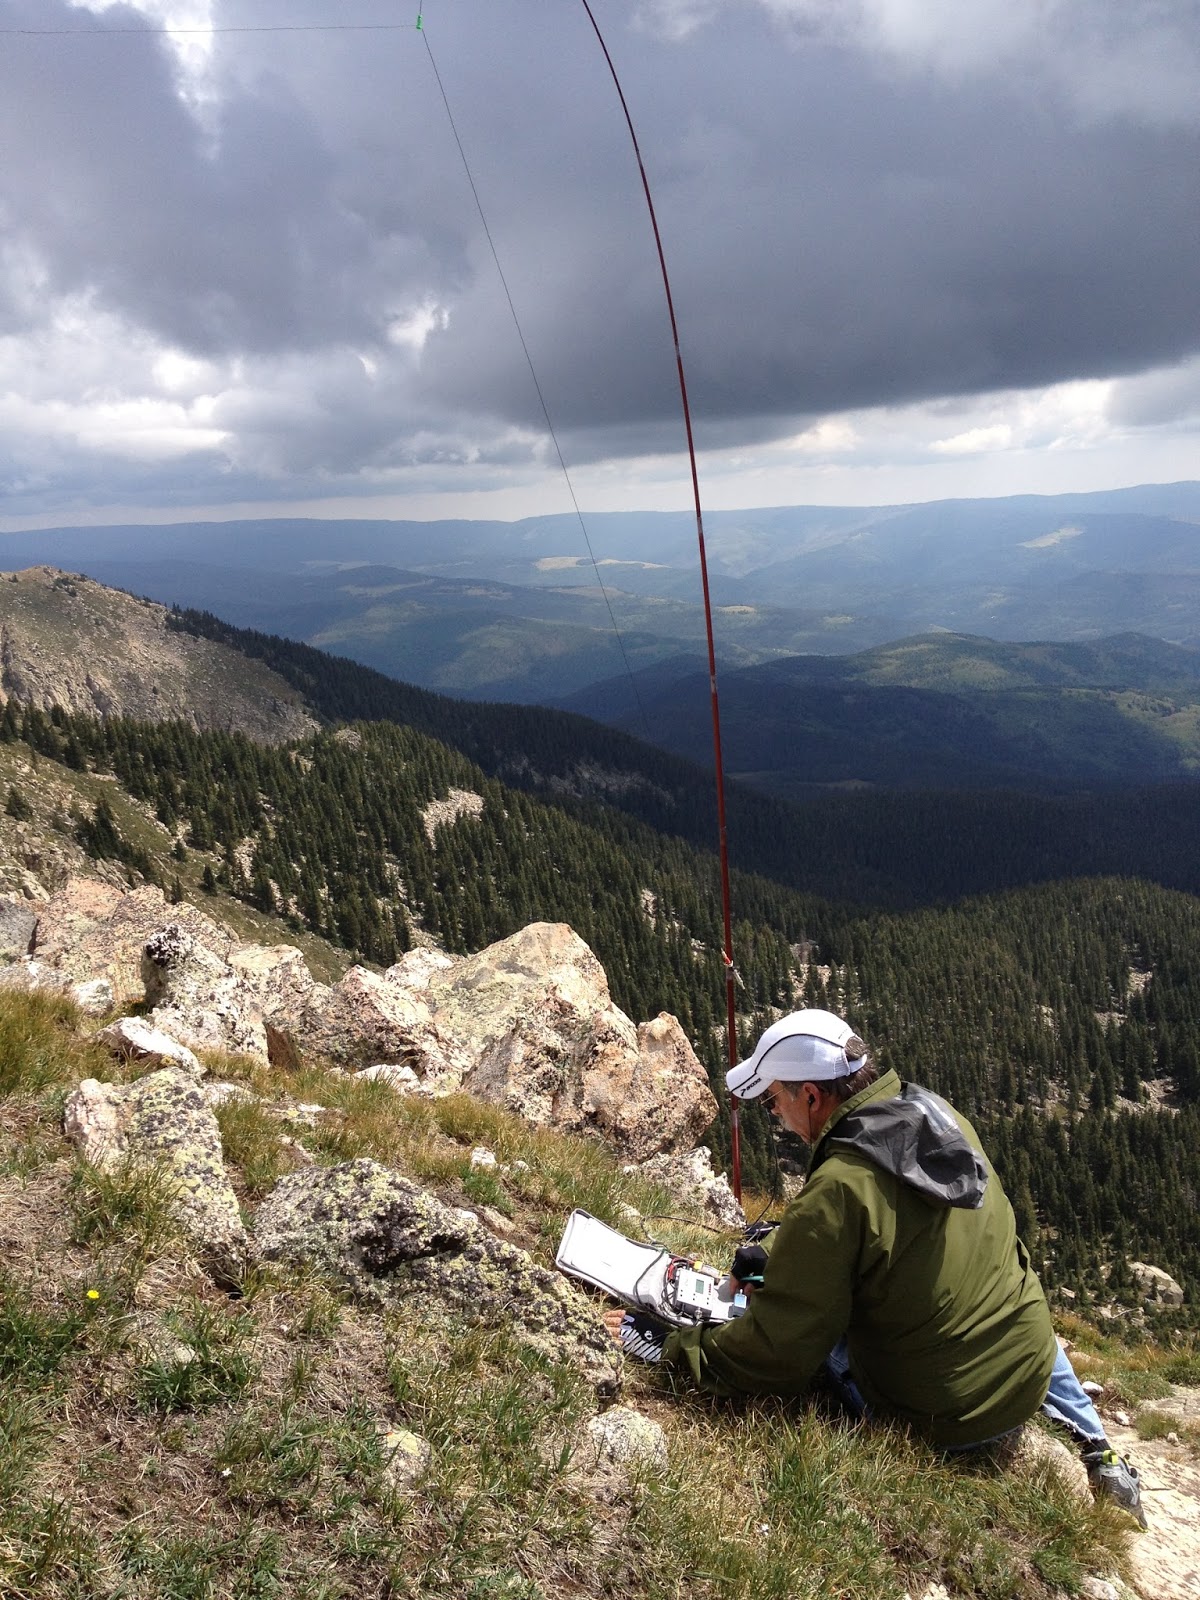
We met at 6:20 am local time and headed for the Trailhead near the ski resort outside of Santa Fe. The day dawned with a partly cloudy sky, not a particularly good sign. We were on the trail at 7:12 am. The trail is a widely used trail, especially at the lower elevations. The trail took us through the forest, across streams and up and down inclines of varying difficulty, however, no one part of the hike is tough. It’s just long. To make a long hike story short, we summited around 11:10, so four hours up the mountain.
We decided, in the interest of time since clouds were building, we would only erect one antenna and take turns operating. After setting up the pole, my job, John deployed the wire. I quickly turn on my 2m radio to hear Alan, NM5S, calling John. I answered and had my first QSO. Alan had camped at Spirit Lake overnight and was checking on us. After we signed, Fred, WS0TA, called. He was on Elk Mountain, another 10 pointer across the valley as were NM5SW and K5RHD. The local S2S’s were in the bag. Of course John worked these guys as well.
John started on HF to mixed results and after knocking off a half dozen or so QSO’s passed the antenna to me. Over the next 6 minutes I managed 9 more QSO’s on 20m before John took another run. The clouds were building, we were 7.5 miles from the truck; it was time to go.
 |
| AD5A Operating from Santa Fe Baldy |
 |
| K1JD on Santa Fe Baldy |
The trip down was uneventful, just long. As always a nice walk through the forest is better that most anything else you may want to do to relax, so John and I enjoyed the walk and had several good, long conversations on numerous topics. There was lots of thunder and rain clouds around us, but not a single drop of rain fell on us. It was a grand time. We got back to the truck at 3:23 pm, 8 hrs 11 mins on the trail, including the activation, but 10 points in our pocket.
This was a great trip, four days, four summits and 36 points. I can’t wait to do it again.
Busy Days, Fun Days, Two Summits in New Mexico
It have been a very busy couple of weeks. For the two or three of you that follow my blog, you have probably noticed the recent silent period. Worry not, I haven't been slacking on radio adventure. As some of you may have noticed, I have been activating a few summits around New Mexico. Well my wife an I have looking for a vacation home in Santa Fe. We weren't in any hurry and wanted to find just the right spot. Well, we found it and spent last week buying it and furnishing it. It is in a non-ham friendly neighborhood, but that makes for more of a challenge. My plan is to do most of my radioing outside anyway. There are summits galore. While I was there tending to moving-in activities I did find time to activate a couple of summits. Below are some brief summaries.
Glorieta Mesa W5N/PW-032 August 16, 2013
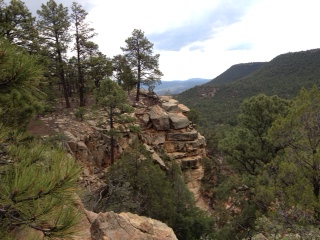
This was my first solo summit. I've done summits with other activators and my wife often does the hike with me, however this time I was on my own. Glorieta Mesa is an 8 point summit whose elevation is just over 8,000 ft. Finding the route required a little research but the SOTA website is very valuable in finding routes if previous activators have uploaded their activation notes. Such was the case here and I was able to get two sets of coordinates, the first directed me where to park and the second pinpointed the previous operating location of another activator. Given those two points the hike was fairly straight forward. Only about 300 feet elevation gain over 1.5 mile climb isn't too bad.
I used my GPS unit with it's TOPO map to navigate to the activation zone. There is no trail per se on this climb. I would classify it as a minor bushwhack. While there are no trails the forest is very walk-able with a few brushy areas that you have to walk through, but not bad.
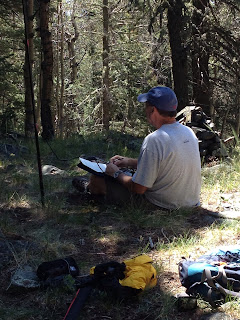
There were some very nice views on the way to the top as evidenced by the picture to the left.
Once on the top I used my ATS-4 and my modified Buddi-Stick vertical. Conditions were decent and after couple of CQ's I had a nice SOTA Chaser pile-up. I managed to work 18 stations in a 20 minute span working stations Coast to Coast.
A Chaser pile-up is the ultimate QRP thrill in my opinion. You are operating a station that you carried up the hill on your back, using a portable antenna and other stations are actually chasing you. The signals were loud and I was getting some 569 and 579 reports.
Glorieta Mesa W5N/PW-032 August 16, 2013
This was my first solo summit. I've done summits with other activators and my wife often does the hike with me, however this time I was on my own. Glorieta Mesa is an 8 point summit whose elevation is just over 8,000 ft. Finding the route required a little research but the SOTA website is very valuable in finding routes if previous activators have uploaded their activation notes. Such was the case here and I was able to get two sets of coordinates, the first directed me where to park and the second pinpointed the previous operating location of another activator. Given those two points the hike was fairly straight forward. Only about 300 feet elevation gain over 1.5 mile climb isn't too bad.
I used my GPS unit with it's TOPO map to navigate to the activation zone. There is no trail per se on this climb. I would classify it as a minor bushwhack. While there are no trails the forest is very walk-able with a few brushy areas that you have to walk through, but not bad.
 |
| On The Way Up |
Once on the top I used my ATS-4 and my modified Buddi-Stick vertical. Conditions were decent and after couple of CQ's I had a nice SOTA Chaser pile-up. I managed to work 18 stations in a 20 minute span working stations Coast to Coast.
A Chaser pile-up is the ultimate QRP thrill in my opinion. You are operating a station that you carried up the hill on your back, using a portable antenna and other stations are actually chasing you. The signals were loud and I was getting some 569 and 579 reports.
View from the Top
Operating Position
I was behind schedule, so I called it quits after about 25 minutes on the air. It was a satisfying trip down the Mesa, mission accomplished. Exercise, portable QRP, Chaser pile-up and 8 Activator points.
Thompson Peak W5N/PW-013 August 17th, 2013
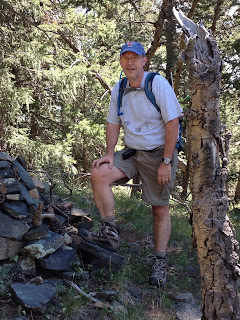
Thompson Peak is a 10 point peak with an elevation at 10,554 ft. To get to the trail head you have to travel a 4WD road for ~15 miles. Once at the trail head the hike is fairly straight forward. The trail is easy to follow. There are some ups and downs on the hike before you get to the summit so its's not just an straight up and straight down hike. The trail is a little over 1.5 miles to the summit with a net 700 ft. climb, but because of the up and down nature of the trail the gross elevation gain might be twice as much.
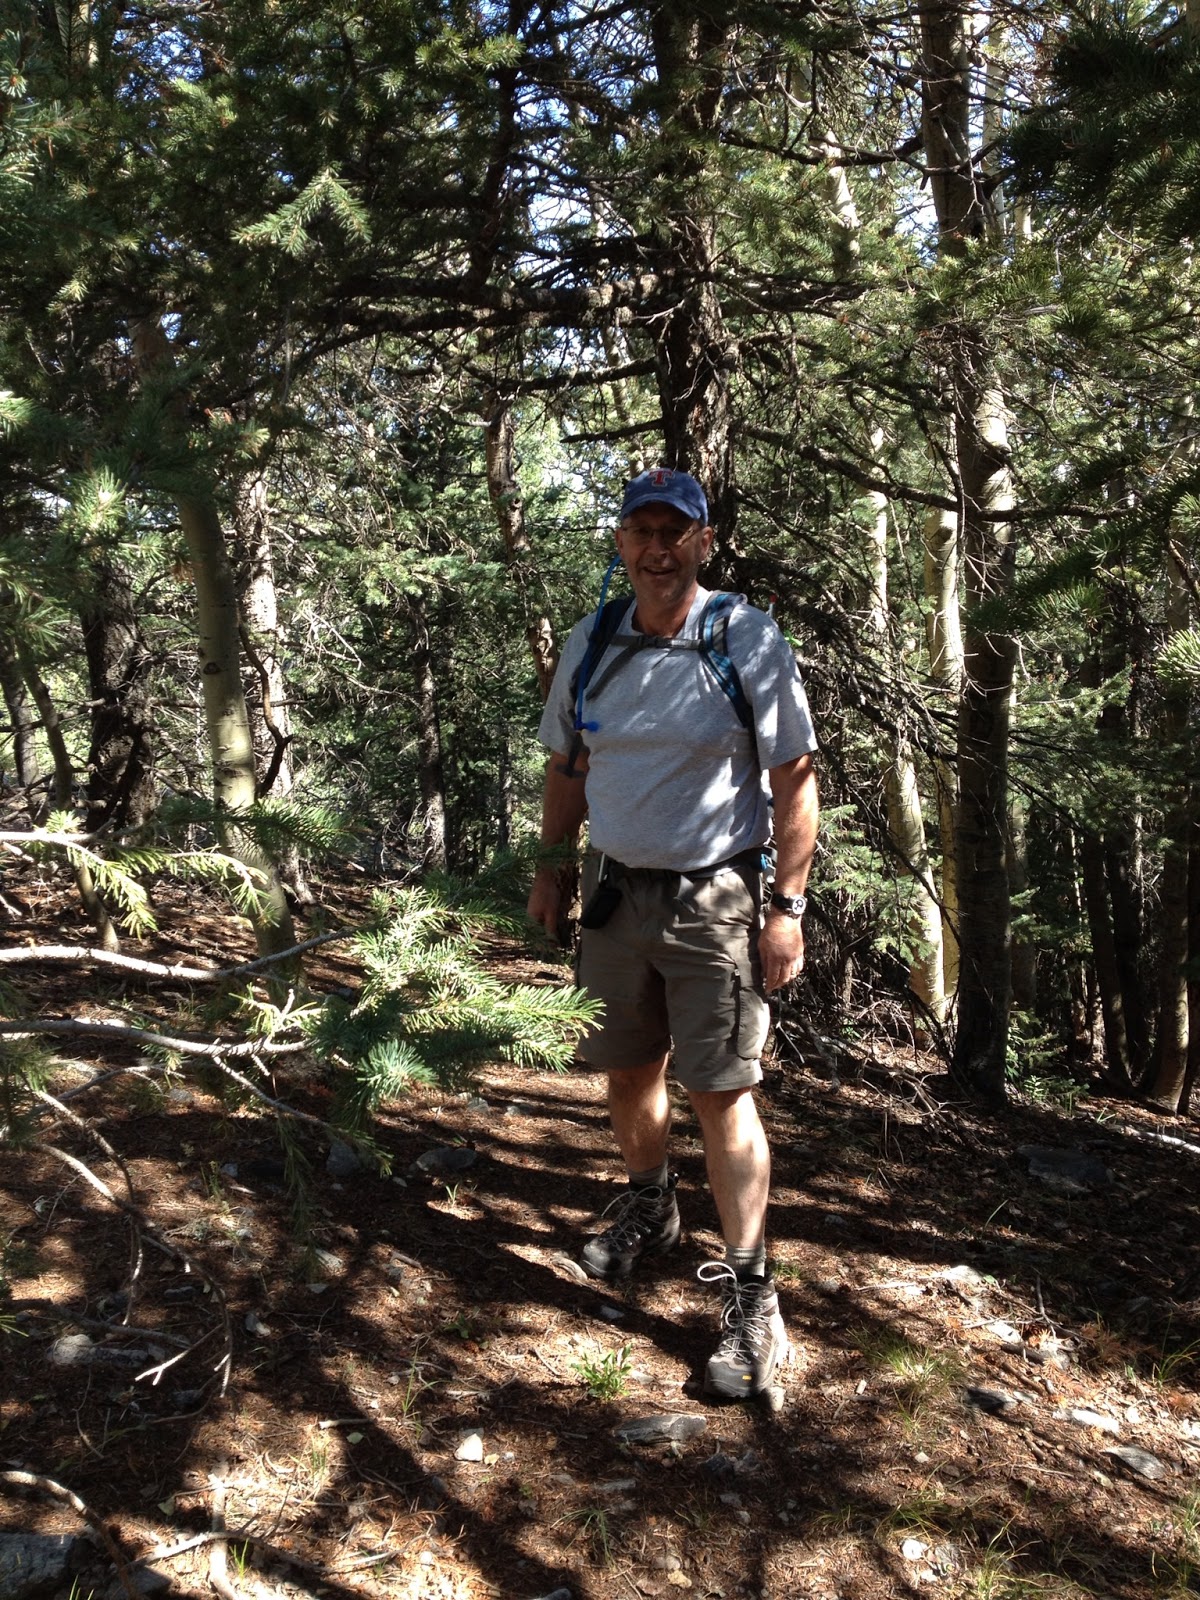
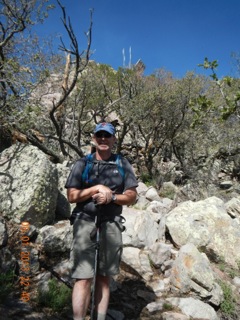
AD5A on the Trail
My old friend and ex-ham Jeff accompanied me on this hike. A nice hike in the forest with an old friend is lots of fun. We enjoyed the hike and before we new it we were on the summit.
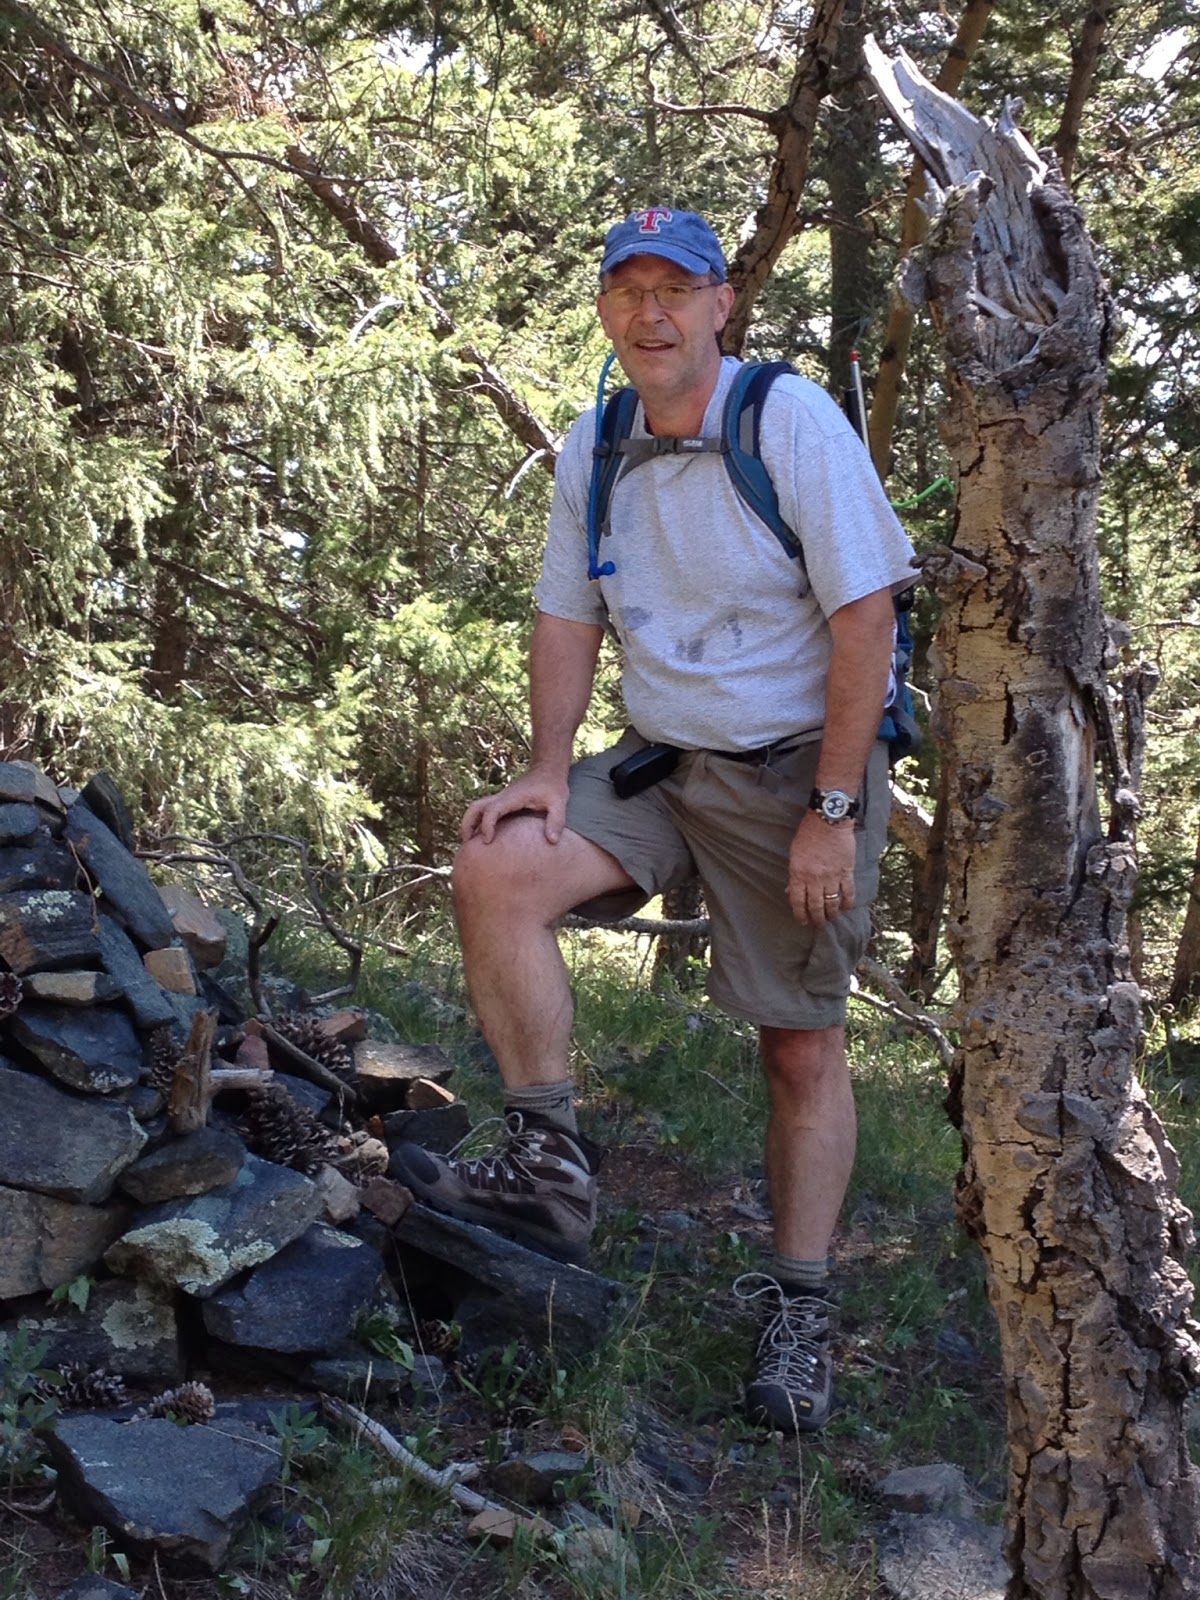
Summit Cairn
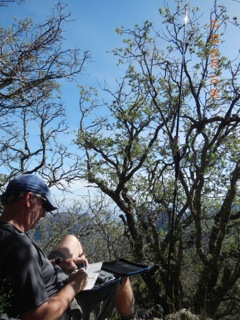
I used my trail friendly 10m/20m/40m/ EFHW antenna. I used my 21 foot collapsible carbon fiber pole to put the end of the wire over the highest branch I could reach and then used the pole as a support for the other end of the antenna. In no time I had a loud pile-up. There was some QSB as K index was 4, but I made 21 QSO's in ~30 minutes, all on 20 meters. I called CQ on 40m, but no joy there.
Operating from Thompson Peak
After several unanswered CQs, it was time to go. After packing up the station we headed down the hill, another mission completed and 10 more activator points on the scoreboard.
The nice thing about these two activations was that after I got down, I was able to go to my new home in Santa Fe rather than a hotel room. That was a first as well. My home QTH is 380 miles from the closest 10 pointer, so travelling is a must if you are to activate summits.
So, look for a few more New Mexico summits from me.
My Backpack Progression
A lot is written in the SOTA Blogosphere about backpacks and which one is the ultimate one for treks into the wilderness to operate portable. What can be quickly be deduced from these articles is that the ultimate backpack is a matter of taste and philosophy. Will you want to account for every possibility or have a quick exit strategy should something go wrong? Your philosophy can be driven by the circumstance, e.g., if I live in the mountains I am quick to abandon a summit attempt as I can always do it tomorrow. However, if I am in the mountains on a vacation or otherwise limited schedule, I might be prepared to endure more in-climate weather to get a summit activation in. Each philosophy dictates a different approach.
As with any activity the more experience you get, the more refined your approach becomes and so it has been with me. My first activation was last March. I took my KX3 with an FT-817 as backup, an Alexloop, a Buddistick, several coax jumpers (BNC - PL-259, BNC - BNC and other combinations just in case), a pound of trail mix and several bottles of water. All this for a 3.5 mile round trip. I didn't even want to weigh it.
As with any activity the more experience you get, the more refined your approach becomes and so it has been with me. My first activation was last March. I took my KX3 with an FT-817 as backup, an Alexloop, a Buddistick, several coax jumpers (BNC - PL-259, BNC - BNC and other combinations just in case), a pound of trail mix and several bottles of water. All this for a 3.5 mile round trip. I didn't even want to weigh it.
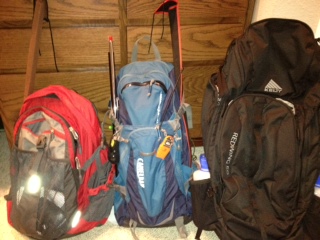
Pack Evolution
I started with the black Kelty, then the red North Face
and finally I've progressed to the CamelBack Fourteener in the middle
I started with a big pack and I filled it up, which is a big mistake. So I realized maybe I should downsize a little. So I began to rationalize what I carried. I realized that the KX3, while a very nice radio, is a lot to carry in both weight and bulk. I am really more of a CW guy, so I was carrying around a lot of capability that I didn't need. I owned an ATS-4 which weighs a few ounces and is a CW only rig with 5 bands. Also, the Alexloop is an effective antenna, but it's bulky and takes a lot space in a pack. For relatively long hikes, it's too much. The problem with bulk is that it makes you get a bigger pack and human nature dictates that you fill it up, so you unconsciously take more stuff. For an antenna I went to a trail friendly EFHW 40/20/10 supported by a carbon fiber fishing pole that telescopes to 21 feet.
If I am on a drive-up/walk-up summit, I might carry some of the bulky stuff because it's easy. I recently used the Alexloop on Mt. Locke because I didn't have to carry if far, sot the situation can dictate a different configuration.
The other consideration is water. You should get a pack that allows you to insert a water bladder with a drinking tube accessible to you while you are hiking. This not only allows you to drink on the go, it is a better way to carry water and eliminates the need for bulky water bottles.
As you can see above I have continually downsized my pack. The CamelBack Fourteener is about 1/3 the capacity of the Kelty that I started with. Below is what I carry.
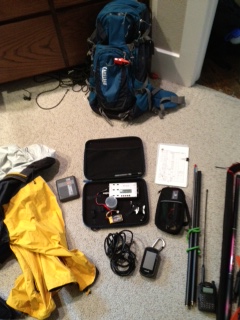
Typical Activation Load
My radio is in an iPad portfolio along with the power supply, paddle and ear phones. I carry two antennas, a modified Buddi-stick and a carbon fiber telescoping fishing pole with an EFHW antenna, VHF radio, coax, GPS, log, first aid kit and rain gear. The pack above weighs about 9 lb. The bladder in this pack holds 100 ounces of water (gallon ~ 128 ounces). I been on an activation in the heat that was 9.5 miles round-trip and I had water left over, so you don't have to fill it up every time. Without water and without any food/snacks the above weighs, including the pack, about 9 lbs. I do have a redundancy with the antennas, but that is to allow for different conditions and what I have time for on the summit. If I lived in the mountains, I would only take one antenna.
I have climbed Mt Sherman, 14,036 feet and Emory Peak, 9.5 mile round trip using this pack and I haven't lacked anything that I needed.
However the game continues, I am still looking for ways to cut back.
Emory Peak Activation
Emory Peak (7,825 ft) is the highest point in Big Bend National Park in Texas. As previously posted I had activated Mount Locke in the Davis Mountain the day before. Mt. Locke was a relatively easy activation , but I would earn my points and more on Emory Peak.
For those not familiar with the Summits on the Air (SOTA) program there are bonus points added for activating a summit either during the winter in cold climates or during the summer in hot climates. West Texas is definitely a hot climate. Emory Peak is a 10 point summit (maximum), but activating in the summer months is worth 3 extra bonus points. On the drive from Mt. Locke to the Big Bend area temperatures hovered between 99 F to 101 F. The temperatures would moderate a little at the Chisos basin where we were staying, although not a lot. The Chisos Mountain Lodge is around 5500 feet in elevation, but the high temperatures during this time of year are in the low 90's.
The Chisos Mountain range within Big Bend National Park is a beautiful place. Emory peak may be the only peak that is climbable, but even then, you must climb the last 35 feet using some, not so easy, rock climbing techniques. I would not recommend it if you aren't experienced.
The trail to the summit of Emory Peak is a very nice trail. It is well marked and maintained. The only issue is that the round trip is 9.4 miles and there is 2,500 feet of elevation gain. Given that distance the elevation gain is not particularly difficult, if you are accustomed to mountain hikes, but it is a long way.
Emory Peak Trail
The Peak is in the background
We started relatively early, 7:30 am. I wanted to start sooner, but my XYL was nervous about the warning about hiking too early. The Big Bend National Park and the Chiso's Mountains in particular have Mountain Lion and Black Bear populations. Both are sighted quite often, but Mountain Lions in particular are active in the early morning. We had to check out of our hotel room at the Chisos Mountain Lodge by 1:00, so we needed to depart the summit by 10:30 by my calculation to get back in time. I figured 2.5 hours up, 30 minutes to operate and then 2 hours back down. If my calculations were correct, 7:30 was the latest we should start. My wife and I are in relatively good shape, so I felt 2 miles an hour was a doable pace considering we were gaining 2,500 feet.
 |
| Cris, my XYL, just below the summit |
 |
| AD5A just below the Summit VHF Antenna above are on the Summit |
The hike up wasn't too bad. Most of it is in the shade as the sun comes up over the mountains. It is a nice hike through a mostly forested trail. The last mile up was exposed to the sun, but there were still patches of shaded forest and the temps were bearable. We reached the summit around 10:00 am, right on schedule.
From my research I know that there weren't any tall trees on the summit, so getting an End Fed Half Wave antenna high enough would be an issue. I also know that time would be short with a hike this long, in the heat, so I needed to be able to deploy quickly. I decided on the Buddi-stick vertical. I only planned to operate on 20m, given the short time, so the vertical made sense.
 |
| Emory Peak Shack You can see the Buddi-stick if you look closely |
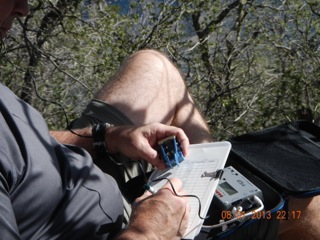
So I quickly deployed the station knowing that I would only have a short time to operate. I propped he vertical against a tree limb and then extended the counter poise over another limb. I took out my SOTA notebook station, seen above, plugged in the LIPO battery to ATS-4 QRP radio, grabbed my Porta-Paddle and I was ready to go. I called my first CQ at 10:13 am CDT. My good friends from Santa Fe, NM, Doc, K7SO and John, K1JD were monitoring my advertised frequency of 14.061. Doc answered my QRL? :-) John quickly followed. What then happened was SOTA bliss. The vertical was working well and in the next 15 minutes I made 21 QSO's. I wished that I had more time, but we needed to get off the mountain, both to beat the heat and to avoid an additional day's charge on our hotel room. So I took the station down as quickly as it went up, packed it all up and Cris and I headed down the mountain. We didn't get away until 10:45, a little behind schedule.
The trip down was uneventful, just long and the last mile or so, the heat was getting just a little on the uncomfortable side. However we were fully prepared, we carry 100 oz Camel Back water bladders in our pack, so we stayed hydrated. We made it back to our room at 12:55 pm. The good people at the Chisos Mountain Lodge let us shower and clean up before check out without an additional charge. I personally think it was self serving on their part as they didn't want us eating in their restaurant smelling like we just came off the trail:-)
This was a challenging hike, but completing it left us feeling good that we can still do it. The radio portion of the adventure came off without a hitch, so it was a good day in the Chisos.
Lighter, Easier to Pack, Telescoping Pole
I've been busy with day job, rock band and some of my other hobbies, but I've been meaning to write about this subject for a while. As I have been analyzing my approach to portable QRP SOTA operations I have been tweaking and lightening my load. One of the major advances is the telescoping pole that I use. As most of you know, Locktite has a very nice set of poles, up to 33 feet as does SOTA Beams. However, the issue is that when collapsed they are still close to 4 feet in length and 2 -3 lbs in weight. This means the pole is fine to carry in your car, but it is awkward to carry up a 14,000 mountain. So what to do?
I found, through KT5X, a supplier of Japanese made carbon fiber, telescoping fishing poles. It telescopes to 21 feet, weighs 7 oz. and collapses down to 25 inches. Brilliant. Now, these are a little pricey, from $75 -$120, but if you are carrying it for a few miles, the price amortizes nicely:-).
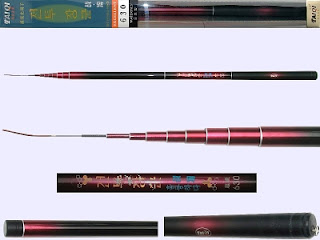
I found, through KT5X, a supplier of Japanese made carbon fiber, telescoping fishing poles. It telescopes to 21 feet, weighs 7 oz. and collapses down to 25 inches. Brilliant. Now, these are a little pricey, from $75 -$120, but if you are carrying it for a few miles, the price amortizes nicely:-).
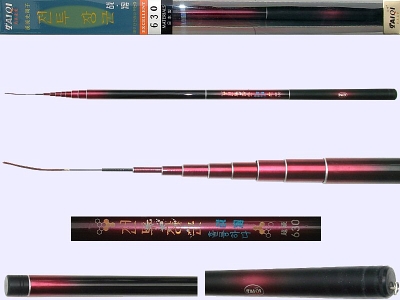
Carbon Fiber Telescoping Poles
There are a couple of caveats with these poles. There is no tip guide and the ends are a little flimsy. However if you wrap the top three sections with rod guide thread and coat it to strengthen the tip, it should suffice. You will also need to add very small rod guides, I used 3 mm guides, or buttons, yes buttons, to route the antenna wire down the pole. The buttons, two hole buttons, will need to be of varying sizes so that each will go further down the pole. The second hole of the button is what you thread the antenna wire through. If you use rod guides they should be mounted at the top of the last 3 or 4 sections so that the pole will still collapse. Once you start pondering this, while looking at a pole, it will make more sense. More on this in a later post.
I've found the best way to deploy an EFHW, where there are trees is to use the pole to place the end of the antenna, wrapped around a winder, over the highest branch you can reach with the pole. Let the winder fall to the ground and tie it off. So now the end of your antenna is 20+ feet high over the branch that you selected. Then thread the other end of the antenna wire down your pole and extend the antenna until the end of the antenna is a couple of feet off the ground, threaded down the pole. Use a velcro wrap to secure it, attach your matching device and you're good to go. I often prop my pole on the limbs of another tree, so there is no need to guy the pole.
So to sum up, this lightens the load considerably and the deployment approach eliminates the need to throw a line or use a sling shot to try to get it over the right branch.
I will post some pictures of my pole in a later post. The poles are available at http://www.allfishingbuy.com/
in a variety of lengths and wall thicknesses.


