 |
 Arduino CW decoder – Conclusion
1. Line in or Microphone input
2. Easy to read display – all boxed neatly
3. An LED that shows the Zero beat
4. Easily accessible Reset Switch
5. Powered from a 12v supply.
I did want to create a usable PCB, something that could be used by a student or someone wanting to build the kit. So using the Fritzing application I set about laying out a circuit board.

This was my very first attempt at creating a PCB , so nerves were a wee bit on the tense side. I also wanted to box the project, so my rationale was to find a box first to work out the physical dimensions of the finished project.
As with the Vero Version – I created a layout that would fit on top of the UNO.
After submitting the design, and waiting a week I managed to get hold of 3 boards. They looked awesome. All white and exactly how I laid them out.
I did make 2 small errors on these boards. The first issue was sitting the capacitors a bit too close to the LM567 IC. That is an easy fix for the next version. But the 2nd and more serious issue is I forgot to ground 2 caps. They were floating and in parallel. I did fix this by attaching a wire to ground from one of the caps. That solved the issue, and I have already corrected the fault for the next batch of boards.
2 further observations of the boards & the project as a whole have highlighted 2 further improvements to the project. The location of the pins for the display / reset switch and audio OUT should be on the other side of the board. That would make a far better layout. Also adding in an audio oscillator / switch & plug to insert a key on the oscillator – then feed the output to the Arduino would immediately mean this kit could be used as a practice oscillator too. – that would show the letters as you transmit them out.
So here is a review of the project so far, and what I intend to do with the project going forward.
Dan Trudgian, MØTGN, is a regular contributor to AmateurRadio.com and writes from Wiltshire, England. He's a radio nut, IT guru, general good guy and an all round good egg. Contact him him here.
Amateur Radio Newsline Report 1972 August 14, 2015
- ANNIVERSARY OF THE INTERNATIONAL RECIPROCAL LICENSE AGREEMENT
- REMEMBERING THE STORMS OF 2005
- NAMES IN THE NEWS
- AUTHOR, AUTHOR,PART 2
- COORDINATING SATELLITES
- EUROPEAN MICROWAVE WEEK
- FINAL CHECK FOR FIELD DAY
- ENIGMA AWARD
- DXING WITH WHEELS
- IN SEARCH OF TELEMETRY REPORTS
- THE U.S. AND CUBA TEAM UP
- THE WORLD OF DX
- LONG DISTANCE CALLER
Global Overlay Mapper ham radio mapping suite gets major update

The Global Overlay Mapper has been around for some years. The previous version was built as a series of browser pages within a Windows shell, and reached the end of its life once Window introduced ‘User Account Control’, making remote updating too difficult. At the time I was away from Ireland, back-packing around the world as a pro-travel photographer (http://www.gnomeplanet.com/) for 8 years.
Now back home again, I decided to completely re-write the Global Overlay Mapper as a proper Windows program that was compatible with Win 7, 8, and 10. Its 38 maps were updated to include all the new countries, prefixes, flags, and IOTA entities. (The Global Overlay Mapper is the only ham map-suite that displays all IOTA entities.) As a proper Windows program, I could now add a variety of features that I’d been planning for some time. You can now geocode a Cabrillo or ADIF log – in other words, you can add positions to each QSO and then plot your log on a map, thanks to the nice guys at HamQTH.Com. You can plot lists of positions or Maidenhead Locators. You can see, display, and plot callbook information. You can see real-time NCDXF Beacon transmission schedules, and plot the beacons.


The Global Overlay Mapper is ideal for every ham, no matter where their special field of interest might be. The local ragchewer, the HF and VHF dxer, International or Local Contester, Field Day Team, Emergency Communications Specialist, DXCC and Award Hunter, IOTA expeditioner; all will find the Global Overlay Mapper an important tool for everyday use. The Global Overlay Mapper is now shareware – it works for 30 days, then requires registration, which costs just USD15. If you registered a previous version, you can upgrade for just USD5.
To find out more, and download your copy, please visit:
http://www.mapability.com/ei8ic/gom/intro.php
Tim Makins, EI8IC, is a special contributor to AmateurRadio.com. Contact him at [email protected].
The LM386 Pixie challenge

The Pixie 2 is this minimal transceiver which I and many others have played around with and had lots of fun with. My 80 m version is shown below, but right now it is very popular with some incredibly cheap Chinese ones on sale on Ebay and other places.
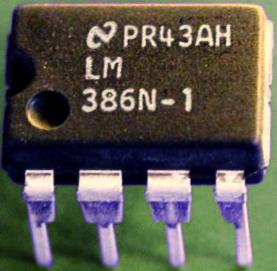
The Pixie 2 uses the versatile LM386 amplifier for its audio output. I have shown previously on this blog how its gain can be boosted and how it can implement a CW filter, and also how the muting can be improved. However, during transmission, the LM386 just sits there idle, although it can be used to amplify a sidetone from an external oscillator.
But I’m sure the old 70’s LM386 can do better than that. Despite its age, recently some pretty amazing uses of this chip have been demonstrated. It can be used as a regenerative receiver at least up to medium wave frequencies and it can also be used as an envelope detector/demodulator.
The LM386 challenge is this: Is is possible to implement a sidetone oscillator for the Pixie using only the LM386 with as few other components as possible? The output level needs to be controllable in order to make it comparable to that of the Pixie in the receiver mode.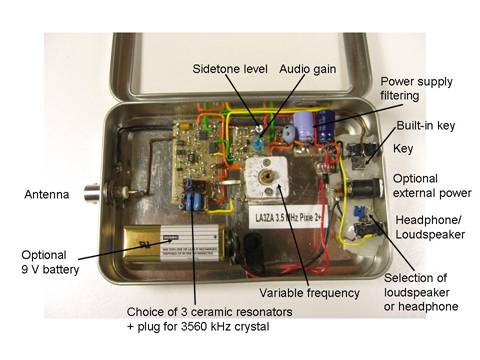
The best data sheet for the LM386 seems to be the one for NJM386 from New Japan Radio Co. It is, as far as I know, the only one which shows the various muting circuits including the one using pin 7 which I have explored. It also shows the LM386 as an oscillator: both a sinusoidal and a square wave one.
In order for the LM386 to be useful as a sidetone oscillator, I believe that the oscillation must take place in the input circuitry. That seems to be the only way to ensure that the output doesn’t come out at a blasting full rail-to-rail swing as in the square wave oscillator example in the data sheet.
By the way, the data sheet referred to above is also the basis for the improved Spice model for the LM386 that just was developed. It came partly as a response to my complaint over how poor the present one was. Maybe the new Spice model, developed by EasyEDA, could help solve the LM386 challenge?
Sverre Holm, LA3ZA, is a regular contributor to AmateurRadio.com and writes from Norway. Contact him at [email protected].
The LM386 Pixie challenge
The Pixie 2 is this minimal transceiver which I and many others have played around with and had lots of fun with. My 80 m version is shown to the right, but right now it is very popular with some incredibly cheap Chinese ones on sale on Ebay and other places.
The Pixie 2 uses the versatile LM386 amplifier for its audio output. I have shown previously on this blog how its gain can be boosted and how it can implement a CW filter, and also how the muting can be improved. However, during transmission, the LM386 just sits there idle, although it can be used to amplify a sidetone from an external oscillator.
But I’m sure the old 70’s LM386 can do better than this. Despite its age, recently some pretty amazing uses of this chip have been demonstrated. It can be used as a regenerative receiver at least up to medium wave frequencies and it can also be used as an envelope detector/demodulator.
The LM386 challenge is this: Is is possible to implement a sidetone oscillator for the Pixie using only the LM386 with as few other components as possible? The output level needs to be controllable in order to make it comparable to that of the Pixie in the receiver mode.
The best data sheet for the LM386 seems to be the one for NJM386 from New Japan Radio Co. It is, as far as I know, the only one which shows the various muting circuits including the one using pin 7 which I have explored. It also shows the LM386 as an oscillator: both a sinusoidal and a square wave one.
In order for the LM386 to be useful as a sidetone oscillator, I believe that the oscillation must take place in the input circuitry. That seems to be the only way to ensure that the output doesn’t come out at a blasting full rail-to-rail swing as in the square wave oscillator example in the data sheet.
By the way, the data sheet referred to above is also the basis for the improved Spice model for the LM386 that just was developed. It came partly as a response to my complaint over how poor the present one was. Maybe the new Spice model, developed by EasyEDA, could help solve the LM386 challenge?
Sverre Holm, LA3ZA, is a regular contributor to AmateurRadio.com and writes from Norway. Contact him at [email protected].
Perseids Peaking
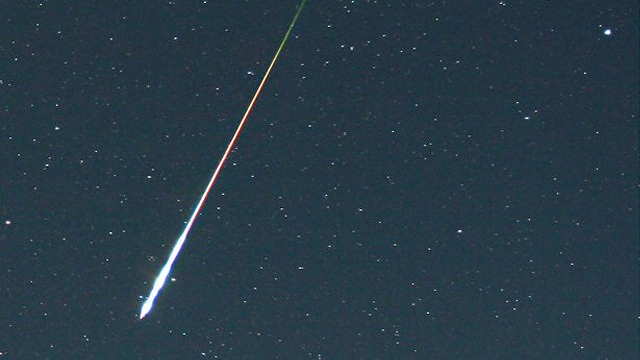
Nowadays, using FSK441 WSJT software, a lot of good fun can be had most non-shower mornings on meteor scatter, just using random meteors. My experience when using the same software during an actual shower has been disappointing, as often the signals are too strong or too long for the software which is looking for shorter, weaker signals. During a large shower such as the Perseids, where typical burns can be quite lengthy, my own experience has given better results with good old SSB or fast CW.
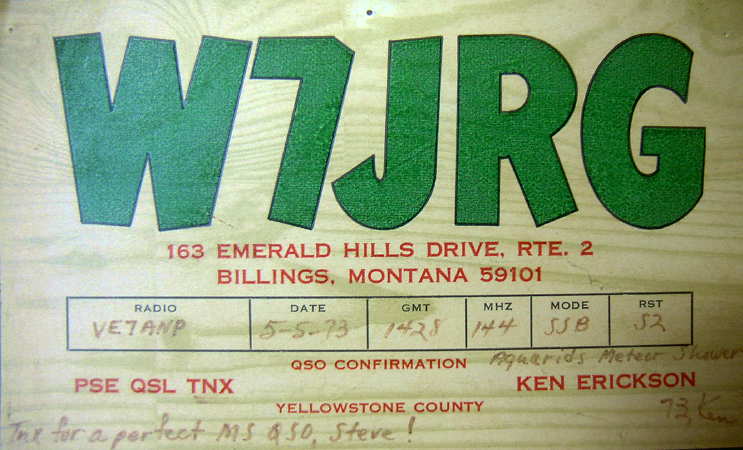
I clearly recall my first-ever meteor scatter QSO, made during the May Aquarids, back in the early 70's. I had arranged a sked with Ken, W7JRG, in Montana. I had grown up reading about Ken's VHF exploits in both QST and CQ as a teenager and was excited about the possibility of finally possibly working him. My station was homebuilt, using a 6360 transverter driven from my Heath HW-100, and feeding a homebrew 5894 amplifier with 1/4" copper tube plate lines. The amplifier produced just a shade over 100W output. My antenna, also homebrew, was a 24-foot 13 element Yagi ... probably not the best for meteor scatter although it worked well enough for me to ragchew every night with stations in Portland, Oregon on SSB.
A few minutes before our sked, I decided to make one final check of my system. Our sked was to be on SSB, using 15 second sequences. I keyed down at full-power and did a final tweaking of plate tuning and antenna loading, and unkeyed, back to receive mode after about 30 seconds of tuning up. My receiver immediately sprung to life with a very loud SSB signal, slightly off-tune. Thinking it was my local buddy, VE7BLF, calling me before the sked, I was surprised to hear a different voice ... it was Ken in Montana at S9++ ..."I've been holding my breath waiting for you to unkey there Steve ... thought you would never finish!"
Needless to say I was just as surprised as he was. We talked back and forth for about another 60 seconds before the burn finally dissipated and signals were gone. What a great introduction to meteor scatter, with the QSO completed before the sked even started! Ken later told me that of all of the meteor contacts he had made, it was one of his best ... I guess we just hit it right.
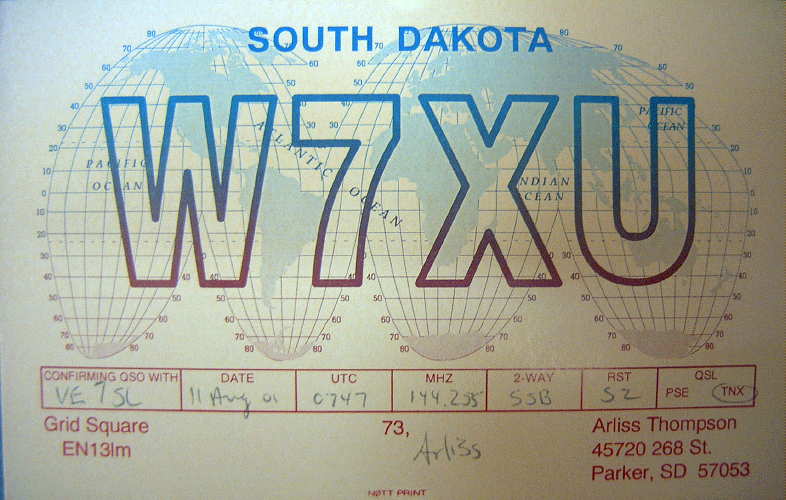
Of all the showers, I always found that the December Geminids was the best, even better than the August Perseids, at least for the North-South path. Having said that, my longest meteor contact was made during the Perseids, with Arliss W7XU in South Dakota ... just a shade over 1300 miles while running just 40W SSB to a 9el Yagi.
Good luck if you are doing some meteor scatter tomorrow or even if you are just watching the shower visually ... conditions should be ideal, if the skies are clear, as the very new moon's sliver does not rise until near dawn.
Steve McDonald, VE7SL, is a regular contributor to AmateurRadio.com and writes from British Columbia, Canada. Contact him at [email protected].
LHS Episode #152: Man Smart (Woman Smarter)
 Hello, ladies and gentlemen! It's time for another action filled episode of Linux in the Ham Shack. Topics for this episode include, women in technology, the Amateur Radio Parity Act of 2015, photo editors (of all things), databases for Linux hardware compatibility, ham radio-specific Linux distributions and much more. Thanks for spending an hour of your day with us. We appreciate all of our listeners. Also, don't forget to send us feedback. We'd love to hear from you.
73 de The LHS Guys
Russ Woodman, K5TUX, co-hosts the Linux in the Ham Shack podcast which is available for download in both MP3 and OGG audio format. Contact him at [email protected].
 Ham Radio Deluxe |
 W5SWL Electronics |
 Ham Radio Prep |
 KB3IFH QSL Cards  Hip Ham Shirts  HamRadioAuctions HamRadioAuctions Reliance Antennas Reliance Antennas Enigma Shop Enigma Shop |  morseDX  Ni4L Antennas  R&L Electronics R&L Electronics antennas.us antennas.us QRV QRV |
- Matt W1MST, Managing Editor
