 |
 A review of the Elecraft K-Pod

There is a rocker switch that will allow you to smoothly switch from VFO A (LED D1 lights up) to B (LED D2 lights up) and then to RIT/RXT (LED D3 lights up) adjustments. The manual says that LED4 is user programable and you can actually control the on/off function of D1, D2 and D3 as well.
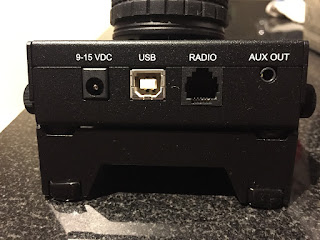
On the top of the K-Pod there are 4 connection ports:
- Auxiliary outputs that the manual says can be used for an external antenna switch, amplifier and so on.
- DATA connector is used to connect an RJ12 cable (supplied) to the K3.
- USB connector (USB cable is supplied) is used to interface the K-Pod with your PC for firmware updates and for what Elecraft calls "future" PC control.
- Power connector (cable supplies) can be used to supply the needed DC to the K-Pod and I say "can be used" because via a simple mod(parts supplied) to the K3 and K3S you can power the K-Pod via the DATA cable.
There were just some minor issues I have:
- The provided USB cable provided is 3 feet which I found a bit to short, even with the front USB ports on my PC 3 feet was still very tight fit.
- On first start up D4 on the K-Pod constantly stayed on. This was not normal and to correct this issue a Bata firmware had to be downloaded to the K3 or K3S if you have that model. I'm not to keen on loading Bata firmware as there could be some bugs with the software.
- I have been spoiled by Elecraft and how easy it was to upgrade their products with new firmware. With your rig or P3 connected to your PC via a USB cable and a couple of mouse clicks using the Elecraft utility software you were good to go. For some reason the firmware update procedure for the K-Pod is much different.
B. Connect the USB cable to your PC
C. While holding F1 and F4 on the K-Pod plug in the other end of the USB cable to the K-Pod.
D. You now start the K-Pod utility program and update it's firmware.
4. I found having the power cable and the RJ12 cable coming from the K-Pod a bit cumbersome. One of the main reasons for me doing the modification to the K3 so the K-Pod is powered via the RJ12 cable.
Mike Weir, VE9KK, is a regular contributor to AmateurRadio.com and writes from New Brunswick, Canada. Contact him at [email protected].
A review of the Elecraft K-Pod
There is a rocker switch that will allow you to smoothly switch from VFO A (LED D1 lights up) to B (LED D2 lights up) and then to RIT/RXT (LED D3 lights up) adjustments. The manual says that LED4 is user programable and you can actually control the on/off function of D1, D2 and D3 as well.
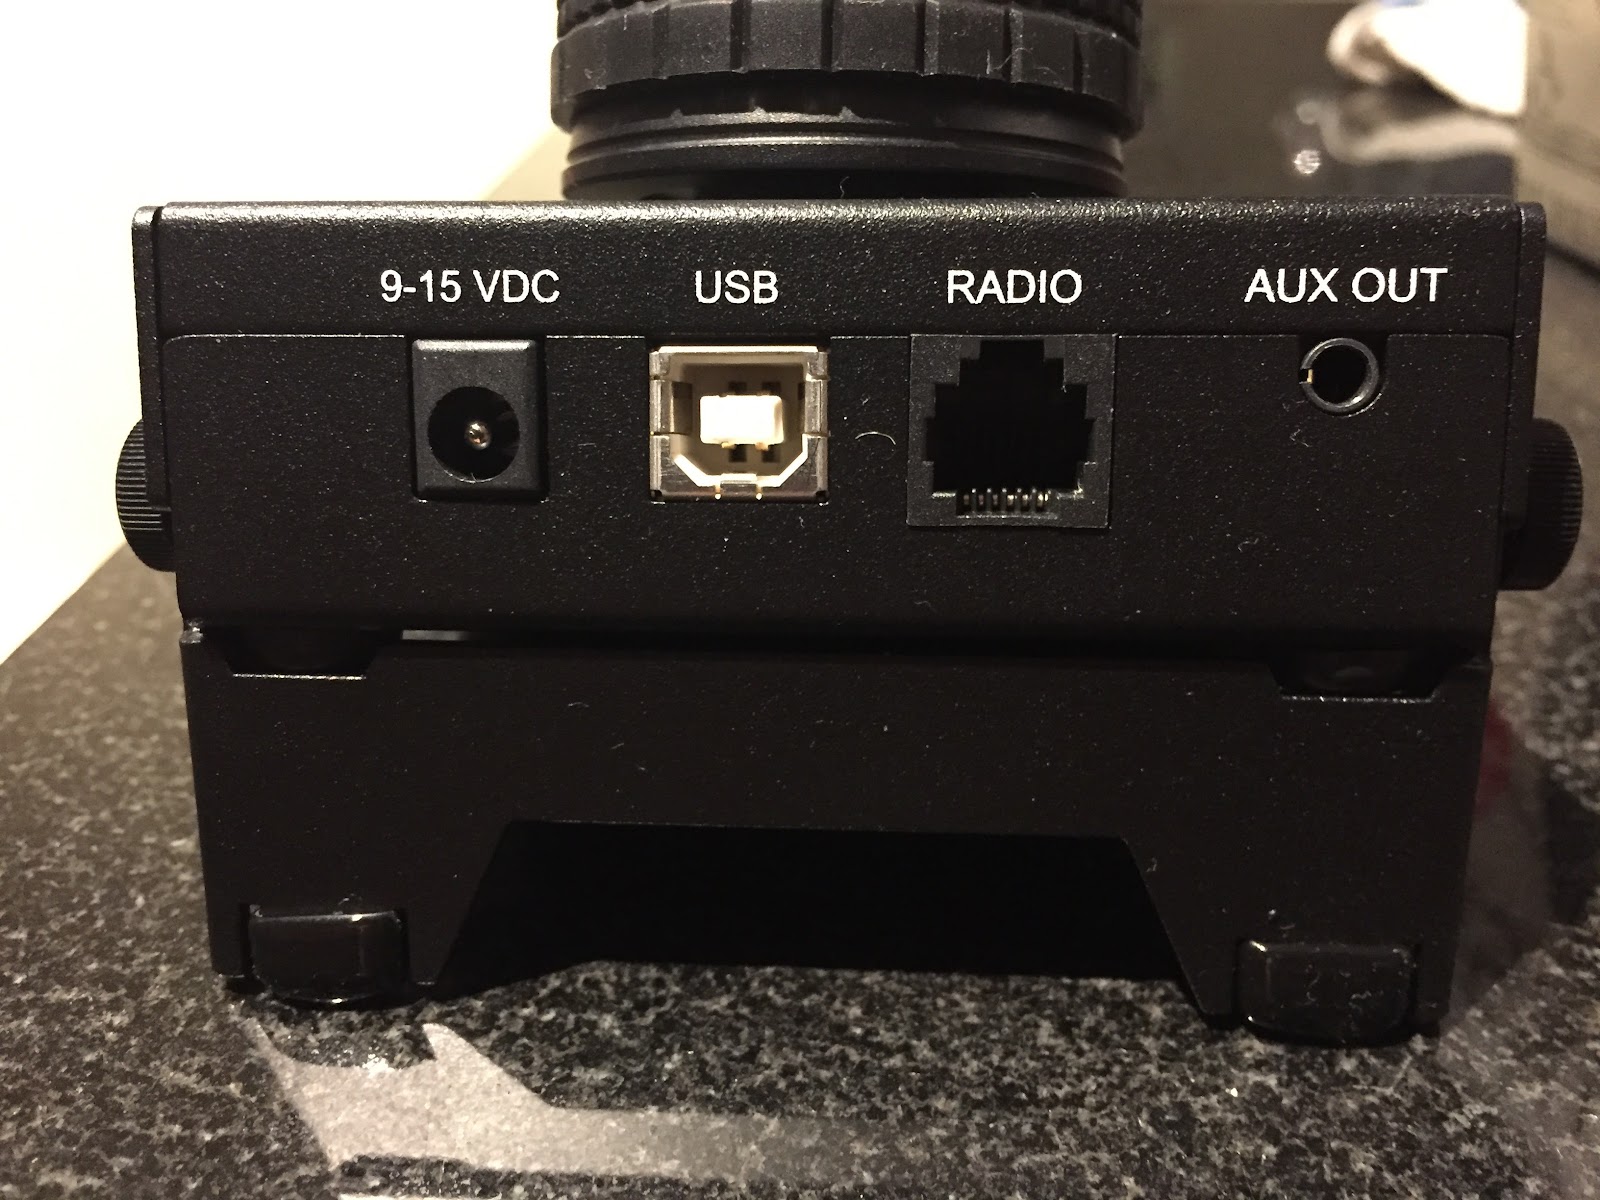
On the top of the K-Pod there are 4 connection ports:
- Auxiliary outputs that the manual says can be used for an external antenna switch, amplifier and so on.
- DATA connector is used to connect an RJ12 cable (supplied) to the K3.
- USB connector (USB cable is supplied) is used to interface the K-Pod with your PC for firmware updates and for what Elecraft calls "future" PC control.
- Power connector (cable supplies) can be used to supply the needed DC to the K-Pod and I say "can be used" because via a simple mod(parts supplied) to the K3 and K3S you can power the K-Pod via the DATA cable.
There were just some minor issues I have:
- The provided USB cable provided is 3 feet which I found a bit to short, even with the front USB ports on my PC 3 feet was still very tight fit.
- On first start up D4 on the K-Pod constantly stayed on. This was not normal and to correct this issue a Bata firmware had to be downloaded to the K3 or K3S if you have that model. I'm not to keen on loading Bata firmware as there could be some bugs with the software.
- I have been spoiled by Elecraft and how easy it was to upgrade their products with new firmware. With your rig or P3 connected to your PC via a USB cable and a couple of mouse clicks using the Elecraft utility software you were good to go. For some reason the firmware update procedure for the K-Pod is much different.
B. Connect the USB cable to your PC
C. While holding F1 and F4 on the K-Pod plug in the other end of the USB cable to the K-Pod.
D. You now start the K-Pod utility program and update it's firmware.
4. I found having the power cable and the RJ12 cable coming from the K-Pod a bit cumbersome. One of the main reasons for me doing the modification to the K3 so the K-Pod is powered via the RJ12 cable.
Mike Weir, VE9KK, is a regular contributor to AmateurRadio.com and writes from New Brunswick, Canada. Contact him at [email protected].
New Shack PC – Linux
The last few years, I have been using an old hand me down laptop for my ham radio activities. The old one had little memory, the battery that didn’t last very long, was starting to boot unreliably, even after a Windows reinstall, and a few other issues. So I bought an open box Dell laptop at a discount from a local retailer. It has 8GB of RAM and a 1 TB disk drive and i5 processor. While it’s not a top of the line laptop, it’ll work for what I have intended. Also the screen isn’t the highest resolution but since it’s dedicated to ham radio usage only it won’t be a problem.
My main goal with this project is to use Linux more for my ham radio activities. I now work professionally in the Linux world so I would like to carry that experience into my ham radio hobby. I am setting this up as a dual boot system, keeping Windows 10 that came on it, and then installing OpenSUSE Leap 42.2 as my Linux distribution. I know Ubuntu seems to be the most popular distribution, but I am most familiar with SUSE Enterprise Linux, so OpenSUSE draws on that experience. I run openSUSE 42.2 on my work laptop on a daily basis so I am very familiar with it.
I thought I would post about the steps I am taking to achieve this so if anyone else decides to do something similar, I will have shared what I went through. I will try to follow this up later with posts about using various Linux applications for ham radio like CQRLog, WSJT-X and other things I find useful.
I will use the Windows install for a few things. My old ham radio laptop was running Windows so I can duplicate it’s capabilities if needed. One of those jobs is some Windows software that I bought from RT Systems for programming my radios. I’ll eventually investigate Linux alternatives such as Chirp but that will be low on the priority list.
The first steps I took in the process are:
- Boot into BIOS/uefi and disable Secure Boot. I don’t need this.
- Boot up Windows, create user account, and fully make sure all updates are installed, and any initial setup.
- Make a Windows 10 recovery USB thumb drive. This is built into Windows 10.
- Download the restore image from Dell to restore the laptop if needed.
- Run the Windows Disk Cleanup utility to remove all unneeded files including any previous version of Windows left behind after the updates, and all update related files. I check all the boxes in the cleanup utility including system files.
- Defragment the C: drive. This is needed so I can shrink the C: partition
- Use diskmgmt.msc to shrink the main Windows 10 partition to about 450GB. That will leave about 430GB of free space to use for Linux installation. I had to disable system protection, pagefile and hibernation in order to get the drive to shrink to where I wanted it. These are unmovable files and might hamper the ability to shrink the disk. After shrinking, I reenabled all of those.
- VERY IMPORTANT STEP: Use Clonezilla to make a complete cloned backup of the entire disk drive so I can put Humpty back together if something bad happens or I make a mistake. This will backup all the partitions to a set of files on a USB drive, and allow me to completely restore the drive and partitions. I now have 3 ways to restore the system. Clonezilla backup, restore image I downloaded, and the Windows Recovery thumb drive I created.
- Install Dropbox as I’ll use that to transfer some things from the old laptop to the new one.
BACKUPS are very IMPORTANT as is the ability to UNDO something even if it means a full restore. NOTE: Clonezilla doesn’t backup empty space to the resulting backup is smaller that the drive that’s being cloned.
Now it’s time to install Linux. I made a bootable thumb drive from the openSUSE Leap 42.2 iso. This was done using dd on my work Linux laptop. The website to download openSUSE from is: http://www.opensuse.org. There are two openSUSE distributions. Leap is a point release and Tumbleweed is a rolling release and always at the bleeding edge. If you want something stable then Leap is the way to go. It’s also what I run on my work laptop as my primary OS.
I booted from the Leap thumb drive, and went through a normal install. From the free space I created by shrinking the Windows partition, I made a 4GB swap partition, a 50GB / (root) partition and assigned the rest of the space to /home which is where all my data will reside.
When Linux is installed, it installs the Grub2 bootloader which is able to detect Windows 10 and make it a selection at boot time. When you boot the system, a Grub2 menu will display allowing the choice of which operating system to boot. You can also choose which one boots as default when the grub2 timer expires.
One thing I found . . . When I booted back into Windows, it assigned drive letters to the Linux partitions which is something I did not want. I started up diskmgmt.msc in Windows and removed the drive letter associations from the 3 Linux partitions. That way Windows won’t mount the Linux partitions and possibly cause an issue.
At this point, I have a dual boot system and am ready to go. So far on the Linux side I have installed the following:
- Terminator – A nice terminal program
- cqrlog & mysql – Popular Linux Ham Radio Logging program. I exported my log from HRD (ver 5.24) on the old computer and imported it into cqrlog.
- tqsl – I made a backup of my certificate using tqsl on the old Windows computer and was able to restore it using tqsl on the new Linux installation.
One last thing before moving on. I took another Clonezilla backup of the entire laptop drive. Now I have two Clonezilla backups and could restore either one if I desired.
Just a note on Virtual Machine vs Dual boot. I use VM’s daily on my work laptop and my other personal laptop so I am very accustomed to their use. On my work laptop I run Linux full time with Windows 10 in a virtual machine along with about 10 other Linux VM’s (not all running at once). For the ham laptop I wanted two things. To run Linux as full time as possible for my ham radio hobby, and for the operating system to have direct access to the hardware without the virtualization layer in the middle.
More to come!

Wayne Patton, K5UNX, is a regular contributor to AmateurRadio.com and writes from Arkansas, USA. Contact him at [email protected].
Wow ….. just wow!
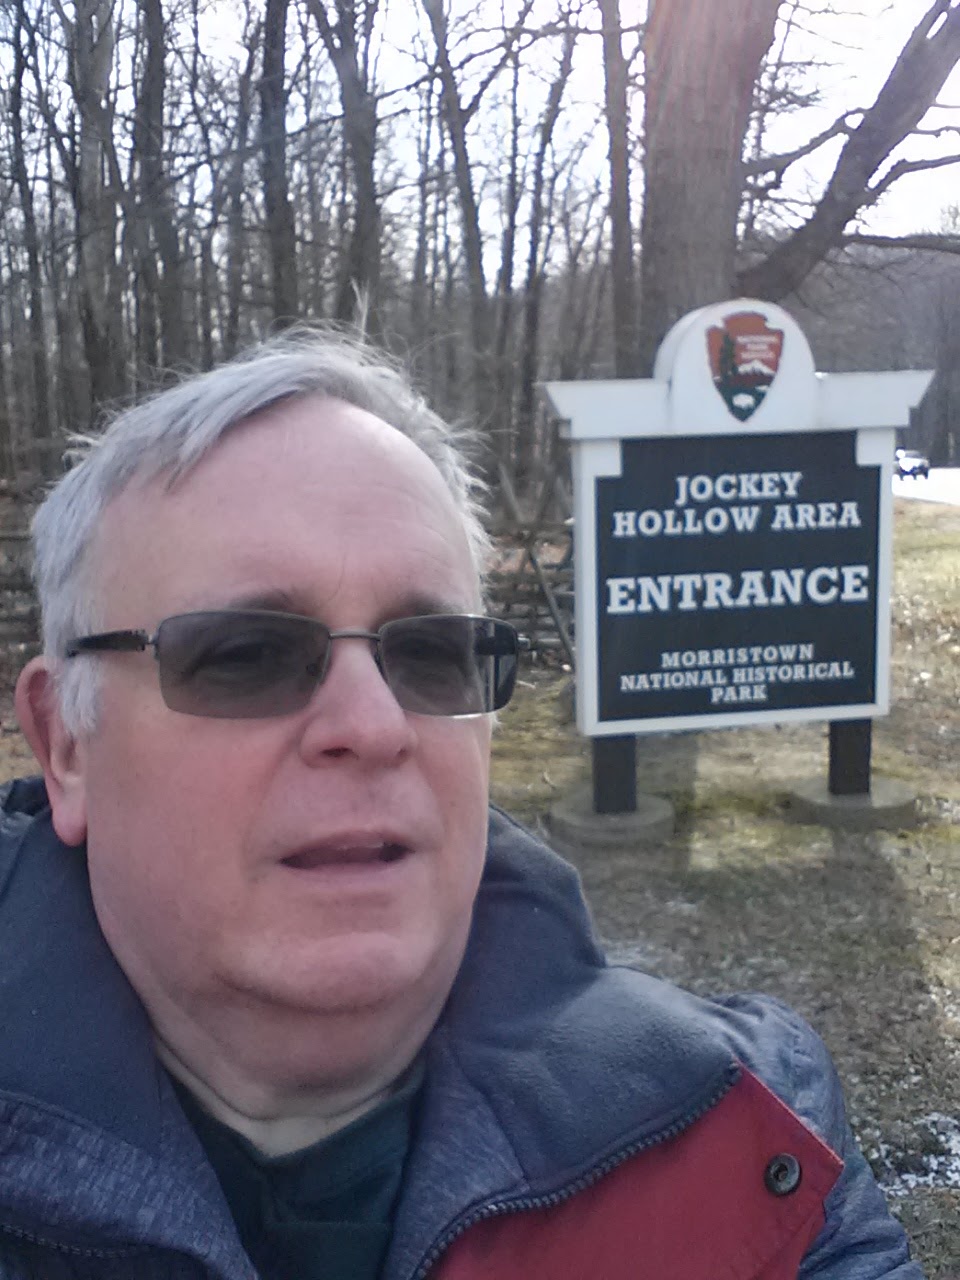
As stated in my earlier post this week, my intention was to come full circle and to end NPOTA as it began, with activations of both the Washington-Rochambeau Trail (TR23) and Morristown National Historical Park (HP28). The day started sunny and a bit cold as I made my way up to Morristown. I haven't been up there since last May, and since I take all back roads to get there, I was using my TomTom GPS unit to guide me there. About 1/3 of the way there, the TomTom gave up the ghost. Rebooting and resetting did no good. The map screen was nothing but a blank, white screen. Fortunately, I was able to retrace my steps without getting lost.
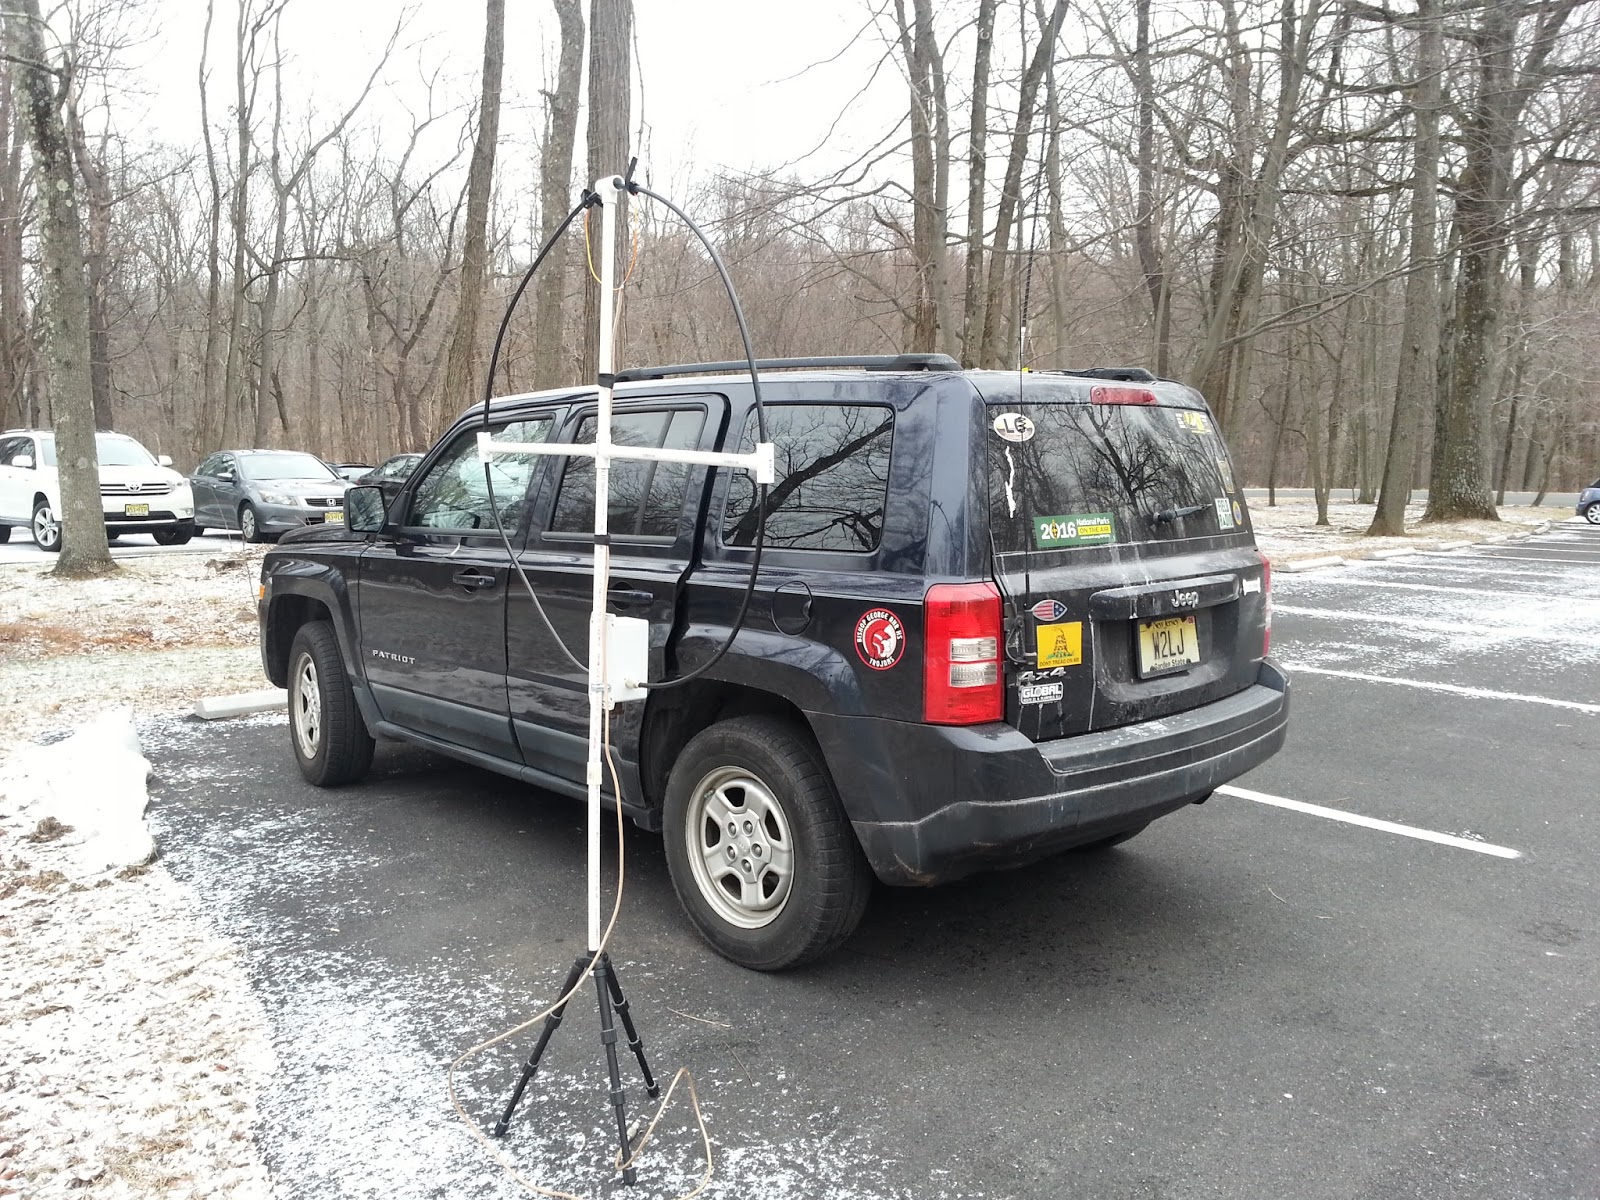
I set up in the parking lot and set up my 40 Meter Hamstick on the Jeep roof and the magloop right next to the Jeep. I was intending to start out on 40 Meter CW with the tried and proven Hamstick in order to get the 10 minimum QSOs that are needed for a valid activation; and only then switch over to the magloop for 20 Meters, as I really haven't used it enough to be confident in it as a proven performer.

About a 1/2 hour later, I arrived at the Frazee House in Scotch Plains, which is right on the Washington - Roachambeau Trail; and it was the same place I activated the Trail from during the NJQRP Skeeter Hunt. When I activated TR23 last January, I did it from the entrance to the Ashbrook Golf Course. It was open yesterday and I didn't want to cause any commotion, so I came back to the Frazee House which is only a couple of minutes farther down the road.


This time I decided to use another arrow from my antenna quiver, I also brought along my Joplin ARC antenna launcher and I got a line over a tree and made use of the PAR ENDFEDZ 40/20/10.

I ran the coax into the Jeep through a crack in the window and got down to business. I ran off a bunch of QSOs on 40 Meters and was about to switch over to 20 Meters when I noticed out of the corner of my eye that a vehicle had pulled up next to me. This time, it wasn't another Radio Amateur. This time, it was a member of the Scotch Plains Police Department. I guess I called some attention to myself, being the only car there, in an otherwise empty place. I got out of the car and walked a step or two to his rolled down window. I introduced myself and gave the spiel about NPOTA and how Raritan Road is part of the Washington - Rochambeau Trail, which he knew. What the Officer didn't know was that the trail is part of the National Parks System and he was very surprised by that. Then he told me about how his grandfather was a Ham, that in fact W2KKG was his call sign. We talked a bit, shook hands and he went on his way; and I returned to the Jeep for 20 Meters.
20 Meter CW proved to be a disappointment. Even with self spotting, I garnered only about 15 QSOs before the activity petered out, way too soon in my opinion. I sat there, with KX3 calling CQ, debating whether I should pack it in and go home. It was getting to be around 2:30 PM EST, and I only wanted to be out until around 3:00 PM as I had a previous commitment at 5:00 PM and I had to get ready for that. Wanting to get a least a few more Qs in the log; so I decided that I would give 20 Meter SSB a shot. With the deep cycle battery, I could boost the KX3's output to 10 Watts. The PAR was up in a tree about 50 feet up or so, so I figured, "What the heck!". I didn't even bother to spot myself, I just hooked up the microphone and started calling CQ on 14.340 MHz, figuring that what would be, would be.
Much to my surprise, about 60 QSOs later, the pileup ceased. With 10 Watts, I had worked all up and down the East Coast, across to California and Washington State and even up into Alberta, Canada. In all, there were only 1 or 2 instances where I had to repeat anything. It was pure bliss!
As it started becoming overcast and dusk started settling in, I packed everything up and headed home. I was in another world, walking in rarefied air. NPOTA turned out to be everything it was chalked up to be; and more. Thanks to Sean, Norm and all the ARRL staff who worked tirelessly behind the scenes to make NPOTA the success that it was. I have never been more proud to be a Life Member of the ARRL. Friendships that will last a lifetime; and new memories that will last a lifetime are the direct results of NPOTA. It just doesn't get any better than this.
Later, I was talking with my good friend Bob W3BBO on Skype, as we do just about every Saturday evenming, I had worked him earlier from HP28 and we talked about our QSO a bit more in depth and about the day in general. Bob stated that, in a way, he felt bad for me. As he tuned around 20 and 40 Meters, it seemed like it was just wall-to-wall NPOTA. He told me that he was sure I should have been at home boosting up my entities worked total. I told him not to feel bad, as not only had I worked a couple new ones via Park to Park QSOs; but there was nowhere in the world that I would have rather been - handing out QSOs as an Activator on the last and best day of NPOTA.
72 de Larry W2LJ
QRP - When you care to send the very least!
Larry Makoski, W2LJ, is a regular contributor to AmateurRadio.com and writes from New Jersey, USA. Contact him at [email protected].
Wow ….. just wow!
As stated in my earlier post this week, my intention was to come full circle and to end NPOTA as it began, with activations of both the Washington-Rochambeau Trail (TR23) and Morristown National Historical Park (HP28). The day started sunny and a bit cold as I made my way up to Morristown. I haven't been up there since last May, and since I take all back roads to get there, I was using my TomTom GPS unit to guide me there. About 1/3 of the way there, the TomTom gave up the ghost. Rebooting and resetting did no good. The map screen was nothing but a blank, white screen. Fortunately, I was able to retrace my steps without getting lost.
I set up in the parking lot and set up my 40 Meter Hamstick on the Jeep roof and the magloop right next to the Jeep. I was intending to start out on 40 Meter CW with the tried and proven Hamstick in order to get the 10 minimum QSOs that are needed for a valid activation; and only then switch over to the magloop for 20 Meters, as I really haven't used it enough to be confident in it as a proven performer.
About a 1/2 hour later, I arrived at the Frazee House in Scotch Plains, which is right on the Washington - Roachambeau Trail; and it was the same place I activated the Trail from during the NJQRP Skeeter Hunt. When I activated TR23 last January, I did it from the entrance to the Ashbrook Golf Course. It was open yesterday and I didn't want to cause any commotion, so I came back to the Frazee House which is only a couple of minutes farther down the road.
This time I decided to use another arrow from my antenna quiver, I also brought along my Joplin ARC antenna launcher and I got a line over a tree and made use of the PAR ENDFEDZ 40/20/10.
I ran the coax into the Jeep through a crack in the window and got down to business. I ran off a bunch of QSOs on 40 Meters and was about to switch over to 20 Meters when I noticed out of the corner of my eye that a vehicle had pulled up next to me. This time, it wasn't another Radio Amateur. This time, it was a member of the Scotch Plains Police Department. I guess I called some attention to myself, being the only car there, in an otherwise empty place. I got out of the car and walked a step or two to his rolled down window. I introduced myself and gave the spiel about NPOTA and how Raritan Road is part of the Washington - Rochambeau Trail, which he knew. What the Officer didn't know was that the trail is part of the National Parks System and he was very surprised by that. Then he told me about how his grandfather was a Ham, that in fact W2KKG was his call sign. We talked a bit, shook hands and he went on his way; and I returned to the Jeep for 20 Meters.
20 Meter CW proved to be a disappointment. Even with self spotting, I garnered only about 15 QSOs before the activity petered out, way too soon in my opinion. I sat there, with KX3 calling CQ, debating whether I should pack it in and go home. It was getting to be around 2:30 PM EST, and I only wanted to be out until around 3:00 PM as I had a previous commitment at 5:00 PM and I had to get ready for that. Wanting to get a least a few more Qs in the log; so I decided that I would give 20 Meter SSB a shot. With the deep cycle battery, I could boost the KX3's output to 10 Watts. The PAR was up in a tree about 50 feet up or so, so I figured, "What the heck!". I didn't even bother to spot myself, I just hooked up the microphone and started calling CQ on 14.340 MHz, figuring that what would be, would be.
Much to my surprise, about 60 QSOs later, the pileup ceased. With 10 Watts, I had worked all up and down the East Coast, across to California and Washington State and even up into Alberta, Canada. In all, there were only 1 or 2 instances where I had to repeat anything. It was pure bliss!
As it started becoming overcast and dusk started settling in, I packed everything up and headed home. I was in another world, walking in rarefied air. NPOTA turned out to be everything it was chalked up to be; and more. Thanks to Sean, Norm and all the ARRL staff who worked tirelessly behind the scenes to make NPOTA the success that it was. I have never been more proud to be a Life Member of the ARRL. Friendships that will last a lifetime; and new memories that will last a lifetime are the direct results of NPOTA. It just doesn't get any better than this.
Later, I was talking with my good friend Bob W3BBO on Skype, as we do just about every Saturday evenming, I had worked him earlier from HP28 and we talked about our QSO a bit more in depth and about the day in general. Bob stated that, in a way, he felt bad for me. As he tuned around 20 and 40 Meters, it seemed like it was just wall-to-wall NPOTA. He told me that he was sure I should have been at home boosting up my entities worked total. I told him not to feel bad, as not only had I worked a couple new ones via Park to Park QSOs; but there was nowhere in the world that I would have rather been - handing out QSOs as an Activator on the last and best day of NPOTA.
72 de Larry W2LJ
QRP - When you care to send the very least!
Larry Makoski, W2LJ, is a regular contributor to AmateurRadio.com and writes from New Jersey, USA. Contact him at [email protected].
Amateur Radio Weekly – Issue 140

2016 Year in Review
For this last issue of the year, I pulled the most popular links from each issue and complied the top 10
as a ‘look back’ on the world of Amateur Radio in 2016. Enjoy! –Cale K4HCK
#10
A stealthy HOA HamStick directional dipole
This is a sneak peek at a very detailed build, tune, and operation on 20 and 40 meter bands using both Phone and PSK31.
Prepared Ham (Issue 94)
#9
Hey, which coaxial cable should I use?
We’ll focus on the most popular cables, with 50 ohm impedance to match the output impedance of our transceivers.
Ham Radio School (Issue 115)
#8
Five common mistakes new Hams make
This short list comes from working with a gaggle of new hams over the years and trying to help them get started in ham radio.
Ham Radio School (Issue 137)
#7
Hidden Antennas for HOA restrictions?
I have a confession to make… I live in a HOA! I know most hams say what the hell did you do that for, you knew you could not put up a 60 foot tower. Turn in your FCC license…
Prepared Ham (Issue 97)
#6
Easy, homemade Outernet antenna
An antenna for less than $1 total cost, doable without power tools and soldering, in less than 30 minutes.
Radio for Everyone (Issue 136)
#5
Portable antenna options for HF
For all the choices, it’s surprisingly hard to find a portable antenna for HF that is affordable and practical.
Off Grid Ham (Issue 138)
#4
End-Fed antenna revisited
I really like the simplicity of this antenna for many aspects: fast to deploy, works on many bands, no antenna to tune…
VA2SS (Issue 126)
#3
New: Baofeng UV-50X3 tri-band mobile
Baofeng just launched the UV-50X3 tri-band mobile radio and it looks like a jab, cross and left hook to the established Japanese manufacturers who were caught dreaming about DMR, C4FM, D-STAR and other leprechauns.
QRPblog (Issue 120)
#2
Repeater owner bans Baofeng radios
Simply put, these radios do not allow for “advancing skills in both the communication and technical phases of the art” (Part 97.1).
N4NJJ (Issue 108)
#1
First impressions of the Icom IC-7300 HF + 6M transceiver
We did not use the transmit functions on the radio, but were able to test out the receiver at my campsite with a Budipole antenna on 40 meters.
AB4BJ (Issue 99)
Amateur Radio Weekly is curated by Cale Mooth K4HCK. Sign up free to receive ham radio's most relevant news, projects, technology and events by e-mail each week at http://www.hamweekly.com.
LHS Episode #181: Drinking to the Future
 In the final episode for 2016, Linux in the Ham Shack discusses 60-meter operation, a new version of fldigi, OpenShot, bash on WIndows, Cheryl installing Ubuntu, a new release of Andy's Ham Radio Linux, predictions for 2017, whiskey and a whole lot more. Thanks for tuning in. We hope you have a happy and prosperous 2017.
73 de The LHS Crew
Russ Woodman, K5TUX, co-hosts the Linux in the Ham Shack podcast which is available for download in both MP3 and OGG audio format. Contact him at [email protected].
 Ham Radio Deluxe |
 W5SWL Electronics |
 Ham Radio Prep |
 KB3IFH QSL Cards  Hip Ham Shirts  HamRadioAuctions HamRadioAuctions Reliance Antennas Reliance Antennas Enigma Shop Enigma Shop |  morseDX  Ni4L Antennas  R&L Electronics R&L Electronics antennas.us antennas.us QRV QRV |
- Matt W1MST, Managing Editor
