 |
 Chart of Cubesat UHF Downlinks
This looked kind of cool, so I thought it was post worthy. Of course, there is a lot that is post worthy, but I only have so many fingers to type. It’s a chart of Cubesat UHF downlink frequiences. This could be very useful up on the wall or bulletin board in the shack.I found it over on Southgate’s website doing my morning surfing. As you’ll notice from the PDF, it’s in French. But there is a link to a “Google English” version. I’m guessing that’s almost the same as regular English. Those Google guys are always tweaking things. Here’s the chart for you. You can download the french PDF version from Cubesat.

Courtesy of http://cubesat.free.fr
Rich also writes a Tech blog and posts stories every Tuesday and Thursday on Q103, Albany’s #1 Rock Station website, as well as Amateur Radio stories every Monday thru Friday on AmiZed Studios and hosts a podcast called The Kim & Rich Show with his fiance’ Kim Dunne
Rich Gattie, KB2MOB, is a regular contributor to AmateurRadio.com and writes from New York, USA. Contact him at [email protected].
Toothbrushes and amateur radio
 So, after successfully fixing my TS-440S did I enjoy operating it? Not a lot – I’ll write about this later – but today very much so.
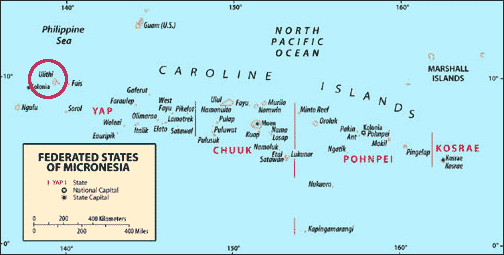
I had to come home early because our water supply was cut-off for maintenance on Sunday and it hadn’t been restored on Monday morning. Well, it had in the mean time, so I did a day’s worth of dishes and turned on the radio afterwards to relax a bit. Found some guys talking on 20 meters, so I listened in. It was a VK4 station with a V63 station talking about antenna’s for the school station. The conversation turned to how John – the V63 operator – was teaching the kids, how he brought over toothbrushes and taught the kids how to brush and how ham radio opened their world.
Now I am not really a fanatic ham and I had no idea where V63 is. So when a chance came up I called in and John – V63JB, his home call is KH6DLK – came back. I told him we had the same profession and asked him about his location, which he told me is Federai Island, Ulithi Atoll in the Western Caroline Islands, never activated on the amateur bands before. Wow, impressive. But I was really touched when he put one of his students on air to chat with an operator-friend from Hawaii a little later. This is amateur radio at its best: opening up the world and connecting people with each other.
Later a PY station called in and I believe there was also a States-side station present in the group (signal strengths weren’t great and readability difficult at times), so it was quite a diverse group from half across the globe meeting on 20 meters this afternoon. I didn’t have the chance to say goodbye to John, but I hope we’ll meet again and I hope he gets his station over there in Ulithi Atoll well established for his students to enjoy. In the mean time I’m contemplating sending him some toothpaste.
Hans "Fong" van den Boogert, BX2ABT, is a regular contributor to AmateurRadio.com and writes from Taiwan. Contact him at [email protected].
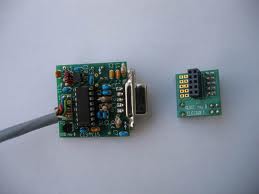
Elecraft’s KIO2 project and kit building tips
 |
| Soldered nut |
 |
| DB9F installed |
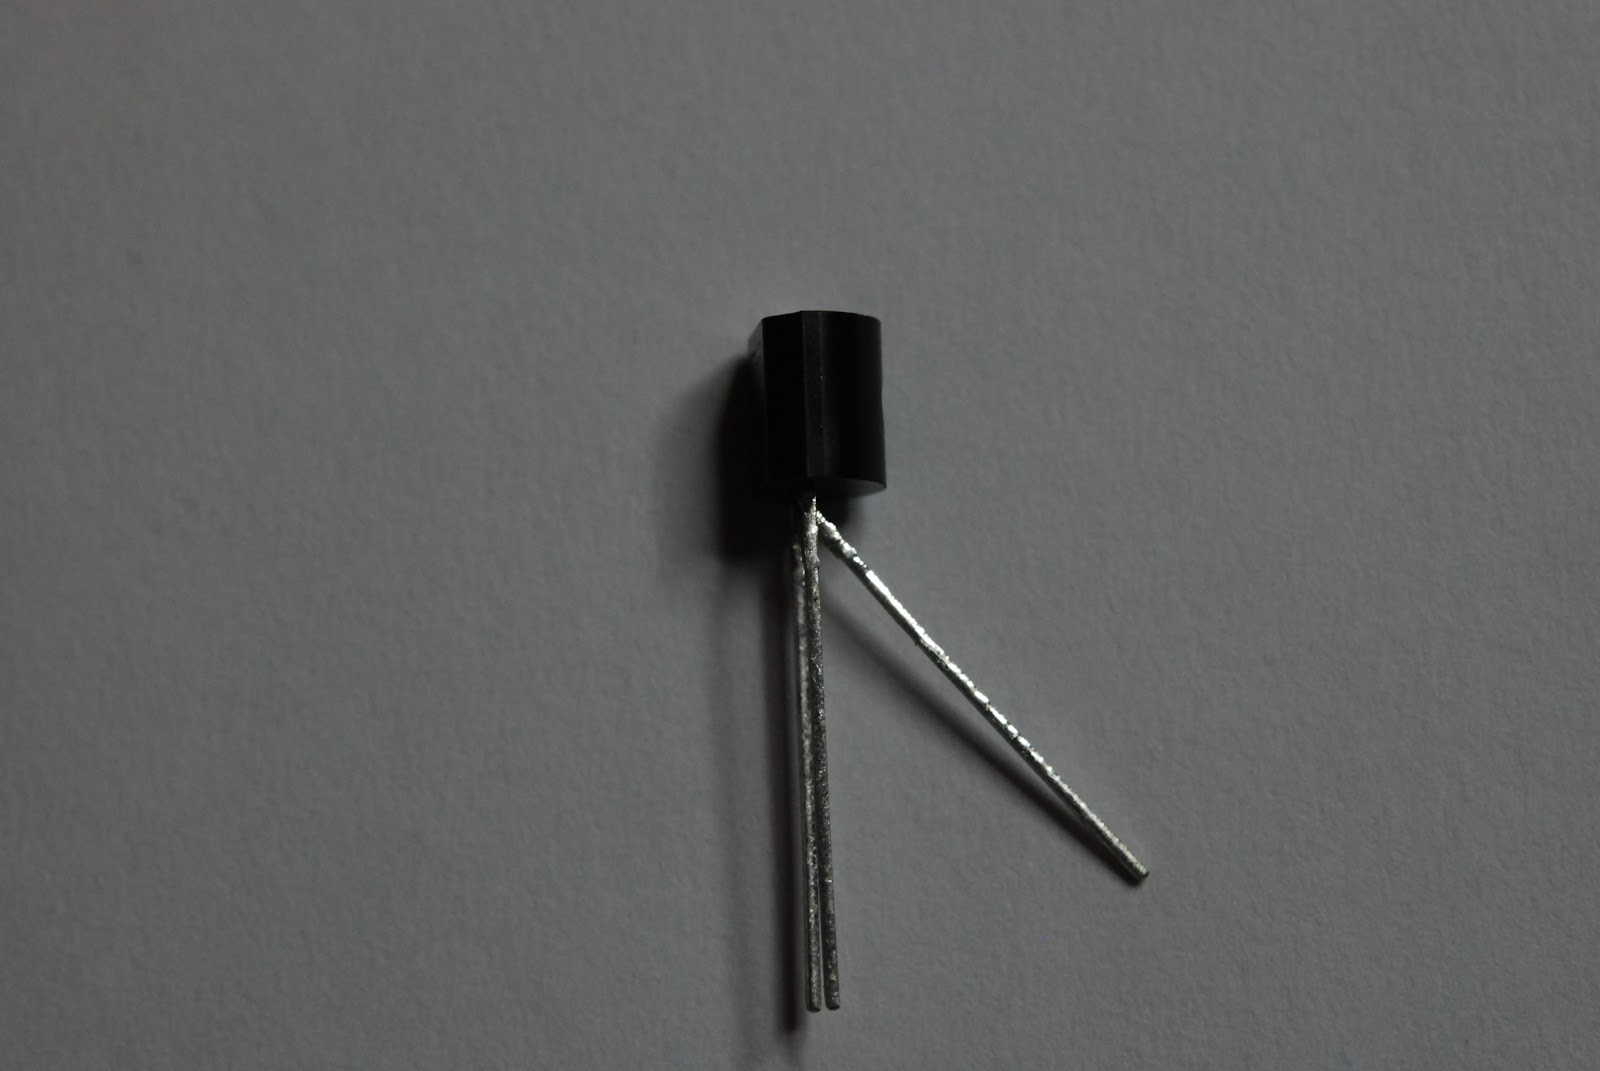
connectors. After a few gentle tries and not successful I gave the board a good push and it did slip on and was a solid mating between the board and connector. At this step you may have to give a little elbow grease but the board will actually mate with the connector. Next I had to mount a 16.289 Mhz crystal care has to be taken as you can damage the crystal very easily with the heat from the soldering iron. The tip on the iron
 |
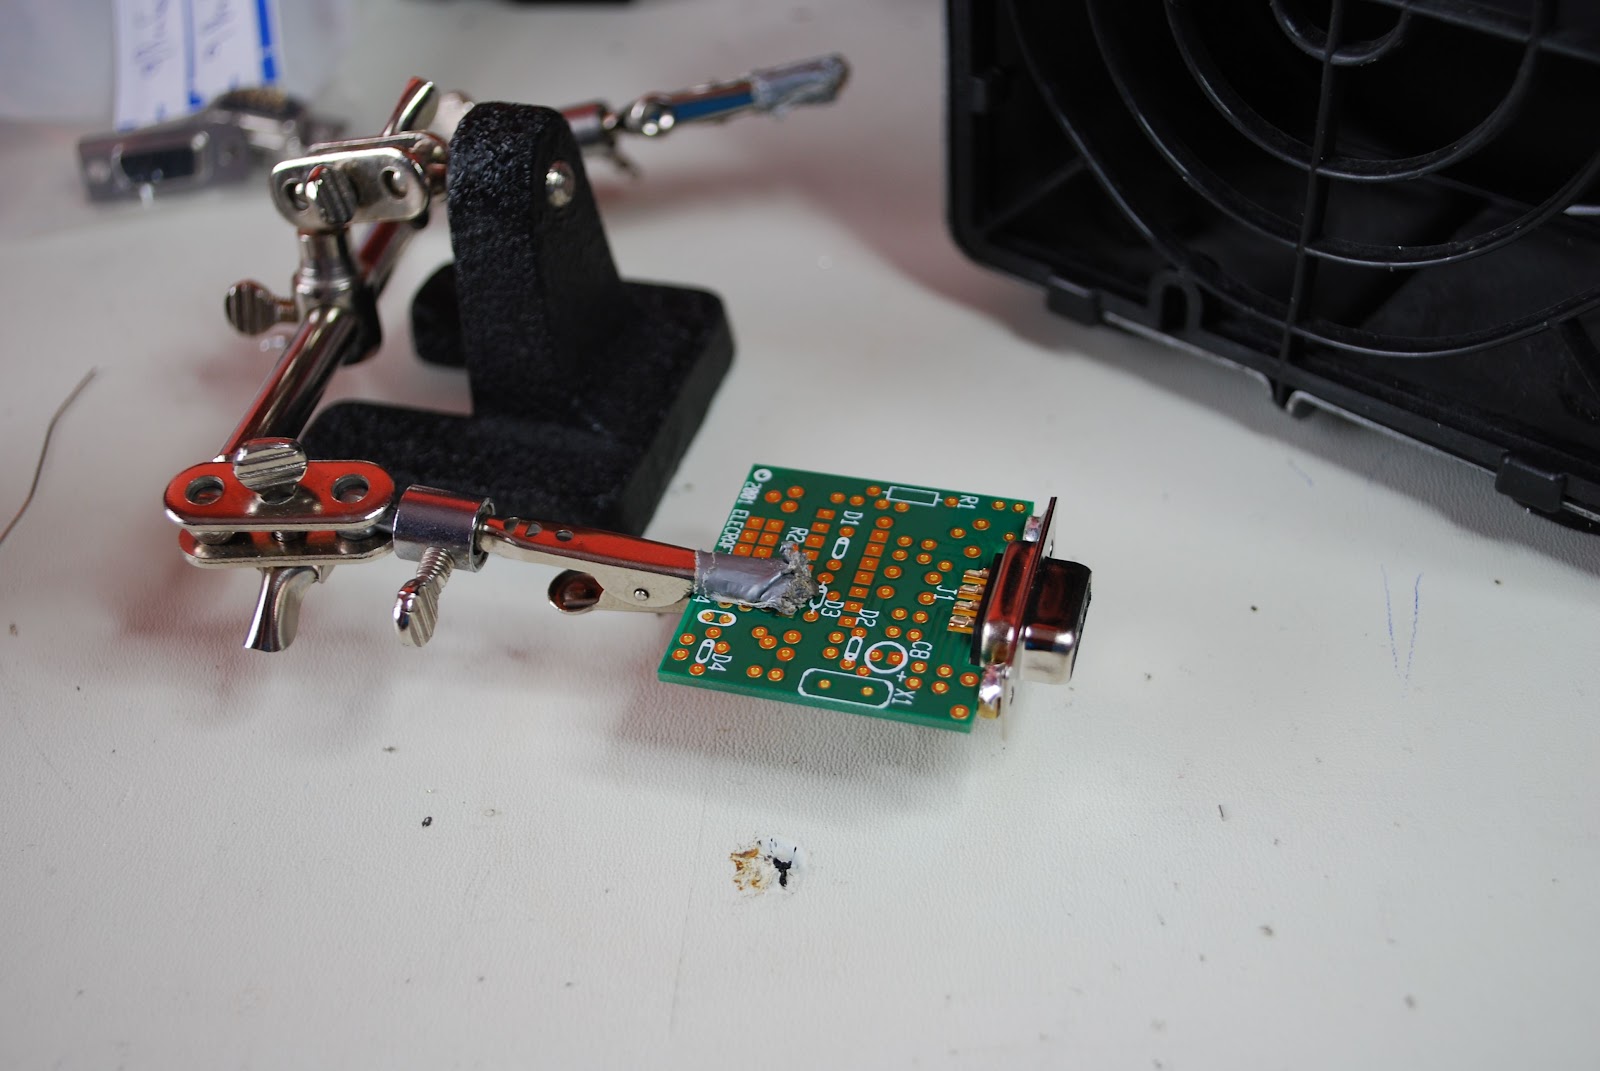
| Soldering on the can |
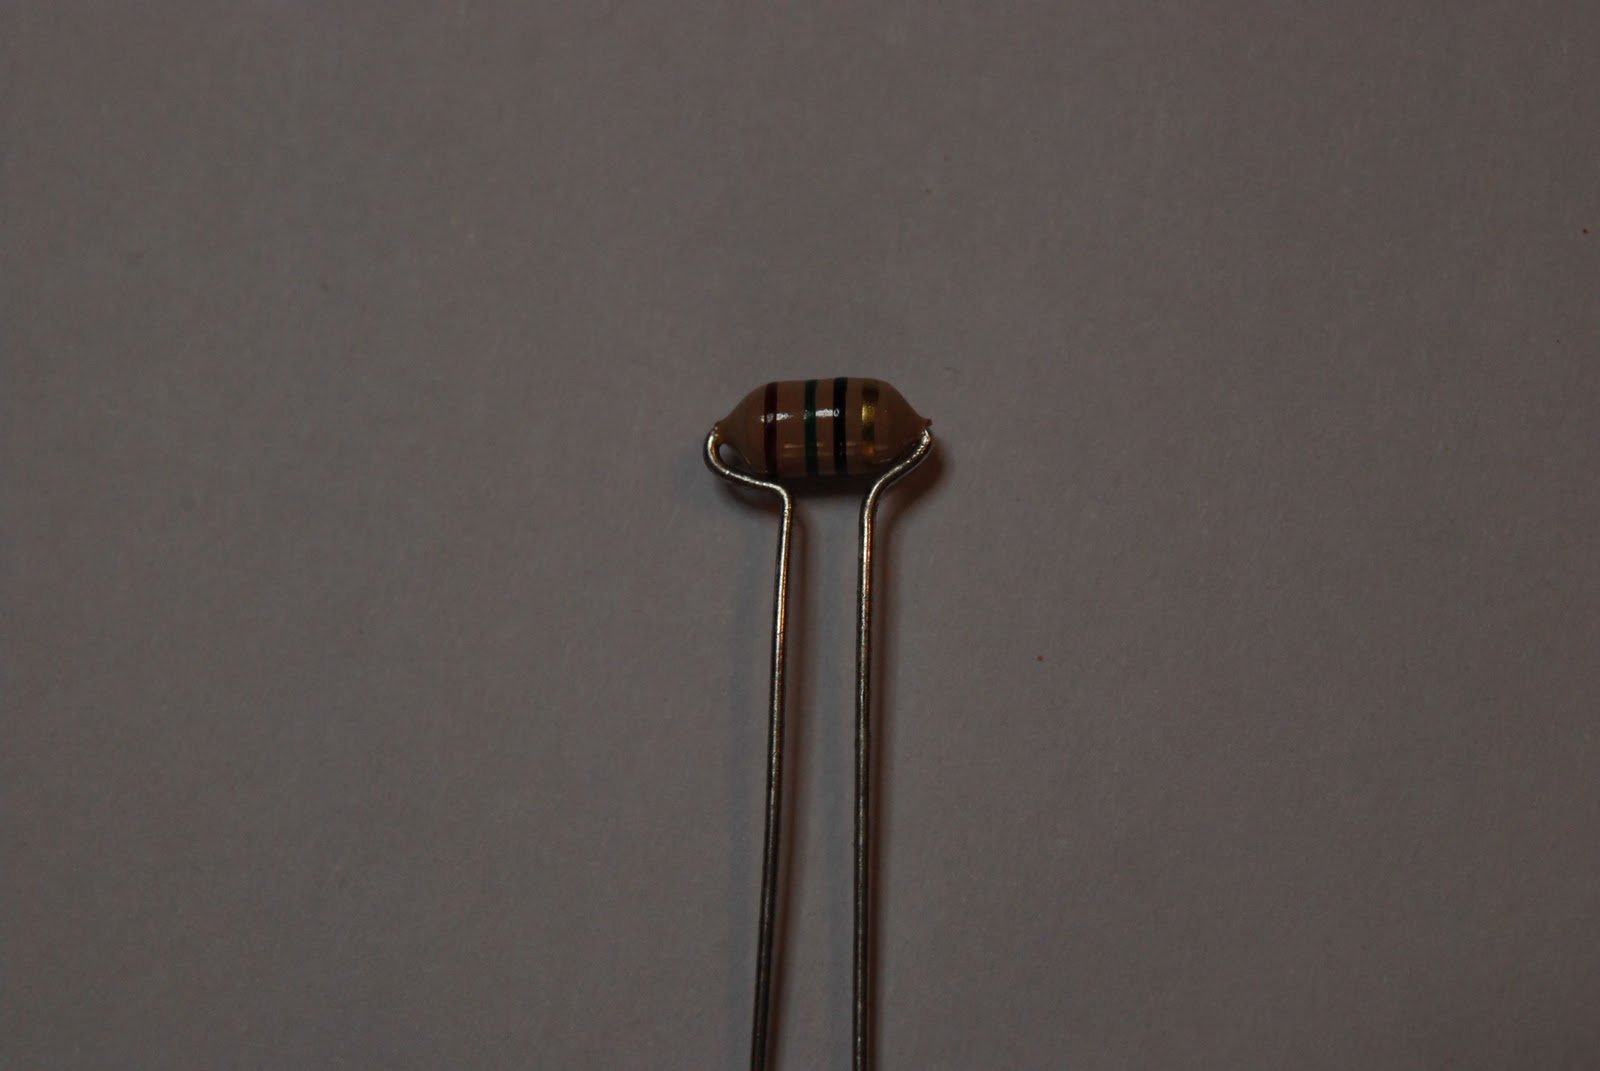
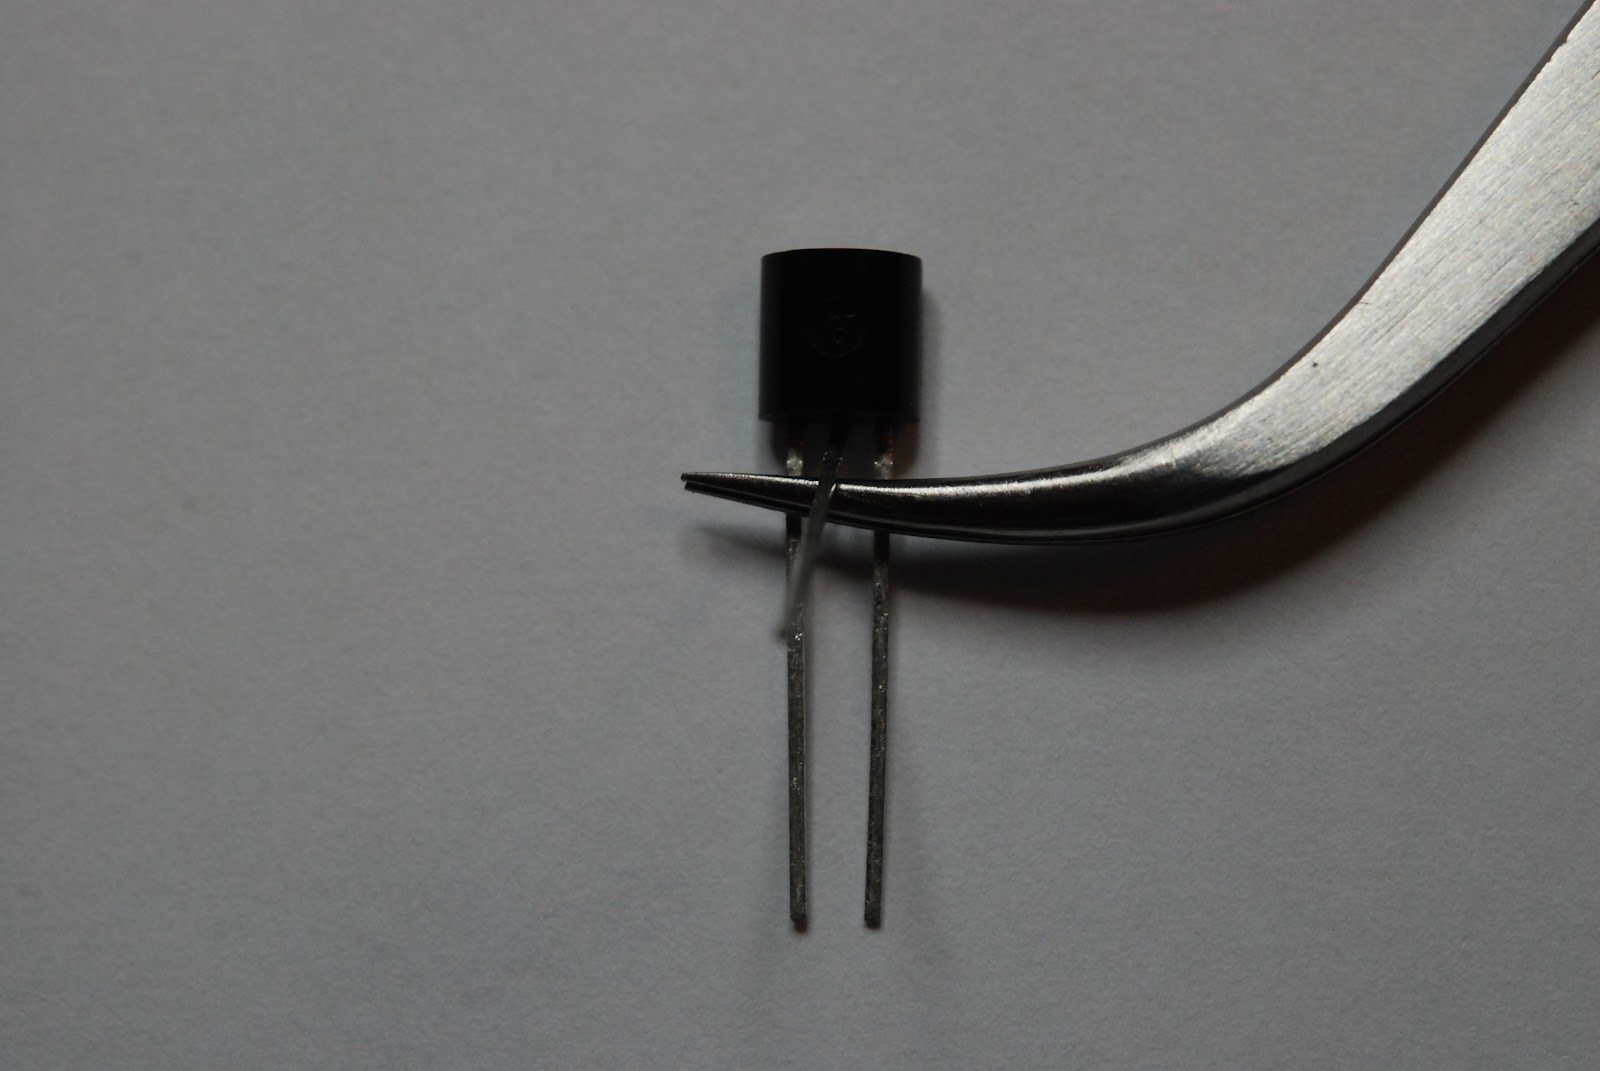
has to be changed back to the smaller tip enabling you to solder the crystal to the PC board. Once that is done a ground has to go from the top of the crystal (the can) to the PC board. To do this you must take the time to change the Weller tip again to the larger tip. Failing to do this and trying to do it the "fast" way may result in damage to the crystal or a poor solder job.....but most likely it will be both. Thus no time will actually had been saved. A discarded terminal lead is used for grounding. I start by forming the lead to fit properly. Then tin the top of the crystal add a little flux to the formed component lead. Put the lead on the top of the can of the crystal and add solder. Doing this way allows you to keep the soldering iron tip on the can for very short intervals. Now it's a simple case of mounting resistors and cap's after changing the Weller tip to the smaller tip. The inductors have been
 |
| Bending inductor leads |
 |
| Middle lead bent outward |
 |
| Tweezers inserted then bend lead |
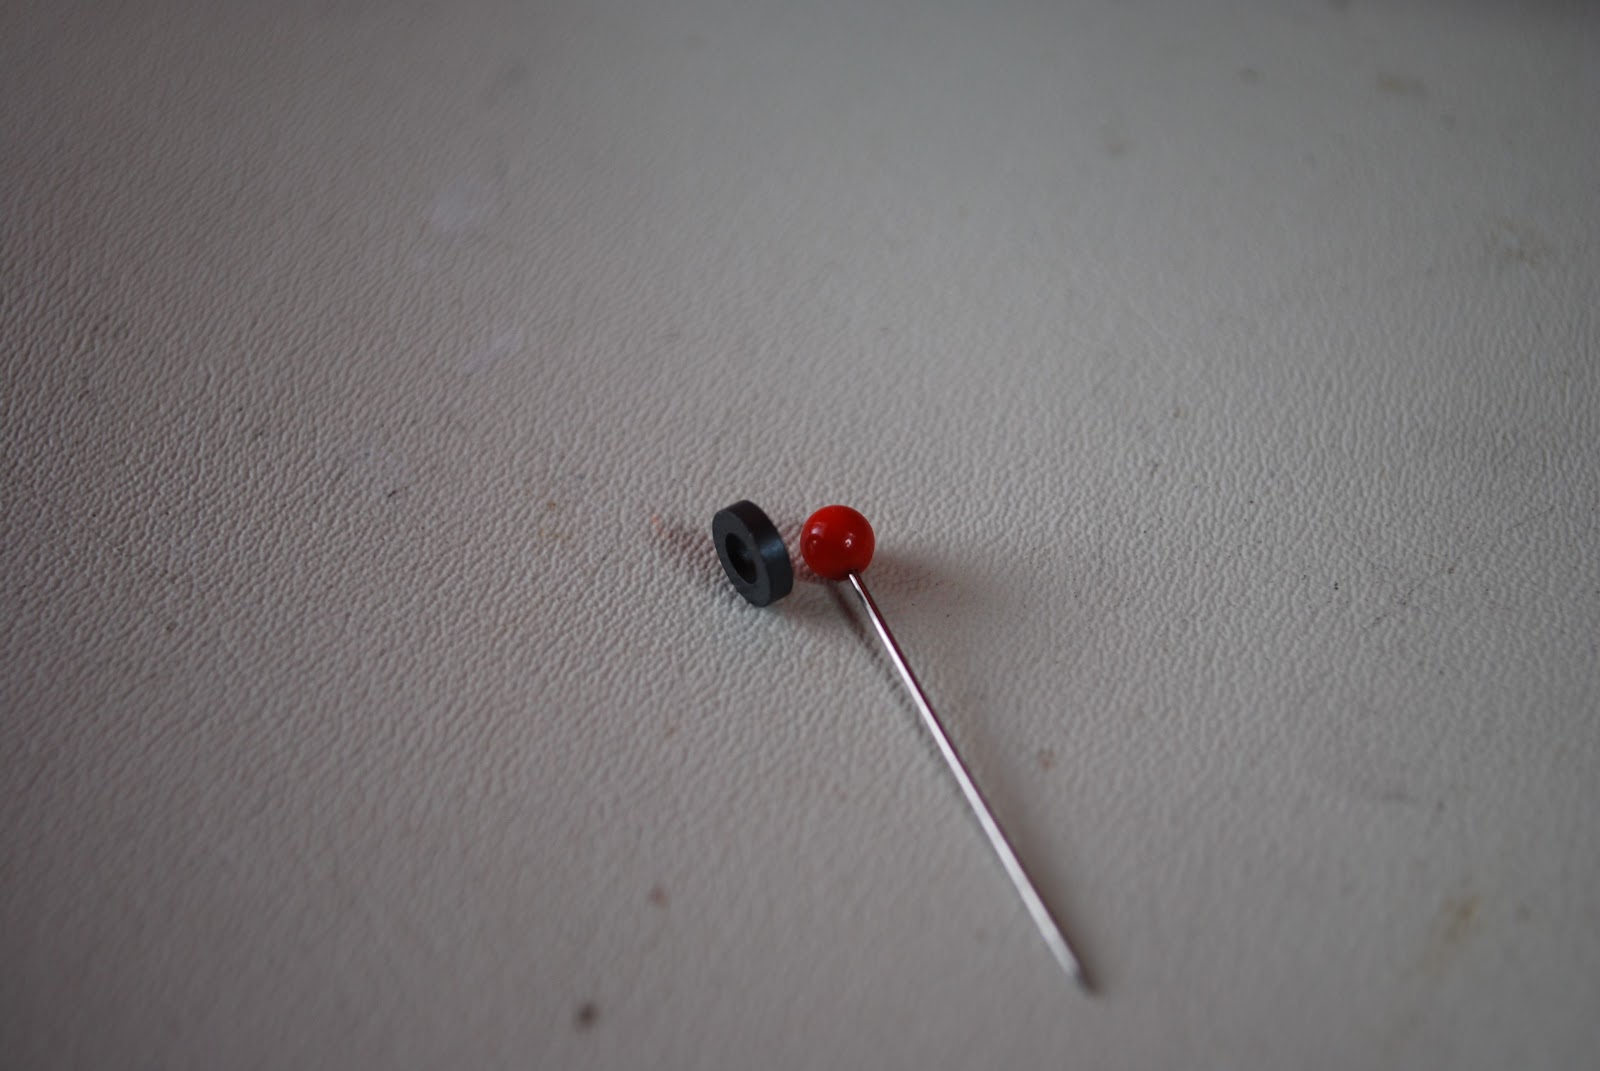 |
| Pin and toroid |
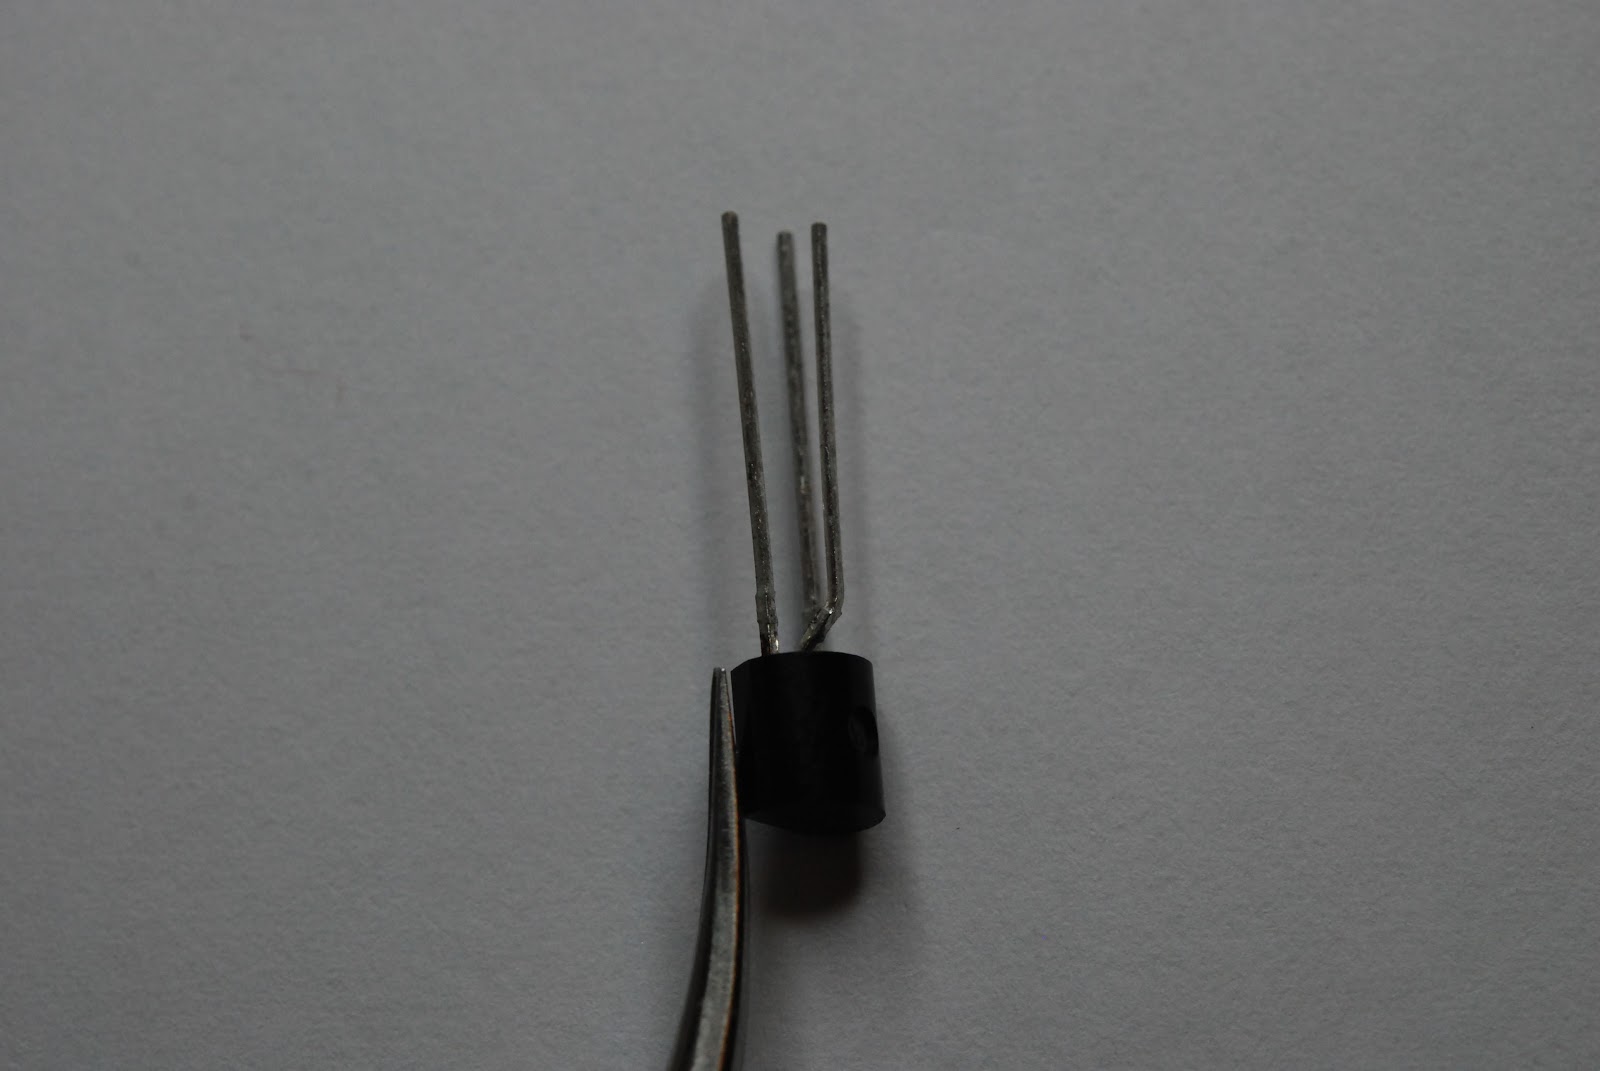 |
| End result |
 |
| Keeping wide turns |
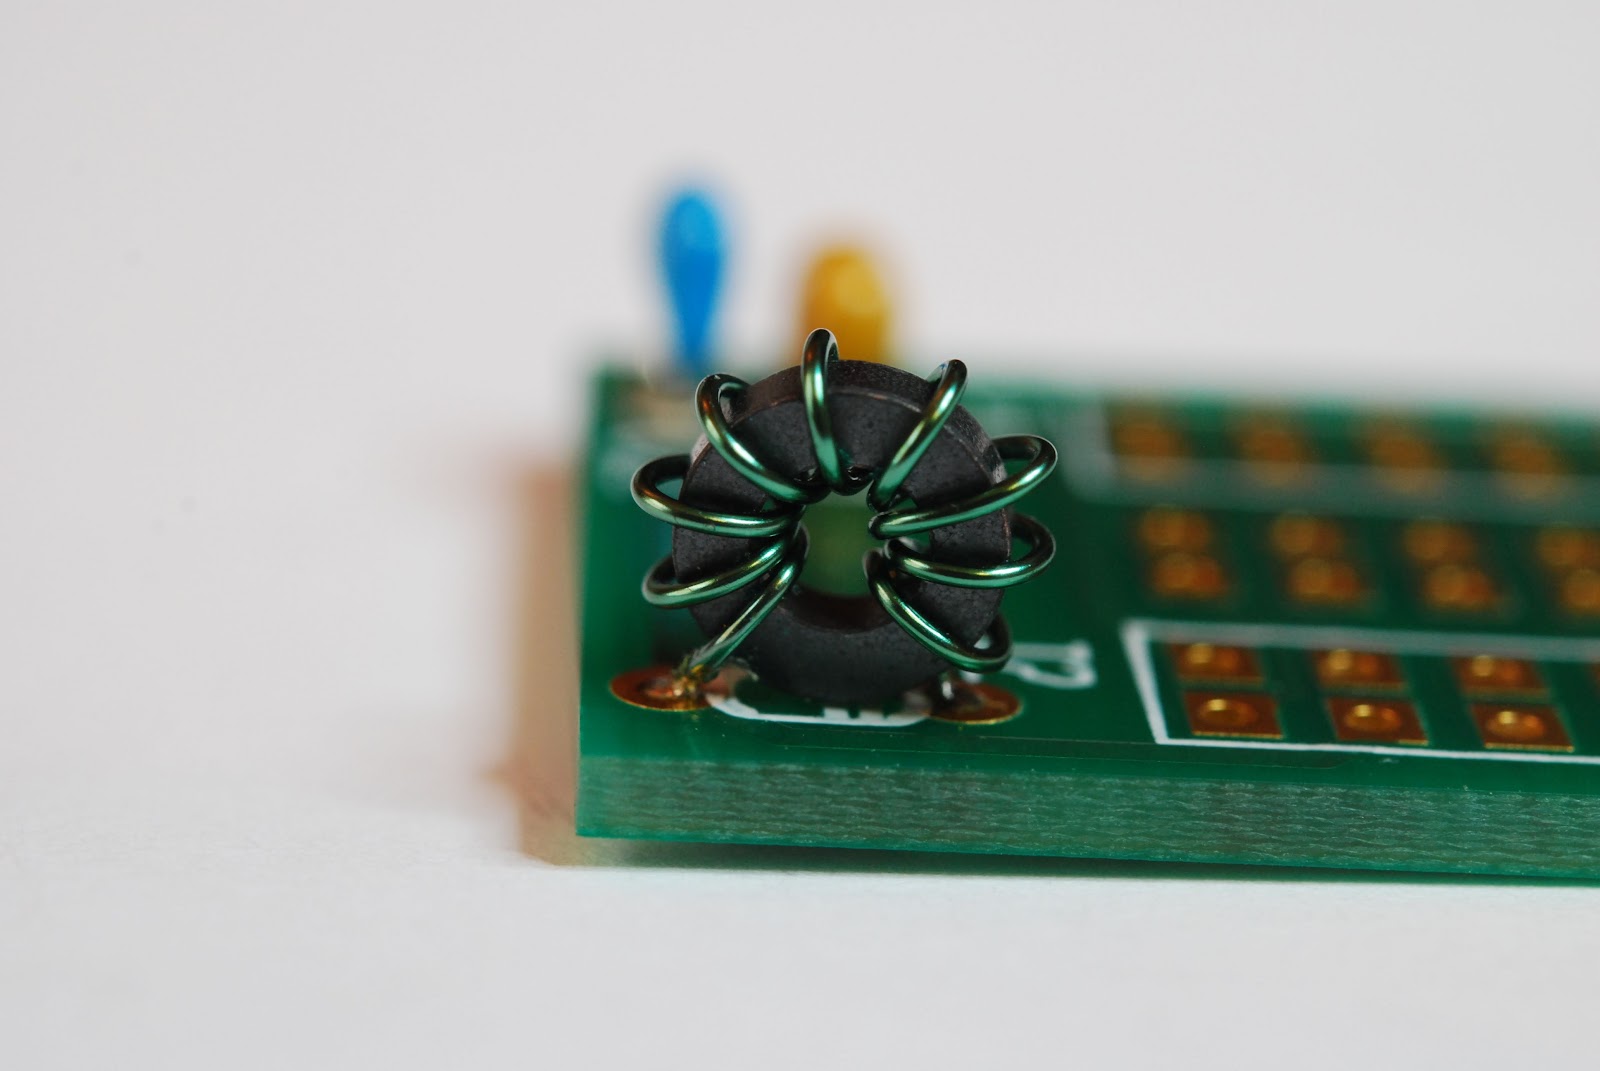 |
| New L1 Toroid |
 |
| Alligator clip vise |
 |
| installing in K2 |
Mike Weir, VE9KK, is a regular contributor to AmateurRadio.com and writes from New Brunswick, Canada. Contact him at [email protected].
This Spewed Out of the Internet #20
 There’s lots of information spewing forth from the interwebznet. Here are a few items of interest.
The amateur radio community is buzzing with excitement from the excellent propagation on the HF bands during the CQ Worldwide DX Contest last weekend. For example, see the radio-sport.net post or my post.
One of our local Boy Scouts passed his Technician exam on the Saturday before the contest, showed up in the FCC database on Friday and was working DX on 10 Meters on Saturday. He managed to snag some good ones, including Australia.
The ARRL is reporting that Logbook of the World is having trouble keeping up with the influx of radio logs. Although it would be nice if they could put a little more compute horsepower on the system, I think it is great that LoTW is seeing this kind of volume.
The Interstate Highway Rest Area Society is making a pitch to encourage hams to monitor 146.52 MHz when mobile. I usually try to do this and every once in a while I will stumble onto a great QSO that way. This group is also promoting ham radio activation of highway rest areas. Yes, really, it is not a hoax.
73, Bob K0NR
Bob Witte, KØNR, is a regular contributor to AmateurRadio.com and writes from Colorado, USA. Contact him at [email protected].
Making VHF go further: Morse can help!
The first weekend in November has always been one of my favourite VHF contests. There aren’t many purely CW contests on VHF these days, but the Marconi Memorial 144MHz is probably the best known. The nice thing is that all over Europe many of the top VHF contest stations and groups take part in the 24 hour event. Quite often at this time of year there is some tropo around and there’s always some meteor reflections too – so there are tantalising hints of contest stations some 1500 or 2000 km away!
These days I don’t treat the Marconi Memorial as a contest but as an exercise in DXing and to see what I can hear and work on 144MHz. This year despite indifferent conditions I was pleased to work TM0W in JN36 at just under 800km – it’s a path that works quite well from here as I see I have worked that station before. DF0MU in JO32 was a nice one too as well as a number of other closer French and Belgian stations. There were hints of more distant Italian and Czech stations, but nothing solid copied.
Although I wasn’t looking to work UK stations this weekend, I did get the impression that there were a few more people from the UK taking part which is good to hear
Tim Kirby, G4VXE, is a regular contributor to AmateurRadio.com and writes from Oxfordshire, England. Contact him at [email protected].
ICQ Podcast S04 E24 – National Ham Convention (06 November 2011)
Series Four Episode Twenty-Four of the ICQ Podcast has been released. News Stories include :-
- Radar sees through concrete walls
- Prospero to be reactivated
- RSGB Intruder Watch activity on 28MHz
- International digi-modes 10m net
- Rotuma High School Amateur Radio Station
- Radio/TV Martí 'anachronistic'
- Bletchley Park's Lost Heroes
- Global Simulated Emergency Test – November 2011
- VK100ARV roster begins
- Radio in Mayo
- Sydney radio hams help search for lost aircraft VH-MDX
Your feedback, North American Hambrief from Chris Matthieu (N7ICE) and Martin is joined by Chris Howard (2E0CTH) to discuss the National Radio Convention
Colin Butler, M6BOY, is the host of the ICQ Podcast, a weekly radio show about Amateur Radio. Contact him at [email protected].
 Ham Radio Deluxe |
 W5SWL Electronics |
 Ham Radio Prep |
 KB3IFH QSL Cards  Hip Ham Shirts  HamRadioAuctions HamRadioAuctions Reliance Antennas Reliance Antennas Enigma Shop Enigma Shop |  morseDX  Ni4L Antennas  R&L Electronics R&L Electronics antennas.us antennas.us QRV QRV |
- Matt W1MST, Managing Editor
