 |
 I’ve Got the Power
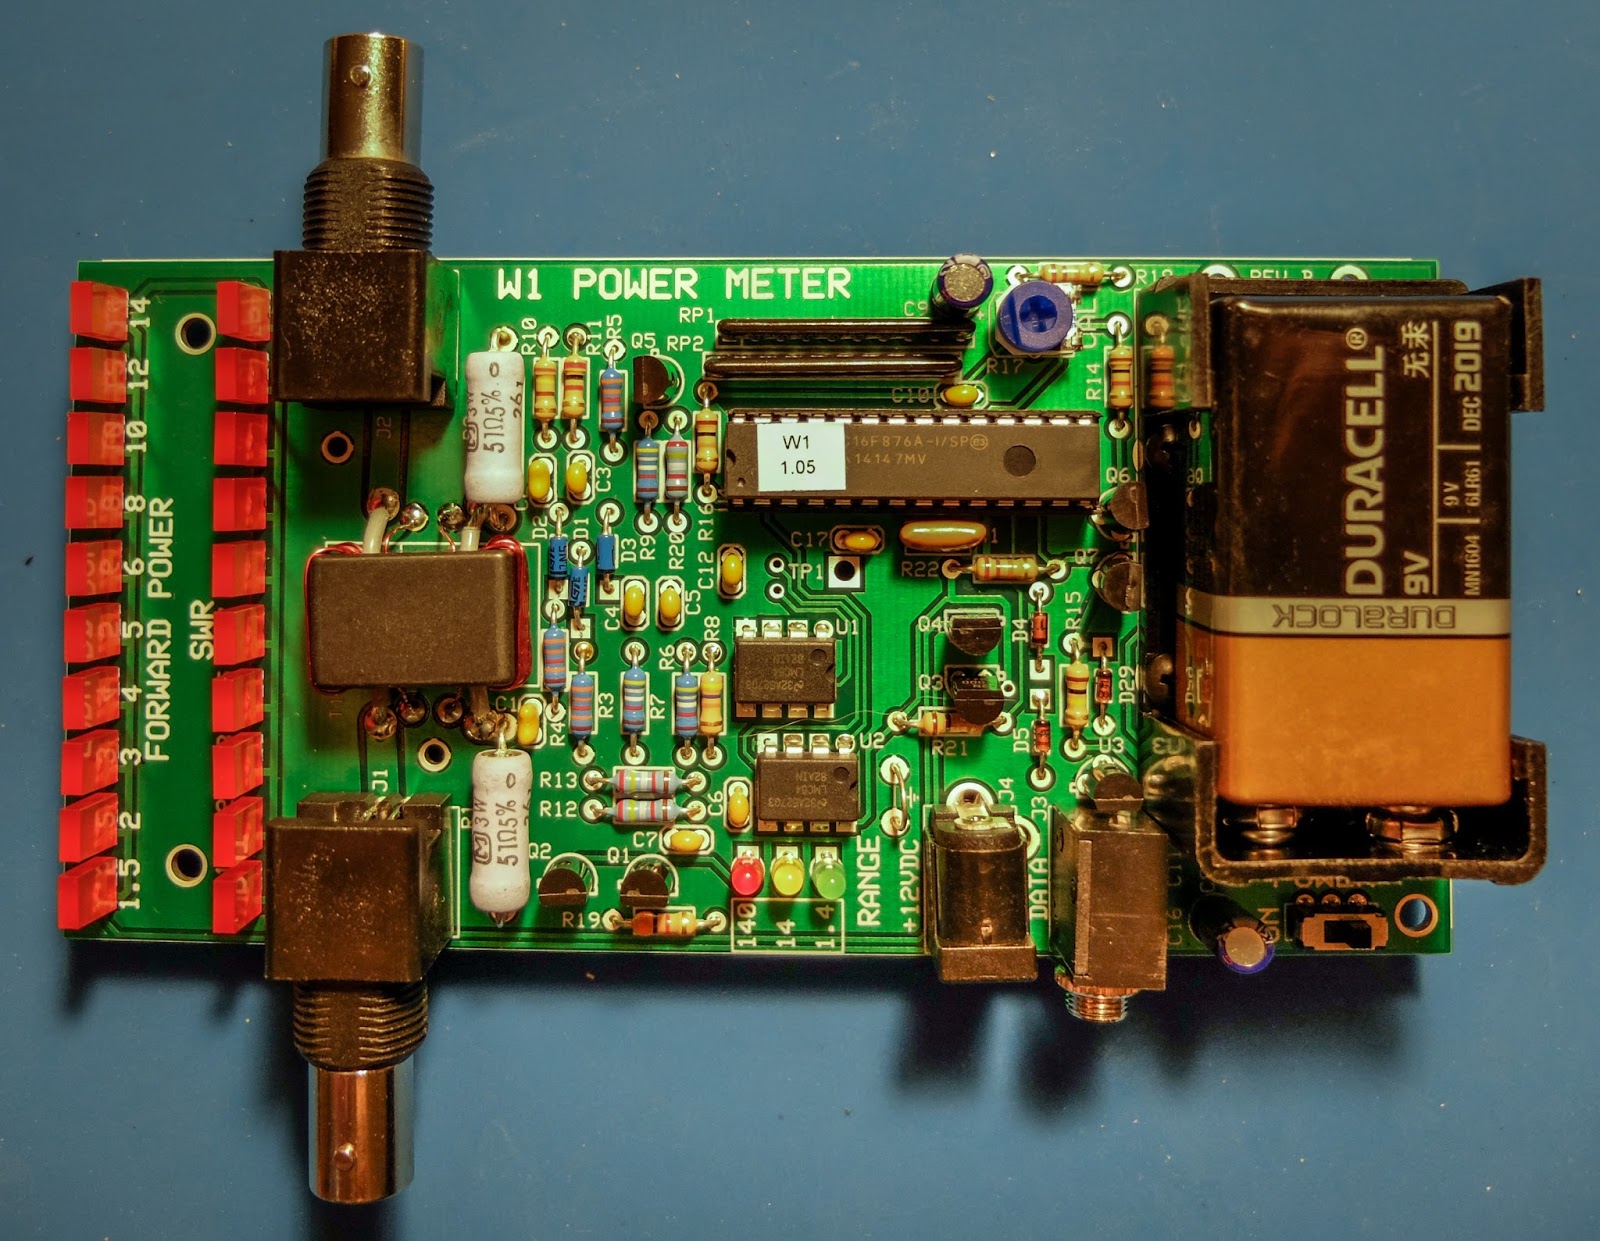
Elecraft W1 Power Meter
The Elecraft W1 is another fine mini-module kit from Elecraft. It is an auto-ranging power meter measuring as little as 150mw up to 140w. The 150 milliwatt to 1.4 watt range is an especially nice feature for QRP'ers.
 |
| Elecraft W1 Power Meter |
Building
I am new to building kits. My first kit was from 4-State QRP (Regen Receiver). This is my 4th Elecraft kit. The instructions are very detailed and easy to follow and I especially like that they give you the resistor color and capacitor identification right there in the instructions without having to refer to a data sheet somewhere else in the documentation.
All the parts come in a single bag so there is a bit of sorting that you need to do when you receive it. I use a big egg carton to sort and inventory the parts so that I can find them more easily.
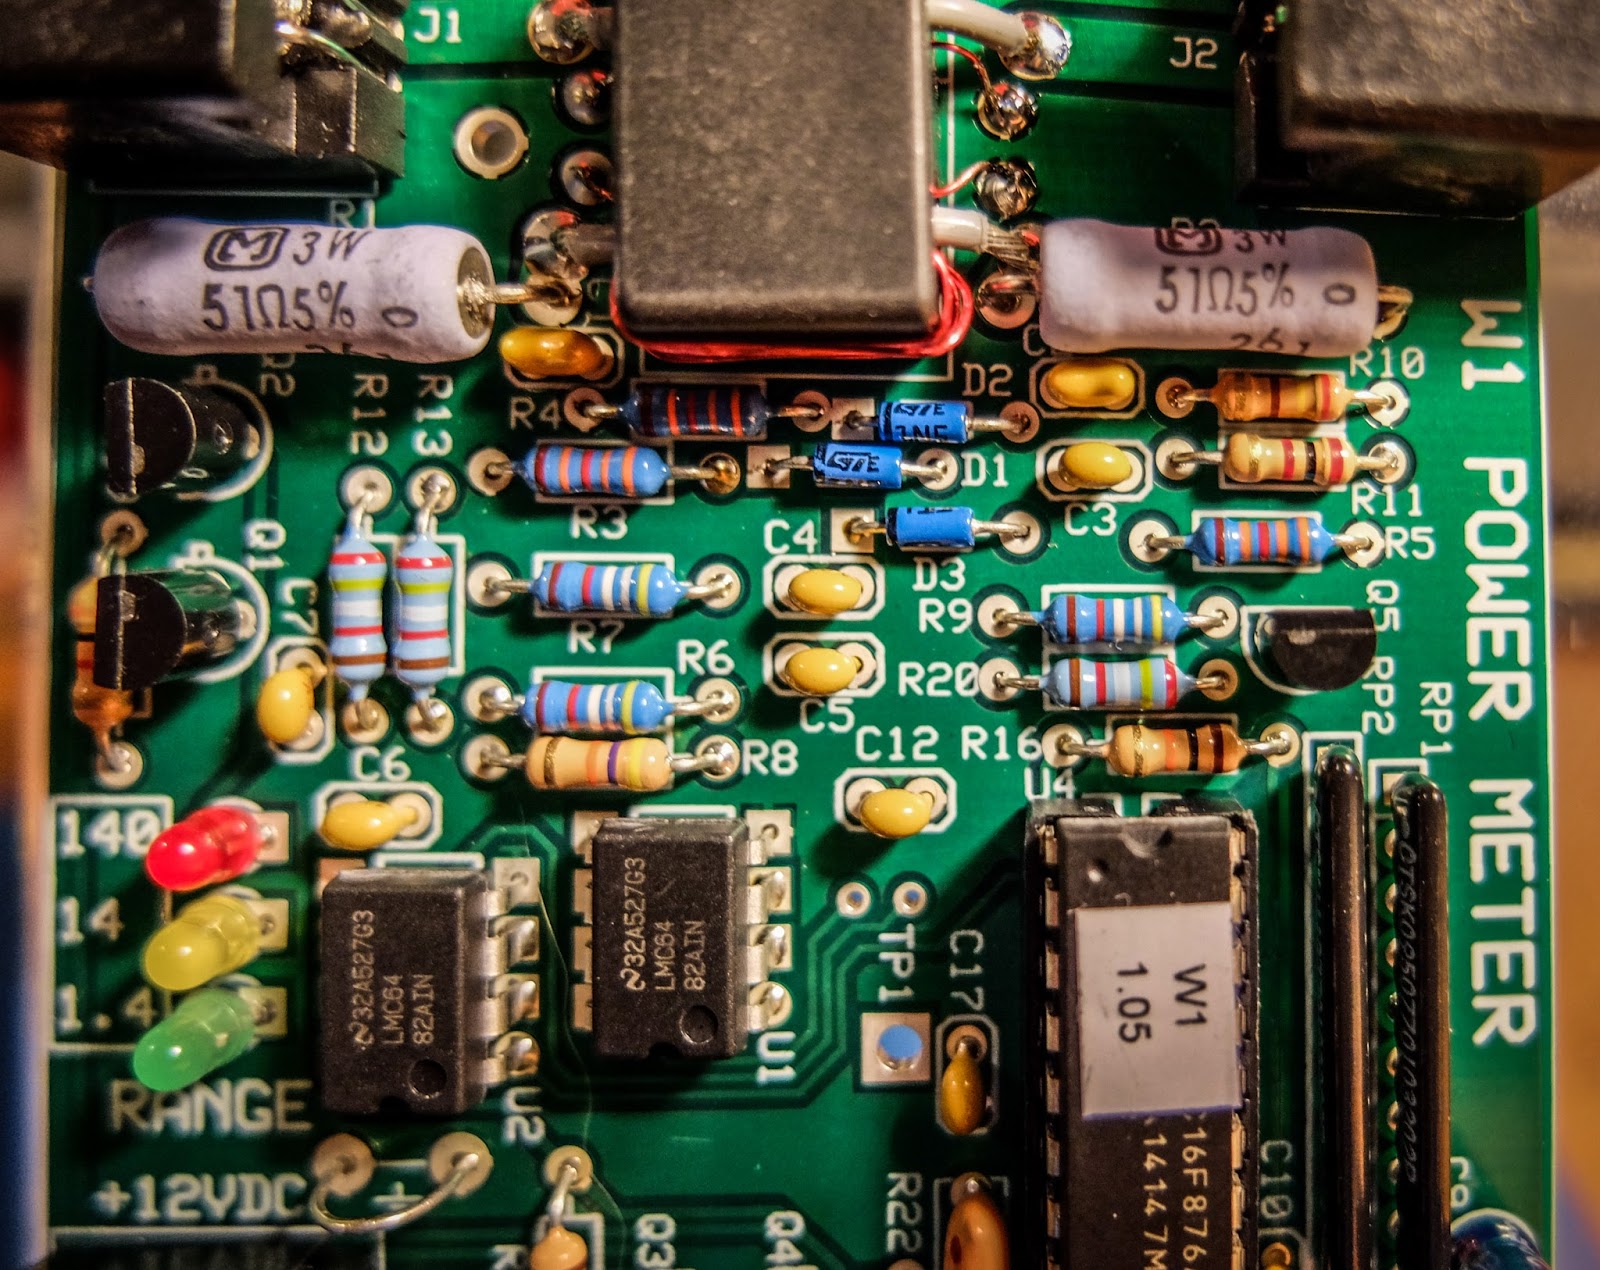
This kit was a bit more involved than the other kits I've built from Elecraft. It has a binocular toroid which is fiddly to wind, 3 ICs and a couple of resistor packs. Lots of soldering. The most tedious parts to solder are the tiny transistors. Those solder pads are really close together for someone new to soldering like me, but I took my time and everything turned out ok. I worked on this kit a little at a time over 3 nights. If you can follow instructions and have a steady hand you should be fine.
The kit has some ESD sensitive parts so you'll want to be able to properly ground yourself and your equipment. Make sure your soldering iron is ESD safe and that you are grounded.
Lastly, final calibration is performed using just a multi-meter.
Build options
The meter can be built in a number of different configurations depending on how you plan to use it. The battery holder and BNC connectors can be installed on the top or bottom of the board and the BNC connectors can even be oriented vertically on the back side of the board. If you plan to use it in an enclosure give some thought to the location of the battery holder and BNC connectors before you get to that part of the build.
I plan to use some stand-offs to mount it to the front of an acrylic photo frame that I already had.
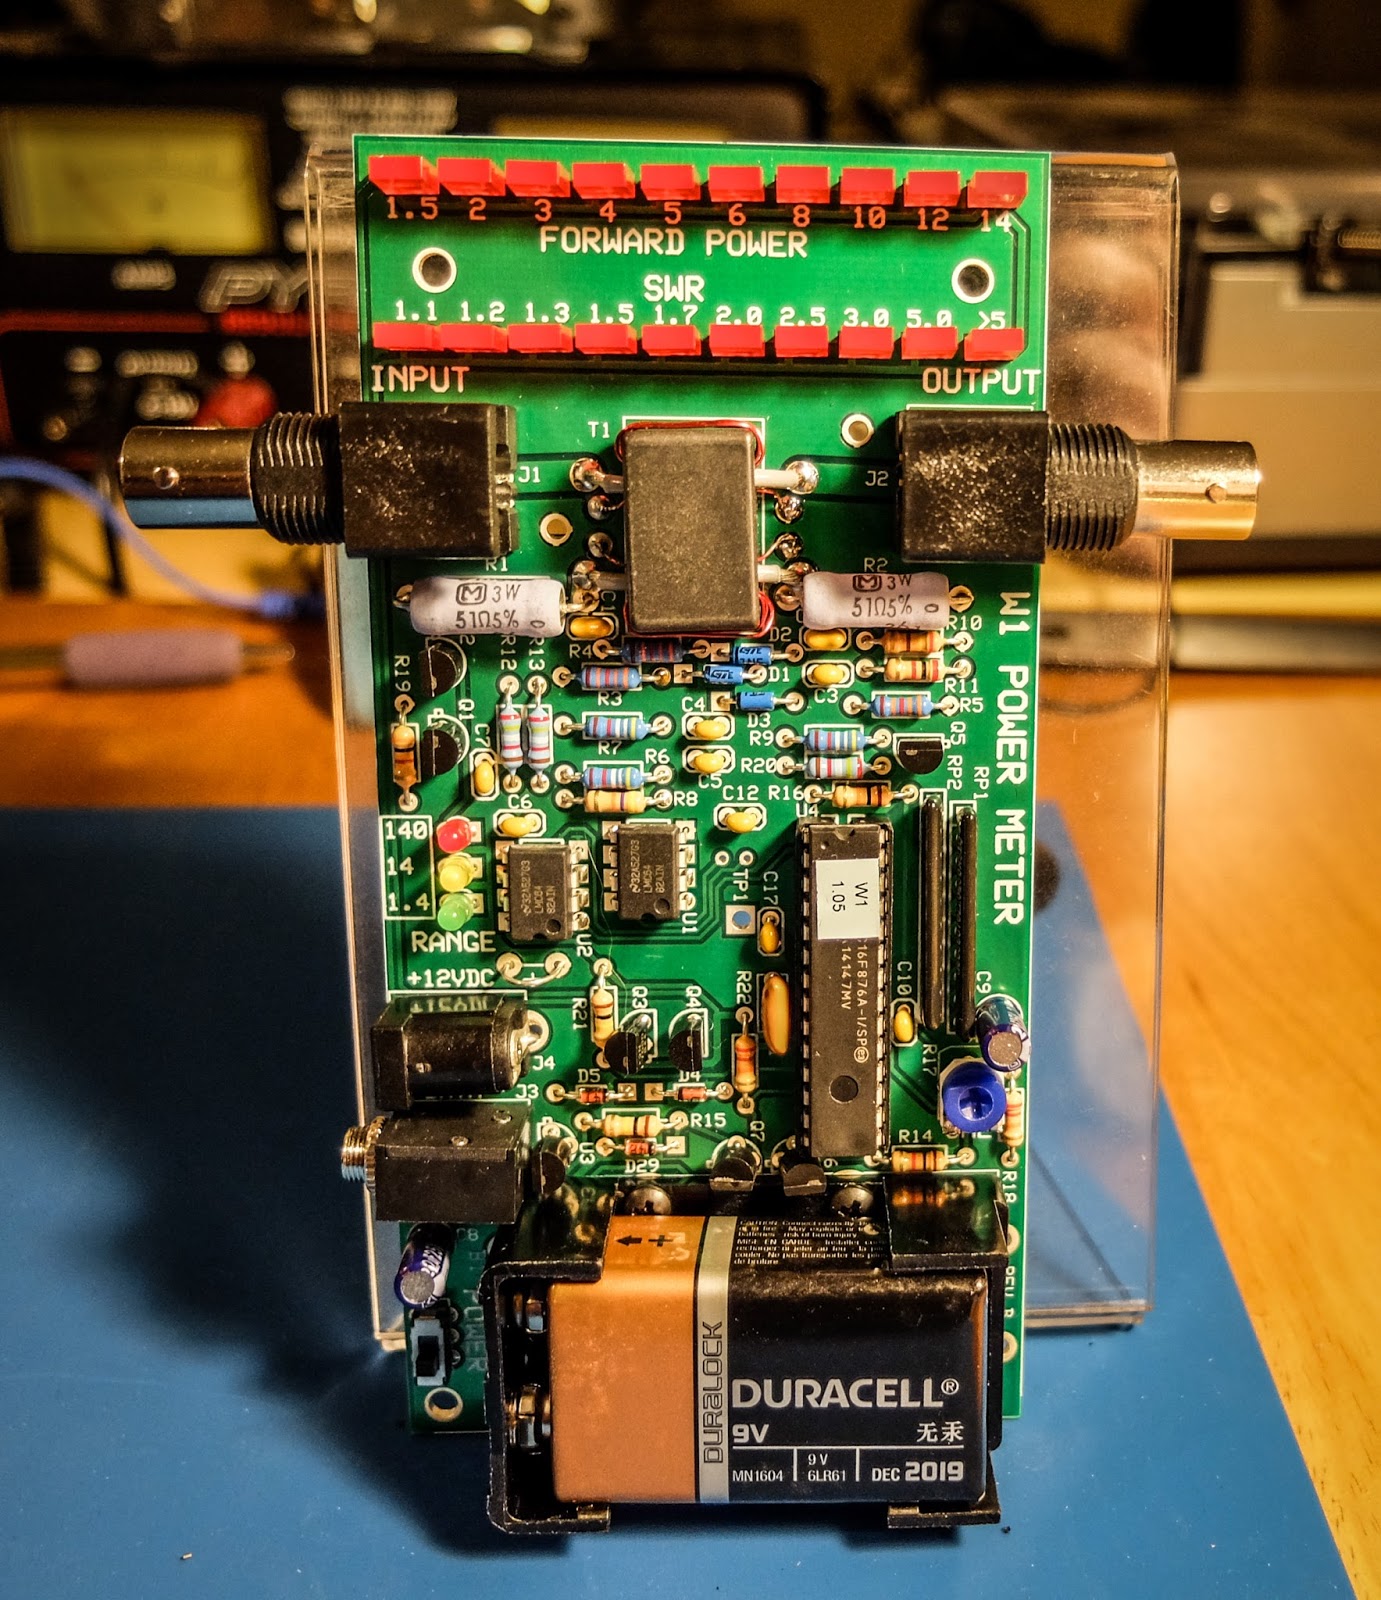 |
| An acrylic-angled photo frame can make a homebrew stand |
Operation
The meter can operate from a 9V battery or from an external power supply via the barrel connector on the side. There is a small power switch at the bottom left of the board.
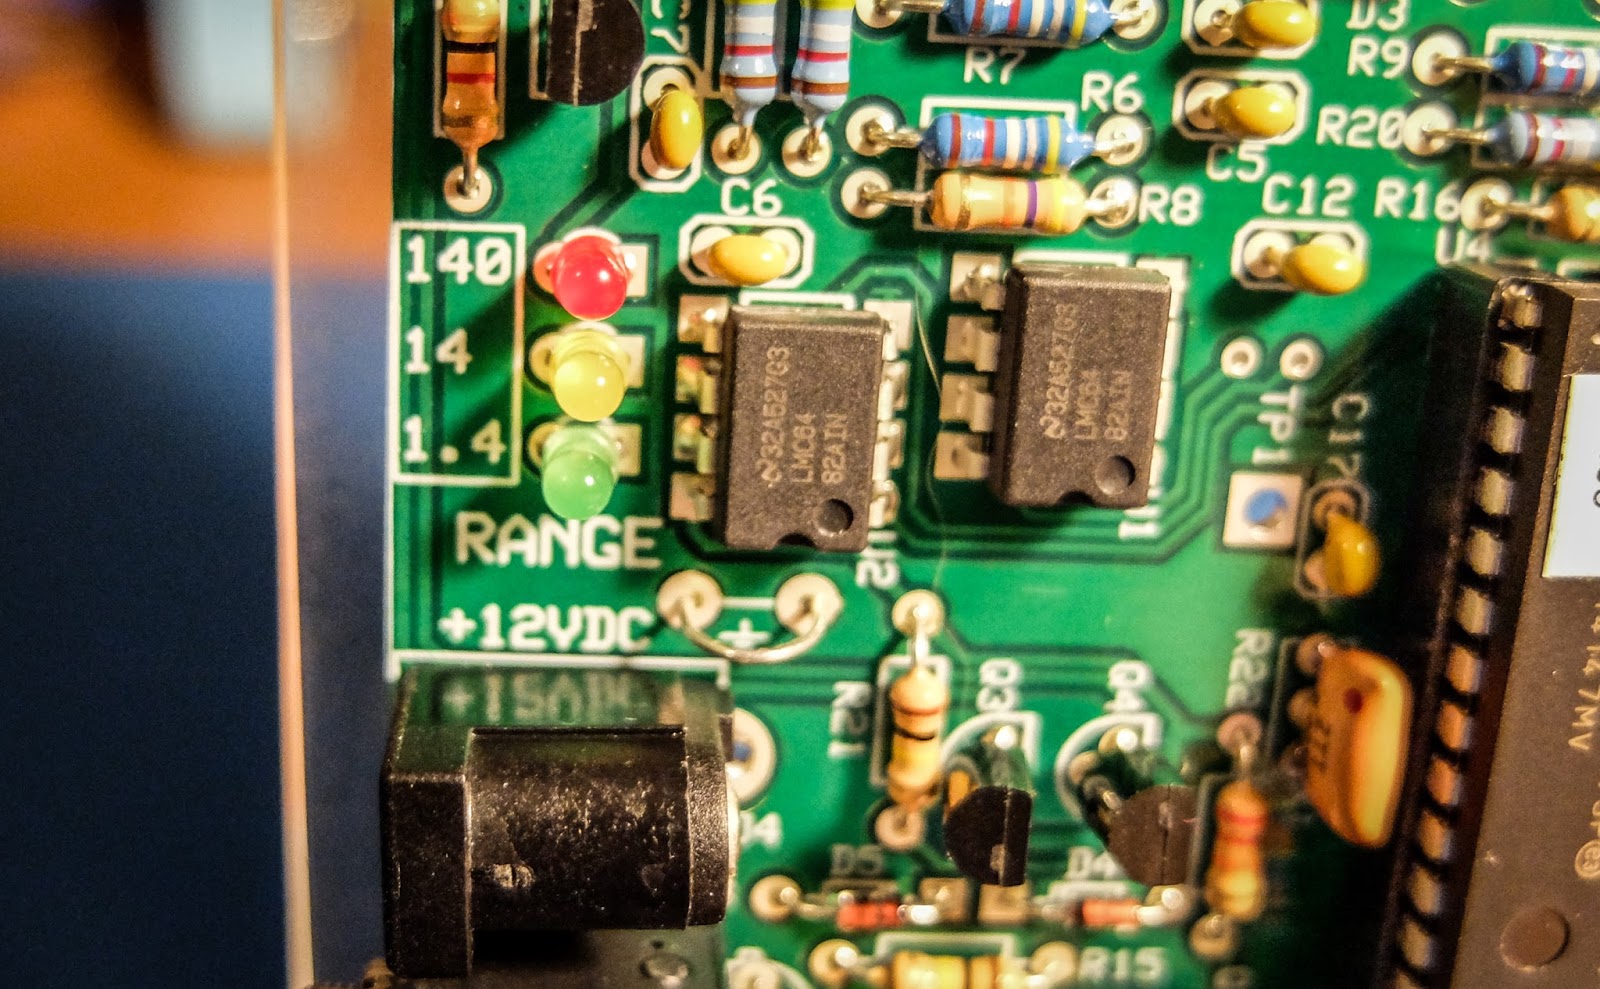
The top row of LEDs indicate power for a given range. The 3 LEDs mid way down the board to the left indicate the current power range. The range can be automatic or set via a command through the serial interface.
The ranges are:
- 150 milliwatts to 1.4 watts -- Green LED
- 1.5 watts to 14 watts -- Yellow LED
- 15 watts to 140 watts -- Red LED
Computer interface
There is a 1/8" stereo jack below the power connector that provides a serial interface to a computer. There is a command set for interacting with the meter as well as a sample application available on Elecraft's site that allows a number of settings to be modified such as peak hold and saved to the meter.Elecraft sells a $15 serial interface cable kit. What they don't tell you is that it has a DB-9 connector rather than a USB connector. I don't even have a computer with a DB-9 serial port so buyer beware. You may want to skip their kit and build your own. I happened to already have a DB-9 to USB converter but I'd preferred their kit to provide a USB connector.
Demonstration
Photos
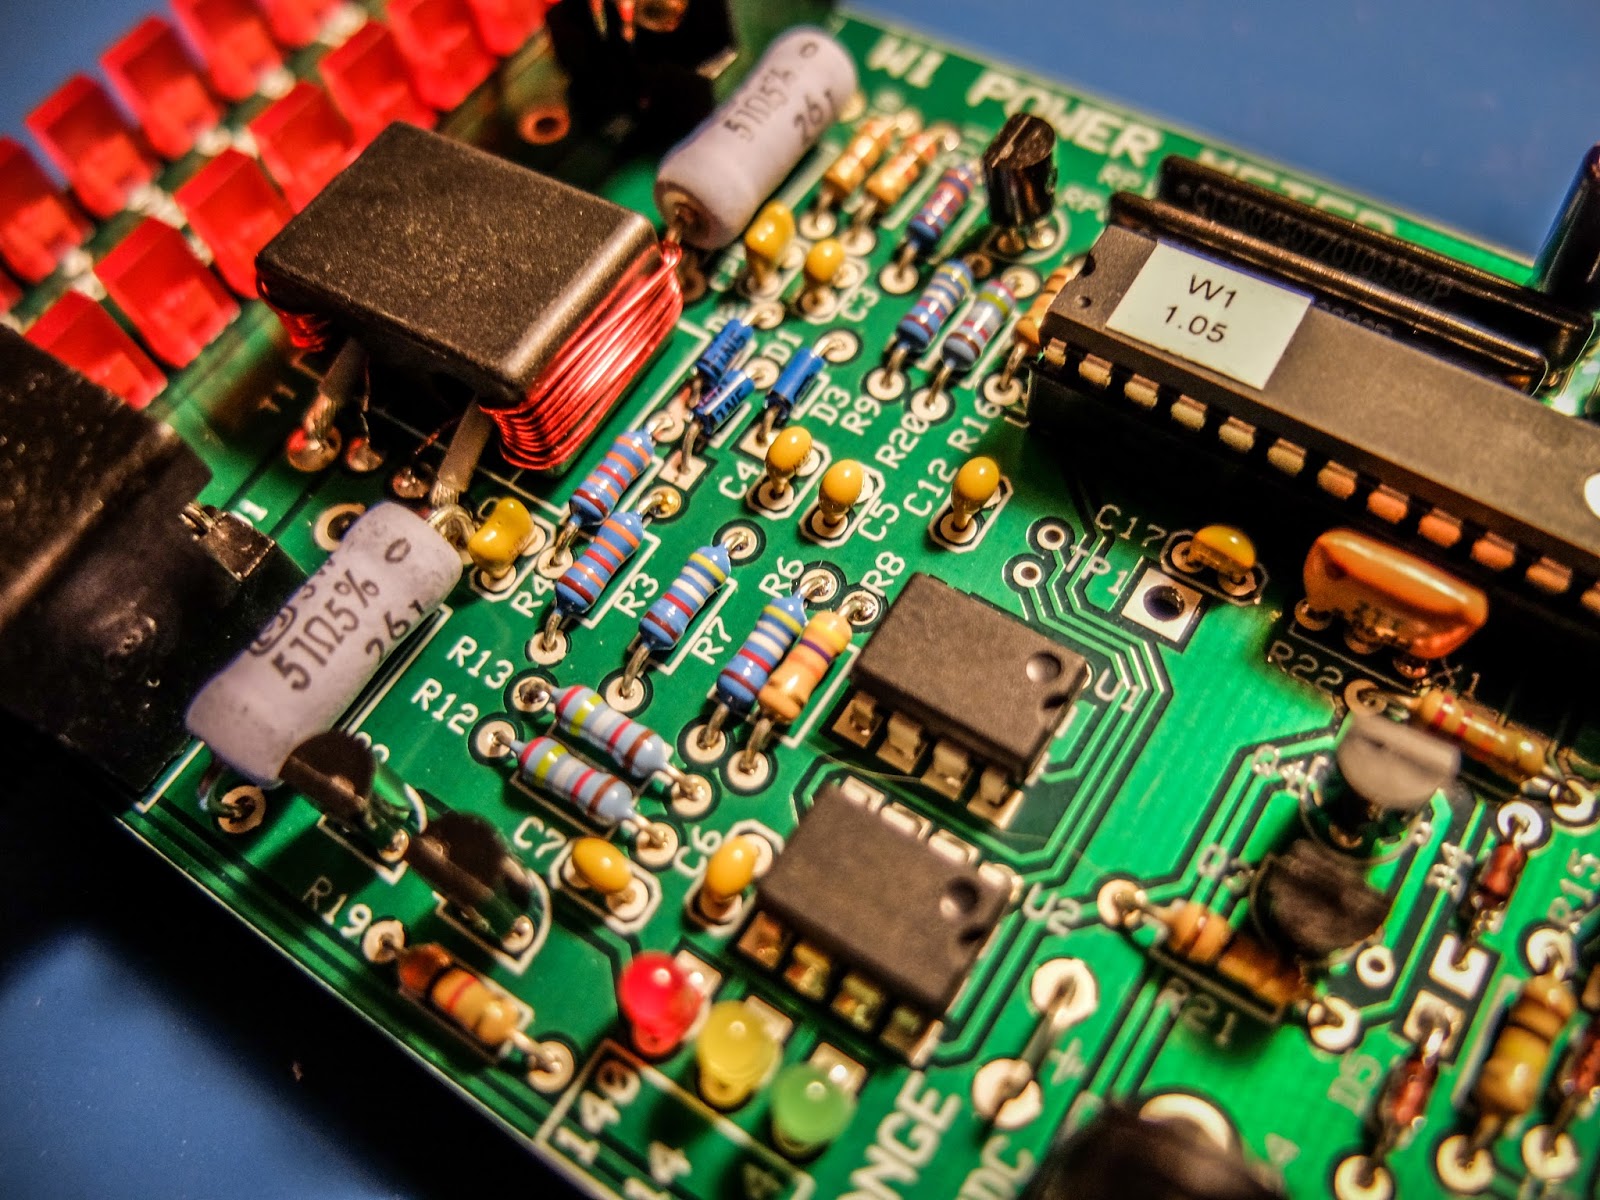 |
| 3 ICs to solder and toroid winding... lots of fun |
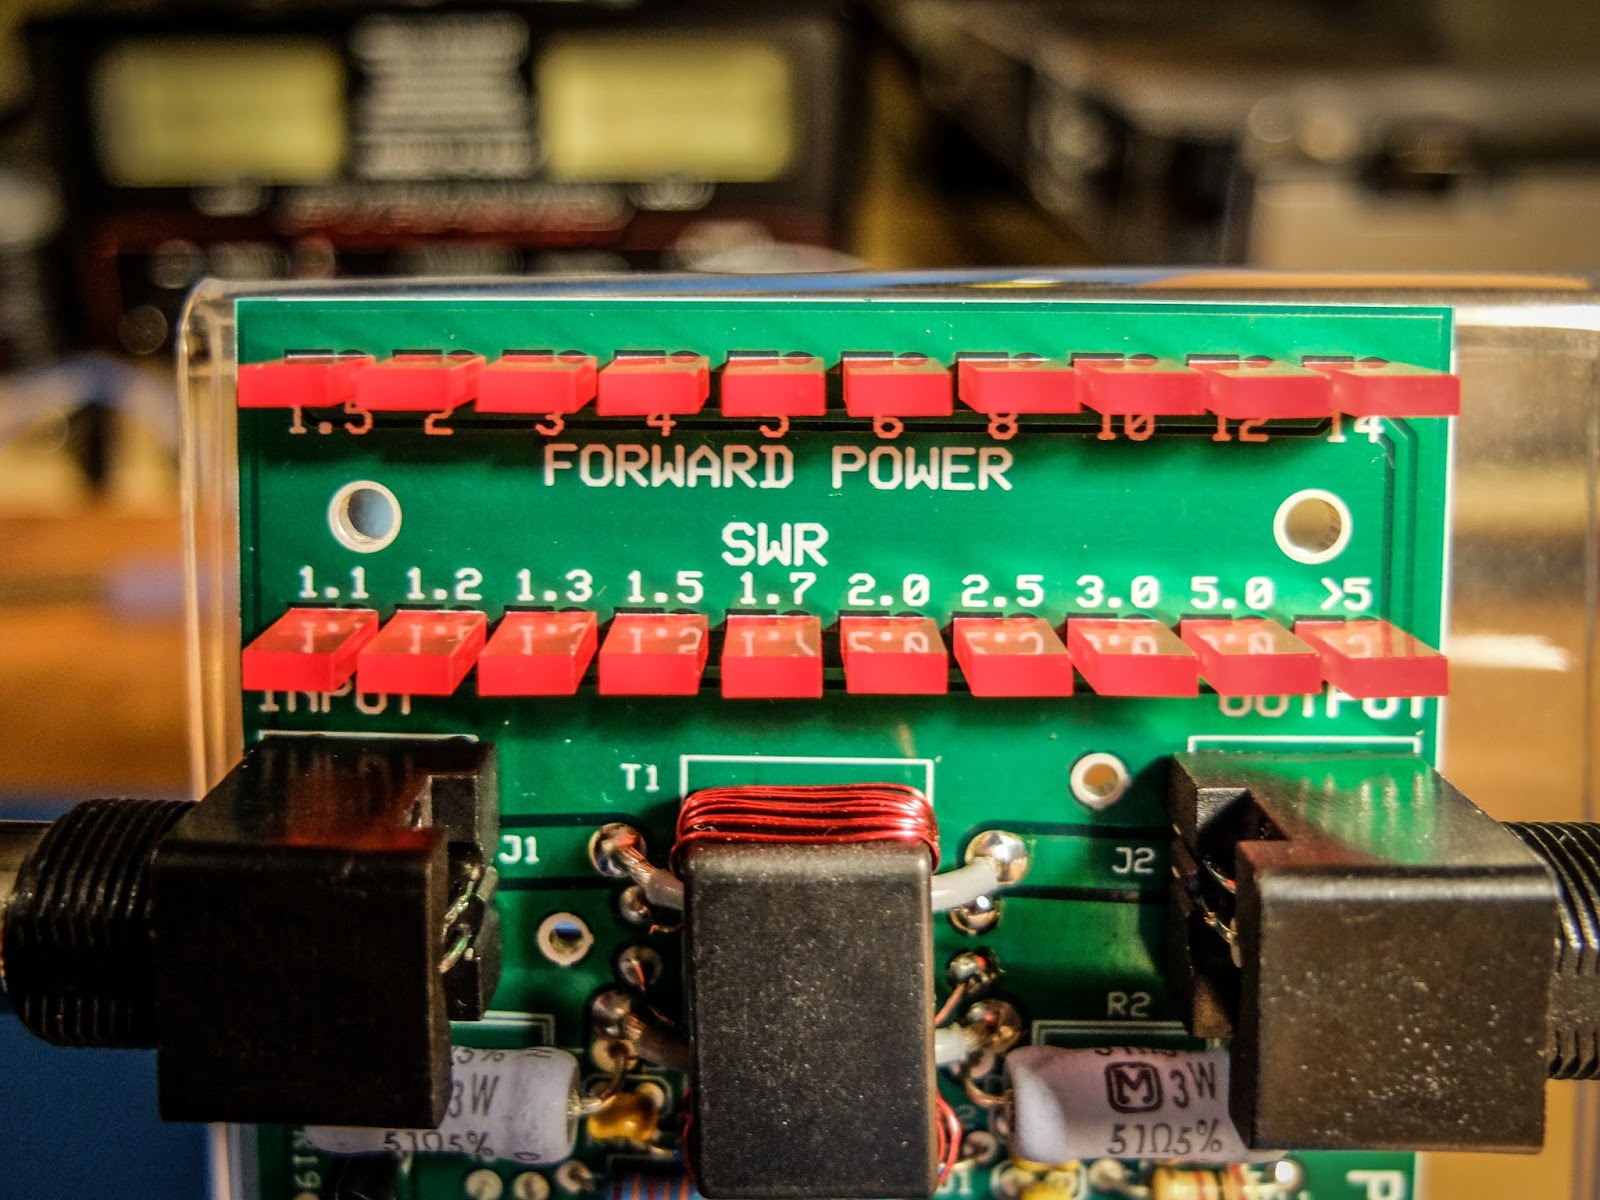 |
| LEDs indicate power in each range and SWR |
 |
| LEDs indicate the power range being displayed |
 |
| Elecraft W1 Power Meter |
That's all for now
So lower your power and raise your expectations
73/72
Richard, N4PBQ
Please support our generous sponsors who make AmateurRadio.com possible:
 Ham Radio Deluxe |
 W5SWL Electronics |
 Ham Radio Prep |
 KB3IFH QSL Cards  Hip Ham Shirts  HamRadioAuctions HamRadioAuctions Reliance Antennas Reliance Antennas Enigma Shop Enigma Shop |  morseDX  Ni4L Antennas  R&L Electronics R&L Electronics antennas.us antennas.us QRV QRV |
- Matt W1MST, Managing Editor
