Author Archive
 Powering the K-Pod via its RJ12 cable.
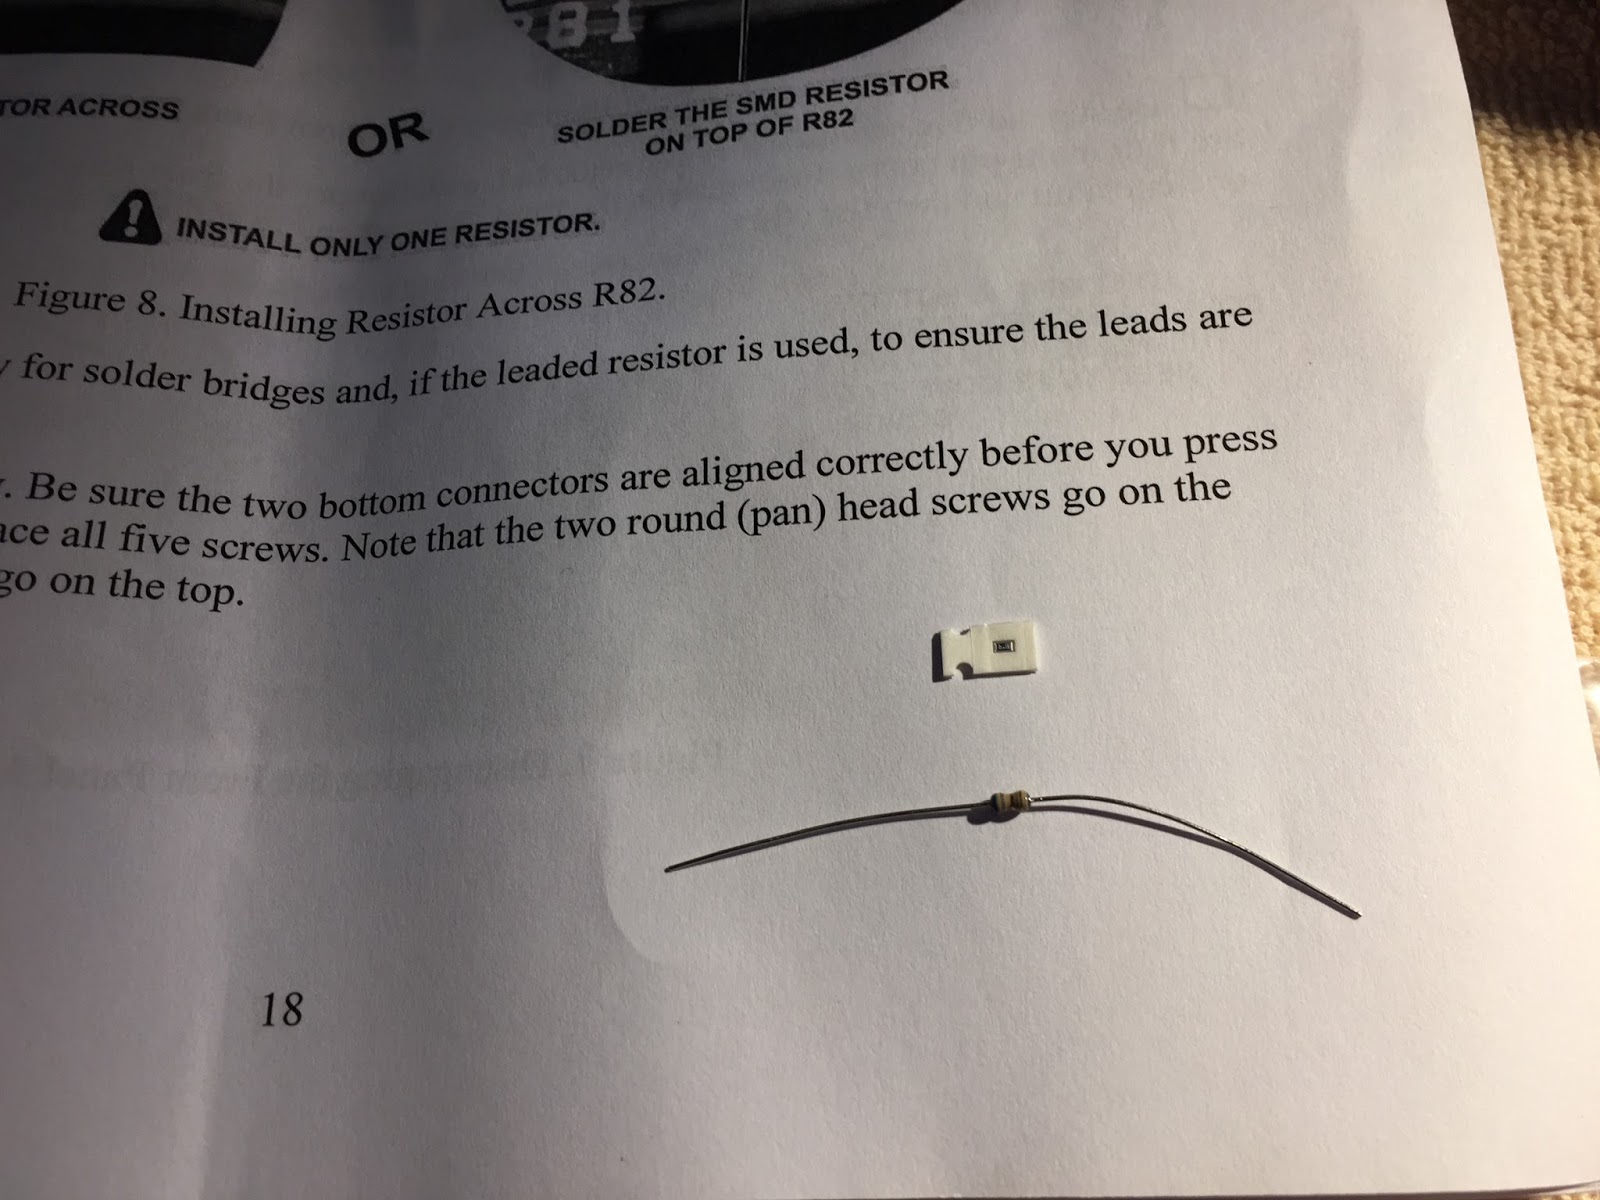 |
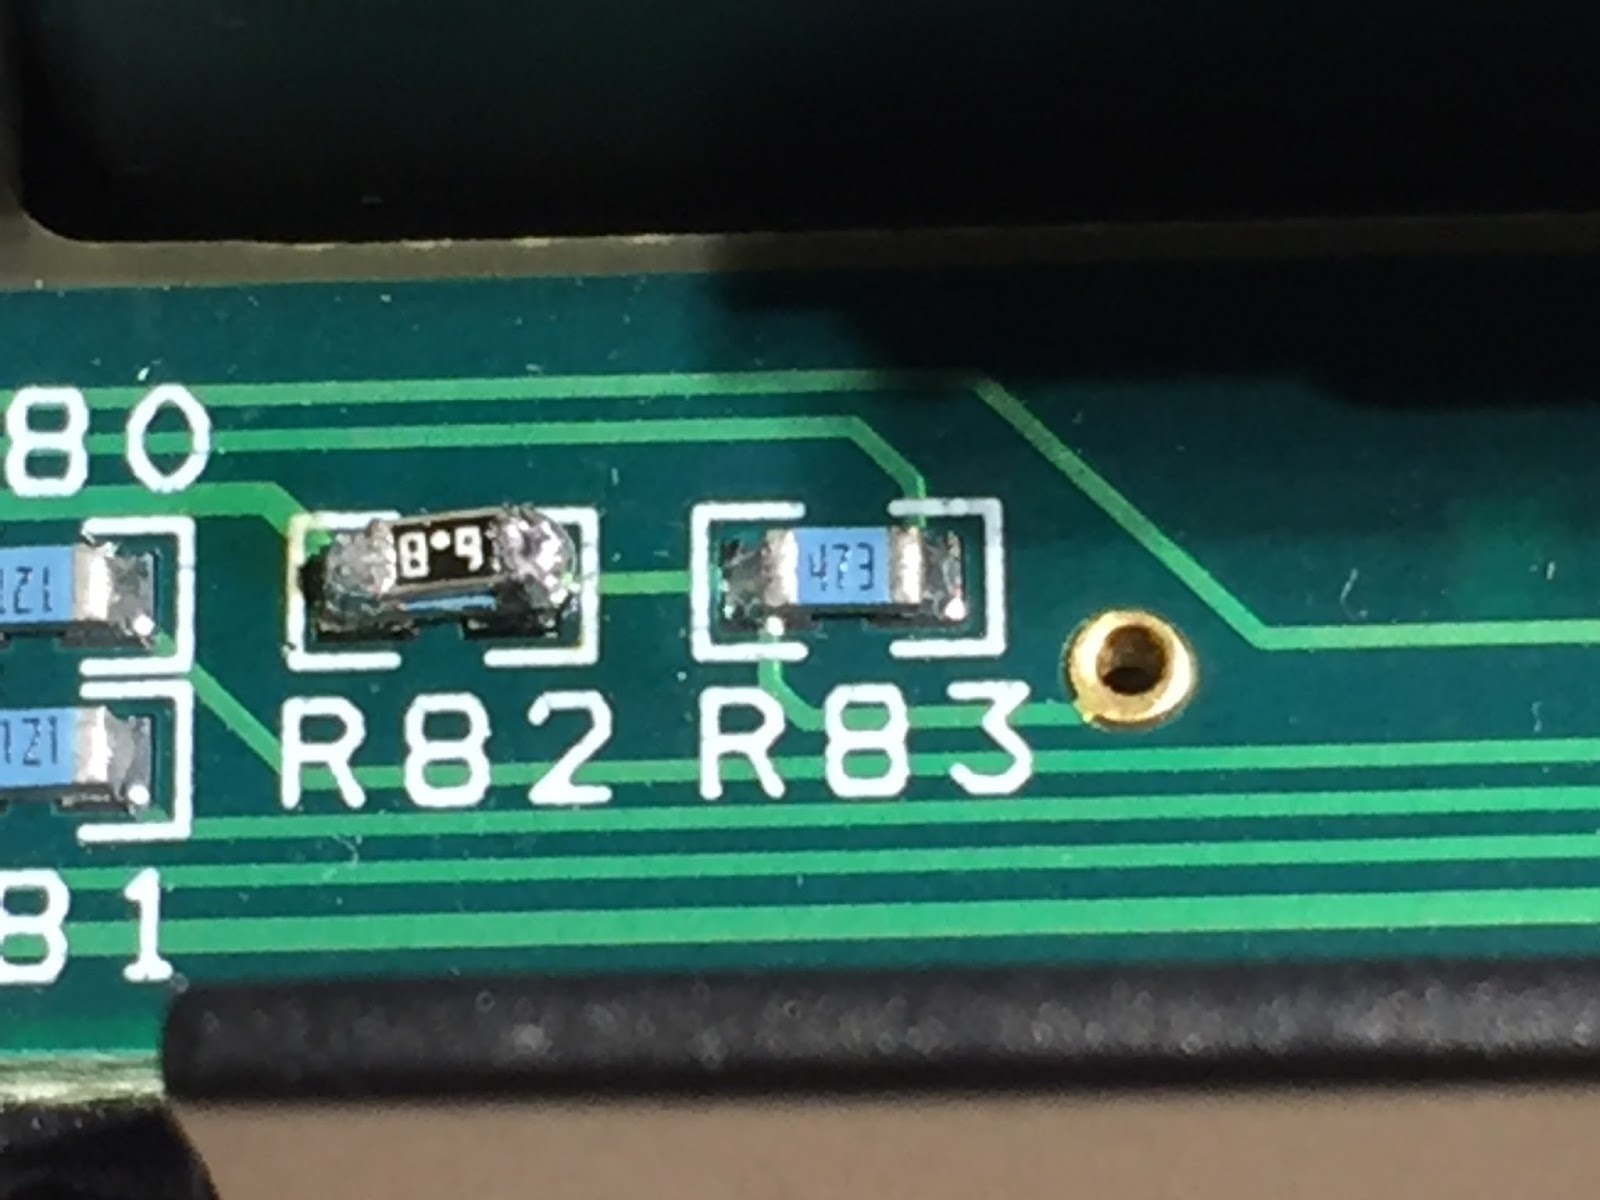
| The 2 resistor through hole and SMT |
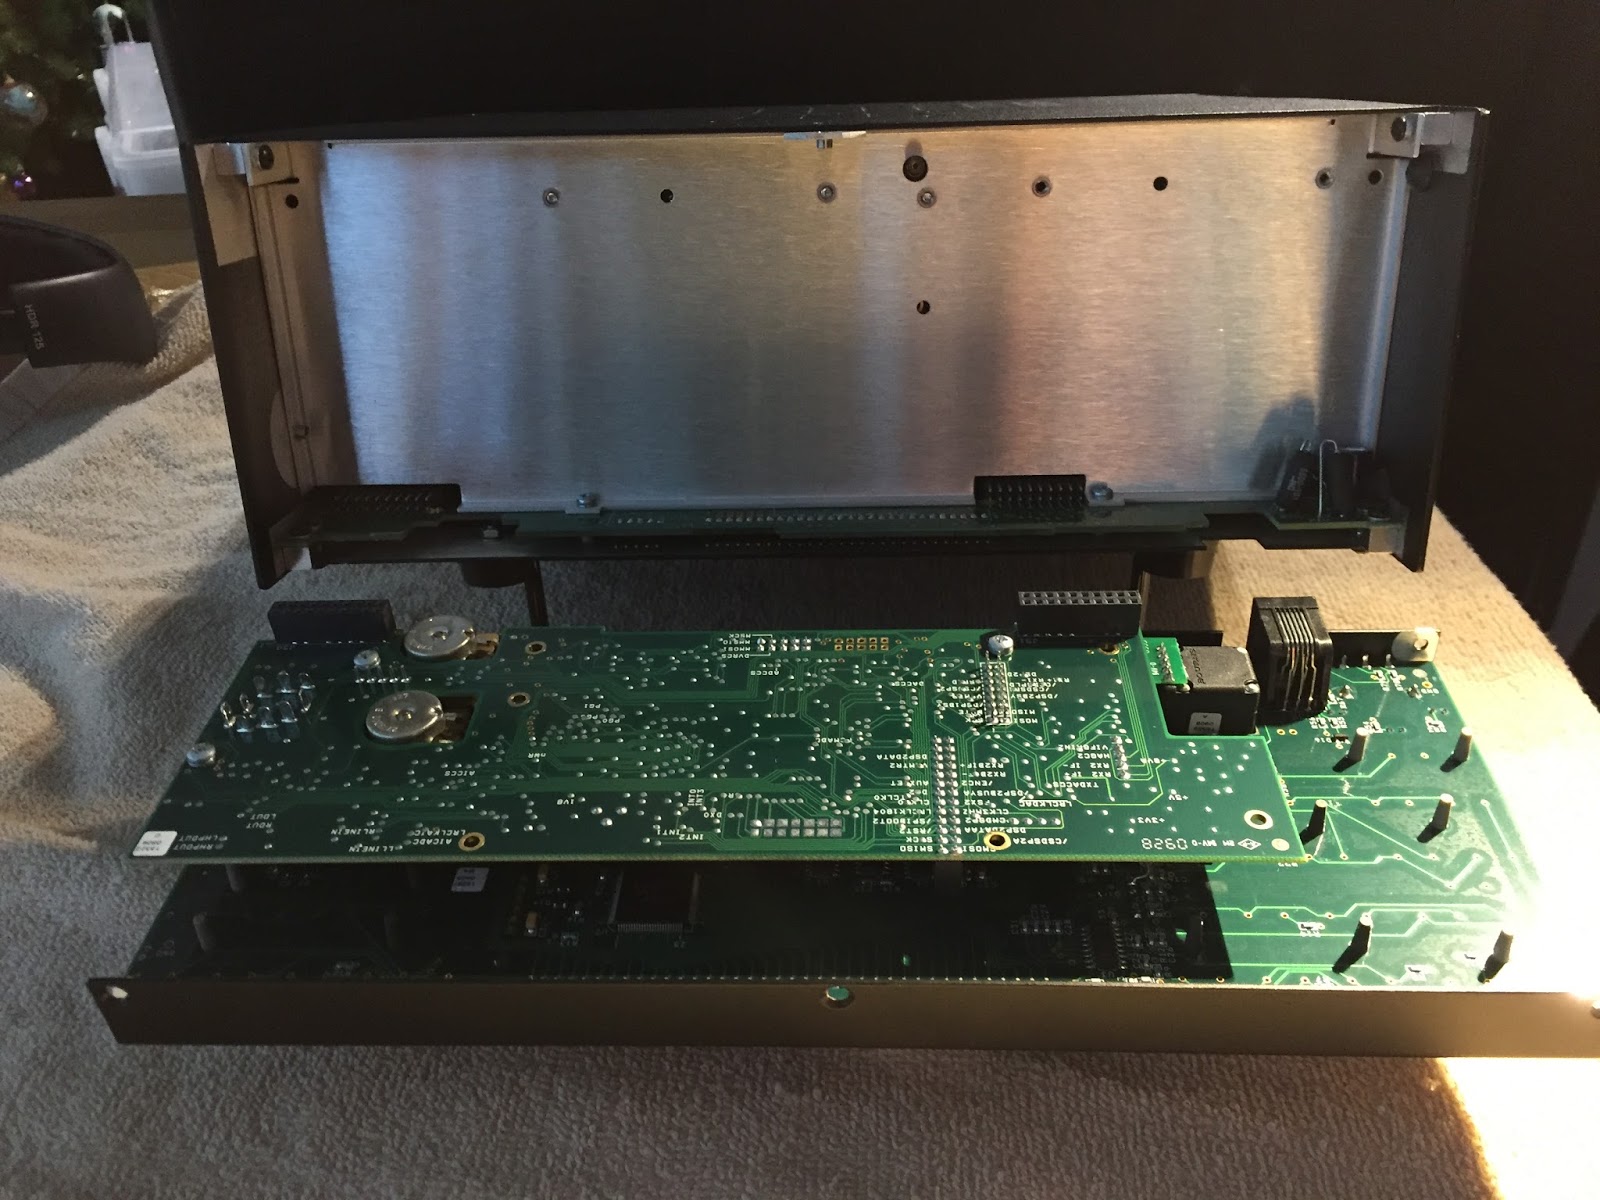 |
| Front panel removed |
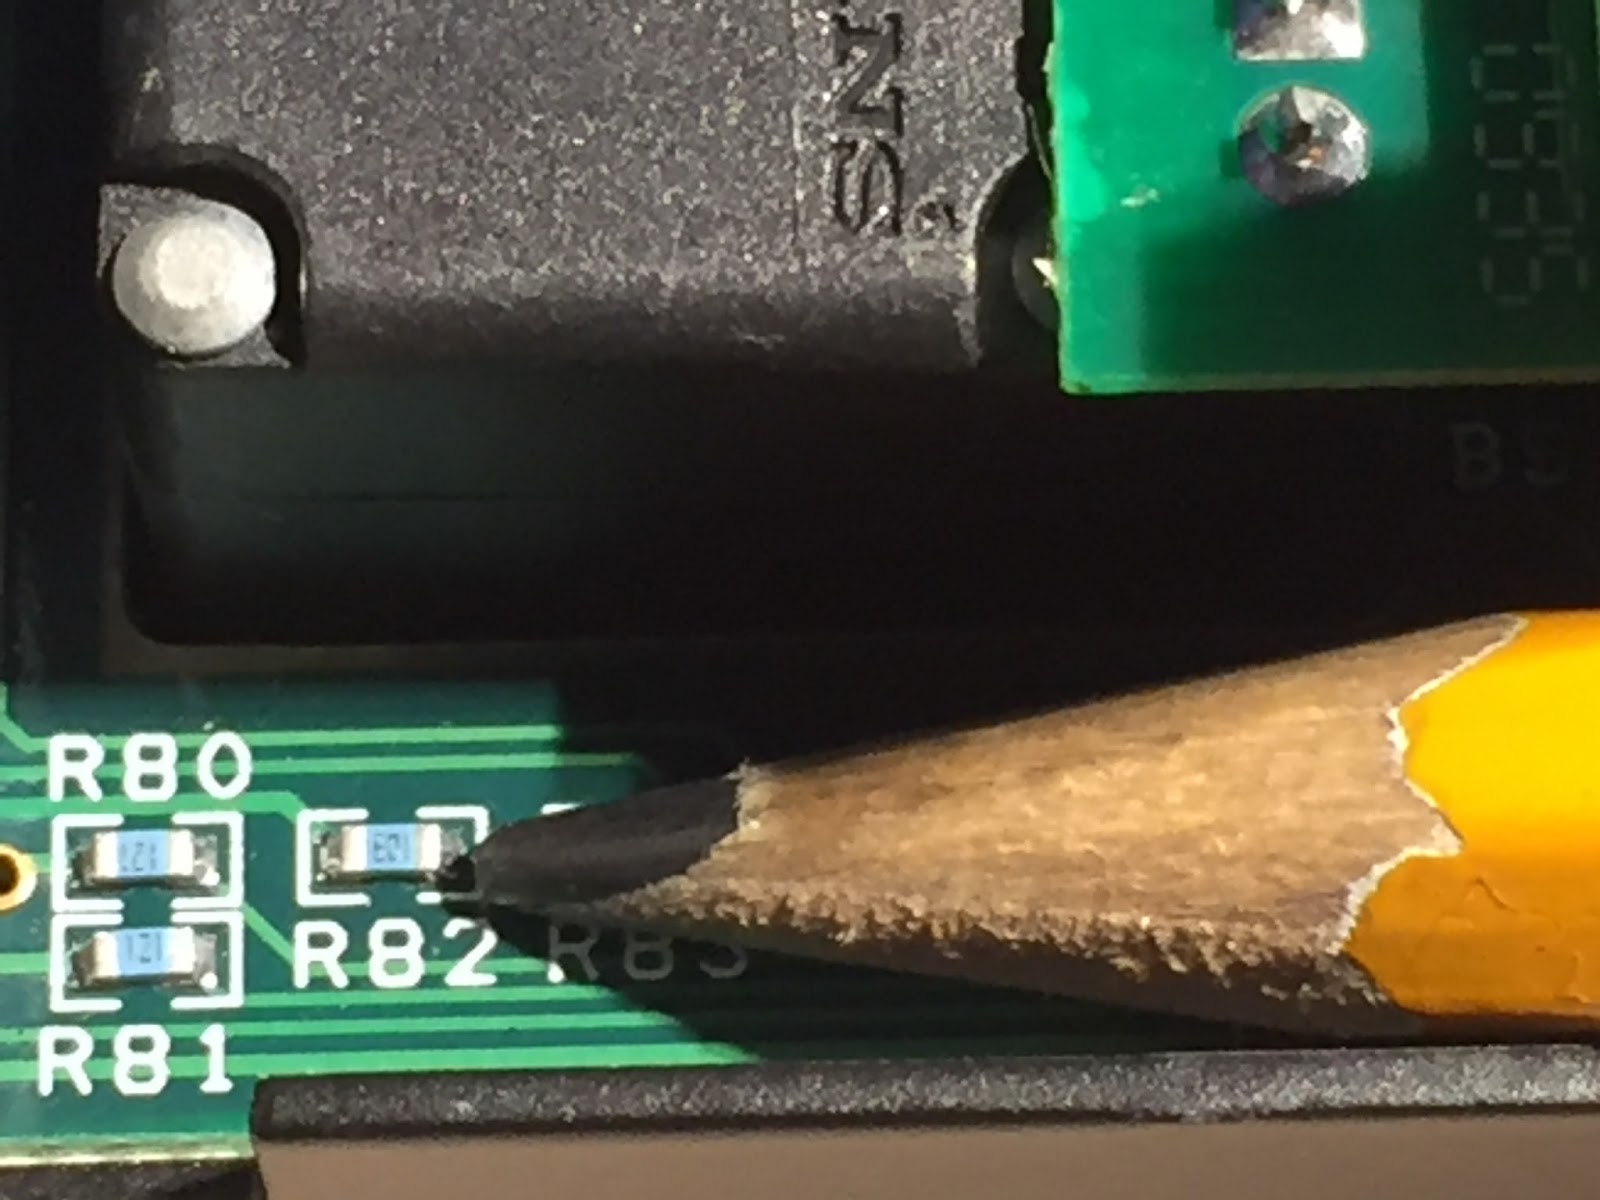 |
| Now that is small!! |
 |
| The deed was done not pretty but it works fine. |
Powering the K-Pod via its RJ12 cable.
|
| The 2 resistor through hole and SMT |
|
| Front panel removed |
|
| Now that is small!! |
|
| The deed was done not pretty but it works fine. |
A review of the Elecraft K-Pod

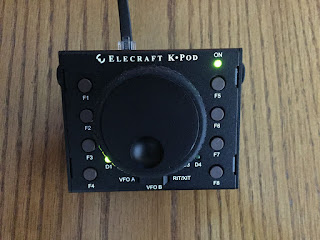
There is a rocker switch that will allow you to smoothly switch from VFO A (LED D1 lights up) to B (LED D2 lights up) and then to RIT/RXT (LED D3 lights up) adjustments. The manual says that LED4 is user programable and you can actually control the on/off function of D1, D2 and D3 as well.
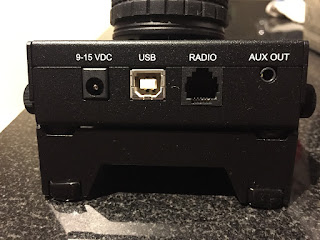
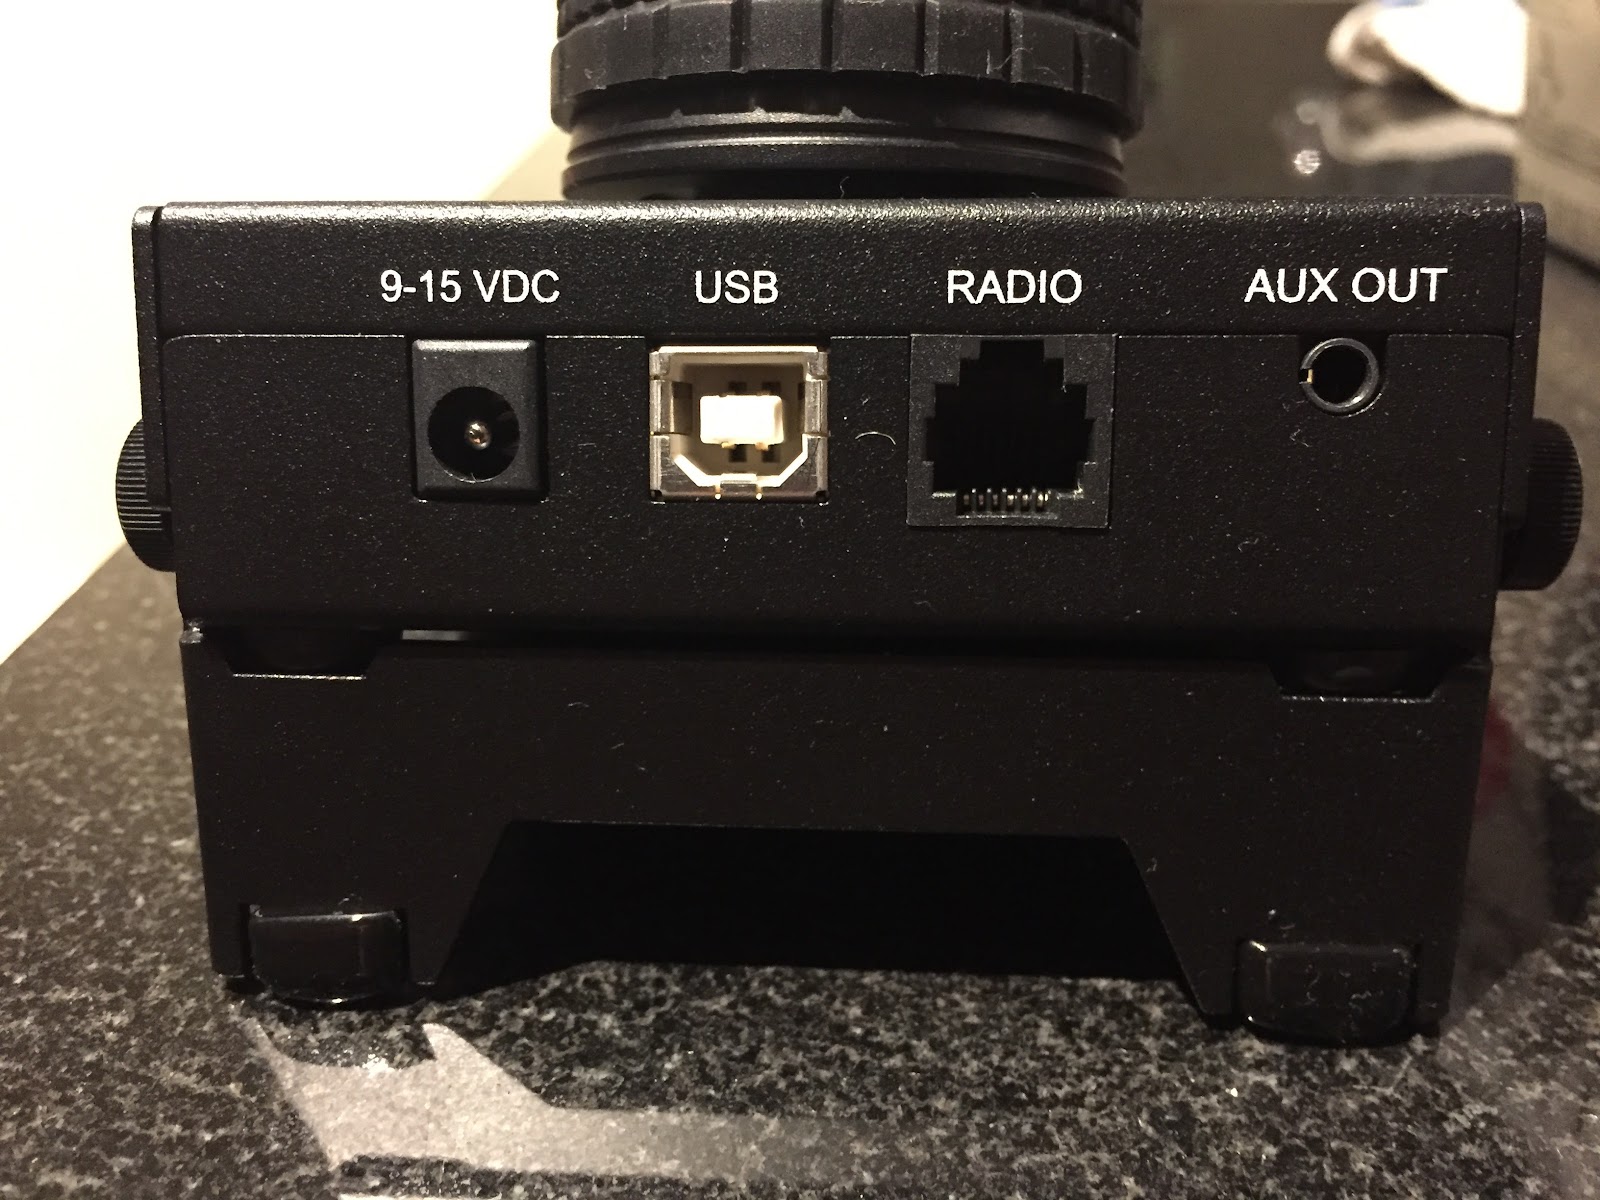
On the top of the K-Pod there are 4 connection ports:
- Auxiliary outputs that the manual says can be used for an external antenna switch, amplifier and so on.
- DATA connector is used to connect an RJ12 cable (supplied) to the K3.
- USB connector (USB cable is supplied) is used to interface the K-Pod with your PC for firmware updates and for what Elecraft calls "future" PC control.
- Power connector (cable supplies) can be used to supply the needed DC to the K-Pod and I say "can be used" because via a simple mod(parts supplied) to the K3 and K3S you can power the K-Pod via the DATA cable.
This was a nice addition to my K3 as for me it's handy to have the VFO control right beside the key. For contests I am able to program the first 3 (or more if needed) macro buttons for contest macros. The K-Pod worked right out of the box once powered up and connected to the K3 you had immediate VFO control, A/B VFO switching and RIT/XIT as well. It was then time to learn about macro programming.
There were just some minor issues I have:
B. Connect the USB cable to your PC
C. While holding F1 and F4 on the K-Pod plug in the other end of the USB cable to the K-Pod.
D. You now start the K-Pod utility program and update it's firmware.
4. I found having the power cable and the RJ12 cable coming from the K-Pod a bit cumbersome. One of the main reasons for me doing the modification to the K3 so the K-Pod is powered via the RJ12 cable.
There were just some minor issues I have:
- The provided USB cable provided is 3 feet which I found a bit to short, even with the front USB ports on my PC 3 feet was still very tight fit.
- On first start up D4 on the K-Pod constantly stayed on. This was not normal and to correct this issue a Bata firmware had to be downloaded to the K3 or K3S if you have that model. I'm not to keen on loading Bata firmware as there could be some bugs with the software.
- I have been spoiled by Elecraft and how easy it was to upgrade their products with new firmware. With your rig or P3 connected to your PC via a USB cable and a couple of mouse clicks using the Elecraft utility software you were good to go. For some reason the firmware update procedure for the K-Pod is much different.
B. Connect the USB cable to your PC
C. While holding F1 and F4 on the K-Pod plug in the other end of the USB cable to the K-Pod.
D. You now start the K-Pod utility program and update it's firmware.
4. I found having the power cable and the RJ12 cable coming from the K-Pod a bit cumbersome. One of the main reasons for me doing the modification to the K3 so the K-Pod is powered via the RJ12 cable.
A review of the Elecraft K-Pod
There is a rocker switch that will allow you to smoothly switch from VFO A (LED D1 lights up) to B (LED D2 lights up) and then to RIT/RXT (LED D3 lights up) adjustments. The manual says that LED4 is user programable and you can actually control the on/off function of D1, D2 and D3 as well.
On the top of the K-Pod there are 4 connection ports:
- Auxiliary outputs that the manual says can be used for an external antenna switch, amplifier and so on.
- DATA connector is used to connect an RJ12 cable (supplied) to the K3.
- USB connector (USB cable is supplied) is used to interface the K-Pod with your PC for firmware updates and for what Elecraft calls "future" PC control.
- Power connector (cable supplies) can be used to supply the needed DC to the K-Pod and I say "can be used" because via a simple mod(parts supplied) to the K3 and K3S you can power the K-Pod via the DATA cable.
This was a nice addition to my K3 as for me it's handy to have the VFO control right beside the key. For contests I am able to program the first 3 (or more if needed) macro buttons for contest macros. The K-Pod worked right out of the box once powered up and connected to the K3 you had immediate VFO control, A/B VFO switching and RIT/XIT as well. It was then time to learn about macro programming.
There were just some minor issues I have:
B. Connect the USB cable to your PC
C. While holding F1 and F4 on the K-Pod plug in the other end of the USB cable to the K-Pod.
D. You now start the K-Pod utility program and update it's firmware.
4. I found having the power cable and the RJ12 cable coming from the K-Pod a bit cumbersome. One of the main reasons for me doing the modification to the K3 so the K-Pod is powered via the RJ12 cable.
There were just some minor issues I have:
- The provided USB cable provided is 3 feet which I found a bit to short, even with the front USB ports on my PC 3 feet was still very tight fit.
- On first start up D4 on the K-Pod constantly stayed on. This was not normal and to correct this issue a Bata firmware had to be downloaded to the K3 or K3S if you have that model. I'm not to keen on loading Bata firmware as there could be some bugs with the software.
- I have been spoiled by Elecraft and how easy it was to upgrade their products with new firmware. With your rig or P3 connected to your PC via a USB cable and a couple of mouse clicks using the Elecraft utility software you were good to go. For some reason the firmware update procedure for the K-Pod is much different.
B. Connect the USB cable to your PC
C. While holding F1 and F4 on the K-Pod plug in the other end of the USB cable to the K-Pod.
D. You now start the K-Pod utility program and update it's firmware.
4. I found having the power cable and the RJ12 cable coming from the K-Pod a bit cumbersome. One of the main reasons for me doing the modification to the K3 so the K-Pod is powered via the RJ12 cable.
Santa came with radio stuff !!
It was a nice surprise that my wife purchased the Elecraft K-Pod for me for Christmas. I did get it a bit early as she wanted to make sure it was here in time and no delivery issues arose due to the busy season. The K-Pod is a nice addition to my Elecraft lineup. It's an external VFO that can control both VFO A-B and RIT via a selector switch . It also has buttons 8 (the "F" buttons) that you can program macros into. There is actually 16 macros that can be programed as each button can hold 2 macro commands (tap or 2 sec hold) The macros can be programmed using the Elecraft utility program on your PC.
Is is wise to buy your wife an appliance for Christmas…..maybe!!