Posts Tagged ‘buildathon’
 GQRP / Kanga receiver

I was sent a kit this week by Kanga UK, who supplied me a new regen receiver. The kit in question makes its debut at the GQRP convention at Rishworth UK this week. Its appearance is marked by the annual buildathon.
The buildathon is a great way for anyone who has an interest in electronics, radio or has indeed has no experience in construction, build a kit and walk away with a working radio. The step by step guide we supply with the kits allows easy installation of the components and instant gratification.
I wrote the instructions for this kit and whilst doing so, I managed to video the whole build. The video is sped up, but the build actually took about 2 hours, not rushing and includes the videoing & taking pictures.
GQRP / Kanga receiver
I was sent a kit this week by Kanga UK, who supplied me a new regen receiver. The kit in question makes its debut at the GQRP convention at Rishworth UK this week. Its appearance is marked by the annual buildathon.
The buildathon is a great way for anyone who has an interest in electronics, radio or has indeed has no experience in construction, build a kit and walk away with a working radio. The step by step guide we supply with the kits allows easy installation of the components and instant gratification.
I wrote the instructions for this kit and whilst doing so, I managed to video the whole build. The video is sped up, but the build actually took about 2 hours, not rushing and includes the videoing & taking pictures.
Acorn II – Buildathon instructions
For those who have not seen the Arcorn II SDR kit, you can now purchase the complete kit for just £29.95 from www.kanga-products.co.uk The kit is an excellent entry into SDR receivers and we will be featuring this kit as a a part of the 2015 buildathon at the RSGB convention.
To aide the construction, I have created a set of instructions that may help with anyone who is building this little kit. You can download the PDF here, There are significantly more pages than the Kanga instructions, but for a group construction project we find that lots of space and easy to follow instructions are a great help.
And if you haven’t seen the construction video – here it is again.
Acorn II SDR Kit
This year at the RSGB convention we will be running a buildathon based upon the same format of the other successful build events in the past – this is an excellent time to attract a new audience to our events.
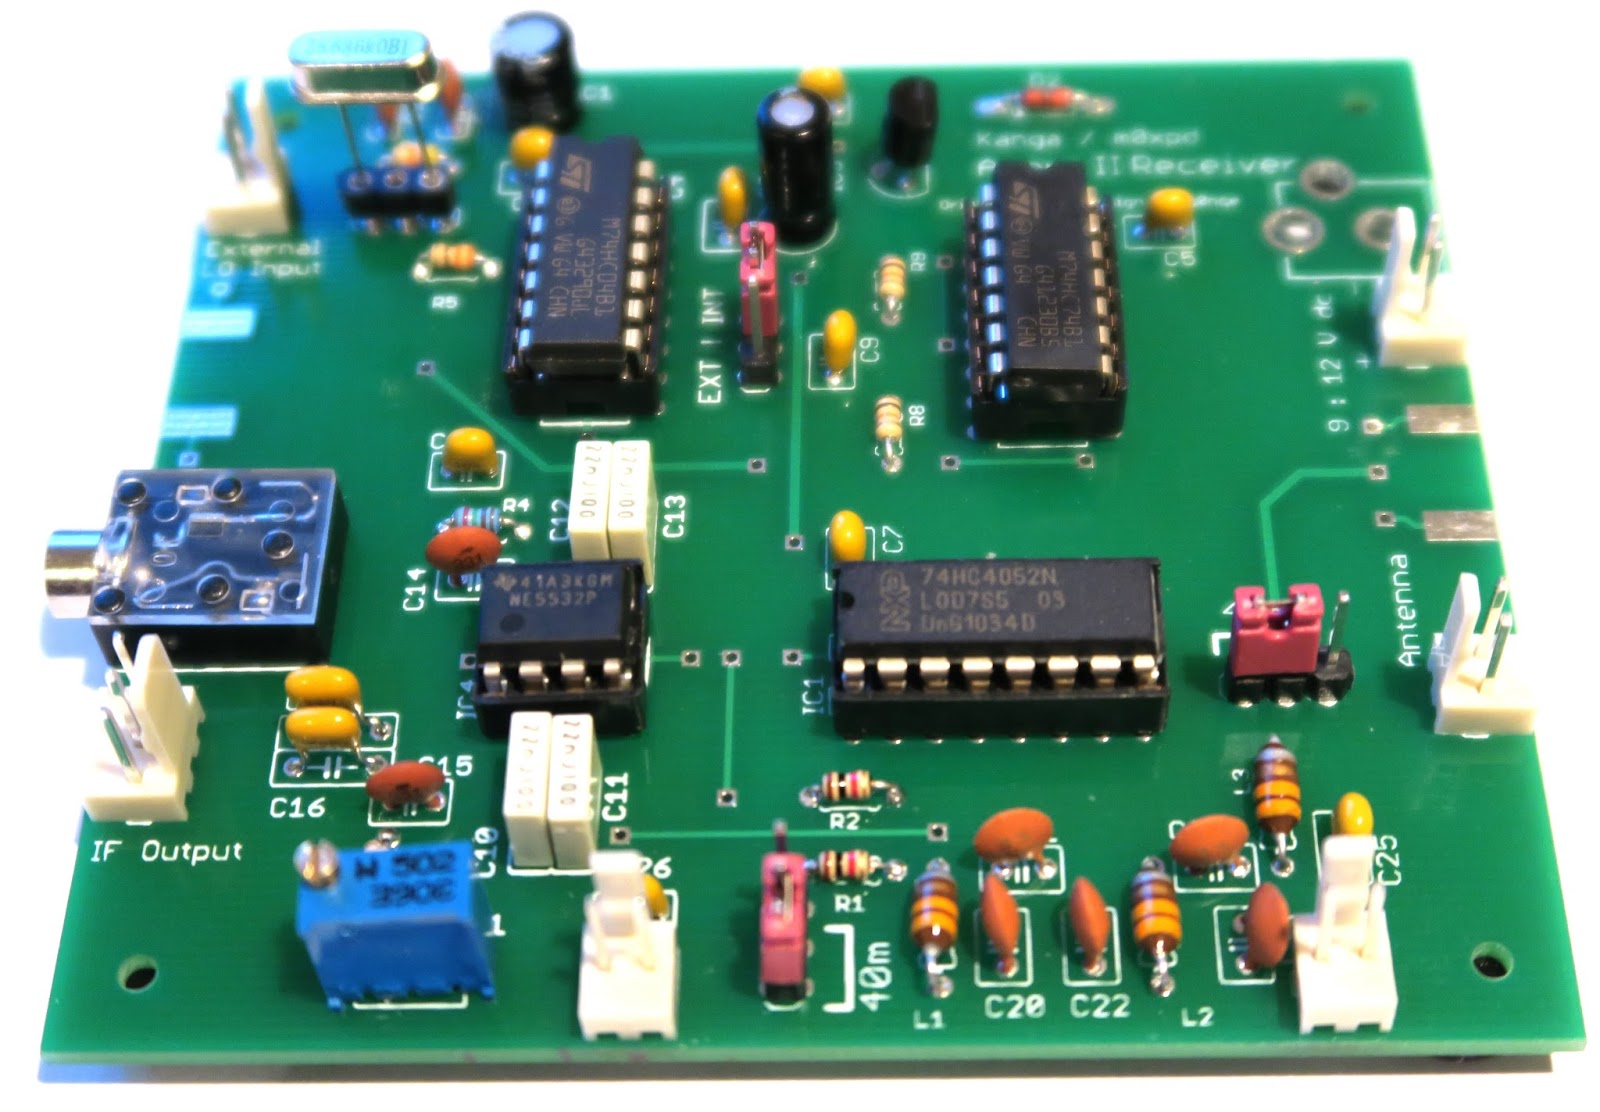
This year however we are using a new kit. The Acorn II kit developed by Kanga Products and M0XPD, is a Software Defined Radio kit that runs on the SSB portion of 40m. But the kit can also be configured to run on any HF band – assuming you have a Band pass filter & a suitable Local Oscillator. The kit has been developed to allow you to pipe in an external Local Oscillator and allow you to connect Band pass filters for other HF bands.
The kit was developed to run with the M0XPD Si5351A Arduino shield, which allows you to use the Arduino as a VFO. And can plug straight into the radio as a local oscillator
Using just a stereo line in on a sound card, and some widely available SDR software (Such as HDSDR), you can get great results from little financial outlay. It is indeed a great introduction into SDR.
I built one of the prototypes here is a video of the build. I will cover configuration & set up in a forthcoming video – perhaps when I have access to a good 40m antenna
Acorn II SDR Kit
This year at the RSGB convention we will be running a buildathon based upon the same format of the other successful build events in the past – this is an excellent time to attract a new audience to our events.
This year however we are using a new kit. The Acorn II kit developed by Kanga Products and M0XPD, is a Software Defined Radio kit that runs on the SSB portion of 40m. But the kit can also be configured to run on any HF band – assuming you have a Band pass filter & a suitable Local Oscillator. The kit has been developed to allow you to pipe in an external Local Oscillator and allow you to connect Band pass filters for other HF bands.
The kit was developed to run with the M0XPD Si5351A Arduino shield, which allows you to use the Arduino as a VFO. And can plug straight into the radio as a local oscillator
Using just a stereo line in on a sound card, and some widely available SDR software (Such as HDSDR), you can get great results from little financial outlay. It is indeed a great introduction into SDR.
I built one of the prototypes here is a video of the build. I will cover configuration & set up in a forthcoming video – perhaps when I have access to a good 40m antenna
CW decoder – The Arduino
 This is arguably the simplest part of the project. As mentioned Budd Churchward had created a series of videos on how he wrote the Sketch, created a PCB and published his code. (Budd’s Sketch is available here)


