Posts Tagged ‘amateurradio.com’
 1 KW 4:1 Ruthroff (Voltage) Balun
 October 17th, 2011 |
  Author:
 Building baluns is just about the easiest construction project there is in ham radio. It pays to build your own, too. I’ve read reports from some disappointed hams out there who have paid good money for poor-quality baluns. The ones worth buying might cost you almost twice what you’ll pay to build your own. So I decided to build my own balun for the New Carolina Windom that I’m putting up. The total cost of materials was $40. 
The New Carolina Windom is essentially an off-center-fed (OCF) dipole. The big difference is in the balun that you use to feed the antenna. A current balun is the proper choice for an OCF dipole, since it effectively chokes common-mode current from standing on the feedline. But for a New Carolina Windom you want common-mode current on the feedline, since you deliberately use a portion of the feedline as a radiator (an additional RF choke is necessary to clamp off this common-mode current at a certain point on the feedline, but I’ll discuss that in a future post). Therefore, you use a voltage balun, not a current balun. The voltage balun allows some common-mode current to stand on the feedline.
Now, before I go any further I must warn you that I am not an electrical engineer. Baluns are a bit mysterious to me, but from the discussions I’ve read on the internet it seems I’m in good company. If you want to learn more about baluns, I recommend Jerry Sevick’s book, Understanding, Building, and Using Baluns and Ununs, available here.  This book has everything — easy-to-follow instructions for building different kinds of baluns, helpful tips from Sevick’s own experience, as well as some deep discussion of theory that should satisfy even a graduate student of electrical engineering. I followed his instructions for building a 4:1 Ruthroff (voltage) balun.
When building a balun there are several factors you must take into consideration. Do you want it to handle a full kilowatt, or are you willing to be forever limited to QRP? Now, I enjoy QRP (I love my little HW-8!), but I also want to have the option for QRO. Therefore, I chose to use not just one toroid, but two — and to use teflon-coated wire instead of the cheaper stuff you can get away with for QRP. I bought 100 feet of stranded (that’s right, stranded — it works fine!) 14 AWG silver-plated copper teflon-coated wire off of ebay for $34, shipped. That’s enough to build quite a few baluns!
When choosing the wire you’ll use in your balun, you must choose the wire size carefully. The diameter of the conductor and the distance between the center of each conductor determines the impedance of the pair you’re winding around the core. In a 4:1 balun, you want an impedance of 100 ohms. Since impedance around a core is only about 80% of that in free space, that means you want a guage and spacing that gives you 125 ohms. You can use the handy caculator for “Impedance of 2-Wire Transmission Line” at KW2P’s website, or you can figure it out yourself using this formula:
Zo = 276 * log 2(S/D)
S = distance between the centers of the two wires
D = diameter of the wire
Any unit of measurement works (inches, mm) as long as you use the same unit for both S and D.
You’ll notice that the spacing between the wires is critical. I used thin strips of strapping tape to tightly bind the wires together every couple of inches, and watched closely to make sure no gaps appeared as I wound the pair on the toroid.
Another thing you have to decide on is the permeability of the core. There’s lots of debate about this. I followed Sevick’s recommendation to use a permeability of 125 (ferrite mix 61). I purchased my two FT-240-61 cores from kitsandparts.com, stacked them, and taped them together using 3M Scotch glass-fiber strapping tape.
Now, what to put the thing in once you have it wound? The last time I built a balun, I put it in a project-box from Radio Shack. I won’t do that again — the plastic is just too thin. You want something strong enough to stand up to the stress put on the box by the eyebolts that you use to hang the balun and connect the antenna-wire to it. PVC pipe and end-caps are popular, but to house a balun this big it ends up being fairly expensive and downright heavy! I found the perfect solution at Menards for just under $7. It is a weatherproof enclosure made from PVC plastic and comes with a neoprene gasket to seal the cover to the box. I used neoprene washers for all the bolts and sealed all the entry-points (except for the binding posts and the bulkhead SO-239 coax connector) with silicone.
I spent a little time in the hardware store picking out the nuts and bolts for this thing. You want to make sure the bolts don’t work loose, so use lock-washers and lock-nuts where you can. I also used star-washers for each lug that I fastened to a bolt. Star washers have teeth in them that cut into the metal, ensuring a good connection. A fellow at the hardware store also cut me a small square of heavy plexiglass for 50 cents to use for securing the wound toroid inside the box.
When you have built your balun, you can test it by putting a pure-resistive load across the terminals and measuring the SWR across the spectrum you intend to use. For a 4:1 balun, that means a 200 ohm load (4*50=200). The SWR should be 1:1 across the spectrum. Here’s a video showing the test of the balun I built:
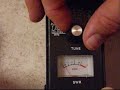
It looks good! I’m looking forward to using this balun. If you would like to build one of these and have any questions, ask away. I’ll give you whatever advice I can. Just remember — you’ll get what you pay for!


Antenna-Day #2, in My Son’s Words
I’m afraid we still don’t have the antenna up, but things are looking good to get it done next week. I have lots of stuff to post regarding this project, but that will have to wait until I have more time. In the meantime, here is my son’s account of what we did on Tuesday of this week:
Helping Dad Build His Antenna, Day 2
by Antonio Mitchell, Thursday, October 13, 2011On Tuesday we began our official work. Dad bought his parts that were on his shopping list and also a titanium drill bit. We kept getting a step closer to finishing our project with each thing we did. It felt good to be getting the project done.
When Dad came home from his shopping trip we began to get ready to go onto the roof. The bolts for [one of] the tripod’s feet were put on, and also the ladder was brought out. We had a bucket which Dad tied some knots to. The bucket was to put things in that would help us put up the tripods. In the bucket were bolts, drill, level, roofing compound, and tape measures. My dad hauled up the first tripod using a rope. Then after that came the bucket.
Once everything was on the roof we set the tripods on each end of the house. We started with the smaller tripod. I made sure it was level and Dad drilled the holes.Once the holes were drilled we spread roofing compound. I helped put the tripod back, while Dad screwed the bolts in. We did the same for the other tripod as well.
After the tripods were on the roof we finished working on the mast. The titanium bit really worked well. It took us till supper-time to finish the tripod and the mast. My dad’s back wasn’t doing well so we did not get to put the mast on the roof. Hopefully soon.


Antenna-Day #1, in My Son’s Words
As my son’s homeschool teacher I’m giving him plenty of writing assignments this year. Yesterday I asked him to write an essay, and I told him he could write it on anything he wanted. Here’s what he wrote:
Helping Dad Build His Antenna
by Antonio Mitchell, Tuesday, October 11, 2011My dad has been meaning to build his antenna for his radio for a while. We (my dad and I) finally got motivated and had some free time as well to build the antenna. We began yesterday to build it. Some complications slowed us down.
Yesterday, we went to Wilmar. The first stop was Walmart. When we were in Walmart I got my glasses back. After that we began our search for parts at Menards. It took us a while to find some parts. The whole trip to Wilmar, shopping, and going home took quite a few hours. My dad had to meet with a church member. While he was gone he got a piece of metal cut for the tripod legs.
When he came home several hours later my mom and I were raking leaves. He began to put together a jig to help hold the poles together. We began to drill holes into the poles. It took both of us to do it. The bit finally broke. After supper my dad worked on making a balun. He also made a new shopping list of parts. It will be a great joy to see the antenna up on our roof.


Enough Planning! It’s Time to Put This Antenna Up!
Hopefully Monday will be an antenna-building day. I don’t know that it will all come together in one shot, but if I don’t get this project going it’s never going to get done.
I spent some time in the hardware store yesterday, picking out the many different bits and pieces that I’ll need for the job. Hard to believe how much it all added up to. Gulp! At least I had a coupon for $10 off of my purchase. As it is there are still a couple more little things I need, but I’ll have to drive up to Willmar for those on Monday.
Here’s a rough sketch that I made last March, dusted off and updated slightly. There are still a couple of unknowns — those are the figures in red. I’m not certain that I’ll need to attach anything to the adjacent church-building, since I may get away with just draping the wire in a nearby tree. But I’ll figure that out as I go. I’ve planned enough! It’s time to put this antenna up!


Of Pounding Ground Rods and Labeling a Field Box
My arm is tired! I pounded in a ground rod tonight, a stout 8-footer from Fleet Farm. It wouldn’t have been so bad if it had gone in on the first try, but it took me three tries before I found a spot that didn’t have some obstruction about four feet under ground! (Remember I live in Granite Falls. There’s lots of rock around here.) I’m not sure which was harder — swinging the sledge hammer until the rod got stuck, or trying to pull the crazy thing out of the ground when it did. Soaking the ground with water helped to get it out in one instance.
It’s tempting to soak the ground with water before pounding your ground rod in, to make it sink in easier, but I’ve read that you shouldn’t do that as you wind up with a poor connection after the soil dries. As with many other things, the easy way isn’t always the best way.
Anyhow, I finally got it in far enough. There’s about ten inches sticking up out of the ground still, but all I’m doing by swinging at it now is flattening out the top. Once my wife hides it with a hosta plant it will look just fine! I tried pounding in a second one, but when it got stuck and I had to work it out (by clamping vicegrips on it and prying it out with a crowbar, a few inches at a time), I called it a day.
Much easier and more satisfying was labeling the toolbox I’ve converted into a field-kit: I’m asking an awful lot of this decal, sticking it on a pebbled surface. But so far it’s sticking just fine. Randy George, N3ZK, does a great job on these, ships them fast, and the price is right! For only $4.00 (shipping included) you get three of these labels.
In the field box right now is my Heathkit HW-8 and all the accessories necessary to zip out to my picnic table and get on the air with my low-hanging, temporary OCF dipole. Pretty soon it will be too cold to do that comfortably! That’s why I’m pounding ground rods, trying to get my long-awaited New Carolina Windom up and going before the ice and snow comes.


Basic CW Operating Procedures
Back when I first got on the air in 1978, CW QSO’s had a pretty standard format. That format didn’t change much until the last few years. But today there’s quite a hodgepodge of operating procedures out there. Most of the time it works, but it’s not uncommon to hear a downright jumbled mess — even from a CW operator who has been on the air long enough to send and receive at 10 wpm or more.
It’s important to learn good operating procedure, not just because it sounds polished but because it serves a practical purpose. You can get away with sloppy operating procedure under perfect conditions, but not if your signal is weak or if there’s much QRM, QRN, and/or QSB. Even under perfect conditions, you’re making the person at the other end work harder if you’re constantly surprising him with your own odd way of operating. Under poor conditions, he may miss some of what you’re trying to say. And even if he succeeds at copying what you’re saying he may well be relieved when the ordeal is over.
I’m not going to get into all of the details of good operating procedure here, but I would like to discuss some basics.
General structure
There is a general structure to a CW QSO that most operators expect. After establishing contact, the first transmission should stick to the basics — RST, QTH, and name. You don’t know yet how well the other fellow is copying you; if you’re a 329, you’re going to torture him if you go on and on about your rig, your power, your antenna, the weather, etc. Furthermore, you might lose the opportunity to hear even the basics from the other fellow if band conditions deteriorate while you’re sending all this on the first transmission. So stick to the basics — and do send them. Here’s the way we all used to do it years ago:
NØART DE NØIP R TNX FER CALL OM BT UR RST RST 579 579 BT QTH QTH GRANITE FALLS, MN GRANITE FALLS, MN BT NAME NAME TODD TODD BT SO HW CPY? AR NØART DE NØIP KN
Note the use of BT. That seems to have fallen out of favor, but once upon a time it was the standard way of changing the subject. The most important thing I want to point out here is to preface each of the three major elements of this first transmission with their labels: RST, QTH, and NAME. It takes a few seconds longer than sending something like, “UR 579 IN GRANITE FALLS, MN OP TODD,” but it is worth it. As the FISTS club puts it, “Accuracy transcends speed.”
The operator replying to this first transmission sends the same three basics in the same way. If he’s inclined (and if he’s received a reasonably good RST) he will probably go on to talk about his station, the weather, etc. As it turns into a ragchewing session you can pretty much send whatever you want.
Procedure signals
Just as the use of BT has fallen out of favor, so have other procedure signals fallen on hard times. I often hear them sent incorrectly and used improperly. Remember what these are — they are procedure signals. Learn to send them well and to use them well, and your operating procedure will improve substantially. The ones most commonly used are AR, AS, BK, BT, K, KN and SK.
Notice the line that appears over each one of the two-letter procedure signals. That means you send the two letters as if they are one character. For instance, KN isn’t sent as dah-di-dah dah-dit (KN) but dah-di-dah-dah-dit (KN).
- AR End of message: Send this after you are completely done sending everything — everything, that is, but call signs and KN. If it’s your last transmission, use SK instead.
- AS Wait:You might hear this if you’re working an experienced operator. If you hear this, the next thing you hear will probably be silence — maybe he has to answer the phone or something. Or maybe you’ll hear him hold his key down while he fiddles with his antenna tuner. Don’t start sending — he’ll start sending when he’s ready. This is a handy procedure sign to know, if you ever need to take a break yourself.
- BK Break: This might be used by a station who wants to enter an ongoing QSO — he’ll send BK between transmissions to see if they’ll let him in and turn their QSO into a “roundtable.” With the advent of full QSK keying, this also became popular among experienced CW operators who could interrupt one another right in the middle of a transmission (perhaps to answer a question or clarify something). But most commonly BK is used to rapidly turn the conversation over to the other station without sending any call signs. For instance, an operator might send something like “HOW CPY? BK” and then cease his transmission. If this happens to you, reply by simply sending BK and answer his question. You can go back and forth in this manner for as long as you want, but don’t forget to obey the law by identifying yourself with your call sign at least every 10 minutes.
- BT Separator: Usually used to change the subject, even if it’s just to go from sending RST to sending QTH. (If you hear the other fellow sending BT several times, it’s because he’s trying to think of what he wants to say next!)
- K Over: This invites anybody listening to reply. Send this after you’re done calling CQ. But if you’re in a QSO, you almost always want to use KN, not K.
- KN Over (to specific station): Send this after signing over to the other station in a QSO, e.g. NØART DE NØIP KN. KN tells other listeners that they’re not welcome to call you yet — you just want the station you’ve named to reply. Don’t send this after calling CQ — send K instead.
- SK End of contact: This lets the other operator know that you want to end this QSO, and this is your last transmission. Usually sent in place of AR right before signing over to the other station.
The Handshake
It has long been customary to send “dit dit” at the very end of a QSO, like a final handshake. On the very last transmisssion, the sending station sends “dit dit” and then the other station replies “dit dit,” and that’s the end. Or (like we did in the old days) you’ll hear the first station send “dit di-di-dit dit” and wait for the second station to send “dit dit” (“shave and a haircut, two bits!”).
But this is often fumbled. Here’s how it usually goes wrong. The first station to send his final farewell, e.g. TNX FER QSO HPE CU AGN 73 73 SK NØART DE NØIP KN, knowing full well that the other station still plans on bidding him farewell in the same manner, goes ahead and sends “dit dit” at the end of his transmission. Naturally, the other station ignores this faux pas, goes on to send his last transmission, and only when he is done does he finally offer “dit dit” for the other operator to send his own “dit dit” again.
Now, this is obviously not the most important point of operating procedure, but why not do it right? No need to be socially awkward at the end of a good QSO!
I’ve only covered a few basics here. For more on CW operating procedures, it’s worth checking out something like http://www.fists.org/basiccw.html. But the best way to learn good operating procedures is simply to pay attention to what proficient operators are doing — especially as you get into more advanced operation, like handling DX pileups. The more listening you do before you wade in, the better operator you will be.


Teaching Morse Code: The Importance of Perfect Dits and Dahs
My son and I had another lesson this evening before bedtime. This time I dug out my paddles and my electronic keyer, since I was afraid that my imperfect fist at the straight key could do him damage.
My fears were well placed!

HT: http://www.rfcafe.com/references/qst/this-business-of-code-feb-1941-qst.htm
It turns out that in our first lesson I made my “dahs” much too long. This caused him some grief when I started using my electronic keyer since the “dahs” and the “dits” sounded too much alike to him, accustomed as he was to my goofy fist (which shall now be rectified ASAP!).
So we spent most of this lesson just fixing my mistake, getting my son to discern between perfectly proportioned “dits” and “dahs.”
I’m glad we caught my mistake on this second lesson and not several months from now! But I still feel bad for exasperating my son.
So to all you would-be Morse Elmers out there, learn from my mistake! Whatever quirks you may have in your fist may be exacerbated at low speed. So unless you have a perfect fist with a straight key, use your electronic keyer right from the beginning when teaching Morse Code.