Posts Tagged ‘amateur radio’
 Handiham World for 25 April 2012


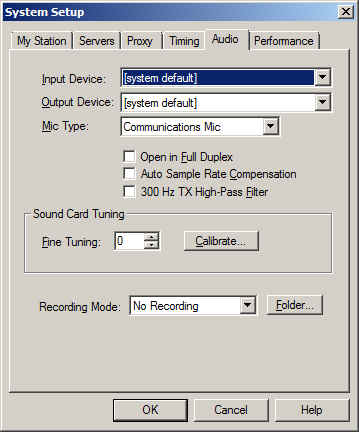
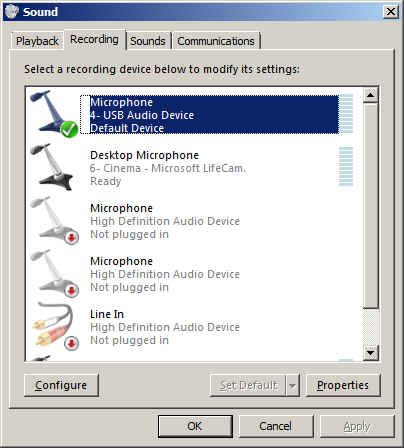
So why do we recommend using “default device” instead of one of the other selections? It is because selecting the recording device via the Echolink pull down does not always result in the correct device actually being used for audio input. This is a real mine field for users who have lots of audio devices. A computer could have a TV tuner, more than one microphone, a webcam with a built-in microphone, a line in device, and even a USB audio line to a transceiver. Don’t laugh – I have had all of these things, and sometimes Echolink reported one microphone being the input when instead the audio was coming from the HF rig connected via USB. It is safer to set your preferred microphone up as the default device in Windows, then always choose the default device as the Echolink input via the Setup menu.
Patrick Tice, WA0TDA
Handiham Manager
Are We There Yet?
Can you say road trip? I love to promote what others are doing in the hobby of amateur radio. Please do me a favor and visit, bookmark and subscribe to the brand new blog site of Connie Bird, NR4CB. Connie is about to embark on a summertime journey that most of us can only dream about. Connie’s blog site is titled Are We There Yet? The site will serve as her written journal as she travels over 6000 miles through two countries, two Canadian provinces, one district (DC), twenty-three states and as many ham radio QSO’s as she can manage.
When I was a teenager, my uncle (K5SOR) and I would embark on similar journeys as we traveled and explored the western US. It was on these trips when I realized I truly wanted to one day call Colorado home. Of course, this was well before my time in amateur radio. But I do recall my uncle working CW mobile and while camping he would typically throw a wire in a tree and check into his HF nets.
Again, please visit Connie’s site. Bookmark and subscribe to the RSS feed. Her journey will begin in late May/early June. She plans to kick things off by presenting a forum titled “On Air, Online, and Eyeballs: The Social Side of Ham Radio”, at the Atlanta Ham Fest on Saturday, 2 June. She then plans to travel up through the eastern portion of the US making her way up to the Boston area for her brothers wedding taking place on Field Day weekend. Of course it doesn’t stop just there. She hopes to operate as a guest operator at W1AW and onboard the USS Yorktown later in the summer.
I would personally like to thank Connie (in advance) for sharing her experiences and her journey with all of us. Of course, I also wish her the best of luck and very safe travels. You may also follow Connie on Facebook and Twitter. Perhaps I can convince Connie to take 30-45 minutes out of her journey and provide the listeners of the Practical Amateur Radio Podcast an update later this summer.
Until next time…
73 de KDØBIK
Loving My Alinco DJ-G7
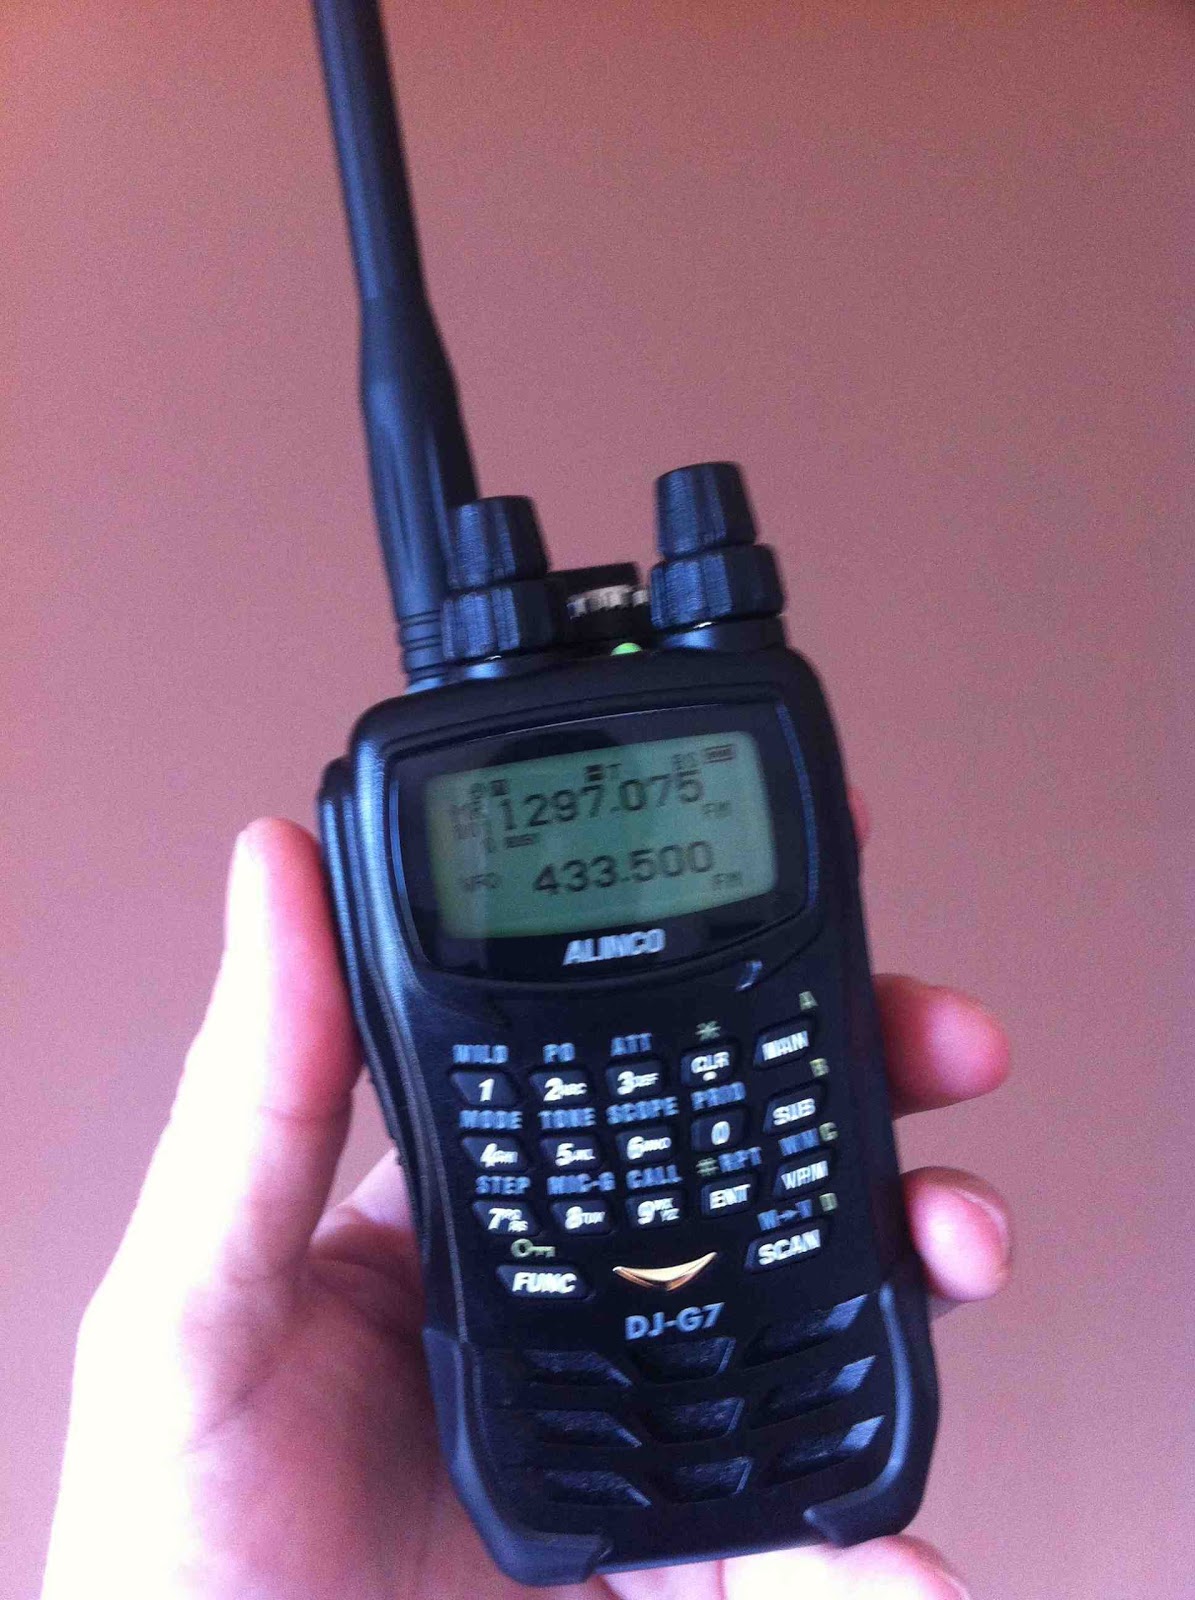 |
| Alinco DJ-G7 |
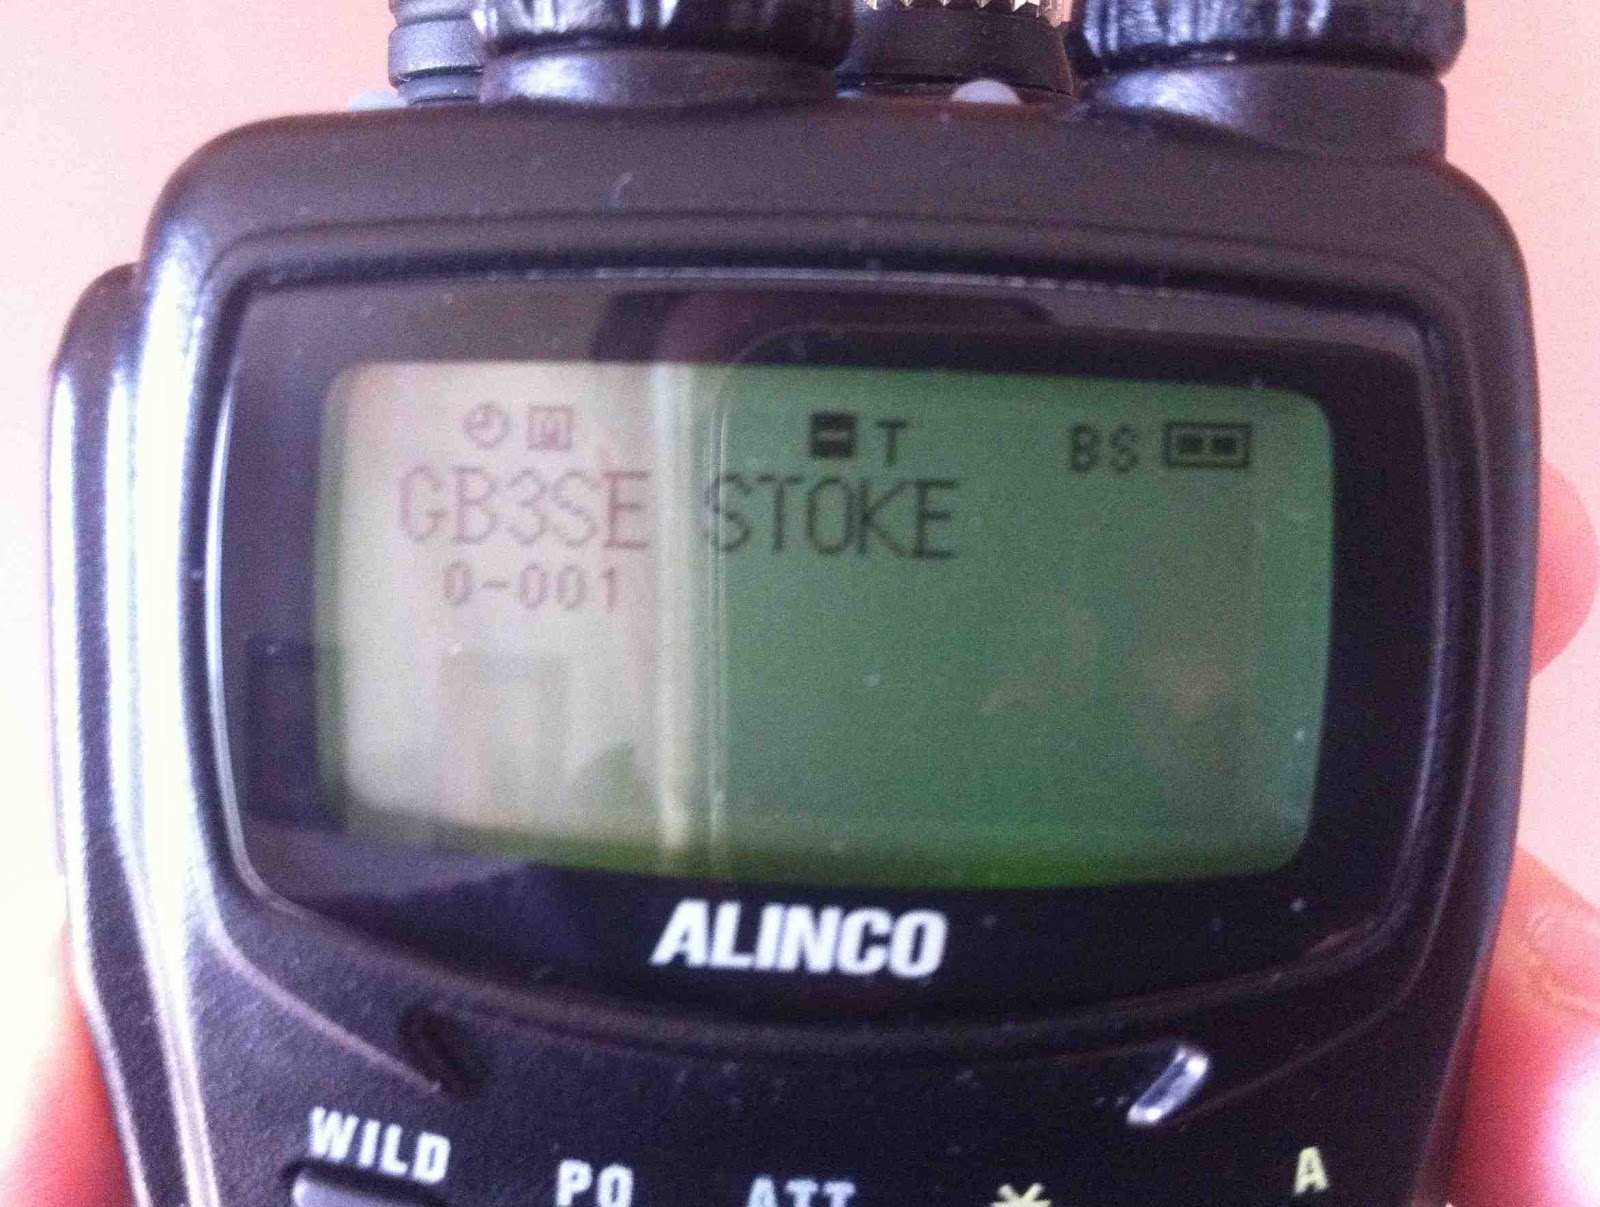 |
| Alphanumeric display |
Read Ross G6GVI's excellent review here: G6GVI Alinco DJ-G7
Update - here's a list of stations worked in my first week QRV on 23cm:
| GW4ZPL | John | Caernarfon |
| G7IEI | Shaun | Bolton |
| G6AOS | Steve | Blackpool |
| G6ODU | Bob | Ormskirk |
| 2E0DDD | Rob | Stoke |
| 2E0XYL | Karen | Wirral |
D-STAR Makeover
No longer will your beautiful, eloquent, flowing QSO be 'bumped' abruptly and permanently off the air by a random mobile station the other side of the world 'pinging' his local repeater for a few milliseconds. You can now even QSY to a 'chat' module and not hog the repeaters of an entire nation while you discuss your passion for North Korean tractor parts for three hours.
The advent of DCS reflectors, hand-in-hand with the German DV-RPTR boards shipped all over the world, is going to save the mode from extinction, no less. Witness the used D-STAR radios in the graveyard of Ebay as testament to the disillusioned DPlus users.
If only they'd have waited.
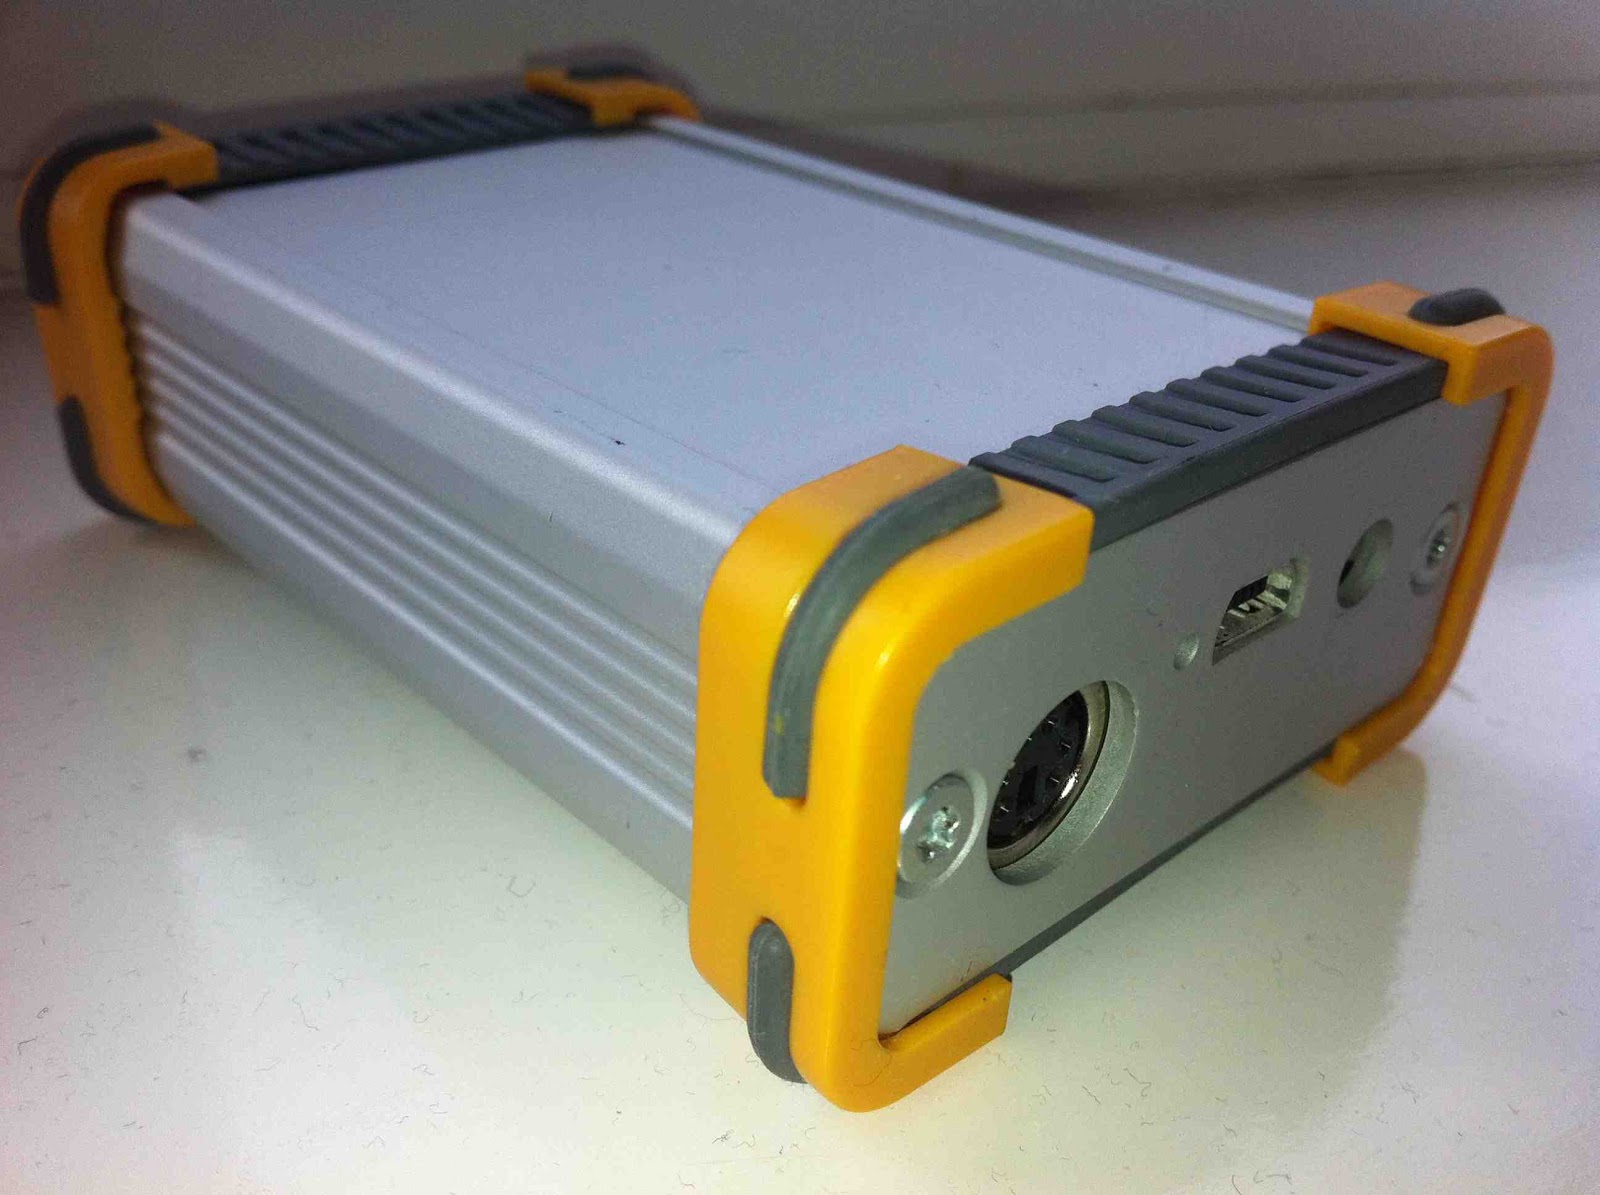 |
| The DV-RPTR unit in its housing |
*UPDATE 24th April 2012: Looks like the Dplus system has been suddenly revamped to include the routing information with the voice packets in the same way as DCS. Shame it took seven years of dysfunctional communications and a rival system to prompt this. I'll be staying on the DCS system - but enjoy whichever system you use and enjoy the mode!
Foundation for Life?
But should that be the end of their radio adventure? I am wondering if there should be a nominal time limit that encourages the foundation licence holder to progress to the next level or the licence is rescinded. Does this sound harsh? Well, there are plenty of analogies - think of your teenager's moped licence.
Should you be able to remain aspirationally dormant at this level for life? Perhaps if you are visually impaired, for example, or face other similar restrictions, then this should be an absolute entitlement.
But has the proliferation of long term M3's and latterly M6's downgraded the quality of the hobby to some extent? For example, take two metres, with fewer of the 'older gentlemen of the air' as I like to call them, taking an active part in daily communications, has the lead example of how to behave been lost? I would say to an extent, yes. More senior operators still monitor two metres and will bemoan inwardly the way that newer operators seem to be making up their own rules of how to behave on the air without any mentoring or peer influence. Yes, I know there are examples of senior operators behaving appallingly, but I really would not want any young aspiring radio amateur to listen to some of the inane, irrelevant and wholly inappropriate conversations floating around the bands in my area - and we're in a comparative Narnia here in north Wales.
I admit to feeling my heart sink when I heard about a five year old girl passing the Foundation Exam recently. This is not an example of how clever the girl is, is it? Likewise the blood drained when I heard of the Belgians giving their novices fifty, yes fifty Watts to play with. Unless I've been reading this incorrectly, the RSGB have been reporting all this as 'good' news.
So where do we set the balance? Where is the incentive to learn, progress and perfect?
Suggestion: Foundation for five years, Intermediate for ten, Advanced for life. Too severe, or the only way to keep any credibility and dignity in the hobby?
Comments please.
Sandpiper 23cm 19 Element Yagi
It didn't help that the elements were supplied in the wrong sequence with a couple of 'wild card' elements from another antenna design altogether. Marc, the manufacturer, was extremely apologetic and helpful in sending me the antenna measurements straight away by email. However, it meant the additional purchase of a metal rule and measuring callipers from our local excellent ironmonger to get cracking.
After what seemed an afternoon of measuring and re-measuring, the beam started to take form. This involved discarding one element and chopping down another to size. In the initial construction the reflector ended up as the first director. What was supposed as a reflector must have come from a 70cm design. No wonder the thing worked better sideways.
But now, all is well. Coupled with my 1W Alinco DJ-G7 I worked Stoke on Trent (2E0DDD) simplex from a local Anglesey hilltop thanks to a slight tropospheric enhancement. It seems to offer the best combination of gain and beam width. This means your calls will be heard reasonably widely with enough gain (17.1dBi). You won't be losing out too much due to de-pointing either. Its size also means that it can be supported by a modest pole/guys or tripod without offering too much windage.
I think it's possibly the most optimal solution for hilltop and portable operating.
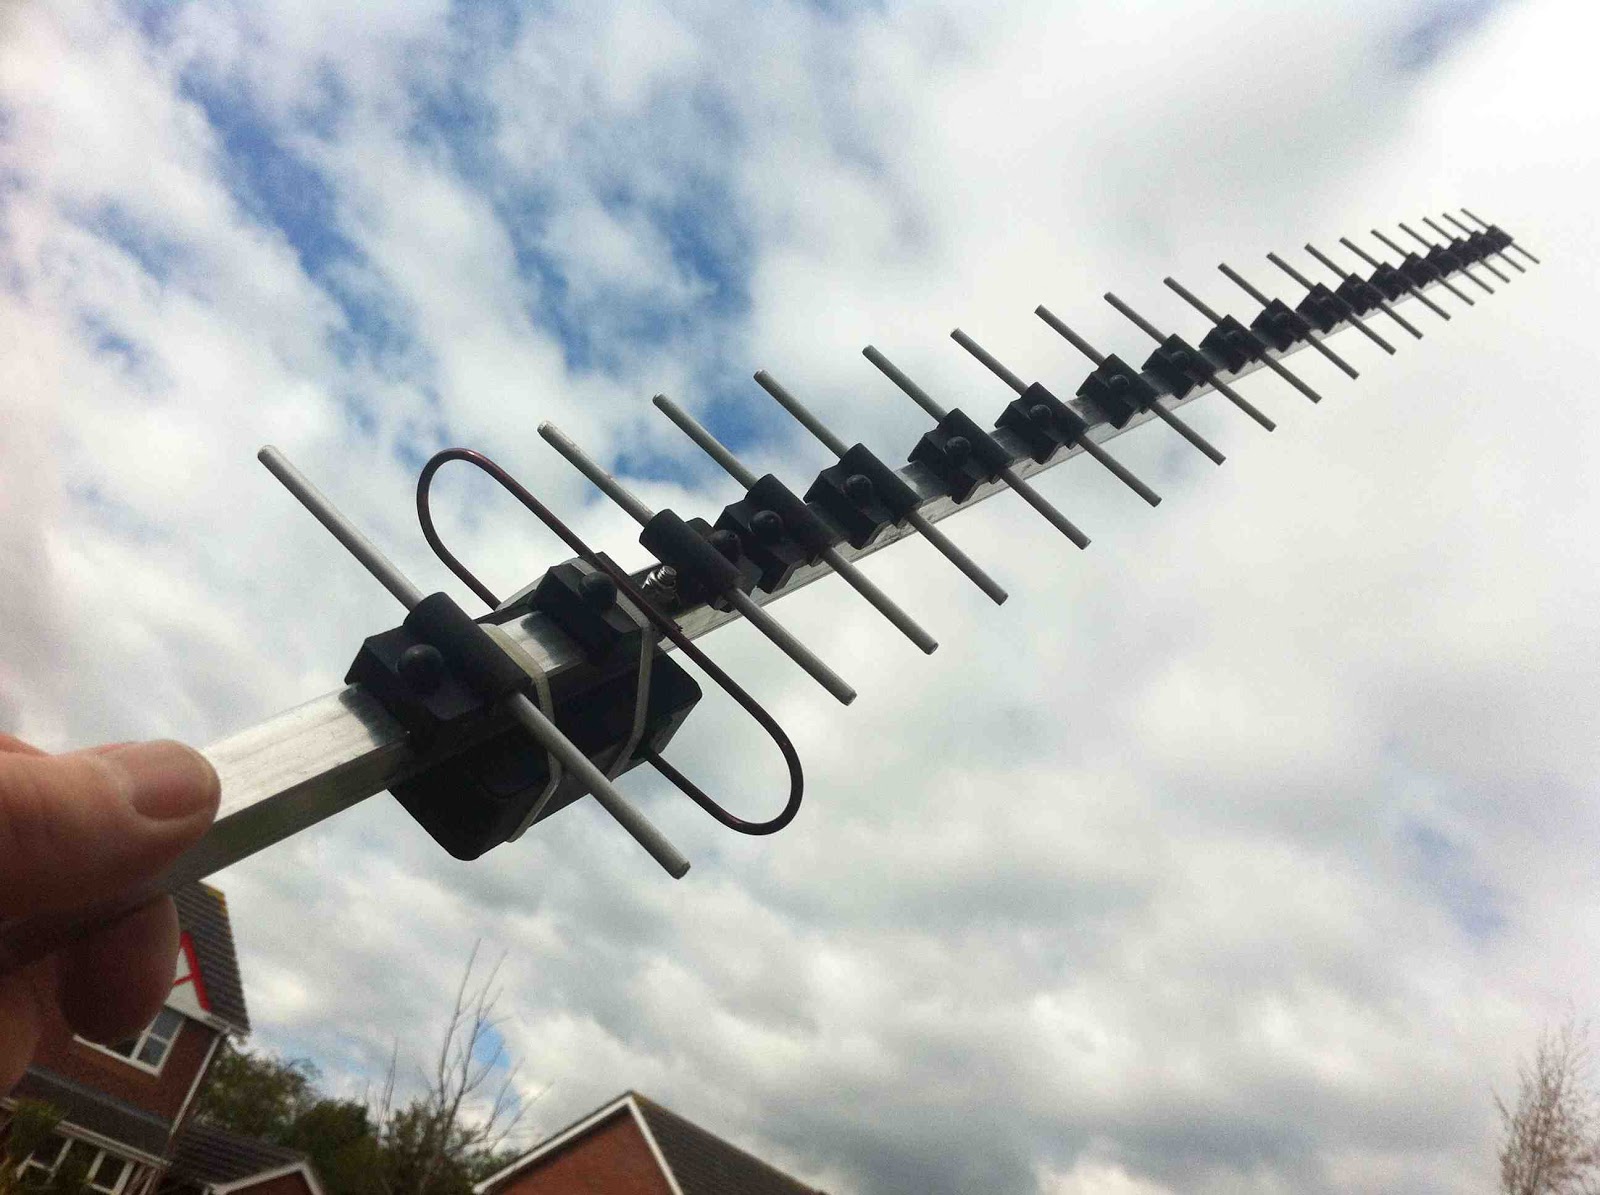 |
| The completed 19 element 23cm Sandpiper yagi |
KX3–The first 24 hours
As previously mentioned, my KX3 shipped from the Elecraft factory on Tuesday afternoon and was delivered to me in Denver, Colorado via USPS Priority Mail Service. I’ve gotta say for the price, USPS Priority service is the best way to go in most cases. Of course this blog post is not about shipping services and I’ll move on.
Over the past couple of weeks I’ve seen some awesome Youtube videos from hams who have received their new KX3. I see no reason to re-invent the wheel, just search Youtube for Elecraft KX3 and you’ll find these.

My Elecraft KX3 is serial number 57. Perhaps s/n 59 would have been cool, but I’m happy nonetheless. I spent a little bit of time with my KX3 the first evening. I took the time to attach Anderson Powerpoles onto the supplied power cable. I adjusted the tilt legs on the back. Which by the way, in recent days I’ve noticed a lot of discussion on the Yahoo KX3 reflector dedicated to the discussion of the tilt legs. I’ve seen no issues with any binding of the thumb screws. You just need to gently loosen the thumbscrew, lower the tilt leg into position and then re-tighten the thumbscrew. Repeat for the other side. It really is that simple.
I grabbed a short coax jumper and connected the KX3 to my Hustler 6BTV. I clicked the band switch until the KX3 was in the 40m band and turned the VFO. While doing so I read through the manual and tried out many of the features of this remarkable radio.
For the most part, my KX3 will be used for SOTA or Summits On The Air and will replace my Yaesu FT-817. At this time, I’m not planning to purchase the Elecraft amplifier which would most certainly turn this little radio into a nice shack rig. I already own a Yaesu FT-950 which I use primarily for SSB and run digital modes from my Yaesu FT-897. I’m happy with what both of these transceivers do for me in the ham shack.
In all honesty, I was also pleased with my Yaesu FT-817 for field use. I purchased it new about 4 years ago and it’s been a trusty companion for both SOTA activations as well as general portable use. So why purchase the Elecraft KX3?
Like many of you, I began hearing about the KX3 around Dayton 2011. I watched the videos and did some research into Elecraft. Everything I read, heard and watched pointed to the KX3 being a fantastic radio. Then in the fall of 2011, I was bitten by the SOTA bug. Chasing quickly turned into activating and now I’m lucky to have the opportunity to assist one of the coolest SOTA activators I know. Of course, I’m talking about Steve Galchutt wG0AT. Steve appointed me as the Central Colorado regional manager. My role is to promote the Summits On the Air program as well as amateur radio. To date, I’ve conducted three face to face SOTA presentations to local amateur radio clubs in the greater Denver area. I’ve conducted one via Skype to a club in Washington state and I have many more lined up. This opportunity has truly allowed me to broaden my Elmer opportunities beyond my blogging and podcasting efforts. Thank you Steve.
So as I learned more, I realized the KX3 would become a much better SOTA performer for me than the 817. Allow me to point out a few of the differences.
Weight – Advantage KX3
My Yaesu FT-817 weighs in at a little over 2.5 pounds. This includes the internal FNB-85 9.6v battery pack.
The KX3 with 8 AA batteries weighs in slightly less than 2 pounds. While I don’t plan to operate the KX3 solely on internal power, I may not install internal batteries. Note: I didn’t purchase the optional KXBC3 charger.
Size – Advantage KX3
The size differences between the 817 and KX3 are minimal. The 817 measures in at 7 3/4 x 5 1/2 x 1 1/2 inches. The KX3 is much more compact with measurements of 8 x 3 1/2 x 2 3/4. Unfortunately, the comparisons I did a few weeks ago with my 2×4 prototype don’t match real KX3 comparisons. I can still use the Lowepro Apex bag but will not pack the battery pack in side.
Durability and Ruggedness – Advantage 817
I’ll admit this was one category I thought long and hard about. The Yaesu FT-817 is a rugged little radio just like it’s big brother the FT-897. I handle all my gear with care, but accidents do happen and certainly portable operations increase this chance greatly.
Now please don’t confuse this with poor construction or design. The KX3 design just has a larger control panel footprint. This is great and what leads to my next category. However, a little more surface area to get damaged from an accidental drop or other mishap. I’ll just be extra careful.
LCD Display and Control Panel– Advantage KX3
I’m 45, will turn 46 in October. I’ve been using reading glasses for the past 4-5 years. Each year my prescription is bumped up a little. I’m to the point where I can’t read anything without either holding it at arms length away from me or making sure I have my reading glasses with me.
The LCD display on the 817 is a tiny 1.5 x 1.0 (rough measurement) screen. However, the LCD on the KX3 is 4.75 x 1.25. I can read the frequency or any of the other items without my reading glasses.
Portability and SOTA Readiness – Advantage KX3
While the Yaesu FT-817 is an all mode transceiver including HF, VHF and UHF operations as compared to the KX3 which today is HF/50MHz only (internal 2m module coming soon). The lack of 2m or 70cm operations does not impact me and the way I will use the rig. I carry the Yaesu VX8 for APRS tracking and will use that radio for any V/UHF operations.
Speaker Audio Output – Advantage 817
Elecraft has stated from the beginning that headphones or external speakers would be a must for a noisy environment. The speaker in the KX3 is tiny and I honestly don’t see how this could have been avoided. However, I view this as a non-issue. I use a lightweight pair of over-the-ear ear buds for SOTA activations. This is important as in windy conditions or even noisy band conditions, a headset or ear buds will help.
Other Features and Functionality – Advantage KX3
I’ve truly enjoyed operating QRP and have honestly gained much more respect for QRP operations in general since being active in SOTA. Working DX from on top of Mt. Herman (W0/FR-063) opened my eyes to what a little bit of power and a properly tuned antenna can accomplish.
While the KX3 does offer extra transmit power from the 817, I will keep it set at 5 watts and only increase to 10 or 12w when needed. In addition, while I’ve never packed my LDG Z-100 Auto tuner on a SOTA trip, I did order the internal ATU in the KX3. However, I firmly believe a successful SOTA activation starts with a properly tuned antenna and will continue to stick to that process.
The VFO knob is most certainly a major difference between the KX3 and 817. You can really crank up or down the bands with much greater precision and speed on the KX3. In addition, the KX3 allows for direct frequency entry. This makes easy work of tuning up and down the bands.
Of course, another feature set that completely blows the 817 out of the water is the ability for the KX3 to decode PSK/RTTY and CW signals. I’ve played around with this and the PSK decode is spot on. The only problem is watching the text. The text is displayed in an 1.5 x .5 inch area of the LCD screen. It goes by pretty quick. I’m experimenting (with much success) using the PSKer iOS app. I plan to blog soon about this testing.
In closing, and in all fairness to the Yaesu FT-817, the 817 is a great little SOTA rig. There are many SOTA activators and other portable enthusiasts who will continue to benefit from the performance the 817 can deliver. Just how much improved performance I’ll gain from the KX3 on a typical SOTA activation has yet to be seen. I plan to correct this and schedule a SOTA activation in the near future.
Until next time…
73 de KD0BIK


