 |
 PART2: Mod for Signalink USB so it can be used with 2 radios
 |
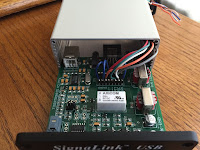
| The finished product |
Below are some of the options I came up with to see if I could get my Signalink USB to work with two different radios……
- Rewire the internals of the unit each time I switch radios, this was just not an option as it is time consuming and the unit I believe over time would not stand up to these continual wiring change outs.
- To purchase Signalinks plug and play boards, you simply plug in the board for the K3 or the KX3. This is for sure an option but again I was wanting to not take the Signalink apart each time I wanted to change out the radios.
- There is also the option of purchasing a second Singalink USB unit but this is very pricey for what I wanted to do.
- Try to figure out if it is possible to set up the internals so with the simple flip of a switch mounted on the outside of the unit I could change the internal wiring to make either the K3 or KX3 work. This was the option I decided to work on.
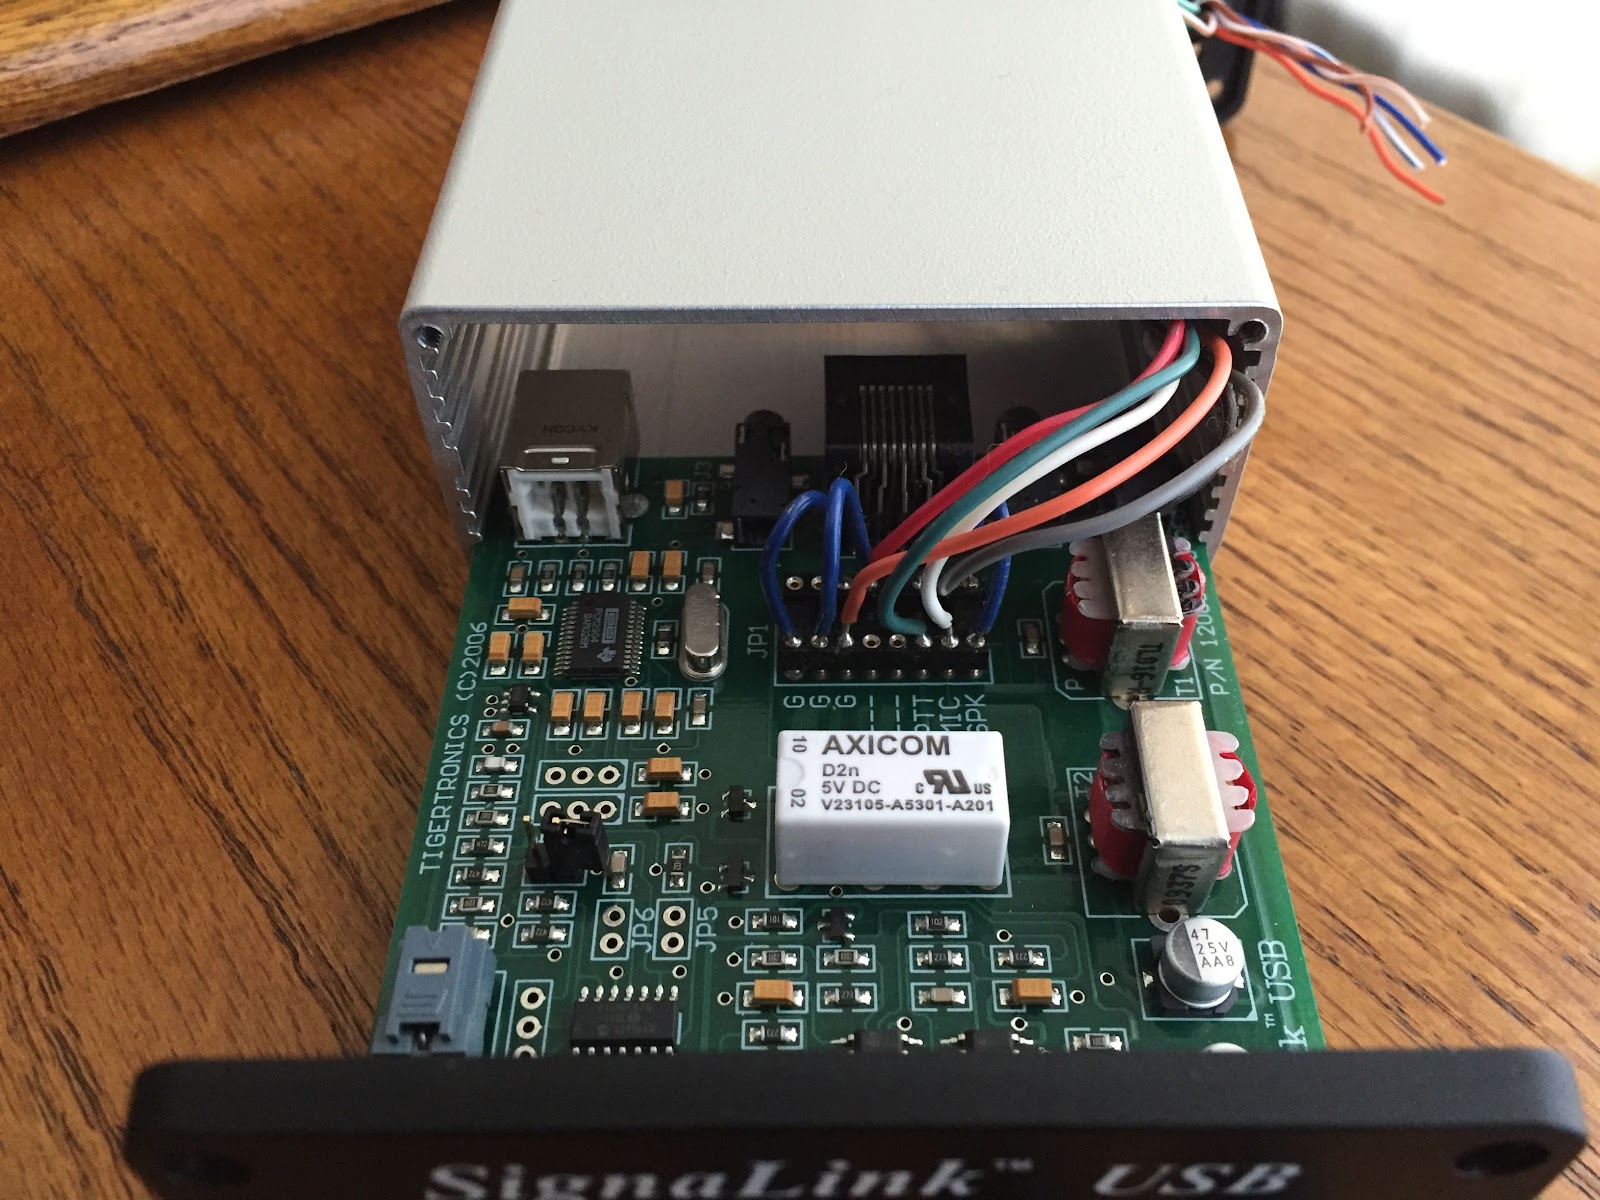
internal mod wiring
So settling on option 4 as my choice I set you to see if and how it could be done. I did an internet search because the way I look at it is why try to reinvent the wheel if someone else already has! My results turned up only 2 that I could find were the unit was being used for 2 radios. Both did not seem to suit my need. The first seemed the operator configured a device that allowed the use of two of the same radiosbut at different locations. Each radio could be controlled by the same Singnalink unit. The other site I found this op used 3 RJ45jacks in a separate box to do just what I wanted to do…BUT…..I was looking to not have yet another “box” I was ultimately looking for an “all in one” solution. I ended up drawing out many possible circuit diagrams and at one point almost finished wiring what I thought was the "solution". I then realized it just was not
going to work and had to hit the drawing board again. I finally came up with a workable plan that involved drilling only two holes in the back panel of the Signalink. I had to install a ON-NONE-ON mini switch and a hole for an RJ45 pigtail to be placed. Some of the things I ended up learning as I went along were:
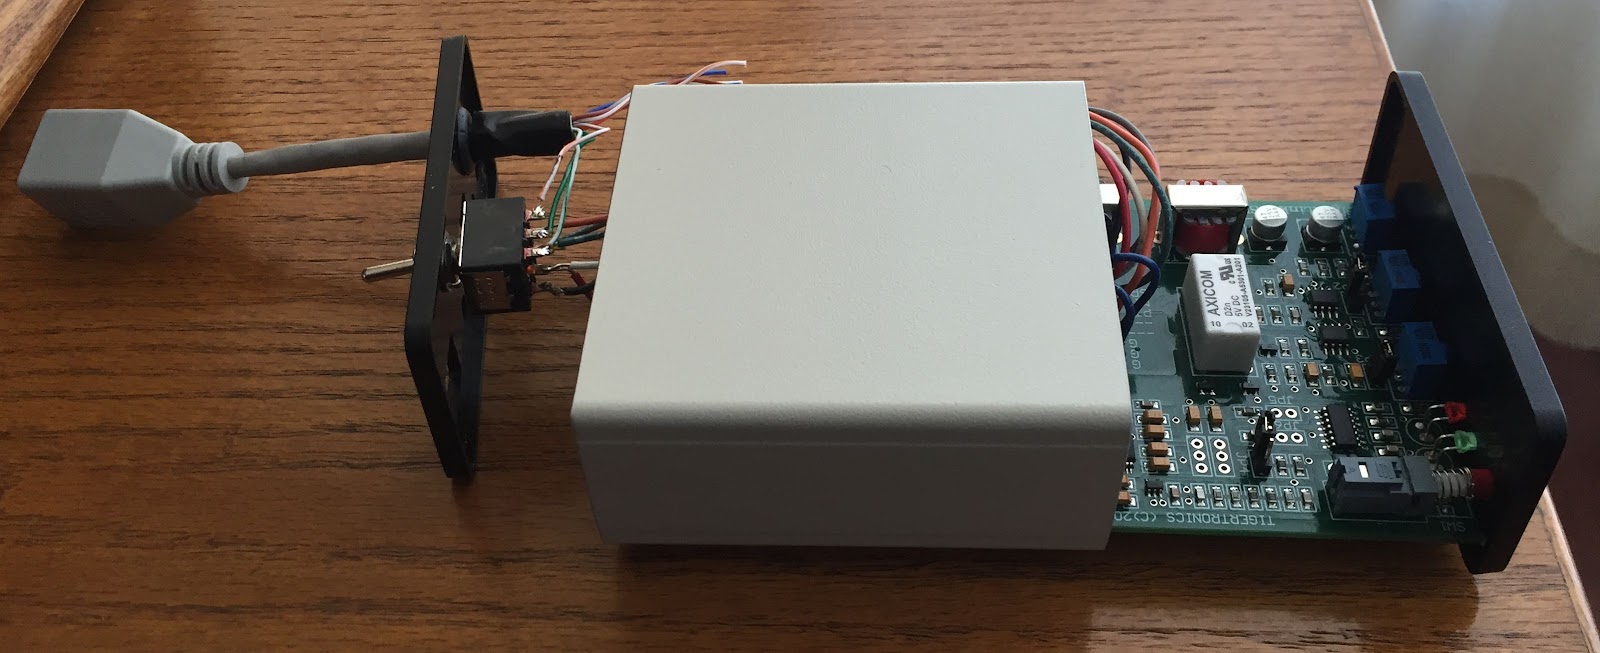 |
| One final check before assembly |
1. A long pigtail had to be made on the connections between new rear panel switch and the 8 pin DIN wiring. This allow the removal (if needed) of the circuit board.
2. I had to solder the wires into the 8 pin DIN they just did not stay in place and with the extended pigtail there was lots of movement in the wires as the covers were put in place, I didn't want any wires coming loose once assembled.
3. I ended up removing the pigtail and adding a rubber grommet as the plastic housing seem to have a sharp edge to it.
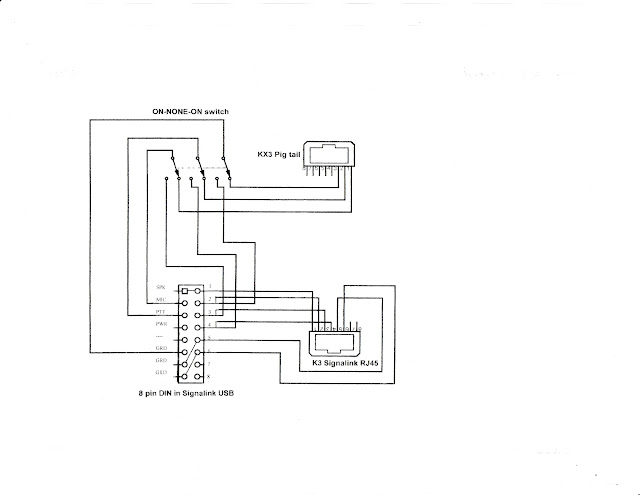
Below is my diagram for the mod, the "K3 Signalink RJ45" is the internal jack on the unit. The wiring shown in my diagram for this RJ45 is the wiring that is on the circuit board and does not need to be added. Also on the 8 pin DIN there are jumpers between Spk-1, GND-5 and GND-6. I have tried the unit both with my K3 and KX3 and it works great. The final thing I have to do is just label the rear switch.
3. I ended up removing the pigtail and adding a rubber grommet as the plastic housing seem to have a sharp edge to it.
Below is my diagram for the mod, the "K3 Signalink RJ45" is the internal jack on the unit. The wiring shown in my diagram for this RJ45 is the wiring that is on the circuit board and does not need to be added. Also on the 8 pin DIN there are jumpers between Spk-1, GND-5 and GND-6. I have tried the unit both with my K3 and KX3 and it works great. The final thing I have to do is just label the rear switch.

6 Responses to “PART2: Mod for Signalink USB so it can be used with 2 radios”
Please support our generous sponsors who make AmateurRadio.com possible:
 Ham Radio Deluxe |
 W5SWL Electronics |
 Ham Radio Prep |
 KB3IFH QSL Cards  Hip Ham Shirts  HamRadioAuctions HamRadioAuctions Reliance Antennas Reliance Antennas Enigma Shop Enigma Shop |  morseDX  Ni4L Antennas  R&L Electronics R&L Electronics antennas.us antennas.us QRV QRV |
- Matt W1MST, Managing Editor

Nice solution Mike. BTW, does the Signalink allow for a PTT of trcvr function via USB or is it VOX switching only? I need something to hard key the PTT line on the trcvr since I no longer have a com port.
Very cool Mike!
Good morning Steve, a very good question indeed! As for me I use the VOX to key the K3 but I did post this question on the Yahoo Signalink group site and I did get a variety of answers. Seems it depends on the rig and the software….but I would contact Signalink with your specifics and see what they say. Sorry I was not able to give you a solid answer.
73, Mike
Good morning Ernest, thanks very much it was a nice challenge to make and then to see it working.
Have a great day.
73, Mike
Tnx Mike
No Problem Steve just sorry I could not be more of a help.
Mike