 |
 Request for Information–Apps
If you own a smartphone and/or tablet device and use any of the amateur radio related apps designed for these devices, I would like to hear from you. I’m conducting research for an upcoming episode of the Practical Amateur Radio Podcast (PARP) and would like to know what apps you are using, how you use them and how they work for you.
Please contact me via the email address listed on my QRZ page. Thank you!
73,
Jerry (KDØBIK)
Jerry Taylor, KD0BIK, is a regular contributor to AmateurRadio.com and writes from Colorado, USA. He is the host of the Practical Amateur Radio Podcast. Contact him at [email protected].
PARP–67 D-STAR, DVAP, DHAP and a side of Pi
Over the weekend I recorded and released episode 67 of the Practical Amateur Radio Podcast. In episode 67 I discussed using D-STAR along with the DV Access Point and the Digital Ham Access Point (DHAP) from Hardened Power Systems. All of course powered by the wonderful little Raspberry Pi.
Thanks for listening…
73,
Jerry (KDØBIK)
Jerry Taylor, KD0BIK, is a regular contributor to AmateurRadio.com and writes from Colorado, USA. He is the host of the Practical Amateur Radio Podcast. Contact him at [email protected].
Arduino Frequency Display For Kenwood TS-520S HF Ham Radio PART 4
This is PART 4a (there is a part 4b below) of the project “Arduino Frequency Display For a Kenwood TS-520S HF Ham Radio”. This part covers switching to a new front end circuit as seen used by the DFD2 frequency counter from “Almost All Digital Electronics”. Their website is http://aade.com/DFD2inst/DFD2inst.htm
All parts: (PART 4), (PART 3), (PART 2), (PART 1)
(PART 4A)
This is PART 4b of the project “Arduino Frequency Display For a Kenwood TS-520S HF Ham Radio”. This part covers testing the circuit and frequency counter software when connected to the Kenwood radio but still on a bread board. The final display is not ready so in this video I simply push the frequence counts to the laptop.
(PART 4B)
Here is the datasheet for the PLL chip I used in (PART 4). Other datasheets can be found in (PART 1).
74HC4046 Phase-Locked Loop with VCO (PDF)
Todd Harrison, KF7NBI, is a regular contributor to AmateurRadio.com and writes from Arizona, USA.
A night out in the big smoke.
 A couple of weeks ago both I and my wife were very lucky to sit in on the recording of News Quiz for BBC Radio 4. Its been an ambition of mine for a number of years to visit Old Broadcasting House and to watch a live radio recording in the Radio Theatre.
My host for the evening arranged a tour of the New Broadcasting house news floor, the Radio 4 Studios and most impressively the BBC canteen !
 I was amazed how small the Radio 4 studios actually were. Gone of the days where you would have an engineer, Producer and Broadcaster sat in the same room. But still in one studio there was still a record player and a reel to reel tape machine. Just in case any of the archives were not digitally stored.
The BBC news floor was impressive, many of the TV presenters milling around and a constant hub of activity. For that many people in a single location I was amazed how quiet it actually was.
After a prawn sandwich (my wife had salad – with Chips) we moved onto the Radio Theatre and sat in the front row for the recording of News Quiz. Sandi Toksvig of course was amazing. She started with a great story, and moved onto the recording of the show making it look easy and seamless, the panelists were on top form (Jeremy Hardy, David Mitchell, Elis James and Mark Steel)– and of course Kathy Clugston was superb in reading the news clips. it’s a shame that so much of the evening was edited out, but you have to compress 2 hours into 30 minutes, But the best jokes stayed in.
After the show we nipped back to the green room, and because on this occasion the panelists were cycling for Sport relief they all were pretty knackered, out of breath and in Jeremy Hardy’s case – drinking a cold beer. To be honest I was shattered watching them cycle during the recording.

I must add a special thank you to Jim and Kathy for inviting us as their guests and organising the whole evening. My wife and myself really enjoyed the evening out in London – It was so surreal that it almost seemed normal.
Dan Trudgian, MØTGN, is a regular contributor to AmateurRadio.com and writes from Wiltshire, England. He's a radio nut, IT guru, general good guy and an all round good egg. Contact him him here.
Buro Cards


John Smithson, Jr., N8ZYA, is a regular contributor to AmateurRadio.com and writes from West Virginia, USA. Contact him at [email protected].
Push power on and………NOTHING!!!
 |
| Faulted part |
power supply fan was missing some blades. Once the supply was opened up I quickly found the faulted
 |
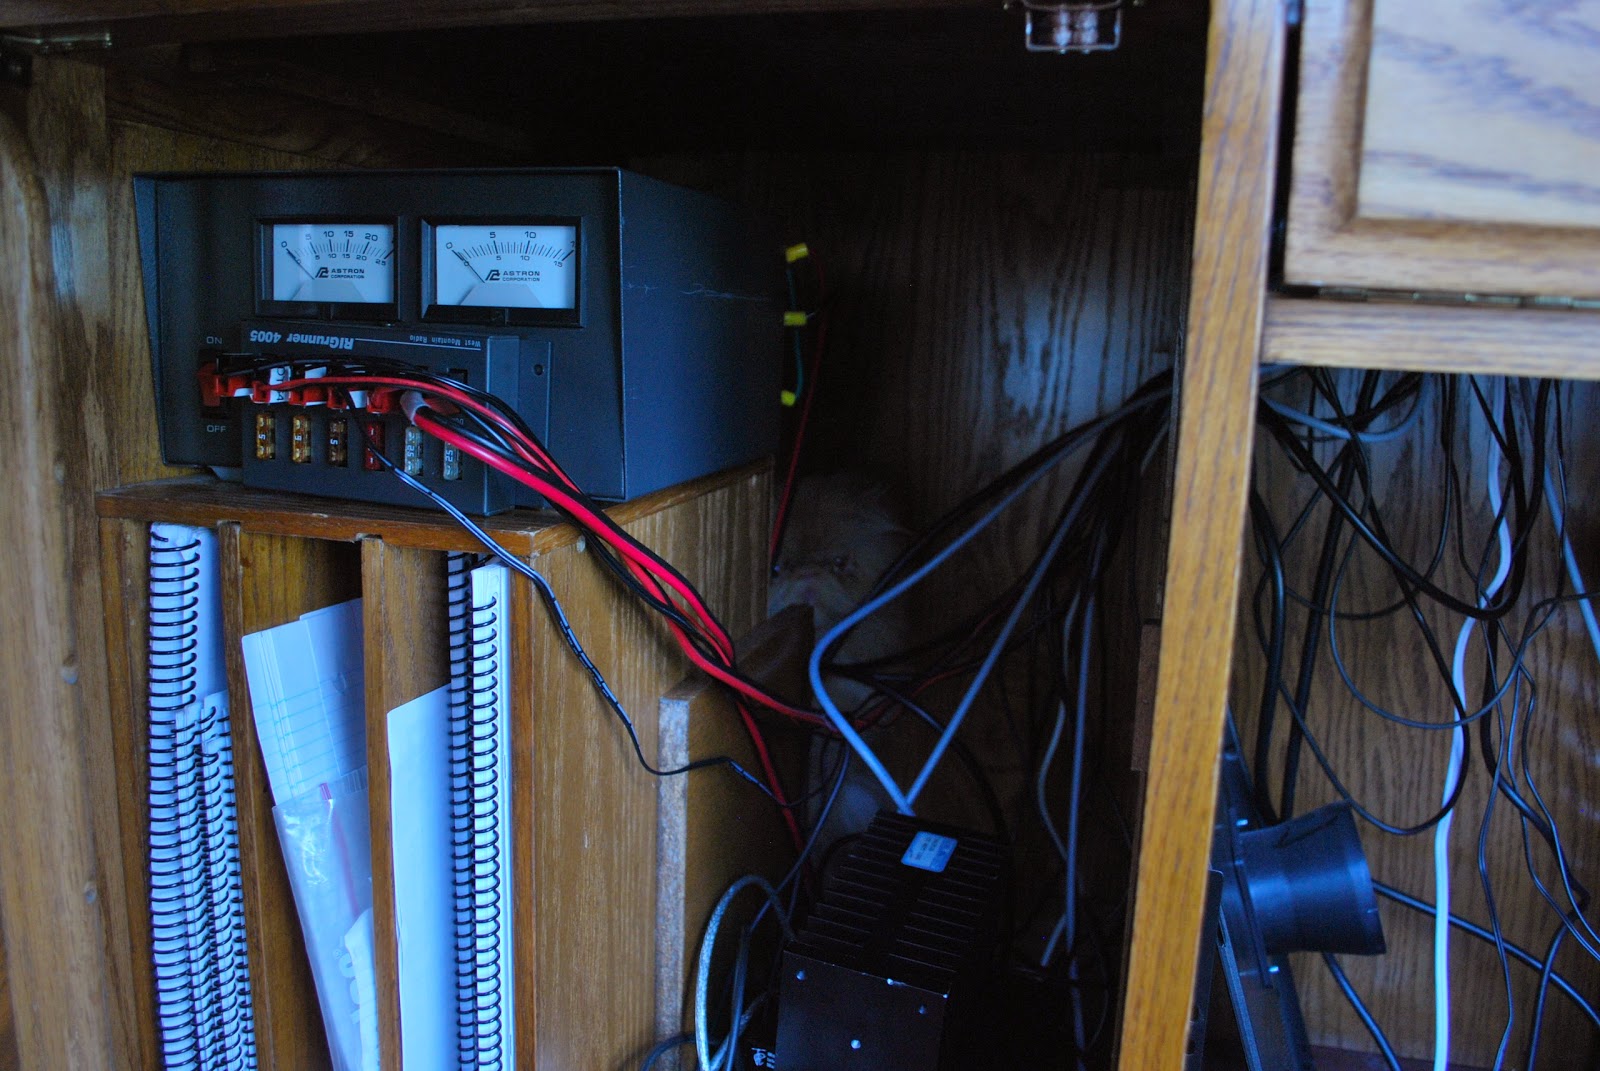
| Cables everywhere |
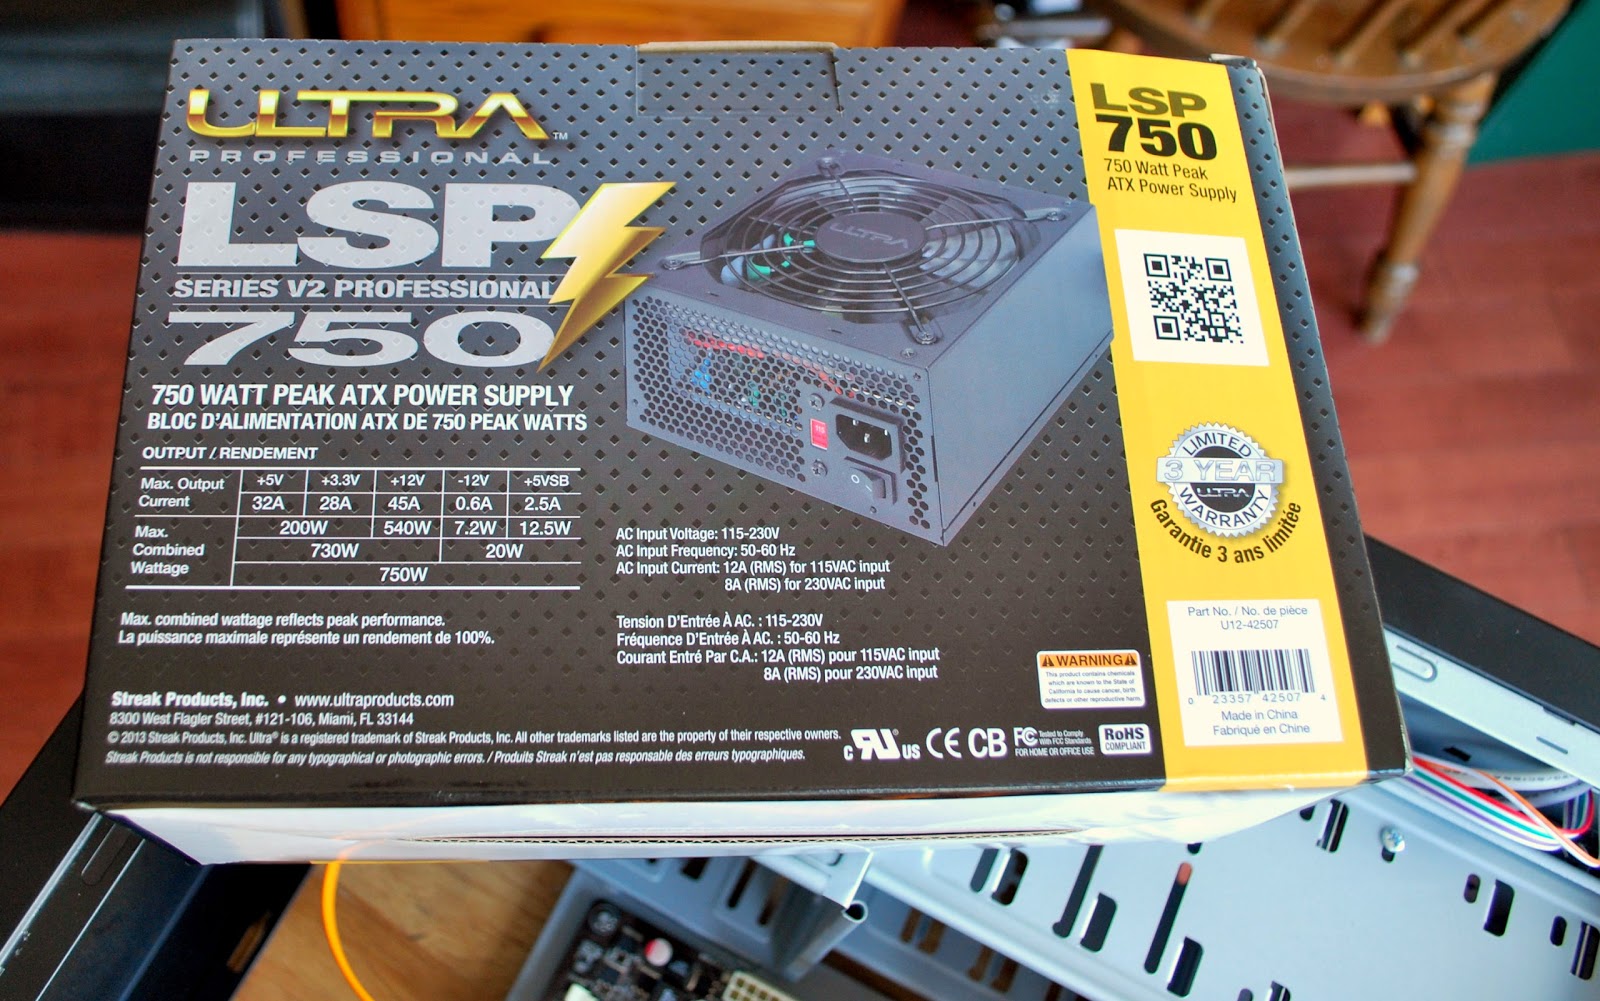
The old supply was a 500 watts supply the new one is 750 and can be used with a new PC when I decide to build one. The new supply fit perfectly into the tower and there sure were lots more cables on this supply! I ended up using only 5 of the some 20 cables so the rest were tucked away in an open bay for future use. With all the cables plugged into the mother board, hard drives and CD drive and the spare cables were as I said tucked away. Before putting the side panels back on it was time to plug in the new supply and power up the PC. I then pushed the power button and NOTHING!!!! Ok I said lets try that again…..NOTHING!!! First thing that came to mind was, did the faulted power supply take something else with it?? It was time to take a breath and think of my next step, time to recheck all the mother board connections. After all I did take time to clean the dust off the board while the side panels were off
 |
| Ready to power up |
 |
| The problem found |
 |
| If you look hard Oliver can be found |
Mike Weir, VE9KK, is a regular contributor to AmateurRadio.com and writes from New Brunswick, Canada. Contact him at [email protected].
The KP2 Slacker DXpedition Guide
I’ve had several opportunities to take amateur radio along on vacation and do a little radio operating from other countries. I try not to focus too much on ham radio during such a trip, as it has a tendency to create marital discord and can suck the fun out of the vacation. Some people call this a “holiday style” DXpedition, or maybe it’s just the slacker approach.

The marine yellow Baofeng UV-5R handheld transceiver got a lot of use.
St John USVI
Joyce (K0JJW) and I were planning a vacation with three other couples that we’ve known for years. It turns out that six of the eight have their ham licenses. (We’re still working on the last two.) Our primary goal was to find an island location with great beaches and snorkeling. Someone proposed the island of St John in the US Virgin Islands and the idea took hold.
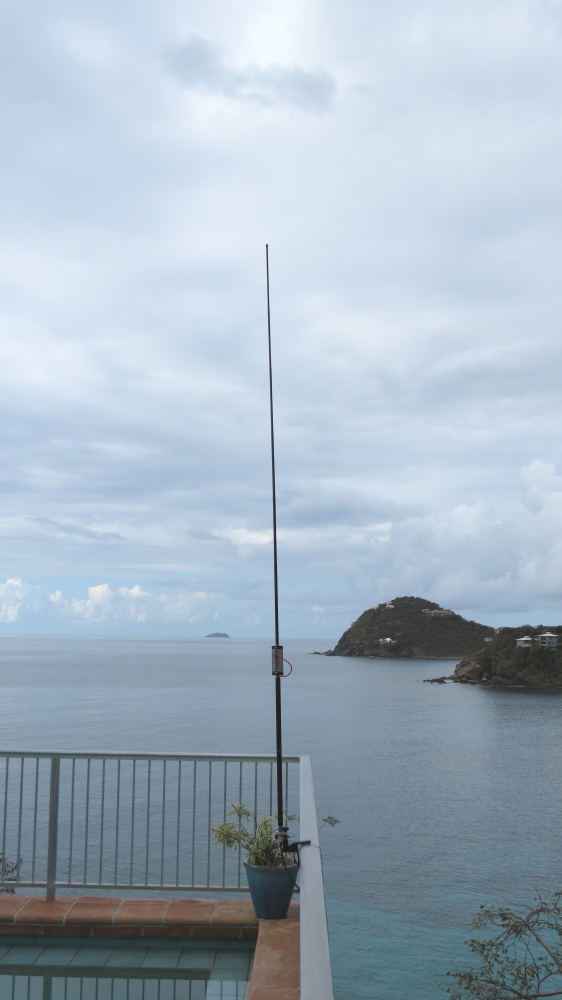
The Buddistick antenna is mounted on the railing of the patio, overlooking the sea.
From a ham radio perspective, USVI is an interesting choice since it does count as a DXCC entity (“country”), even though it is a US possession. See my article on HamRadioSchool.com for more information on how that works. Anyone with an FCC license can operate from there without any special licensing or approval. KP2 is the prefix for USVI, so identify as KP2/<callsign> to indicate that you are operating from USVI.
Radio Gear
We were trying to pack light, so the radio equipment had to fit into our normal luggage. I took my Yaesu FT-817 and a Buddistick™ antenna. Paul (KF9EY) took along a Yaesu FT-100D, while Denny (KB9DPF) transported his FT-817 and a G5RV Junior antenna. Our primary operating mode was using the FT-100D (more power, baby) to drive the Buddistick, which was attached to the railing on the patio.

The FT-100D was the primary operating rig, carefully placed on a random table out by the pool, with the St John Guidebook nearby.
I decided that the true slacker approach required some Official Beach QRP contacts in the style of Buddies in the Caribbean (see the video). One day on the beach, I took along my FT-817 and the Buddistick and set up for some QRP action.
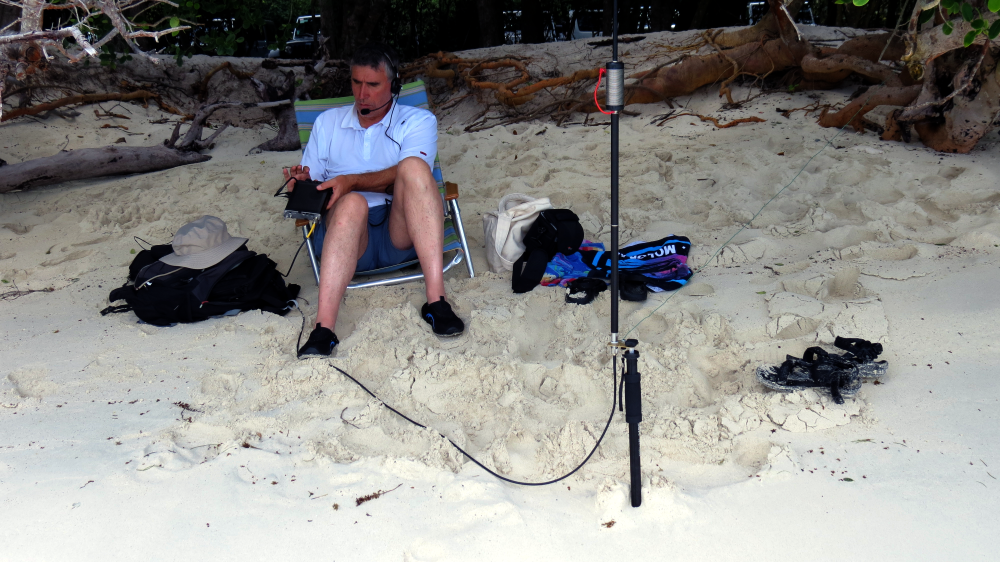
Some slacker beach operating (Bob K0NR).
The Buddistick was mounted on a Dolica WT-1003 camera monopod stuck into the sand, with the radial trailing off into the vegetation. My compact Heil headset was a convenient way to make some phone contacts without blasting my fellow beach bums with noisy audio.

The view looking out from the beach operating location.
How did we do on the HF bands? We managed to make a number of contacts on 20m, 15m and 10m into the Americas and Europe. I was a bit disappointed that we never really got a pileup going. I think our signal was plenty strong but KP2 is maybe just not that rare.

The innovative “plop the rig on top of a backpack” operating configuration.
We spent quite a bit of time exploring the island, driving around in two rental Jeeps. For mobile communications, we chatted back and forth on 146.58 MHz, the Golf-November-Tango frequency, using handheld transceivers. In the end, these radios probably got the most use during the trip. (Did I mention this was a slacker DXpedition?) There are a few 2m repeaters in the islands but we did not make use of them.
I brought a Yaesu FT-60 and a Baofeng UV-5R along on the trip, but mostly ended up using the Baofeng radio. If was the perfect radio to take to the beach — does the job and not that big of a loss if it landed in the ocean. Using the dual receive feature of the HT, I monitored the marine calling frequency, 156.80 MHz, listening to the boat traffic.
So if you are looking for a great place to go to enjoy the sand and water, I highly recommend St. John. Go ahead and take along some ham gear and do some slacker DXing. For more information on KP2 ham radio, see the ARRL Virgin Islands Section web site.
— 73, Bob KP2/K0NR
QSL to KP2/K0NR via Logbook of the World or to K0NR via Buro or Direct with SASE
Bob Witte, KØNR, is a regular contributor to AmateurRadio.com and writes from Colorado, USA. Contact him at [email protected].
 Ham Radio Deluxe |
 W5SWL Electronics |
 Ham Radio Prep |
 KB3IFH QSL Cards  Hip Ham Shirts  HamRadioAuctions HamRadioAuctions Reliance Antennas Reliance Antennas Enigma Shop Enigma Shop |  morseDX  Ni4L Antennas  R&L Electronics R&L Electronics antennas.us antennas.us QRV QRV |
- Matt W1MST, Managing Editor
