 |
 Tomorrow is always another day
I started my lunchtime QRP session fully intending to work the N3AQC QRP-pedition to the USS Requin which is docked by the Carnegie Science Center in Pittsburgh. John K3WWP and Mike KC2EGL were there today, and I figured that maybe, just maybe, I might be able to hear them on 40 Meters. So I set up the Buddistick for that band - magmount base, all four 11 inch arms, untapped coil, extra long whip. I was able to get the SWR down to about 1.5:1 and I heard plenty of signals, but no N3AQC. They started at 10:00 AM, and by the time I was able to get to the parking lot, it was 1:30 PM, so I don't know if they were on lunch break also, or perhaps they had just called it a day by then, or perhaps they were on 20 and 30 Meters. But tuning around for about 15 minutes and not hearing N3AQC, I decided to switch over to the higher bands, as lunch time is only an hour.
So I took two of the 11" arms off, put the coil tap in its accustomed position and put the Buddistick back on the roof. Tuning around, at 14.018 MHz, I heard them - PZ5W - Suriname. The same station from yesterday, and they were even louder than they were on 15 Meters. So without even thinking, I dialed in a 1kHz up split and gave a call ... and was heard. I sent my info and completed the exchange and then looked down at the KX3.
In my haste, I hadn't touched up the SWR with the autouner. My SWR was 1.7:1 and the KX3's power had folded back to 3 Watts. So what I couldn't accomplish with 5 Watts yesterday, got done with 3 Watts today. That felt nice - really, really nice.
Looking at my watch, I saw I had about 15 minutes left before I had to break down and go back into the building, so I prowled around the band some more for a few minutes. Lo and behold, T2TT - Tuvalu coming in loud and clear! Argh! Ten minutes was not enough to even consider it a decent try, but I did - and failed.
But ...... tomorrow is always another day.
72 de Larry W2LJ
QRP - When you care to send the very least!
Larry Makoski, W2LJ, is a regular contributor to AmateurRadio.com and writes from New Jersey, USA. Contact him at [email protected].
National Parks On The Air
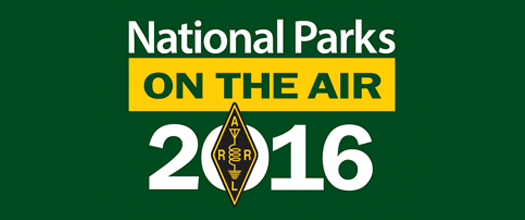
From the ARRL: “Throughout 2016, Amateur Radio will be helping the National Park Service celebrate their 100th anniversary. Hams from across the country will activate NPS units, promote the National Park Service and showcase Amateur Radio to the public.”
This should be an exciting event for me. This past summer I got to enjoy some extended travels through a few of our national parks (visited a total of 5). This coming summer I am planning the same but hopefully am going to be able to visit even more.
While I do not intend to conduct any extended activations, I do plan on getting onto the HF bands from my mobile while I am at the parks.
I am getting closer to locking in my summer travel’s calendar. Most parks start taking reservations at six months out… just about there.
ARRL is already selling quite a bit of National Parks On The Air (NPOTA) swag. One item that I have ordered is the NPOTA map, which I’ll post in the room where I will do my trip planning.

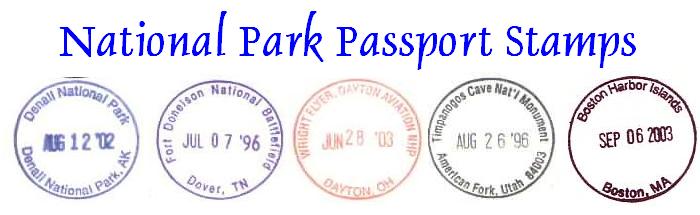
I will need to think through how I cam going to do my logging. For QSL cards, I can use postcards from the park and stamp them with each park’s National Park Passport stamp.
Scott Hedberg, NØZB, is a regular contributor to AmateurRadio.com and writes from Kansas, USA. Contact him at [email protected].
IC7300 – not yet?
The IC7300 is being actively “pre-sold” with UK dealers asking people to part with £50 deposits to secure these transceivers when they become available. I don’t think any have shipped yet and I suspect it will be late spring before they appear in the UK.
 |
| http://www.icomamerica.com/en/media_events/news/NewsArticle.aspx?id=201521 |
The price will drop once the dealers have creamed good profits from those who must have the rig at any price – the early adopters. Really I would like the 10W version which would be a class QRP rig. This would be even better than the IC703.
It is quite likely that the early sets will have some software or hardware issues which will be corrected on later models sold.
Of all the products around, it looks the most attractive and I like the SDR architecture. Let’s hope the ball grid arrays are soldered well! From bitter experience I know this can be a nightmare tweeking the process. I can wait.
ICOM America has more information on this transceiver.
Roger Lapthorn, G3XBM, is a regular contributor to AmateurRadio.com and writes from Cambridge, England.
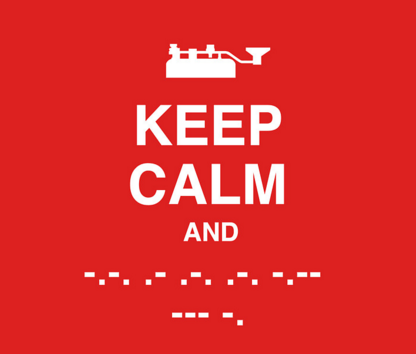
Learn Morse Code – All the Cool kids are doing it
Amaze your friends / Confound your enemies
Ok so maybe all the cool kids aren't doing it... who wants to be a cool kid anyway? They have issues.
So whats up with all this beeping?
Morse code is fundamentally a method of encoding every letter in the alphabet plus numbers and punctuation as two pieces of data. Two sounds actually, one 3 times longer than the other. If you were to speak the two sounds out loud one would sound like DIT and the other DAH. That's it. That's all you have to know. Two sounds, one 3 times longer than the other. There, and you thought this would be hard? Pah!
 |
| Beep Beeeeeep -- There you have it... Morse Code. Any questions? |
Why is it called Morse Code?
Why learn Morse code?
CW is small but powerful
CW uses between 100Hz and 150Hz of bandwidth compared to 2400Hz - 3000Hz used by phone modes. That makes it about 20 times more efficient, or put another way, your signal to noise is improved by a factor of 20 over phone. It's also easier to copy (interpret) a CW signal down in the noise than a spoken voice.
So you want to learn "the code"
A "C" in Morse Code sounds like DAH DIT DAH DIT. It has a beautiful rhythm when you listen to it out loud. Go ahead and shout it out, you've got nothing to lose at this point.
So, if you have toyed around with learning Morse Code and have some visual chart with dots and dashes. Shred that chart right now. Go ahead and do it. I'll wait... Did you shred it? Ok let's proceed.
 |
| Carry On |
Methodology
One wrong way
Morse Code was a requirement for my General amateur radio license in 2006, but I only had to prove copy skills at 5 words per minute. Someone recommended a set of tapes that employed mnemonic phrases to memorize each letter. Basically each letter "sounds" like some phrase. I'm going to tell you one of the mnemonic phrases as an example but please immediately erase it from your memory because it takes a long time to un-learn this method. The letter "Y" sounds like the following phrase said out loud "Why did I die?" OK, now just imagine you've memorized some phrase like that for every letter of the alphabet and punctuation mark. Now every time you hear a letter in Morse Code one of these phrases runs through your head and you have to let it run its course before the letter pops out on the other side of your consciousness. You can understand how crippling this becomes when the speed goes above 5 words per minute. Trying to counts DITs and DAHs hits the same wall.
One right way
I'm not going out on a limb to say there is only one right way to learn Morse Code so I will say that what follows is "One right way" to learn the code and it is working for me.
This method is recommended by the ARRL and is implemented by many applications used for Morse Code training. This allows you to learn the sound of the letters at the full target speed you want to operate at. If you learn the sound of the letters at 13wpm then you will find yourself stuck there until you relearn them at a higher speed because you're learning to recognize sounds, not DITs and DAHs. Our brain has an easier time of slowing a sound down than speeding it up so if you start at the target speed the slower speeds will work themselves out. I started with a target speed of 18wpm and I am kind of stuck there right now, while learning the sound of the characters at a higher speed to progress. I wish I had originally chosen 20wpm as my target speed because in my experience that is a common speed in many QSOs.Farnsworth Method
Learn the sound of the letters at the full target speed you wish to be able to copy.
Keep the speed of the letter spacing (silence between the letters) to be at your current learning speed to give you thinking time. I.e. you're letter spacing may be set at 8-10wpm to start out with while you're actually learning the characters at a target speed of 20wpm.
Your training should also incorporate the Koch Method which directs the order in which you learn the letters, numbers and punctuation and determining when to progress to the next element.
Koch Method
Begins with just two characters (K, M). Once strings containing those two characters can be copied with 90% accuracy, an additional character is added, and so on until the full character set is mastered.
Code Trainer
I looked at a number of different code trainers. I tried PC applications, mobile device apps and internet based applications. I live in a very internet connected place and I nearly always have access to the internet. I don't always have my PC with me but I do usually have access to a guest PC or a mobile internet capable device so I chose a website that has a training application that incorporates both the Farnsworth and Koch methods and would keep track of my progress.Learn CW Online http://lcwo.net/
Learn CW Online is a really nice Morse Code tutor. You create a login for it to keep track of your progress and settings for character speed and effective speed. It has multiple ways to train so try the different ones out to find out what works best for you. I used the Koch Method CW Course which is accessible after you log in. It starts out with two letters and keeps track of your accuracy, making suggestions as to when you should add an additional letter. There are 40 lessons in that course which include the alphabet, numbers and punctuation. I've read that other people really like the MorseMachine application on that site.
After you've gone through all 40 Koch lessons you may still have trouble with a particular set of characters. Use the Code Groups application to work through your stumbling blocks. Lastly natural language training is provided in the plain text training application which sends real sentences at your speed settings. You can also paste text into the convert text to cw application and download the resulting MP3 to practice off-line.
Listen to real QSOs
Secondly you'll begin to start copying the myriad of abbreviations and prosigns and jargon used during QSOs that exists nowhere outside of amateur radio CW conversations. As you come across new "words" that you copy. Circle them until you begin to recognize what they mean. Some of the abbreviations are standardized but many others are just shorthand and sometimes unique to a particular operator or region. You'll also start to become familiar with the way operators communicate their goodbyes which vary greatly in content, abbreviations and length. Some goodbyes in morse code seem to take as long as the entire previous part of the QSO. In other cases the conversation ended and you didn't even hear the door slam behind you.
A word about Morse Code translators
Pace yourself and have fun
Morse Code is a mode for folks that don't have a lot to say but want to take a long time to say it; so why rush?
Sending Morse Code
Personally, I'd recommend that you hold off practicing sending code until you have worked through all the lessons and can properly copy. Your brain needs time to memorize the proper sound for each letter. If you start practicing too soon you could develop poor timing habits that will take time to correct.
I have had a little over 300 CW QSOs now and while that is still a relatively small number easily a 3rd of them have been lengthy ragchews lasting over 20-30 minutes so I've spent a lot of time "off-script" from the standard exchange. At this point I don't have to concentrate much on what I'm sending, it just comes out. I only have to think about spelling long words.
Remember the golden rule. It's better to send good code than receive.
What kind of key
The video below discusses some difference in learning to send on a straight key versus a paddle...
Straight key
 |
| Straight Key (manual key) |
Straight keys are simple, inexpensive and can work with many inexpensive practice oscillators such that you don't need a radio to practice sending. The disadvantage of straight keys is that your reflexes are entirely responsible for properly spaced DITs and DAHs in addition to intra-character and word spacing. The advantage is that after some practice they become an extension of your arm and simply repeat what you're hearing in your head. I personally started with a straight key and still like to use one for the majority of my QSOs but it's a personal preference.
Paddle with electronic keyer
 |
| Paddle -- requires electronic keyer |
A paddle works with an electronic keyer. The disadvantage of a paddle is it requires additional equipment and that you will be learning a different reflex from the actual code that is in your head. I.e. when you send an I or an S or an H you are not reflexively sending the DITs that make up the letter but are instead training yourself how long to depress the paddle for the string of DITs. This is a new skill and doesn't directly correspond to what you hear in your head. The advantage to using a paddle with an electronic keyer is that the keyer will send perfect length and ratio DITs and DAHs every time so your reflexes don't have to be as quick or precise. Also it requires far fewer movements of your hand to send code with a paddle and you won't tire as quickly as you would with a straight key. I won't go into the concept of squeeze keying here. For now don't worry about it.
As to the specifics of using a paddle with a keyer:
The electronic keyer may be external or built-in to the radio. If it's external then it will normally have a speaker or mic jack to provide a sidetone allowing you to practice without connecting to a radio. If you don't have an external keyer and want to practice with a paddle you will need a radio with a built-in electronic keyer and be aware how to set it to not transmit for practice. Usually this is accomplished, strangely enough, by turning off VOX (which stands for voice activation) in the radio's menu. Keyers have a speed setting and weighting. Speed seems pretty obvious. Weighting is the ratio of the length of the DIT to the DAH in length. In general the weighting should be set to a higher value when you are sending at a slow speed and set to a lower value as your speed goes up.
Your first on-air QSO
You are ready to venture into your first, heart pounding, fight or flight response on-air QSO
If none of those options present themselves then just go for it on-air. Find an ongoing QSO that you feel you can copy or is moving just slightly faster than you can copy. Copy the call-sign of the station you can best copy and wait for them to sign with each other (they will each send their 73s / 72s and send a DIT DIT at the very end). Then call that station.
AA4XX AA4XX DE N4PBQ N4PBQ N4PBQ PSE QRS KNIf you've been listening to regular QSOs you'll recognize the form above. The repetition of the other station's call is to get their attention. You repeat yours for their benefit. The PSE QRS is asking them to slow down and the prosign KN means you're asking only them to respond. Have a prepared QSO text ready in terms of what to send. The SKCC beginners corner has a good sample QSOs.
Here is a sample QSO from when I was just venturing onto the air.
What is going on in the radio
As far using Morse Code in radio communication is concerned; a transmitter modulates a 100Hz to 150Hz wide signal called a Continuous Wave or CW at a particular frequency. The time the signal is transmitted corresponds to the length of time the trasnmitter key is depressed. When listening on a receiver you hear a tone whose pitch is determined by your offset from the frequency of the transmission. If you are listening exactly on the same frequency you will hear nothing because there will be zero Hz offset. So most modern receivers offset the receiver frequency above or below the signal and offset their own transmit frequency by the chosen offset. So if the offset is 750Hz you will hear a 750Hz tone if you are exactly on frequency with the other station. Confusing? Good, you're well on you way.Summary
I've jotted down my thoughts on the ins and outs (mostly outs) of learning Morse Code as part of my QRP Ham Radio adventure. I think it is relevant enough to visitors to the Ham Radio QRP website to make it a static page available from the main menu:
Richard Carpenter, AA4OO, is a regular contributor to AmateurRadio.com and writes from North Carolina, USA. Contact him at [email protected].
A trip to visit the USS New Jersey

The Ocean – Monmouth Amateur Radio club (OMARC) N2MO had the honor and privilege of touring the Battleship New Jersey, BB-62 on Saturday.
Our guide was Dave WA2TVS of the Battleship New Jersey Amateur Radio Club, NJ2BB. Nine OMARC members met at our club facility at 0800 and then car pooled to the battleship. Arriving around 0930 we were met dock side by Dave. The tour started with us going aboard and making our way forward. Standing in front of Turret One, with those three huge 16” navel rifles over head made it was quite an experience.
After getting a brief history of the ship we made our way to the communications center. The NJBARC has there Amateur Radio club Station in a small compartment just off the communications center. With four operating positions, it’s cramped. Our group split into to two groups. The smaller group stayed to operate and the larger group started out on the tour. Now having been on large naval ships before I was somewhat used to climbing steep ladders. But some of the group had to be watched on them. One has to remember that this ship was originally manned by very young men. So old men like me do have a hard time with the ladders. But the hardship of climbing up and down them was worth it. Dave give us the grand tour, which included areas not covered by the standard tour. We went up and down the ladders, and made our way aft, stopping at all the museum spaces that have been sit up throughout the ship.
After about three hours, we arrived back at the communications center. The smaller group had already eaten lunch in the galley. So we left them to operate and made our way to the galley for lunch: pulled pork, hot dogs and chili. After which we went back to trade places with the small group. I chose to be at the twenty meter station. Although the bands were not in the greatest shape, I started calling CQ. After a few calls, I started making contacts. The others in my group were on fifteen and forty meters. The massive antenna systems aboard the ship work great. Soon we were adding contacts to the logging program database.
Our time on board was short and we soon had to go QRT, but our time aboard will not be forgotten. I would like to thank the Members of the New Jersey Amateur Radio Club for being our hosts and allowing us to operate from this very special venue.
Our thanks also go to the Battleship New Jersey museum for all the hard work it has done and all the hard work it takes to maintain the ship as a museum. But most importantly: Thank You To All Those Men who took this grand Old lady into Harm’s Way in defense of our Country. THANK YOU, JOB WELL DONE!
Jeff Harshman, N2LXM, is a special contributor to AmateurRadio.com and writes from New Jersey, USA. Contact him at [email protected].
KX3 Shield installation
Amongst many deliveries this week, one very welcome package was side plate covers for the KX3. Ive noticed on recent trips that the soft pouch that I use to hold the KX3 is offering very little protection to the knobs.
The side plates allow the installation of a clear cover that is intended to give protection to the delicate front panel.
Installation is easy. It takes less than 10mins and also comes with a Heat sink to help the PA transistors stay cooler for longer. I didn’t want to fit the heat sink at first – I thought it wouldn’t allow the radio to fit in the carry pouch. But as you will see the case I use was able to take both the radio and heat sink. To complete the installation you will need 10minutes of spare time, a screwdriver and a 10mm spanner.
If you own a KX3, use it out and about – this is a quick and simple upgrade you should seriously consider.
Dan Trudgian, MØTGN, is a regular contributor to AmateurRadio.com and writes from Wiltshire, England. He's a radio nut, IT guru, general good guy and an all round good egg. Contact him him here.
 Ham Radio Deluxe |
 W5SWL Electronics |
 Ham Radio Prep |
 KB3IFH QSL Cards  Hip Ham Shirts  HamRadioAuctions HamRadioAuctions Reliance Antennas Reliance Antennas Enigma Shop Enigma Shop |  morseDX  Ni4L Antennas  R&L Electronics R&L Electronics antennas.us antennas.us QRV QRV |
- Matt W1MST, Managing Editor
