 |
 Amateur Radio Weekly – Issue 116

When everything else fails, ham radio will still be there—and thriving
Ham is now a full-fat fabric that can provide Internet access. Why aren’t you using it?
ars technica
FCC to investigate rise in noise floor
The FCC is investigating changes and trends to the radio spectrum noise floor to determine if there is an increasing noise problem.
ARRL
Daily Twitter HF Activity Challenge
Amass as many contacts as possible between 0000z and 2359z each day. Post your results to Twitter.
SOTABEAMS
TCP and UDP connections over audio
This binding provides an abstract version which emits and consumes floating point samples which can be fed to a sound card.
GitHub
6 Meter Quad Turnstile Antenna
A quad turnstile consists of two cubical quad loops oriented in a diamond configuration and angled 90 degrees apart from one another.
High on Solder
DIY Powerpole voltage and current meters
Due to the availability of nice and cheap modules, it is very easy to make them oneself.
AmateurRadio.com
Canada Day Contest 2016 is coming
Amateurs all over the world are invited to Canada’s Birthday Party on the air.
RAC
23DA330 Jeremy’s Homebrew Quad
Jeremy was able to remove about 145′ of #19 copper wire from the old discarded washing machine motor which provided him more than enough wire to create 3 square loop driven and parasitic elements.
Delta Alfa
Video
Icom 7300 Fldigi Setup
Whether I’m using N1MM, N3FJP, MMTTY or Fldigi, the rig settings stay the same.
K0PIR
Digital modes via satellite
An example of what it’s like to work amateur satellites using digital modes.
YouTube
Last Pass of April 2016 ISS SSTV Event
This is one of two rare MAI-75 passes over North America.
YouTube
Amateur Radio Weekly is curated by Cale Mooth K4HCK. Sign up free to receive ham radio's most relevant news, projects, technology and events by e-mail each week at http://www.hamweekly.com.
A Tip o’ the Hat

I really have to extend a hearty "tip o' the hat" to all you QRP SSB guys out there. Not being used to SSB operations, not being used to QRP SSB operations has provided me with a learning experience. In your writer's most humble opinion, QRP SSB has a difficulty factor of 10X compared to QRP CW.
Today during lunch time, I was hunting around for NPOTA stations on 20 Meters. Not hearing anything on the CW bands, I moved on up to the realm of voice - foreign territory, indeed!. There I heard two stations. K0USA on 14.260 MHz and K0RP on 14.340 MHz. K0RP was very weak, with QSB making it worse. K0USA was a good 5X5 into NJ and even 5X7 when QSB would let up. I decided to concentrate on Mary, who was the op behind the mic. It took the better of 15 minutes, but I got in the log - and it was a new one for me, MN46, the Homestead National Historical Monument in Nebraska.
For her part, Mary did a superb job dealing with my weak signal. Only 5 Watts to the Buddistick has gotten me decent results on SSB in the past, but today, with the monstrous QSB, it was their beam (which was pointed south, by the way - I was off the side) and her great ears that made the difference. I owe her a ton of gratitude for sticking with me and granting me the ATNO.
Getting back to the topic of SSB vs CW ..... I'm pretty confident in my CW skills. From past practise, it's pretty easy for me to gauge who is workable and who isn't. I still get surprised from time to time; but I've gotten pretty good at figuring out who I am able work and who I am not..
QRP SSB is still a crap shoot for me. Like I stated, it's foreign territory. To make things even worse, shall we say that patience is a "hard won virtue" for me? Living in New Jersey all my life, I'm used to the fast pace of the Northeast. Things, especially at work, are wanted yesterday. I'm used to dealing with that, and delivering those kind of fast results. The downside is, that I've come to expect that, in return. Waiting is still a battle for me. Not in all situations, but in many - especially when I am dealing with myself.
QRP SSB is an extra hard challenge for me and will be for quite a while. The upside is hopefully, I'll become more skilled at it; and I'll also gain more patience, because of it..
72 de Larry W2LJ
QRP - When you care to send the very least!
Larry Makoski, W2LJ, is a regular contributor to AmateurRadio.com and writes from New Jersey, USA. Contact him at [email protected].
A Tip o’ the Hat
I really have to extend a hearty "tip o' the hat" to all you QRP SSB guys out there. Not being used to SSB operations, not being used to QRP SSB operations has provided me with a learning experience. In your writer's most humble opinion, QRP SSB has a difficulty factor of 10X compared to QRP CW.
Today during lunch time, I was hunting around for NPOTA stations on 20 Meters. Not hearing anything on the CW bands, I moved on up to the realm of voice - foreign territory, indeed!. There I heard two stations. K0USA on 14.260 MHz and K0RP on 14.340 MHz. K0RP was very weak, with QSB making it worse. K0USA was a good 5X5 into NJ and even 5X7 when QSB would let up. I decided to concentrate on Mary, who was the op behind the mic. It took the better of 15 minutes, but I got in the log - and it was a new one for me, MN46, the Homestead National Historical Monument in Nebraska.
For her part, Mary did a superb job dealing with my weak signal. Only 5 Watts to the Buddistick has gotten me decent results on SSB in the past, but today, with the monstrous QSB, it was their beam (which was pointed south, by the way - I was off the side) and her great ears that made the difference. I owe her a ton of gratitude for sticking with me and granting me the ATNO.
Getting back to the topic of SSB vs CW ..... I'm pretty confident in my CW skills. From past practise, it's pretty easy for me to gauge who is workable and who isn't. I still get surprised from time to time; but I've gotten pretty good at figuring out who I am able work and who I am not..
QRP SSB is still a crap shoot for me. Like I stated, it's foreign territory. To make things even worse, shall we say that patience is a "hard won virtue" for me? Living in New Jersey all my life, I'm used to the fast pace of the Northeast. Things, especially at work, are wanted yesterday. I'm used to dealing with that, and delivering those kind of fast results. The downside is, that I've come to expect that, in return. Waiting is still a battle for me. Not in all situations, but in many - especially when I am dealing with myself.
QRP SSB is an extra hard challenge for me and will be for quite a while. The upside is hopefully, I'll become more skilled at it; and I'll also gain more patience, because of it..
72 de Larry W2LJ
QRP - When you care to send the very least!
Larry Makoski, W2LJ, is a regular contributor to AmateurRadio.com and writes from New Jersey, USA. Contact him at [email protected].
CW Forever …?
 |
| 24 Hour 'JT' 6m Activity |
The transverter develops just over 70 watts output when run on 13V and so far, has been able to take all of the nightly punishment I've been able to throw at it with flying colors. Here is a WSPRnet screen shot taken from a typical night of my WSPR beaconing on 630m:
 |
| courtesy: KB5NJD's 630m Info |
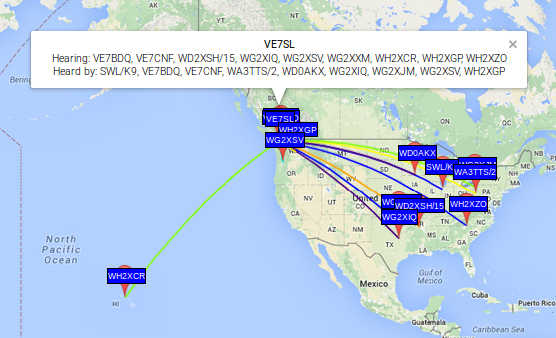
I was also able to have my first JT-9 mode QSO this week, with Toby, VE7CNF. This mode is the weak-signal WSPR QSO mode, tailored for LF/MF work and allows for calls, signal reports and confirmations (R's) to be exchanged ... the minimum requirements needed to claim a contact. Although additional information can be exchanged, its 13-letter message buffer does not exactly promote ragchew style conversations and some creativity is required to exchange more than the basics.
With many of our newer 'digital-savy' amateurs not necessarily being proficient in CW, I suspect that JT-9 may well evolve to become the go-to weak signal communication mode on 630m, much as it has in Europe. In fact, popularity of this mode in Europe has already spawned a few JT-9 contest weekends on 630m, with high activity levels being reported. I'm really looking forward to a 630m JT-9 QSO party in North America, once the band becomes a reality in the U.S.A.
JT-9 is capable of decoding signals reliably down to -24db SNR and boasts a 50% reliability of decoding at -26db SNR. Audible CW drops out at around -16 to -18db SNR, so communicating with JT-9 is the equivalent of going from 100 watts to around 800 watts ... a significant improvement and very helpful on 630m! Like WSPR, JT-9 will work with non-linear transverters and amplifiers such as the commonly-used and simple to build switching MOSFET Class D/E styles.
There also appears to be a fast-growing use of JT-65A on the 6m band this summer, with numerous 'CW forever' operators finding the mode's ability to dig up to 10db deeper into the noise paying off with surprising results. Some western North American operators have noticed that European JT-65A signal levels indicate that they should be in the CW-copiable range yet no CW activity is heard, for which there seems to be no ready explanation. Perhaps more will be learned this summer as the use of this mode continues to expand.
As one of the 'CW forever' proponents willing to try something different, I also have been listening for and working stations on 6m over the past few days on JT-65A. With the IC-756ProIII throttled back to 25 watts, I've found it fairly easy to make contacts when the band is open but have yet to hear or work anything unusual.
I'd love to hear your own comments on the use of JT-9 or JT-65A, particularly on 630m or on 6m ... maybe you can pass along some tips for those of us that are new to the mode on this band.
I may have to reconsider this 'CW forever' thing!
Steve McDonald, VE7SL, is a regular contributor to AmateurRadio.com and writes from British Columbia, Canada. Contact him at [email protected].
DIY Powerpole voltage and current meters
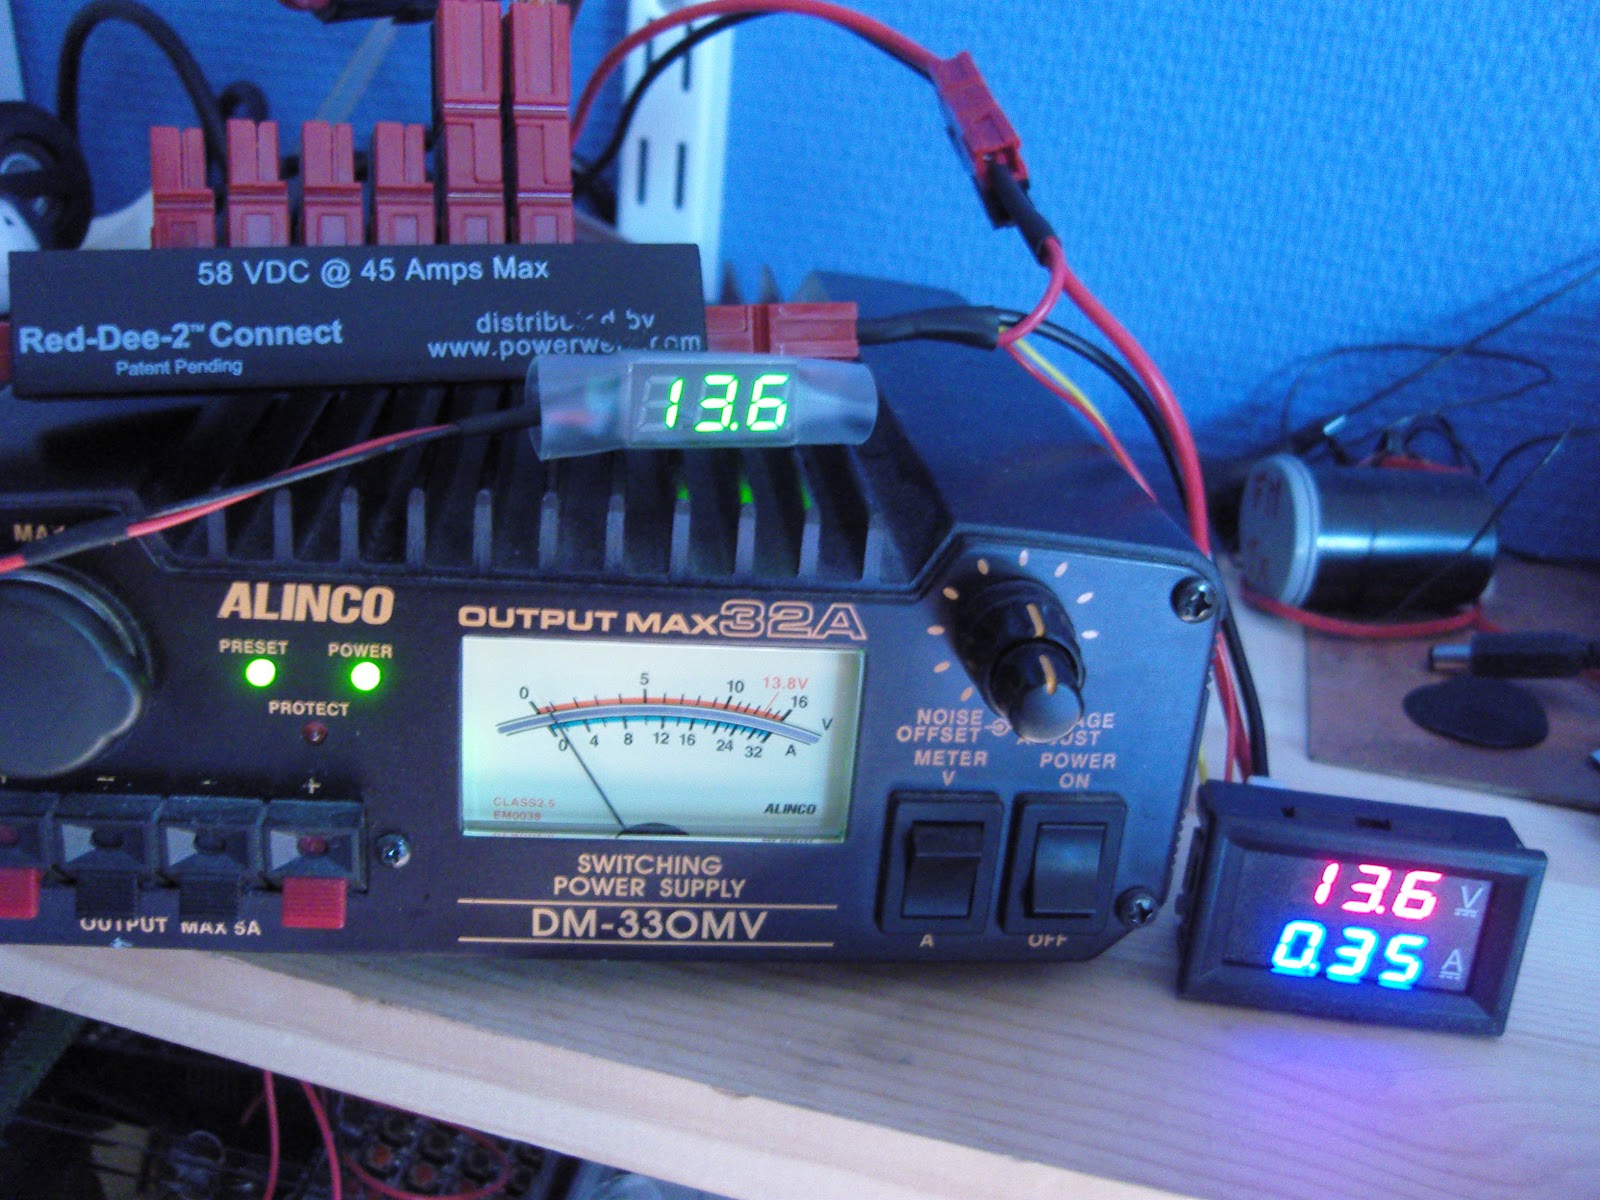
Powerpole voltage and current monitoring is quite nice to have. One can buy commercial meters, but due to the availability of nice and cheap modules, it is very easy to make them oneself.
To the right you’ll see my combined voltage and current meter as well as my volt-meter on top of the power supply.
Both of the modules have been bought on Ebay:
- Miniature 0-30 V DC LED 2 wire Digital voltmeter (371333527599) where the display is 22 by 10 mm. Cost slightly more than $1
- 0-100 V, 0-10 A Dual Voltmeter Ammeter (262455987311) costing less than $3. The module size is 48 x 29 x 26 mm and the letters are 7 mm tall just like the miniature voltage display.

- Related post: “New gadget measures negative resistance“
Sverre Holm, LA3ZA, is a regular contributor to AmateurRadio.com and writes from Norway. Contact him at [email protected].
DIY Powerpole voltage and current meters
Powerpole voltage and current monitoring is quite nice to have. One can buy commercial meters, but due to the availability of nice and cheap modules, it is very easy to make them oneself.
To the right you’ll see my combined voltage and current meter as well as my volt-meter on top of the power supply.
Both of the modules have been bought on Ebay:
- Miniature 0-30 V DC LED 2 wire Digital voltmeter (371333527599) where the display is 22 by 10 mm. Cost slightly more than $1
- 0-100 V, 0-10 A Dual Voltmeter Ammeter (262455987311) costing less than $3. The module size is 48 x 29 x 26 mm and the letters are 7 mm tall just like the miniature voltage display.
Sverre Holm, LA3ZA, is a regular contributor to AmateurRadio.com and writes from Norway. Contact him at [email protected].
SOTANA May Be Right For You
I have “a friend” that could probably use this.

The post SOTANA May Be Right For You appeared first on The KØNR Radio Site.
Bob Witte, KØNR, is a regular contributor to AmateurRadio.com and writes from Colorado, USA. Contact him at [email protected].
 Ham Radio Deluxe |
 W5SWL Electronics |
 Ham Radio Prep |
 KB3IFH QSL Cards  Hip Ham Shirts  HamRadioAuctions HamRadioAuctions Reliance Antennas Reliance Antennas Enigma Shop Enigma Shop |  morseDX  Ni4L Antennas  R&L Electronics R&L Electronics antennas.us antennas.us QRV QRV |
- Matt W1MST, Managing Editor
