 |
 Raspberry Pi APRS iGate
Further to my previous post(s) on APRS and Specifically Direwolf, here’s something with a bit more meat.
APRS has always been a bit of a thing for me. I like to go for a ride or a walk on the Lakeland fells and whilst I don’t get to go on as many SOTA trips as I’d like I do nearly always carry a hand held when I’m on the mountain bike. I know that there are a few local hams who like a bit of APRS and you never know when you’ll need a way of communicating when you’ve gone over the handbars and smashed your phone….
So what?
Well I also have an early Raspberry Pi model B and an RTL-SDR dongle. I live quite close to a digipeater and also have a terrible QTH for an iGate. So, I thought I’d combine the two with my liking f APRS. I’m glad to say the process was really easy and very robust. Want to have a go yourself? Ok…
So lets start
- Get you SD card and load it with the OS (I used the Raspian image from the Raspberry Pi site)
- Get a copy of the Direwolf software from WB2OSZ (and simply excellent documentation) from GitHub
- Have a look in the Direwolf docs folder. Follow the Raspberry-Pi-SDR-IGate instuctions and the Raspberry-Pi-APRS. I’m definitely not going to try and replicate of better these docs as they are perfect
- Get an APRS passcode from Magicbug
- Off you go, simple as that. Any issues then the Direwolf Yahoo Group should sort you out

That’s it really. There are a few little odds and sods like beaconing your iGate. This can be achieved by adding a line into the sdr.conf file so it looks a little like this:
# # Sample configuration for SDR read-only IGate.
#
# We might not have an audio output device so set to null.
# We will override the input half on the command line.

ADEVICE null null
CHANNEL 0
MYCALL MX0WRC

# First you need to specify the name of a Tier 2 server.
# The current preferred way is to use one of these
# regional rotate addresses:
# noam.aprs2.net - for North America
# soam.aprs2.net - for South America
# euro.aprs2.net - for Europe and Africa
# asia.aprs2.net - for Asia
# aunz.aprs2.net - for Oceania

IGSERVER euro.aprs2.net

You also need to specify your login name and passcode.
# Contact the author if you can't figure out how to generate # the passcode.

IGLOGIN MX0WRC 12345 (your passcode)
PBEACON sendto=IG delay=0:30 every=10:00 symbol="igate" overlay=R lat=54^38.5611N long=3^3$

# That's all you need for a receive only IGate which relays
# messages from the local radio channel to the global servers.
I’ve not managed to get it to start up automatically if it falls over with the dw_start.sh script but that is a work in progress. Here we are on APRS.fi

Ok, thats all very well but mine is remote. There are a few suggestions from the RPi people but I plumped for Weaved and tightVNC as a solution. Here are the instructions I followed for Weaved, and for TightVNC . If you don’t fancy a link then try this:
Install Weaved and run the installer
sudo apt-get install weavedconnectd
sudo weavedinstaller
Then TightVNC
sudo apt-get install tightvncserver
Run it once to do the password thing, then to run at boot
sudo su
sudo nano vncboot.sh
Enter this into nano
#! /bin/sh
# /etc/init.d/vncboot

### BEGIN INIT INFO
# Provides: vncboot
# Required-Start: $remote_fs $syslog
# Required-Stop: $remote_fs $syslog
# Default-Start: 2 3 4 5
# Default-Stop: 0 1 6
# Short-Description: Start VNC Server at boot time
# Description: Start VNC Server at boot time.
### END INIT INFO

USER=pi
HOME=/home/pi

export USER HOME

case "$1" in
 start)
  echo "Starting VNC Server"
  #Insert your favoured settings for a VNC session
  su - $USER -c "/usr/bin/vncserver :1 -geometry 1280x800 -depth 16 -pixelformat rgb565"
  ;;

 stop)
  echo "Stopping VNC Server"
  /usr/bin/vncserver -kill :1
  ;;

 *)
  echo "Usage: /etc/init.d/vncboot {start|stop}"
  exit 1
  ;;
esac

exit 0
Then chmod
chmod 755 vncboot
Lastly
update-rc.d -f lightdm remove
update-rc.d vncboot defaults
I can’t tell you how useful to follow the steps enough. I found that one RTL dongle isn’t quite the same as another so there can be issues. So much so that I wiped the SD card a few times so as to get right and simple. If you didn’t want to run Jessie, Jessie lite will do but you’ll need to find an alternative way to remotely access the RPi, with something like SSH as VNC doesn’t work (easily) without the X server.
As always, comments, suggestions and alternative approaches are always welcome, after all this is a hobby and none of this hard work belongs to me, I just follow the instructions 
Alex Hill, G7KSE, is a regular contributor to AmateurRadio.com and writes from Cumbria, UK. Contact him at [email protected].
In the park with 5 watts, KX3 and new Endfed antenna
 |
| My outdoor shack |
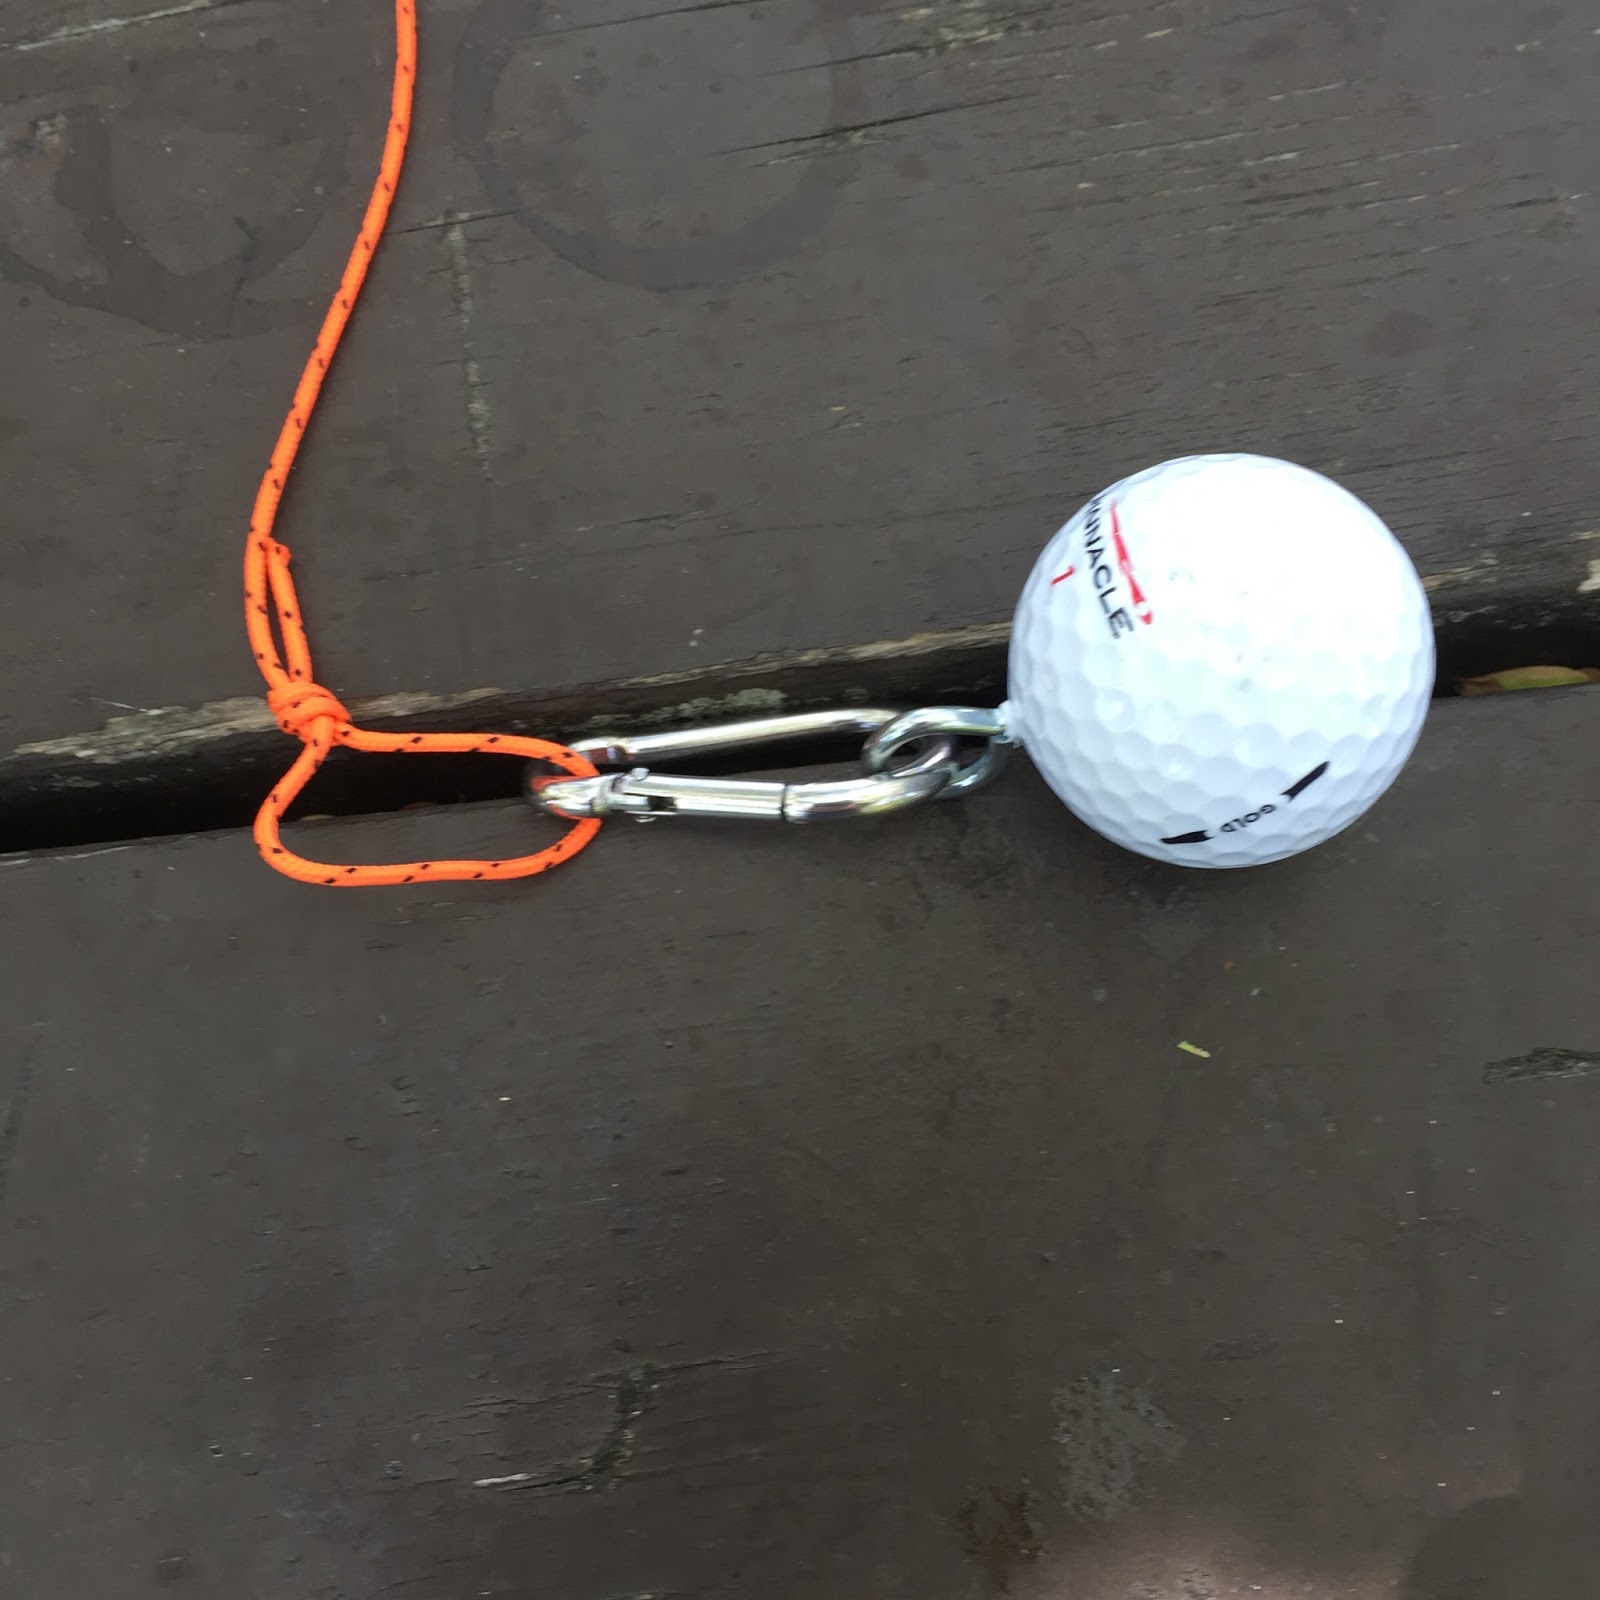 |
| Golfball setup |
10m Frequency SWR
28.020 3.8
28.060 3.8
15m
21.020 2.9
21.060 2.9
20m
14.020 3.8
14.060 3.8
40m
7.020 8.4
7.040 8.4
The antenna was mounted in a sloper configuration the high end at about 20 feet off the ground and the other end ground mounted. The tuner in the KX3 was able to bring all bands but 40m to a flat match, I was able to get 40m down to 1.5. The bands were very quite but I did spend some time
 |
| Anchor point |
Mike Weir, VE9KK, is a regular contributor to AmateurRadio.com and writes from New Brunswick, Canada. Contact him at [email protected].
In the park with 5 watts, KX3 and new Endfed antenna
|
| My outdoor shack |
|
| Golfball setup |
10m Frequency SWR
28.020 3.8
28.060 3.8
15m
21.020 2.9
21.060 2.9
20m
14.020 3.8
14.060 3.8
40m
7.020 8.4
7.040 8.4
The antenna was mounted in a sloper configuration the high end at about 20 feet off the ground and the other end ground mounted. The tuner in the KX3 was able to bring all bands but 40m to a flat match, I was able to get 40m down to 1.5. The bands were very quite but I did spend some time
|
| Anchor point |
Mike Weir, VE9KK, is a regular contributor to AmateurRadio.com and writes from New Brunswick, Canada. Contact him at [email protected].
6m Es – Is It Changing?

With the summer Sporadic-E season now approaching its midpoint, it looks as though this year may be another poor one. Having been operating on 6m every summer since the early 70's, I'm beginning to believe that we may be seeing some changes in what was once the normal summer pattern.
This summer, I can count on one hand, the number of good solid openings ... openings lasting for several hours. Over the past forty plus years, summers on 'six' for me, here in southwestern BC, were usually very predictable. The last week of May would usually see the start of regular band openings that would quickly escalate to almost daily openings through June and July. It was not uncommon to see the band open all day, into the very late hours and then still be open the next morning. Intense Es from California predominated the 70's and 80's ... much different than the past several summers here. The stronger openings now, when they occur, seem to be more to the southeast, favoring Colorado and other nearby central states. At times, this will turn into double-hop to the southeastern states, usually favoring the 'EM' grids.
Really long-haul openings have also taken on a different flavor. For more than two decades, openings to Japan on Sporadic-E almost always occurred late at night, near midnight ... late afternoon for the JAs'. The openings rarely favored anything other than the west coast. Openings to Europe from the west coast were, for the most part unheard of, and any claims of summer-time EU contacts were often dismissed as 'wishful thinking' and not taken too seriously.
A huge shift in long haul Es over the past decade has pretty much re-written the rules of what we have always taken to be 'normal'. Summertime openings to Europe, from the west coast, have now become a regular expectance and, although still rare and usually short-lived, somewhat dependable. Our midnight openings to Japan have largely disappeared ... replaced by hour-long, mid-afternoon or dinner-hour JA runs, and more often than not, right over our west coast heads to any U.S. call district fortunate enough to be in the propagation's hot-spot. All of this is so very different than the 70's and 80's!
So why are things different now? Is it subtle influences from our ever-changing sun?

We are now heading into our sixth straight day of a spotless sun, but in reality, solar activity has been slowly winding down for the last several years. Long term studies tend to show that the solar cycle has little effect on summertime Es, but maybe not.
Is it climatic change ... global-warming? The e-layer is supposedly high above any weather influence yet there is evidence pointing to Es being associated with lightning storms and high altitude plasma-driven sprite activity. Maybe global-warming includes ionospheric changes as well and perhaps weather plays more of a role than previously thought.
 |
| Courtesy: http://www.astrosurf.com/luxorion/qsl-perturbation.htm |
Is it changes in equipment, with an ever-increasing number of 6m stations sporting huge antenna systems and higher ERPs' than ever before?
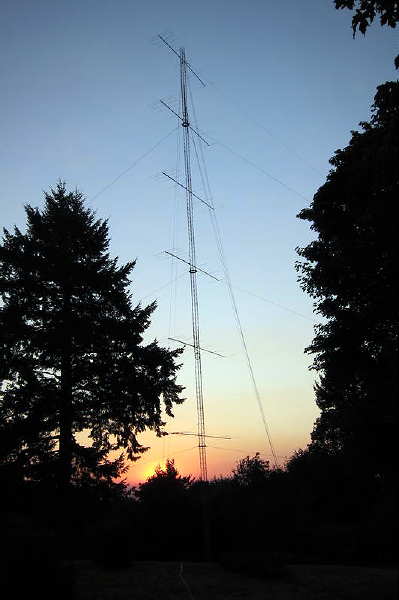 |
| Six 7-el Stacked Yagis At W7EW |
Maybe it's the influence of the Internet on operating practices? There is no doubt that having the ability to watch and follow realtime propagation paths, by the very minute, has made a huge difference in operating strategies ... along with big payoffs when it comes to catching those fleeting openings that would likely otherwise have gone unnoticed. On more than one occasion, I have worked Europeans on a seemingly 'dead band', with no propagation indicators at all ... just an announcement on the Internet that said station was calling 'CQ' at the time. Perhaps nowadays, there are just more savvy operators with good stations and a much better understanding of the DX possibilities ... slowly wringing out the best of what 6m has to offer. Maybe it's a combination of several factors.
Let me qualify my observations by saying that these have been my experiences and perhaps unique to the PNW and southwest VE7 only. Longtime Es data-collector, WA5IYX (Pat) in Texas, graphically shows the yearly Es variance in his region. The pattern appears somewhat sinusoidal in nature over the past few decades, but except for the occasional 'stinker', the variances from one summer to the next are not huge.
 |
| Annual Es At WA5IYX courtesy: http://www.qsl.net/wa5iyx/ |
Are my observations similar to what you may have observed over the past many years? Are the changes real or only imagined? As with most global events being driven by mother nature and continually dynamic, I see no reason why 6m propagation should remain constant from decade to decade ... but I'd sure like to see a little more of it.
Now, usually when I voice complaints about our bad 6m propagation, it seems that things often flip from terrible to amazing soon after. The best Es of the summer often peaks in or close to the first week of July, now fast approaching. Let's hope that this is one 'constant' that hasn't changed as well!
**********************************
Wouldn't you know it. I put above blog together on Tuesday evening, intending to publish it on Wednesday. Early Wednesday morning, before 0900 local time, several Europeans were worked on CW ... perhaps the propagation gods were looking over my shoulder?
As is so often the case with these relatively new types of openings between EU and the west coast, there were no particular propagation clues from this end, other than a brief reception of the KØGUV/b in Minnesota. I was only alerted by the EU propagation reaching as far west as Colorado (KØGU) and a posting on the ON4KST 6m propagation logger that K7RWT in Oregon was hearing the VA5MG/b, sometimes a precursor to PNW propagation over the pole. The propagation map at the time shows no real indicators out this way ... once again, the value of realtime prop-watching via the Internet seems to have played a big role in finding these types of openings.
 |
| courtesy: http://www.on4kst.org/ |
Steve McDonald, VE7SL, is a regular contributor to AmateurRadio.com and writes from British Columbia, Canada. Contact him at [email protected].
Field Day – ’29 Style!
 |
| courtesy: WA3TTS & NO3M |
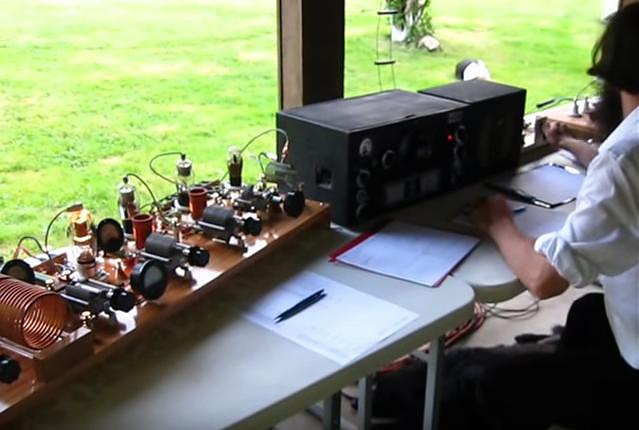
In Eric's own words:
I had a 1920/1930s style Field Day setup this weekend and a bunch of guys over. 80M doublet with homebrew open wire line (approx 550 ohm), the transmitter was a 27-24-24-865 job more or less straight out of July 1931 QST, but with a Hartley instead of crystal oscillator. 27 tuned to 80M, first 24 to 40M, second 24 also 40M, and the 865 on 40M. About 10W. Never did get a chance to try her out on 20M by using the second 24 as a doubler.
I also built the complementary amplifier using a 203A from the August 1931 QST article. I had not even tested the amplifier, only having been finished at 1AM Saturday morning!! It is somewhat different in that the grid circuit is composed of the driving rig's antenna coupling coil/cap, re-wired to be in parallel, not series, of course. It was coined as being a good amp for any existing power oscillator or MOPA, We did a quick job of neutralizing while the gang was here and fired it up..... no modern measurement devices in sight, so we were only going on RF current. 0.9 amps into 50 ohm (pre-tuned the homebrew link coupled, balanced tuner with an analyzer beforehand)... so about 40 watts. I was hoping for 100W.... anyways, after most guys left, a couple of us starting messing around with it more, mainly tightening the output coupling of the MOPA and amp tanks. NICE! 1.45 amps, ie. 105W on 40M.
Anyways, I'll have a full writeup and photos on my website in a few days. We used an HRO5 for a receiver; everyone commented on how good it sounded and well it handled. Of course, this is from a bunch of guys that grew up with this stuff and/or has owned one at one time or another. Everyone had a great time and lots of good discussion and visiting, including 153 QSOs with that pile of junk!
73 Eric NO3M
Most will agree that Eric's station is far from a "pile of junk" as his superb homebrewing skills are clearly evident! Setting up this old style gear can be challenging at any time, but doing it for an outside weekend operation must have been a ton of work. Well done Eric!
For more information about building and operating '29-style transmitters, see the links on my blog sidebar.
Steve McDonald, VE7SL, is a regular contributor to AmateurRadio.com and writes from British Columbia, Canada. Contact him at [email protected].
Weekly Propagation Summary – 2016 Jun 27 16:10 UTC
Here is this week’s space weather and geophysical report, issued 2016 Jun 27 0346 UTC.
Highlights of Solar and Geomagnetic Activity 20 – 26 June 2016
Solar activity was very low during the entire summary period with only B-class flare activity observed. No Earth-directed CMEs occurred.
No proton events were observed at geosynchronous orbit.
The greater than 2 MeV electron flux at geosynchronous orbit reached high levels on 21-22 Jun and 25-26 Jun following coronal hole high speed stream events. Normal to moderate levels were observed on the remaining days.
Geomagnetic field activity was quiet on 20-21 Jun. Mostly quiet conditions were observed early on 22 Jun but activity increased after 22/1800 UTC due to enhanced solar wind parameters and unsettled to minor storm levels were observed. Quiet to unsettled conditions with isolated active periods were observed on 23-24 Jun due to negative polarity CH HSS effects. Quiet to unsettled conditions were observed on 25-26 Jun with an isolated period of active conditions observed from 26/2100-2400 UTC due to CH HSS effects.
Forecast of Solar and Geomagnetic Activity 27 June – 23 July 2016
Solar activity is expected to be very low throughout the forecast period with a slight chance for C-class activity.
No proton events are expected at geosynchronous orbit.
The greater than 2 MeV electron flux at geosynchronous orbit is expected to be at high levels from 27 Jun to 01 Jul following CH HSS effects. Normal to moderate levels are expected on 02-03 Jul as a CIR redistributes electrons. High levels are expected to return from 04-07 Jul following a recurrent CH HSS. Moderate levels are expected from 08-21 Jul followed by moderate to high levels on 22-23 Jul following another recurrent CH HSS.
Geomagnetic field activity is expected to begin at unsettled to active levels but decrease to mostly quiet levels by midday on 27 Jun and remain quiet through 29 Jun. Quiet to unsettled conditions are expected from 30 Jun to 05 Jul with isolated active conditions possible on 03 Jul due to a recurrent negative polarity CH HSS. Quiet conditions are expected on 06 Jul. Quiet to unsettled conditions are expected from 07-12 Jul with minor storms possible on 11 Jul and active periods likely on 12 Jul due to effects from a recurrent positive polarity CH HSS. Mostly quiet conditions are expected to return from 13-18 Jul with unsettled periods possible on 14-15 Jul. Quiet to unsettled conditions are expected on 19-21 Jul due to negative polarity CH HSS effects with an isolated active period likely on 19 Jul. Quiet conditions are expected for the remainder of the period.
Don’t forget to visit our live space weather and radio propagation web site, at: http://SunSpotWatch.com/
Live Aurora mapping is at http://aurora.sunspotwatch.com/
If you are on Twitter, please follow these two users: + https://Twitter.com/NW7US + https://Twitter.com/hfradiospacewx
Get the space weather and radio propagation self-study course, today. Visit http://nw7us.us/swc for the latest sale and for more information!
Check out the stunning view of our Sun in action, as seen during the last five years with the Solar Dynamics Observatory (SDO): https://www.youtube.com/watch?v=zXN-MdoGM9g
We’re on Facebook: http://NW7US.us/swhfr
Visit, subscribe: NW7US Radio Communications and Propagation YouTube Channel
ICQ Podcast Episode 214 – Calibration
In this episode, Martin M1MRB / W9ICQ is joined by Leslie Butterfield G0CIB and Matthew Nassau M0NJX to discuss the latest Amateur / Ham Radio news. Colin M6BOY rounds up the news in brief, and this episodes feature is Calibration.
EURO 2016 Amateur / Ham Radio Award
Ofcom Remove Amateur / Ham Radio Statistics
White House honors Limor Fried AC2SN
Russia Trial Electromagnetic Warfare System
FCC Technological Advisory Council Noise Floor Inquiry
New National Belize Amateur / Ham Radio Society
RadioShack Photography Competition
ZS1TWO Cape Town 2m Beacon
Colin Butler, M6BOY, is the host of the ICQ Podcast, a weekly radio show about Amateur Radio. Contact him at [email protected].
 Ham Radio Deluxe |
 W5SWL Electronics |
 Ham Radio Prep |
 KB3IFH QSL Cards  Hip Ham Shirts  HamRadioAuctions HamRadioAuctions Reliance Antennas Reliance Antennas Enigma Shop Enigma Shop |  morseDX  Ni4L Antennas  R&L Electronics R&L Electronics antennas.us antennas.us QRV QRV |
- Matt W1MST, Managing Editor
