 |
 Look, No IP
A couple of years ago we changed our broadband Internet service provider. The new provider did not support a static IP address. I have a QNAP network attached storage device which is primarily used for backup. However, it’s actually a Linux box that runs the LAMP (Linux, Apache, MySQL and PHP) software which I occasionally use as a web server for experimentation. I sometimes need it to be accessible from the internet. So I opened a free account with DynDNS in order to access the server using a host name.

Some time last year after I came out of hospital I started to receive emails from DynDNS informing me that my account was being disabled due to abuse and inviting me to open a paid account. As far as I could tell, the only “abuse” was that my script to inform DynDNS of my current IP address was running more than the number of times DynDNS permitted. I had no idea why it should start misbehaving like that and cynically thought it was just a ploy to convert free users to paid subscriptions. I was in no frame of mind to deal with the problem, nor to dig into my wallet, so I simply closed the account and had done with it. This would have had the effect of breaking some APRS-related functions on my site but I had other things of greater concern to think about.
A few days ago I decided to look into why the CDGVHF ANSRVR group was not sending any messages. ANSRVR is an APRS tool used to send APRS messages to groups of interested people. CDGVHF stands for Cumbria Dumfries and Galloway VHF group and it is intended to disseminate alerts about VHF and UHF openings in the Cumbria, Dumfries and Galloway area (grid square IO84.) It’s essentially a filter that acts on emails sent out by DX Sherlock and converts them to APRS messages addressed to ANSRVR. I could, of course, just have the emails sent to my smartphone. But it’s more fun to make use of ham radio!
I looked for an alternative free service to DynDNS and decided to try No-IP Free. As far as I can tell, No-IP won’t accuse you of abuse for updating your IP address too frequently, in fact its client software appears to do this every few minutes which seems like plenty. It does have a requirement that you confirm your account is being used once a month, which could be a bit annoying, but I’ll see what happens at the next update.
In the meantime, CDGVHF is now sending out propagation alerts again. To receive alerts of VHF and UHF openings in the IO84 area just send an APRS message to ANSRVR with the text CQ CDGVHF. You’ll need to repeat this from time to time as the server unsubscribes you from the group after 8 hours of no activity, unless you are using KJ4ERJ’s APRSISCE software which can maintain your subscription for you.
Julian Moss, G4ILO, is a regular contributor to AmateurRadio.com and writes from Cumbria, England. Contact him at [email protected].
Jeep Wrangler Radio Install
We recently sold the old white Jeep and bought a 2012 Wrangler (JK). After quite a bit of researching and experimenting with antenna mounting options, I finally got the ham gear installed in it. My objective is to get 2 Meter and 70 cm FM capability into the vehicle, using the Yaesu FT-7800 that I pulled out of the old Jeep. The big question was what to do about the antenna. The fiberglass hardtop does not make for a good antenna ground plane. Even if it did, during the summer months, we’ll sometimes take the top off to enjoy the open air ride.

The 2012 Jeep Wrangler Sport — Can you spot the antenna?
Initially, I planned to use the Arizona Rocky Road NMO antenna mount with a Diamond dualband antenna that is a 1/2 wave on 2 Meters. The 1/2 wave does not need a ground plane, so the performance is usually better with irregular mounting structures. However, I found that this antenna combination did not clear my garage door. I don’t like to have to remove or tilt a vehicle antenna to get in/out of the garage — my experience is that it usually just gets left in the “down” position. I tried a shorter 19-inch dualband whip antenna but its performance was dismal due to these factors: lack of a ground plane, being blocked by the vehicle body and poor grounding on the spare tire carrier. By the way, the grounding issue on the tire carrier (and many other technical topics) are discussed in these online forums: WranglerForum, JK-Forum. I think the Arizona Rocky Road mount would have been my preferred way to go (with the longer Diamond antenna), except for the garage issue. One problem I ran into with that mount is that the standard NMO mounts I have (the basic mounts with the cable attached) did not handle the thick steel of the mount. I had to purchase special NMO mounts made to handle thicker metal (see TheAntennaFarm.com).

The antenna mounting bracket near the hood, driver’s side.
I abandoned the Arizona Rocky Road approach and decided to use a simple NMO mounting bracket (Laird SBTB3400) on the driver’s side hood. Like all Wrangler antenna installations, this is a compromise. It is lower on the vehicle than I would like but it does not block the driver’s view. Other people have used a variety of “trunk lip” mounts to accomplish the same thing but be sure to check out the driver’s view before installing. Installing the mount was easy, just three holes drilled and three sheet metal screws.
The next question was where to install the radio. I took advantage of the FT-7800′s detachable control head, mounting it on the dash, while placing the radio under the driver’s seat. I attached the radio’s mounting bracket to the floor of the Jeep with two heavy sheet metal screws. This keeps the radio up off the floor in case water gets into the Jeep. However, it only provides about 1 inch of water clearance, so you hard core Jeepers that are used to flooding the interior of the vehicle during stream crossings may find this inadequate.

The radio body was installed under the driver’s seat
I have to admit that I ran into a significant problem at this point. There was not enough clearance around the radio mounting bracket to get all four of the screws installed that attach the radio to the bracket. In the end, I unbolted the drivers seat and tilted it back, which gave me room to insert and tighten the screws. More careful positioning of the radio mount might have saved me from this hassle.
It is always a bit of an adventure to find a way to route the power cable from the engine compartment to the vehicle interior. Fortunately, Jeep has made this very easy, but it is not obvious just by looking around. Fortunately, the folks on the various online forums have scoped this out and provided good advice.
I popped off the small side panel of the dash on the driver’s side, to expose a hole filled with foam (see photos).

The plastic panel on the driver’s side of the dash pops open to reveal a routing hole filled with foam
A stiff wire or coat hanger can be poked into this hole and the foam easily gives way.

A coat hanger is shown poking through the routing hole
And the coat hanger comes out the other side, right next to the antenna mount.

Coat hanger pokes through near the antenna mount
I routed the power cable and the antenna cable through this hole. I connected the power cable directly to the battery, which is the recommended approach to avoid alternator whine and other problems. I understand there is a similar routing hole on the passenger side but I did not verify that.
The last thing to figure out was where to mount the control head. Although it is a tight fit, I mounted it in front of the gear shift. (I have the 6-speed manual transmission…the automatic transmission gives you more room here.) The control head is very light, so I used stick-on Velcro (about an inch wide and four inches long) to attach it to the dash. This seems to work OK but I will admit that the attachment is just a bit wobbly…fine for turning volume and VFO knobs but the not so good for pushing buttons. Also, I’ll have to see if it shakes lose on bumpy 4WD trails. If so, I’ll fabricate a small bracket to provide better attachment.

FT-7800 Control Head and Mike Mounted to the Dash
In the process of exploring, I did take the dash apart to figure out what my options were. In retrospect, it was probably unnecessary due to where I eventually mounted the radio and control head. I found this youtube video to be very helpful in dismantling the dash.
Initial checkout shows that the radio installation is working fine. I was pleasantly surprised that the antenna SWR was quite good (<1.5) over the bands of interest. I will use the short 19-inch whip most of the time but I can swap out other NMO mount antennas (including the Diamond dualband antenna I mentioned earlier.)
I appreciate all of the info out on the interwebz concerning JK radio installs and I am passing along what I learned to assist other folks with their Jeep installations.
- 73, Bob K0NR
Update 20 June 2012:
It turns out that the Velcro (hook-and-loop fastener) approach did not work. The Velcro attachment itself was pretty reliable but the stick-on adhesive failed after a few weeks. I used a couple of L-shaped brackets to attach the control head to the dash and it seems to be working fine. I have used Velcro successfully in past installations but in situations where the control head was positioned on top of the center console so the main purpose of the Velcro was to prevent horizontal movement. In other words, the Velcro did not have to support the entire weight of the control head, just keep it from moving around.
Bob Witte, KØNR, is a regular contributor to AmateurRadio.com and writes from Colorado, USA. Contact him at [email protected].
ICQ Podcast S05 E10 – Planning Antennas (06 May 2012)
Series Five Episode Ten of the ICQ Podcast has been released. News Stories include :-
- Turing’s code breaking papers released
- Special Event station VX3W
- Amateur Frequencies by Olympic and Paralympic Games
- Ham Radio operators respond when severe weather strikes
- SCOTIA Challenge
- 16 Japanese educational satellites to be launched
- Eurovision Song Contest special callsigns
- Lewes Amateur Radio Society Grows
- Amateur radio club members rewarded for activities
- Bath-based Distance Learning
- Experimenter's Special SDR Receiver
- Dutch Mills on the Air
- Ham Radio in Nursing Home
Martin M1MRB discusses Antenna Planning.
Colin Butler, M6BOY, is the host of the ICQ Podcast, a weekly radio show about Amateur Radio. Contact him at [email protected].
Please Consider Donating to Get YMC ARES® Started
 Would you please help launch the Yellow Medicine County, MN Amateur Radio Emergency Services® Group? Even just a few bucks from each of my readers over at amateurradio.com (where this blog is syndicated) would be a tremendous help. I just accepted the position of Emergency Coordinator here, and I’m really starting from scratch. There are only a few active hams in our county right now (I’ll be trying to recruit more, believe me), and we’re strapped for cash. Even with sacrificial spending on our part we’re going to have trouble scraping together the approximately $500 needed to get incorporated and apply for 501(c)3 status. This status will:
- make future donations tax-deductible (helpful when trying to raise money)
- allow ARES® volunteers to deduct mileage and other expenses (helpful when trying to recruit and retain new members)
- make us eligible for grants that are otherwise unattainable
If you would like to donate, just click the button below. I’m using my wife’s PayPal account for now (once we’re incorporated, YMC ARES® will have its own account), but your donation will be tracked and every penny will go toward the YMC ARES® Group. If we reach $500, I’ll post an update right away and take down the appeal for donations in the sidebar of my blog.

Thank you so much for considering this!


![]()
Todd Mitchell, NØIP, is a regular contributor to AmateurRadio.com and writes from Minnesota, USA. He can be contacted at [email protected].
A great day = portable op’s
 |
| Portable op's QTH |
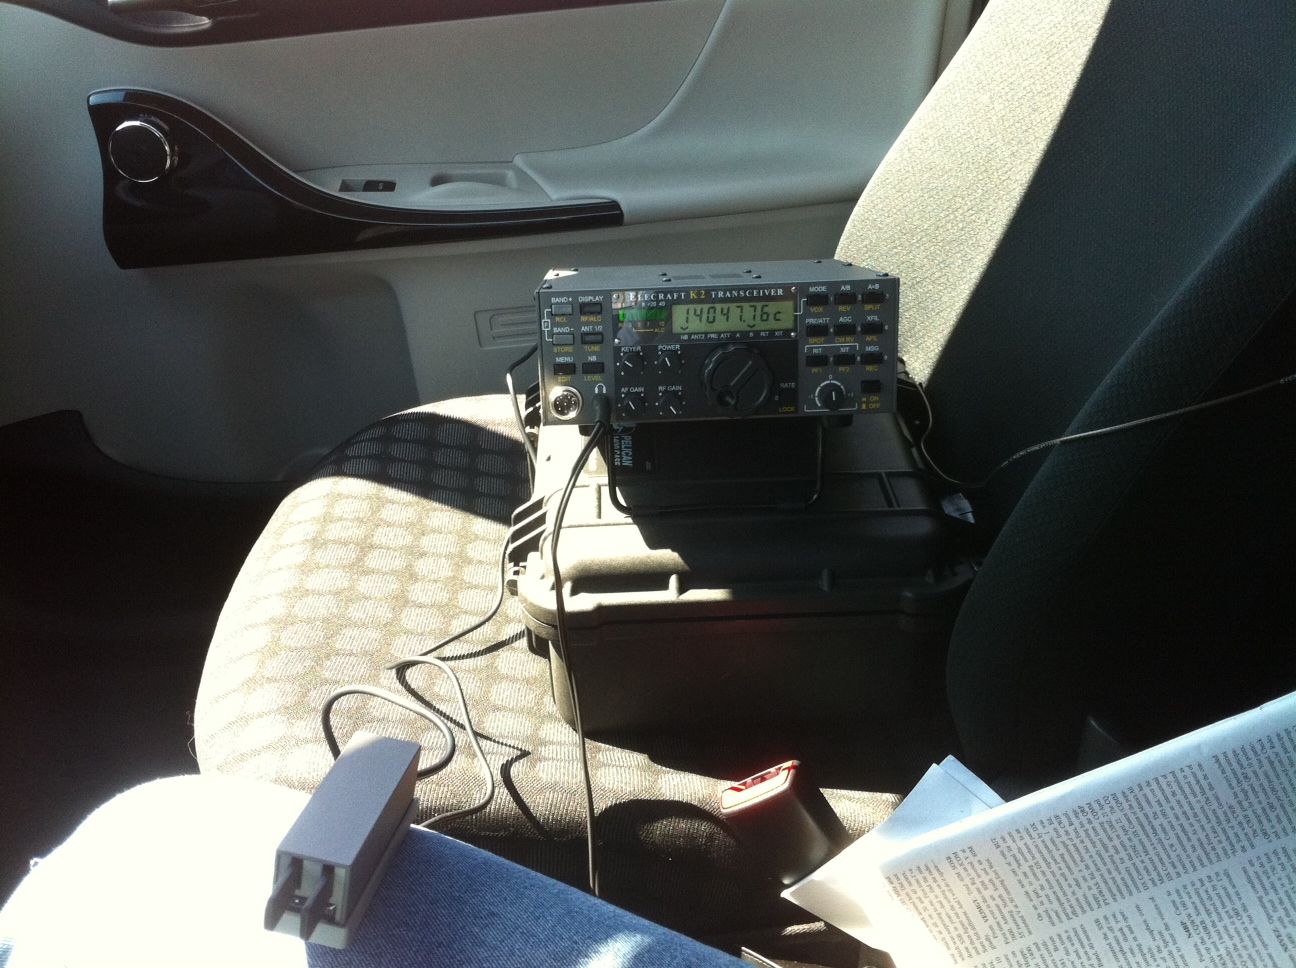 |
| VE3WDM portable in action |
stuff I really don't use anymore thus it will be sold for "ham bucks". Cleaning up the shack gave me the warm fuzzes once is was all done and long over due for sure. I just hate looking for
 |
| all packed away in trunk |
- NN7ZZ Mendon UT 14.047
- K7EAR Solomon AZ 14.040
- IQ0PG Italy ARI contest 14.031 880 miles per watt.
- IZ1A Italy ARI contest 14.022 QRZ.COM can't find maybe incorrect copying
- DL5AXX Germany ARI contest 14.010 810 miles per watt.
- IK2HDF Italy ARI contest 14.011 834 miles per watt. I was very happy with the how the antenna and rig worked and was surprised at the distance I was able to get. I know for sure next time I am going to lower the output and start making some 1,000 miles per watt potable contacts. Some things that have to be worked on before next time......remember all the items to bring, some bottled water, longer cable for Palm paddle key and some adjustments to the Palm paddle key are needed. Well it's time to spark up the BBQ and get some dinner...cheers!!!
Mike Weir, VE9KK, is a regular contributor to AmateurRadio.com and writes from New Brunswick, Canada. Contact him at [email protected].
Olivia — the Magic Mode
I have to give credit to Gary L. Robinson, WB8ROL, for the title of this post. I met him on the air tonight using Olivia 500/16, and pretty soon I was reading his article about this mode . . . but I’m getting ahead of myself.

Olivia 500/16. Image obtained from http://www.oliviamode.com.
My introduction to Olivia took place yesterday afternoon at a meeting in a little coffee-shop in Marshall between the MN ARES® ASEC, Section 5 DEC, Lyon Co. EC, and myself (at which I accepted the position of Yellow Medicine Co. EC, but that’s another story). They explained that FLDIGI is the software they are training people on, that every Thursday evening at 8:00 P.M. there is a MN ARES® digital net on 80 meters, and that they are using Olivia 500/16 for this net.
Well, my power of recall being what it is, I’d forgotten all about it till I heard the clock chime 8:00 while I was doing the dishes (after dining on my wife’s fabulous slow-cooked chicken). “Honey,” I asked, “would you mind if I left the rest of the dishes to you? I’d like to go check out a net on the radio.” I sure am blessed with a sweet wife — she took over without batting an eye while I dashed downstairs and started hooking up my laptop to the interface while firing up FLDIGI.
Sure enough, there was the net. I “listened” (How do you say it? Read?) for nearly an hour, and finally checked in right as the net was closing.
Well, tonight before going to bed I decided to try it again. This time I went up to 20 meters where I had a nice ragchew with Gary, WB8ROL (my first “real” QSO). We hit it off right away — his career path took him from law enforcement to programming just like mine did, we both have bad backs, and we both like cats and penny-whistles — but what really got my attention was his website: www.oliviamode.com. This fellow is a veritable evangelist for this mode! If you haven’t read his QST article about Olivia, click here and enjoy “Ghost QSOs — Olivia Returns from the Noise.”
I can attest to what Gary writes about in that article. As the band began to fade, his signal dropped until I couldn’t hear it at all. All I could hear was static; I assumed I’d lost him. Not only couldn’t I hear him, I couldn’t see anything on the waterfall display. But incredibly, letter after letter appeared on the screen as Gary typed his last message!
Olivia really is “the Magic Mode!”


![]()
Todd Mitchell, NØIP, is a regular contributor to AmateurRadio.com and writes from Minnesota, USA. He can be contacted at [email protected].
 Ham Radio Deluxe |
 W5SWL Electronics |
 Ham Radio Prep |
 KB3IFH QSL Cards  Hip Ham Shirts  HamRadioAuctions HamRadioAuctions Reliance Antennas Reliance Antennas Enigma Shop Enigma Shop |  morseDX  Ni4L Antennas  R&L Electronics R&L Electronics antennas.us antennas.us QRV QRV |
- Matt W1MST, Managing Editor
