 |
 Texture–Another phase complete
I bet you’re thinking, “Jerry received his KX3 and the basement project has been placed on the back, back burner”. Yes, it’s been a while since I provided a progress update on the basement project. Yes, I did receive my KX3 as I’ve blogged about several times. But NO, the basement project was not placed on the back, back burner…it has been progressing along nicely. Today I have a major update to provide.
We’ve turned some major corners in the past few months with this project. While I know many of you could certainly have done everything I’ve completed over the past 3-4 months in perhaps just a few weekends, I’ve wanted to make sure I had time for other things. Plus I’ve never considered this to be a race. Very early on I established a goal for completion of Labor Day weekend to be fully moved into the new space. I’m very happy to report that we are still on-time and on budget.
On April 16th, I reported “The Shack has a Ceiling”. My wife and I started the process of mudding the joints and all the screw holes (along with a few “oops” areas). We taped and applied the first coat of joint compound (drywall mud), then sanded. We repeated that process, then sanded. Finally, last weekend I applied the third and final finish and wider coat of joint compound and we lightly sanded. We were ready for the next phase…texture!
Of all the tasks I’ve performed for this project (framing, electrical, plumbing, A/C Vent, drywall) applying texture is the only thing I’ve never done before. So I spent some spare time over the past week or two watching YouTube videos and reading as much as I could on the art of applying texture. Because I will have some other future drywall projects to complete, we opted to purchase a texture sprayer/hopper gun versus rent.
Home Depot sells the Wal-Board Texture Pro 200 hopper sprayer for $70 bucks. While this machine might not be everything a pro would need, I figured it would work fine for my use. Since I had used the pre-mixed joint compound for the taping and mudding phase, I decided to stick with that versus other formulas.
Since I had never applied texture I really had no clue just how much material (joint compound) we would use. I started out with two 5 pound buckets. In an empty 5 gallon bucket I thinned the pre-mixed joint compound into a consistency of thick paint. We were looking for a medium orange peel texture. After mixing for a few minutes with my drill and mixing attachment, I filled the hopper and applied texture to the side of a cardboard box. A little tweaking of air pressure and mixture consistency and I was ready to go.
After texturing two of the 16’ walls, I realized I probably needed another 5 gallon bucket of pre-mix. I kept mixing and spraying, mixing and spraying. My wife was starting to feel sorry for me and I think she also secretively wanted to try her hand at the texture gun. She began spraying while I continued to mix.
This teamwork actually worked out really well. I didn’t fill the hopper as full as I would have normally done for myself and when I wasn’t mixing compound, it allowed me to move and position the drop cloth and plastic around the room as she continued to spray. We managed to get all the walls textured in just about 3 hours.
To celebrate, we went to Home Depot yesterday and took advantage of their Behr paint Memorial Day Savings event. We saved $5 per gallon and $25 per 5-gallon. A nice savings and just when we needed it.
We will probably take this coming weekend off and resume work on the weekend of June 9-10. The next phase is the painting phase and I suppose if we get started on 9 June, we could easily be finished in a few weekends and have the painting phase finished by July. This leads us to the flooring phase.
At the time of this blog posting, we are not 100% clear on just what we will do with the floor. Tile of some type has always been the top choice. Carpet in a basement just doesn’t work and I want the ability to zoom across the room in my chair if need be. Decisions…Decisions…but they will be made and will be made in the very near future.
")
My apologies as the picture above just simply does not do the texture job any justice at all. I took this in a hurry this morning and didn’t take time to turn on all the portable lights. The ceiling recessed lighting is still covered. The two bumps are tape covering electrical outlet boxes. These will be just above the desk surface in the ham shack.
While I hate the see the long holiday weekend come to an end, there is a part of me that is looking forward to going back to work so that I can get some rest and recharge my batteries for the next phase…PAINT!!!
Until next time…
73 de KDØBIK
Jerry Taylor, KD0BIK, is a regular contributor to AmateurRadio.com and writes from Colorado, USA. He is the host of the Practical Amateur Radio Podcast. Contact him at [email protected].
First impressions
Good conditions and a new toy to play with has resulted in a lack of time to write about them. Since my last post I have spent a lot of time getting to know the Elecraft KX3. For those of you on the waiting list all I can say is: it’s worth the wait. If you aren’t, then what are you waiting for?
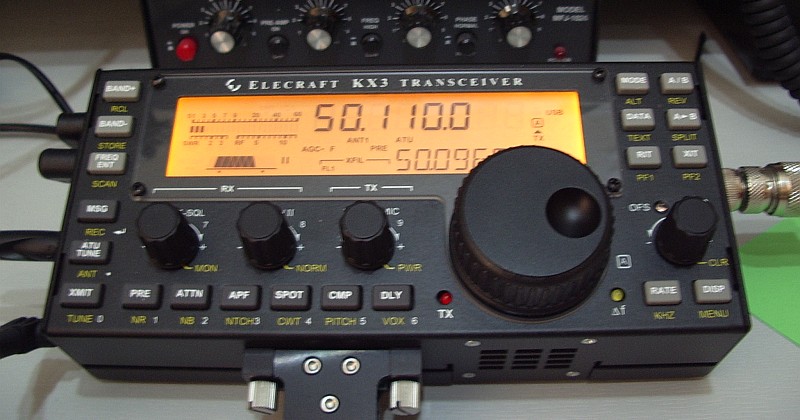
The KX3 really is the ultimate portable rig. It knocks the FT-817 into a cocked hat. It looks and feels like a baby K3. The only reservation I would have about its adoption by diehard SOTA enthusiasts who go out in all weathers is that it is rather an expensive radio to subject to the worst of the British climate. But as a fair weather walker I would have no such reservations. In fact I have already got a plastic toolbox with a foam insert into which I will soon be making a KX3-sized hole!
If you are a K3 owner then the KX3’s similarity to its parent means you will know what to expect. But there are also things where familiarity to the K3 is not an advantage, where functions are not in the same place. The KX3’s front panel is a little bit shorter and quite a lot less wide, but the same number of functions have been crammed into it. All the buttons have dual functions depending on whether they are pressed or long-pressed. The radio is powered on and off by pressing two buttons at once. Some of the knobs have three functions depending on whether you press them first or long-press the button below.
If it sounds complicated then it really isn’t and you’ll quickly get the hang of it. The only thing I can’t understand is the decision to make AGC Slow/Fast/Off an option on the configuration menu. The AGC button on my K3 gets a fair bit of use, mainly to turn AGC off when operating PSK with a wide bandwidth. But I don’t plan on using the KX3 for data modes much so this isn’t an issue I’m particularly bothered with.
The KX3 designers have made a few unusual choices of interface sockets, notably a 4-pole 3.5mm jack for the microphone. These jacks are a bit hard to obtain but don’t worry: you probably won’t need to. Four poles are only needed to support the up/down buttons of the Elecraft MH3 mic. You can actually plug a computer headset with its two 3-pole 3.5mm jacks into the phones and mic sockets (RF immunity not guaranteed.) You won’t have a PTT but you can use VOX instead or the XMIT button on the front panel. Ideal for windy hilltops (is there any other sort?
Some SOTA operators may be put off by the lack of 2m coverage. Elecraft has promised 2m will be available as an option, as it is for the K3. Hopefully it will perform better than the ubiquitous hand-helds and even the FT-817 when subjected to the large out of band signals experienced on British hilltops.
What many people will want to know is: what is the receiver performance like? “Better than an FT-817” But that would surprise no-one and in any case is only an educated guess. I don’t have the antennas or QTH to subject the KX3 to challenging input levels. All I can say is that the KX3 receiver is quiet and delivers clear and open-sounding audio. Just like a K3, in fact.
Julian Moss, G4ILO, is a regular contributor to AmateurRadio.com and writes from Cumbria, England. Contact him at [email protected].
eBay – gotta love it
if you’re a seller!
Just for the heck of it, I’ve been keeping a watch on the auction for an ATS-3B that ended tonight. I was watching a bidding war right before my very eyes.
The final winning bid was $317.00 – not bad for a kit that originally sold for $160.00. Admittedly, it is assembled and comes with a carrying case. But that is almost double the original price.
I mentioned before that I think that eBay is a very good thing for sellers. You have to wonder how many items end up garnering a bigger selling price than they ever would in a classified ad situation. The “macho” of not allowing yourself to be outbid? A feeding frenzy – like sharks drawn to prey? Or is it just consumer ignorance?
An ATS-3B for over $300, that NorCal Doublet the other week for $60. Admittedly, I’m not in the market for either item, so maybe if I was, those prices would not seem so inflated.
It will be interesting to see what that Palm Mini Paddle and Code Cube end up going for. Right now, they’re at $90.00 with about 40 minutes to go.
72 de Larry W2LJ
QRP – When you care to send the very least!
Larry Makoski, W2LJ, is a regular contributor to AmateurRadio.com and writes from New Jersey, USA. Contact him at [email protected].
45,868 miles with an attic antenna……SHUT UP!!!
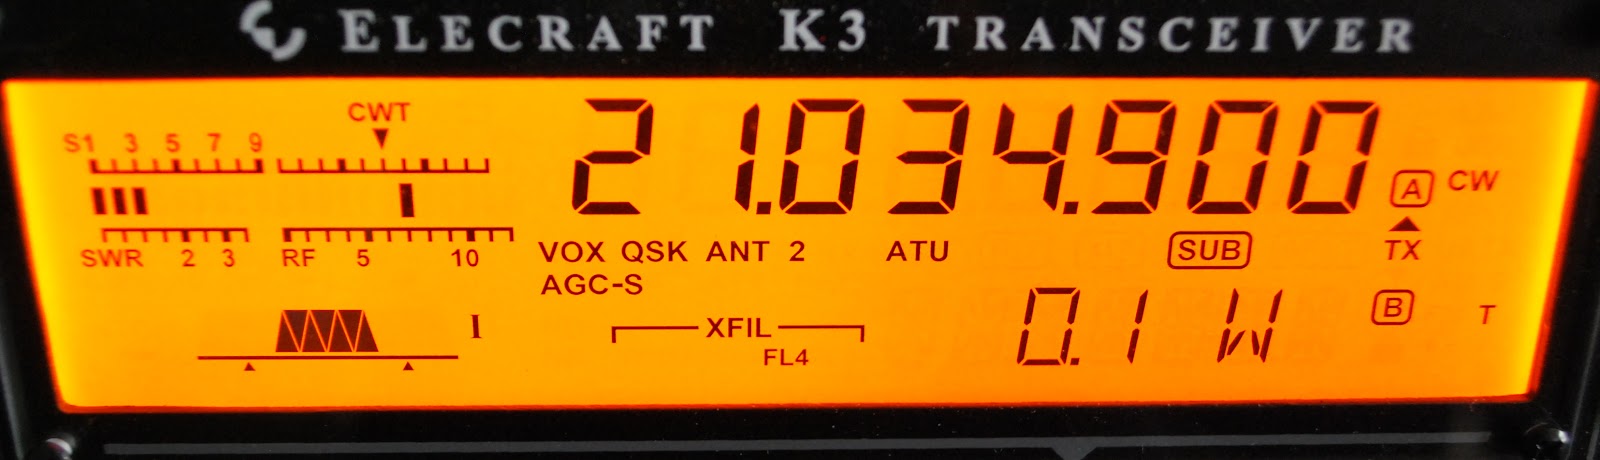 |
| The K3 is ready to go at 100mW's |
To make things interesting as I was not "contesting" in the true sense I started to drop my power as I gave out contest points. I started at 1.5 watts to CR1X in Finland that worked out to 2755 miles per watt. Update....Thanks to PE4BAS my distance to CR1X who is in the Azores not Finland is 2417 miles per watt, thanks Bas for the info! He had no problem copying me so down went the power. I leveled out at 100mW's just for the reason this is as low as the K3 will venture.
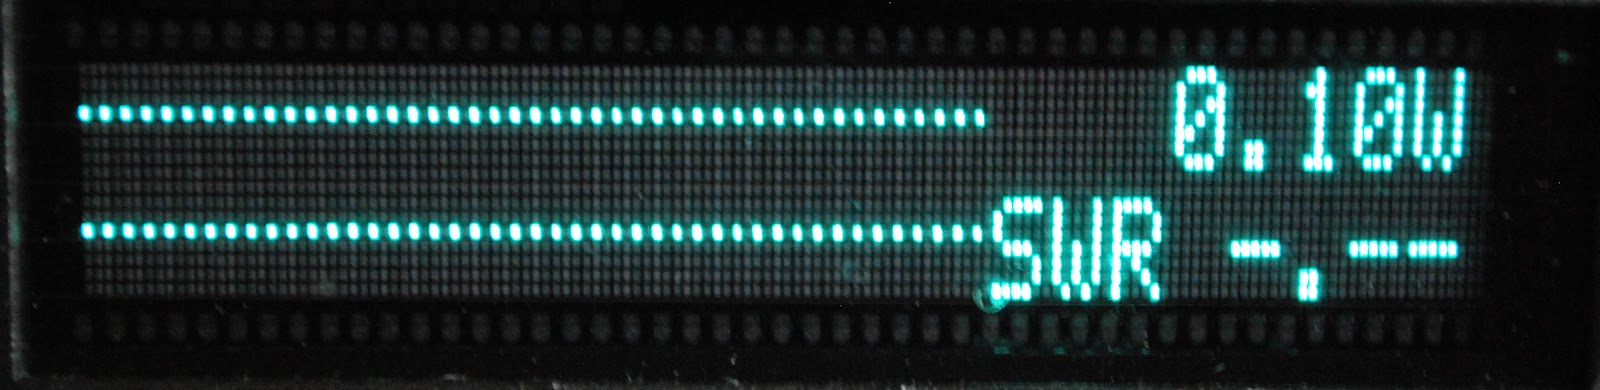 |
| Proof 100mW's is on it's way...no SWR showing |
1. HA8JV 45,868 miles per watt
2. IR9Y 44,558 " "
3. 9A1A 44,187 " "
4. OL7C 42,496 " "
Until this contest my personal best Miles per watt 16,737 miles per watt when making contact with ZS4TS at 500mW's. Even at 100mW's being copied was easy and I was very surprised. I did not want to drop my power to the point were the contest station was spending his valuable time trying to make contact with me, but that never happened. I am now in the market for an attenuator do get my power output to below 100mW's and see what happens. I was looking at the Hendricks 41db attenuator. It's a kits and looks like a very nice unit.
Mike Weir, VE9KK, is a regular contributor to AmateurRadio.com and writes from New Brunswick, Canada. Contact him at [email protected].
Hi-Per Mite demonstration video
I finally managed to record some video, with my Canon SX-230, of the Hi-Per Mite Active Audio CW Filter. I had to delay filming by a week due to sinusitis, but this turned out for the best since the WPX yielded enough signals to show what this filter can do. I am more than happy with it and it is going to be a permanent part of my set up. Thanks to Larry (W2LJ) for mentioning this great filter here on this site. The only thing left is to find a case to build it in. This coming Saturday we are going up north to Taipei, so ample opportunity to get one. Enjoy the video.
Hans "Fong" van den Boogert, BX2ABT, is a regular contributor to AmateurRadio.com and writes from Taiwan. Contact him at [email protected].
SatNOGS Ground station
![]()
I’ve had a mechanically completed SatNOGS ground station sitting in my garage in need of some care and attention for a while. Its just one of the projects that that I have filed under ‘ working but not very robust’. Essentially after I killed off the first driver board we have not managed to get it to drive properly (that is without smoke pouring out of motor driver’s).
Fortunately the SatNOGS gang have made it much easier to load up the client software on a RPi and run a rotator free ground station on the development site. So over the weekend I have produced a standalone set up in between going to the 2nd harmonics rugby festival under the moniker Ground Station 170
The set up is very simple get yourself a RPi 3, an rtl-sdr dongle and a simple antenna (I used this one which took all of 10 minutes to make) and have scheduled a few passes to see if it works. There is some info here if you’d like to have a go
If you have a few moments you can look at the other SatNOGS stuff such as the recently presented video.
Alex Hill, G7KSE, is a regular contributor to AmateurRadio.com and writes from Cumbria, UK. Contact him at [email protected].
WX9XRU 70MHz beacon now active
Dave, WW2R/5 reports that the WX9XRU 70MHz beacon in Virginia was activated on Saturday afternoon, 26th May. The beacon is beamed across the Atlantic, so hopefully there will be many reports from Europe this summer.
Dave heard the beacon, by Es off the back of its’ beam on Sunday on his 70MHz dipole over a distance of 1626km.
Tim Kirby, G4VXE, is a regular contributor to AmateurRadio.com and writes from Oxfordshire, England. Contact him at [email protected].
 Ham Radio Deluxe |
 W5SWL Electronics |
 Ham Radio Prep |
 KB3IFH QSL Cards  Hip Ham Shirts  HamRadioAuctions HamRadioAuctions Reliance Antennas Reliance Antennas Enigma Shop Enigma Shop |  morseDX  Ni4L Antennas  R&L Electronics R&L Electronics antennas.us antennas.us QRV QRV |
- Matt W1MST, Managing Editor
