 |
 There is a saying here in America
and probably other countries, too. It’s for when things don’t work out quite up to your expectations. The phrase that is used is “Guess I’m a day late and a dollar short”.
I have to make an alternative. “Guess I’m a day early and a dollar up!” Because, when I came home from work today; and looked down while I was unlocking the door – this is what I saw:
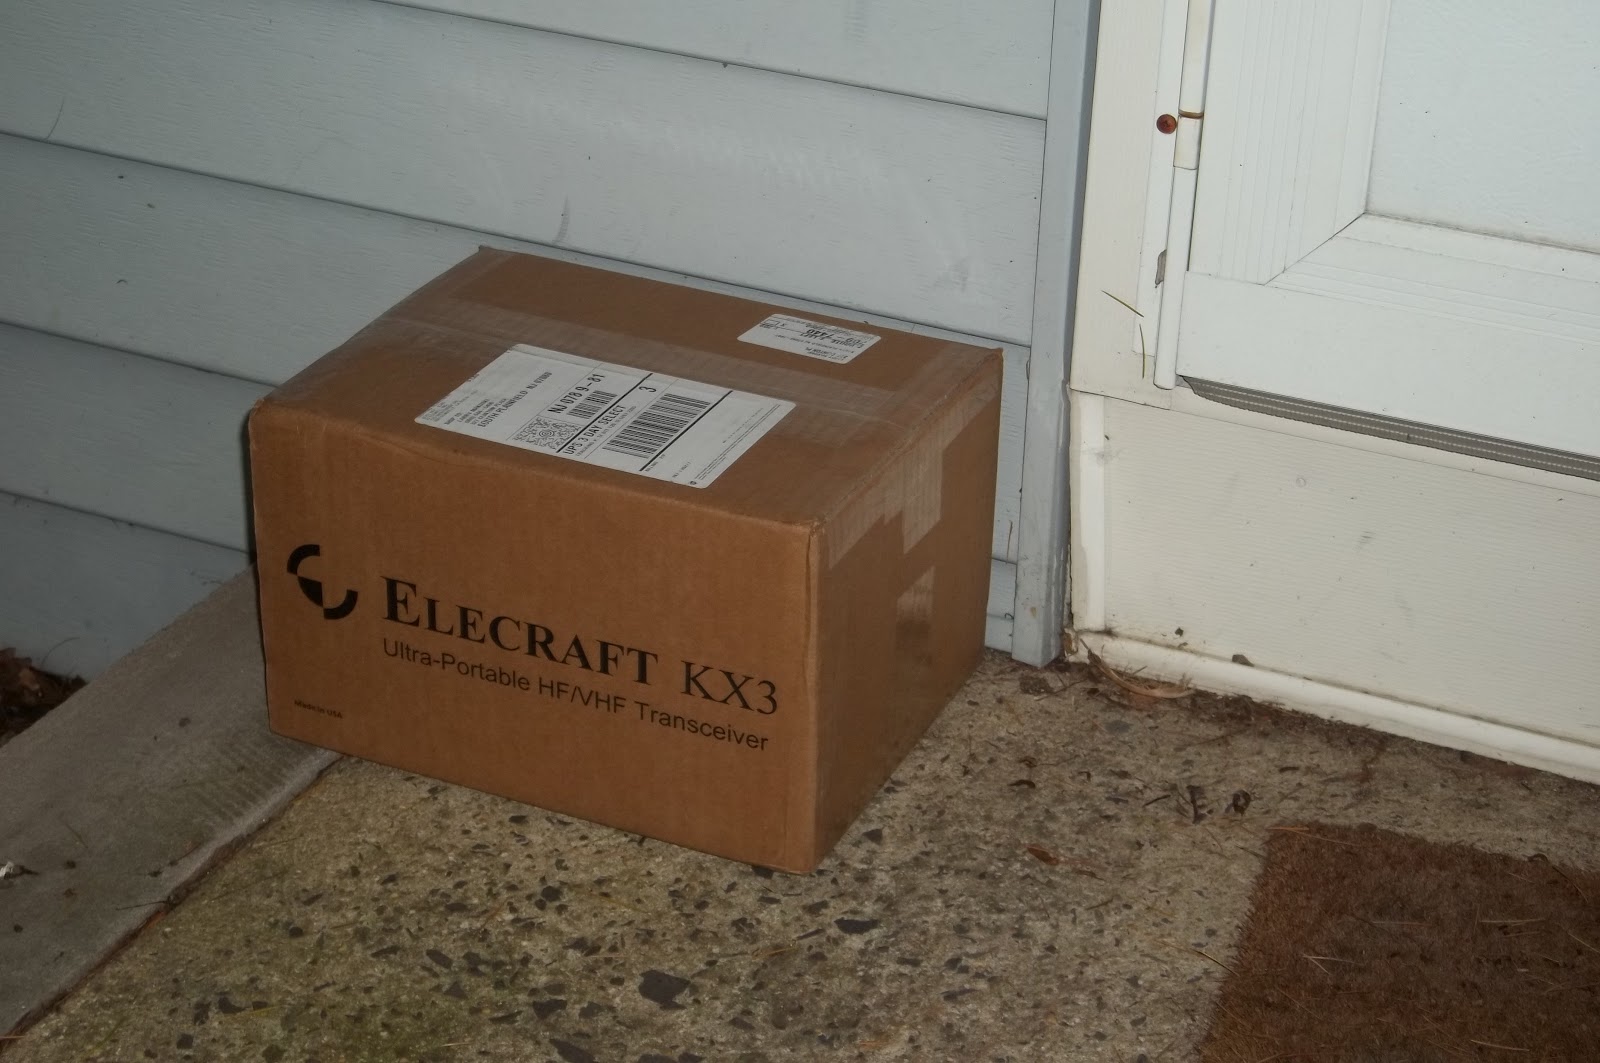
‘Twas sitting right there, on the front stoop – waiting me to pick it up and bring it inside. And it arrived a day early! According to the e-mail that I had received from the folks in Aptos, I was not expecting this until tomorrow.
Upon opening the box, I saw now nice and neatly everything was packaged:
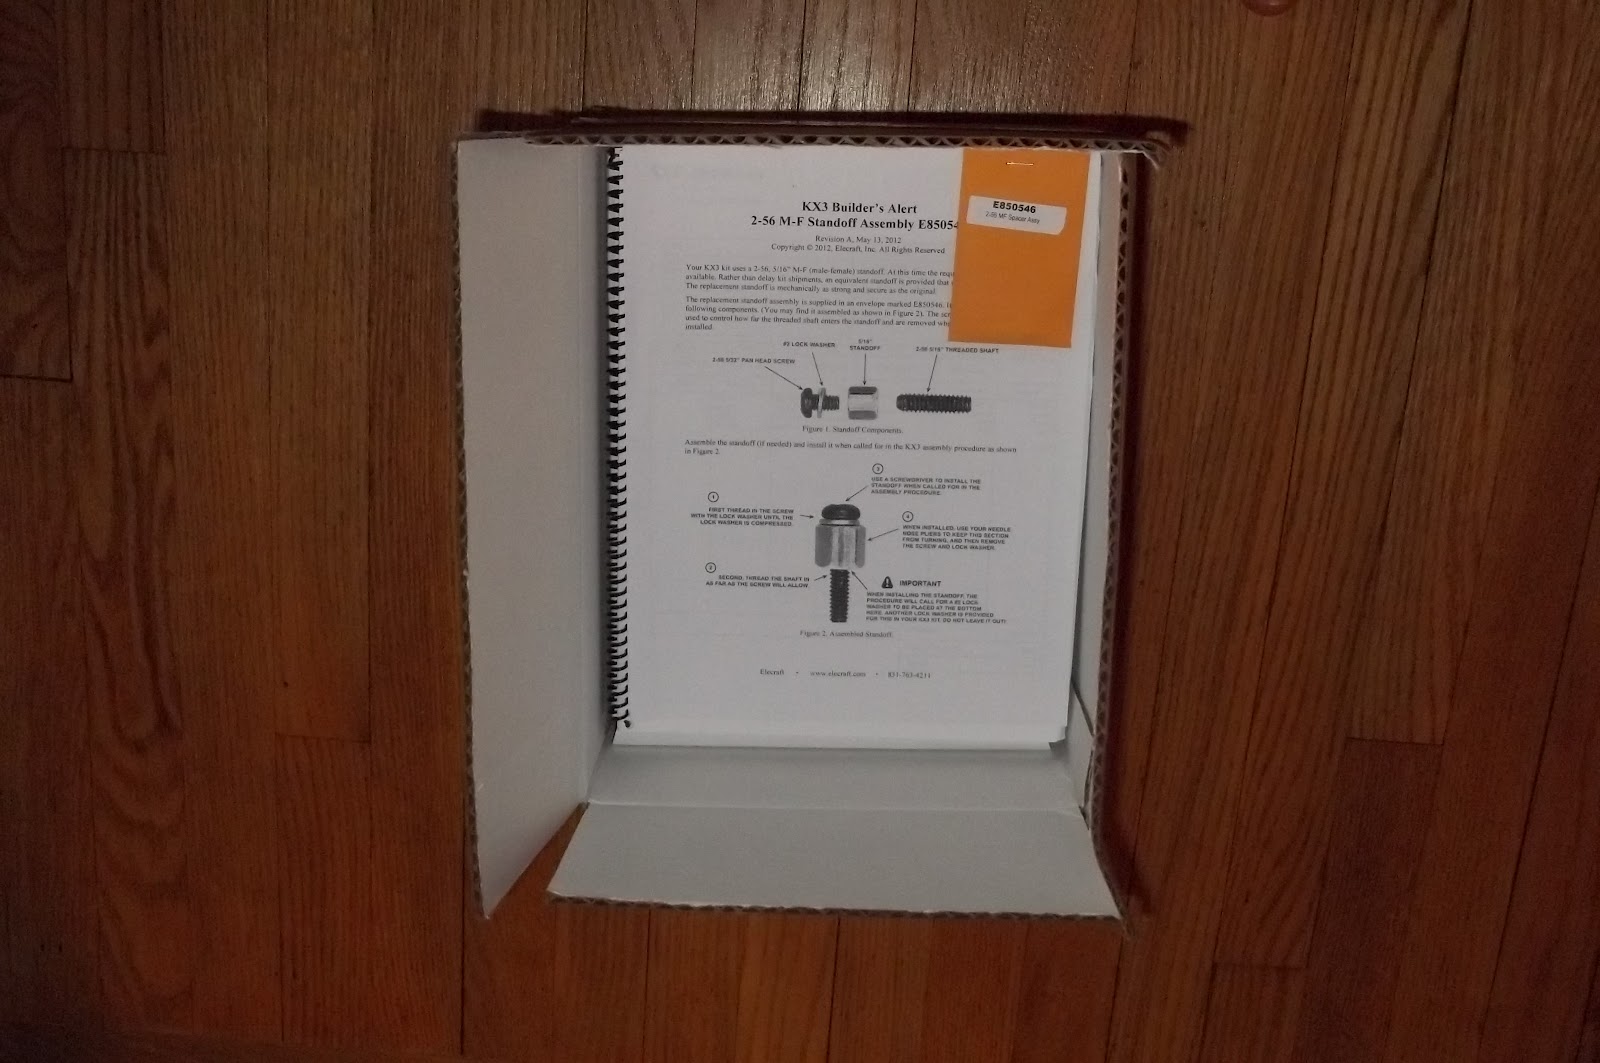
The errata sheet, followed by the manuals (building and owner’s) and finally the boxes containing the goodies underneath.
As long as this has taken, I am in no glorified, all Hell bent, gotta-get-it-done-now rush. I am going to spend tonight clearing off my worktable in the shack, and will take some time to re-read the construction manual – again. Right now, if nothing comes up out of left field, I am anticipating construction being completed over the next two evenings.
Pictures and details to follow.
72 de Larry W2LJ
QRP – When you care to send the very least!
Larry Makoski, W2LJ, is a regular contributor to AmateurRadio.com and writes from New Jersey, USA. Contact him at [email protected].
Handiham World for 30 May 2012
Welcome to Handiham World.

You can do it!
Listen to this podcast in its entirety here: http://handiham.org/audio/handiham053012.mp3
Today, just as we did last week, we are going to begin with Troubleshooting 101 as part of our initiative to help new ham radio operators (and even some of us older ones) learn how to do some basic troubleshooting for ourselves. Yes, it can be tempting to ask someone else to do things for us. This can become a bad habit when it keeps us from learning new things, especially things that we could – with a bit of practice – learn to do for ourselves. Knowing these basic things can serve us well in the future when no help is available.
Troubleshooting 101

Let’s get to today’s troubleshooting question:
Question: I carry my HT everywhere, and recently I was outdoors when it started to rain. Luckily I was close to a picnic shelter and was able to stay dry until the rain passed. It did get me thinking about what I would do if my radio did get wet though. Any ideas?
It is summertime, and we do want to be outdoors, and naturally we want to take ham radio along for the walk! Part of always carrying a radio is the possibility that you – and the radio – will get wet. But there is wet and then there is really soaked. The two are pretty different, but you are probably going to want to act quickly in either case to protect the radio.
Recently I read a story in WIRED about how some really high percentage of cell phone users drop their phones in the toilet. I think it was something like 25%! Unless you have a waterproof radio, you are probably not going to be able to fish it out of the bowl in time to avoid damage.
Let’s assume you have a typical HT that is not marketed as waterproof, submersible, or even water-resistant. It can likely survive a bit of surface moisture, such as getting caught in a rainstorm, as long as you act quickly to get it out of the direct rainfall, power it off, and dry the outside as quickly as possible. It might also be a good idea to remove the battery. If the radio falls into the water, it is a different ballgame. As soon as the radio begins to sink, water pressure increases and forces moisture into the radio’s case in a way that does not happen in a simple rainstorm. That means that you have to act very quickly to get the radio out of the water and remove the battery. The next step is to dry the outside of the radio as quickly as possible, then (with the battery still removed), place the radio and battery pack in a dry container with a desiccant, sealing the container so that the moisture is drawn out of the radio by the desiccant. Are you wondering what a desiccant is? I am sure you have run across those little packets of silica gel that are sometimes packed with electronic devices. They remove humidity that might damage the electronics. If you don’t have silica gel packets handy (most of us just throw them away because they have a finite life anyway), you can put the radio in a container with uncooked rice overnight. The rice will help to draw moisture out of the electronics. When you dig the HT out of the rice in the morning, put it on a nice, dry paper towel. Is there any sign of moisture still on the towel? If so, you might need to repeat the rice treatment. In any case, you will not be powering up the radio for days – that means keeping the battery out. You want to make sure that the radio is completely dry before putting the battery back in. If you can perform the drying out procedures in an environment with already low humidity, that is best. An air-conditioned, dehumidified house trumps a humid garage workbench. I would avoid using a hair drier to try to heat the radio. You do not want to add heat that can speed up chemical reactions or damage the electronics or even melt the case. I would not want to try the radio for at least a week so that I was darned sure all the water was out.
Let’s consider the best plan of all: prevention. It is much better not to have to dry out a wet radio, so we want to follow some basic procedures to keep our electronics dry, rain or shine. If you take your HT everywhere, always keep a small plastic bag in your pocket. The plastic bag can be used to stow your electronics should you get caught in a downpour. Since I have my little doggie Jasper with me when I am out walking, a dog waste bag does the job of radio protector in an emergency. These bags come in little rolls and are available anywhere pet supplies are sold, or you can just stuff a zip-style plastic food bag into a pocket. If you are boating or in a wet environment, you can just store the HT in a plastic bag when it is not in use.
You should also plan ahead, developing good habits when around water. Keep your HT in a case that will keep it from falling out. If you keep it in a pocket, be sure it is a pocket that is deep enough to keep it from working its way out when you sit down. One danger of using pockets instead of a belt clip and case is that you can forget your cell phone or HT in that pocket and run it through the washing machine. Don’t laugh – it happens! If you do use pants pockets for your radio and phone, get in the habit of quickly patting each pocket when changing clothes so that you will feel the HT or phone and remember to remove it. At Dayton earlier this month I was using the restroom in Hara Arena and there was some guy sitting in one of the stalls having a phone conversation on his cell phone. Not only is this kind of clueless socially, it is also the reason cell phones go for a swim in the toilet. Never use your HT or phone in the bathroom, because the bathroom has more water hazards than the golf course after a thunderstorm. Similarly, it is best to keep the HT somewhere away from the kitchen counter, another place where spills happen and are even expected.
Finally, there is the drenching in something other than plain water. I’m afraid there is not much you can do about a radio that takes a salt water swim or a hot coffee bath. If disaster happens, the procedure is the same: remove from the liquid as quickly as possible while watching out for your own safety, take out the battery, and dry out as quickly as possible with absorbent towels on the outside and the dry rice treatment. Hopefully salt has not penetrated the radio, but if it has there may not be much you can do. The salt deposits left behind can become conductive in high humidity conditions, causing shorts. I am not a fan of disassembling electronics to give them a cleaning with distilled water or solvent, as that is a job for trained bench technicians. Considering the cost of bench time, it is likely that a salt water swim will mean it is cheaper to buy a new radio. Similarly, a drenching with sugar-infused soft drinks can leave a real mess of residue behind. If this mess gets onto circuit boards it can also absorb moisture and cause shorts, even after the drying out process. It will also gum up push buttons on the HT’s keypad. The bottom line: Don’t have your HT anywhere near such possible spills in the first place. If one does occur, follow the emergency procedure:
- Remove the radio as quickly as possible from the spill.
- Remove the battery.
- Blot the surface with a fresh paper towel or other absorbent cloth.
- Dry in a container of uncooked rice.
While your gooped-up radio is drying out, you can start shopping for a new one. It never hurts to be prepared for the possibility that your old HT is down for the count.
Email me at [email protected] with your questions & comments.
Patrick Tice, WA0TDA
Handiham Manager
A dip in the pool

It’s time to test our knowledge by taking a dip in the pool – the question pool, that is!
Today we are busting our brains with a question from the Extra Class pool:
E5C16 asks: “In polar coordinates, what is the impedance of a circuit that has an admittance of 7.09 millisiemens at 45 degrees?”
Possible answers are:
A. 5.03 E-06 ohms at an angle of 45 degrees
B. 141 ohms at an angle of -45 degrees
C. 19,900 ohms at an angle of -45 degrees
D. 141 ohms at an angle of 45 degrees
Now, you may be asking yourself, “Why should I worry about this particular question when the current question pool is only good until the end of June?”
The answer about why you should understand this question (and more importantly the answer) is that it is exactly the same question, including the question number, that appears in both the current pool AND that brand-new pool!
We can’t go into super-detail about how to work these out, but you can find the process easily enough in the ARRL or Gordo books or in the Handiham audio lecture series.
Briefly, here is the skinny:o Ohms at such and such an angle. If you have forgotten what admittance is, it is simply the reciprocal of impedance. If you don’t know what impedance is, you need to go back and hit the books. Anyway, here is how such a conversion works:
- The absolute value of Z (the impedance) equals 1 over .00709 (which is the 7.09 milliseimens converted into seimens by moving the decimal point three places to the left. The “1 over” part comes from the fact that we are working with a reciprocal, which means we flip the numerator and the denominator to get “1 over some other number”, which is a reciprocal.
- With me so far?
- Good; so now you just divide 1 by .00709 using your calculator. You get 141.0437 etc., etc., so you round that to 141 ohms.
- You look at the question and the possible answers again. Hey, answers B & D each have 141 in them! Now you have a 50-50 chance of guessing which one is right!
- But the question specifies “…at 45 degrees”, and we have done nothing with that number yet. We need to consider that phase angle “theta” equals zero degrees minus the 45 degrees we have been given. So zero minus 45 equals minus 45 degrees.
- Now we look at our two possible choices. Answer B is the one that says 141 ohms at an angle of -45 degrees, while answer D says 141 ohms at an angle of 45 degrees. Because you have cleverly subtracted 45 from zero to get -45 degrees, you pick answer B, 141 ohms at an angle of -45 degrees.
Here is a little memory trick: Always remember that admittance questions involve a reciprocal, you you are going to be dividing some small number into one. It will be expressed as one over the other number. You need to remember to convert to seimens by moving the decimal point. Then if the angle you are given is positive, such as 45 degrees, the final answer will likely be negative, such as -45 in this case. The reason for all this angle stuff is that we are not dealing with direct current. We are dealing with alternating current, which is always changing, so we have to pick a point in its alternating cycle where our specifications can be listed numerically.
Pat Tice, WA0TDA, is the manager of HANDI-HAM and a regular contributor to AmateurRadio.com. Contact him at [email protected].
6m up and about
After a good few weeks without any radio fun I hooked up my semi-homebrew 2 ele beam and had a good couple of QSO’s with CT1EAV and CT1EEB on 6m. There were a good few station out this evening and I’m glad this brief outing has proven that the flimsy beam works.
Alex Hill, G7KSE, is a regular contributor to AmateurRadio.com and writes from Cumbria, UK. Contact him at [email protected].
Texture–Another phase complete
I bet you’re thinking, “Jerry received his KX3 and the basement project has been placed on the back, back burner”. Yes, it’s been a while since I provided a progress update on the basement project. Yes, I did receive my KX3 as I’ve blogged about several times. But NO, the basement project was not placed on the back, back burner…it has been progressing along nicely. Today I have a major update to provide.
We’ve turned some major corners in the past few months with this project. While I know many of you could certainly have done everything I’ve completed over the past 3-4 months in perhaps just a few weekends, I’ve wanted to make sure I had time for other things. Plus I’ve never considered this to be a race. Very early on I established a goal for completion of Labor Day weekend to be fully moved into the new space. I’m very happy to report that we are still on-time and on budget.
On April 16th, I reported “The Shack has a Ceiling”. My wife and I started the process of mudding the joints and all the screw holes (along with a few “oops” areas). We taped and applied the first coat of joint compound (drywall mud), then sanded. We repeated that process, then sanded. Finally, last weekend I applied the third and final finish and wider coat of joint compound and we lightly sanded. We were ready for the next phase…texture!
Of all the tasks I’ve performed for this project (framing, electrical, plumbing, A/C Vent, drywall) applying texture is the only thing I’ve never done before. So I spent some spare time over the past week or two watching YouTube videos and reading as much as I could on the art of applying texture. Because I will have some other future drywall projects to complete, we opted to purchase a texture sprayer/hopper gun versus rent.
Home Depot sells the Wal-Board Texture Pro 200 hopper sprayer for $70 bucks. While this machine might not be everything a pro would need, I figured it would work fine for my use. Since I had used the pre-mixed joint compound for the taping and mudding phase, I decided to stick with that versus other formulas.
Since I had never applied texture I really had no clue just how much material (joint compound) we would use. I started out with two 5 pound buckets. In an empty 5 gallon bucket I thinned the pre-mixed joint compound into a consistency of thick paint. We were looking for a medium orange peel texture. After mixing for a few minutes with my drill and mixing attachment, I filled the hopper and applied texture to the side of a cardboard box. A little tweaking of air pressure and mixture consistency and I was ready to go.
After texturing two of the 16’ walls, I realized I probably needed another 5 gallon bucket of pre-mix. I kept mixing and spraying, mixing and spraying. My wife was starting to feel sorry for me and I think she also secretively wanted to try her hand at the texture gun. She began spraying while I continued to mix.
This teamwork actually worked out really well. I didn’t fill the hopper as full as I would have normally done for myself and when I wasn’t mixing compound, it allowed me to move and position the drop cloth and plastic around the room as she continued to spray. We managed to get all the walls textured in just about 3 hours.
To celebrate, we went to Home Depot yesterday and took advantage of their Behr paint Memorial Day Savings event. We saved $5 per gallon and $25 per 5-gallon. A nice savings and just when we needed it.
We will probably take this coming weekend off and resume work on the weekend of June 9-10. The next phase is the painting phase and I suppose if we get started on 9 June, we could easily be finished in a few weekends and have the painting phase finished by July. This leads us to the flooring phase.
At the time of this blog posting, we are not 100% clear on just what we will do with the floor. Tile of some type has always been the top choice. Carpet in a basement just doesn’t work and I want the ability to zoom across the room in my chair if need be. Decisions…Decisions…but they will be made and will be made in the very near future.
")
My apologies as the picture above just simply does not do the texture job any justice at all. I took this in a hurry this morning and didn’t take time to turn on all the portable lights. The ceiling recessed lighting is still covered. The two bumps are tape covering electrical outlet boxes. These will be just above the desk surface in the ham shack.
While I hate the see the long holiday weekend come to an end, there is a part of me that is looking forward to going back to work so that I can get some rest and recharge my batteries for the next phase…PAINT!!!
Until next time…
73 de KDØBIK
Jerry Taylor, KD0BIK, is a regular contributor to AmateurRadio.com and writes from Colorado, USA. He is the host of the Practical Amateur Radio Podcast. Contact him at [email protected].
First impressions
Good conditions and a new toy to play with has resulted in a lack of time to write about them. Since my last post I have spent a lot of time getting to know the Elecraft KX3. For those of you on the waiting list all I can say is: it’s worth the wait. If you aren’t, then what are you waiting for?
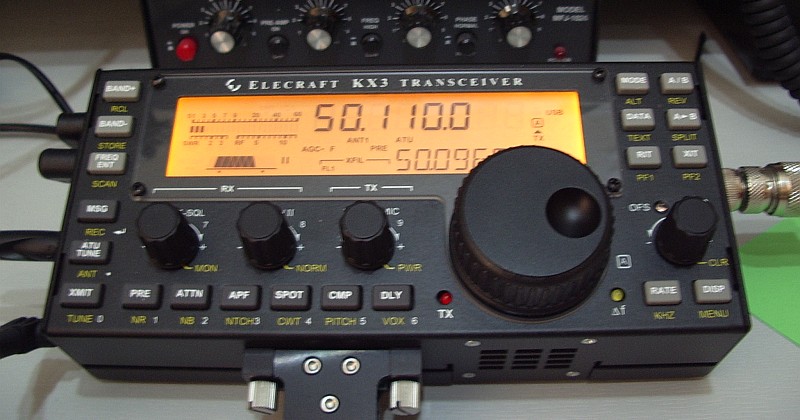
The KX3 really is the ultimate portable rig. It knocks the FT-817 into a cocked hat. It looks and feels like a baby K3. The only reservation I would have about its adoption by diehard SOTA enthusiasts who go out in all weathers is that it is rather an expensive radio to subject to the worst of the British climate. But as a fair weather walker I would have no such reservations. In fact I have already got a plastic toolbox with a foam insert into which I will soon be making a KX3-sized hole!
If you are a K3 owner then the KX3’s similarity to its parent means you will know what to expect. But there are also things where familiarity to the K3 is not an advantage, where functions are not in the same place. The KX3’s front panel is a little bit shorter and quite a lot less wide, but the same number of functions have been crammed into it. All the buttons have dual functions depending on whether they are pressed or long-pressed. The radio is powered on and off by pressing two buttons at once. Some of the knobs have three functions depending on whether you press them first or long-press the button below.
If it sounds complicated then it really isn’t and you’ll quickly get the hang of it. The only thing I can’t understand is the decision to make AGC Slow/Fast/Off an option on the configuration menu. The AGC button on my K3 gets a fair bit of use, mainly to turn AGC off when operating PSK with a wide bandwidth. But I don’t plan on using the KX3 for data modes much so this isn’t an issue I’m particularly bothered with.
The KX3 designers have made a few unusual choices of interface sockets, notably a 4-pole 3.5mm jack for the microphone. These jacks are a bit hard to obtain but don’t worry: you probably won’t need to. Four poles are only needed to support the up/down buttons of the Elecraft MH3 mic. You can actually plug a computer headset with its two 3-pole 3.5mm jacks into the phones and mic sockets (RF immunity not guaranteed.) You won’t have a PTT but you can use VOX instead or the XMIT button on the front panel. Ideal for windy hilltops (is there any other sort?
Some SOTA operators may be put off by the lack of 2m coverage. Elecraft has promised 2m will be available as an option, as it is for the K3. Hopefully it will perform better than the ubiquitous hand-helds and even the FT-817 when subjected to the large out of band signals experienced on British hilltops.
What many people will want to know is: what is the receiver performance like? “Better than an FT-817” But that would surprise no-one and in any case is only an educated guess. I don’t have the antennas or QTH to subject the KX3 to challenging input levels. All I can say is that the KX3 receiver is quiet and delivers clear and open-sounding audio. Just like a K3, in fact.
Julian Moss, G4ILO, is a regular contributor to AmateurRadio.com and writes from Cumbria, England. Contact him at [email protected].
eBay – gotta love it
if you’re a seller!
Just for the heck of it, I’ve been keeping a watch on the auction for an ATS-3B that ended tonight. I was watching a bidding war right before my very eyes.
The final winning bid was $317.00 – not bad for a kit that originally sold for $160.00. Admittedly, it is assembled and comes with a carrying case. But that is almost double the original price.
I mentioned before that I think that eBay is a very good thing for sellers. You have to wonder how many items end up garnering a bigger selling price than they ever would in a classified ad situation. The “macho” of not allowing yourself to be outbid? A feeding frenzy – like sharks drawn to prey? Or is it just consumer ignorance?
An ATS-3B for over $300, that NorCal Doublet the other week for $60. Admittedly, I’m not in the market for either item, so maybe if I was, those prices would not seem so inflated.
It will be interesting to see what that Palm Mini Paddle and Code Cube end up going for. Right now, they’re at $90.00 with about 40 minutes to go.
72 de Larry W2LJ
QRP – When you care to send the very least!
Larry Makoski, W2LJ, is a regular contributor to AmateurRadio.com and writes from New Jersey, USA. Contact him at [email protected].
45,868 miles with an attic antenna……SHUT UP!!!
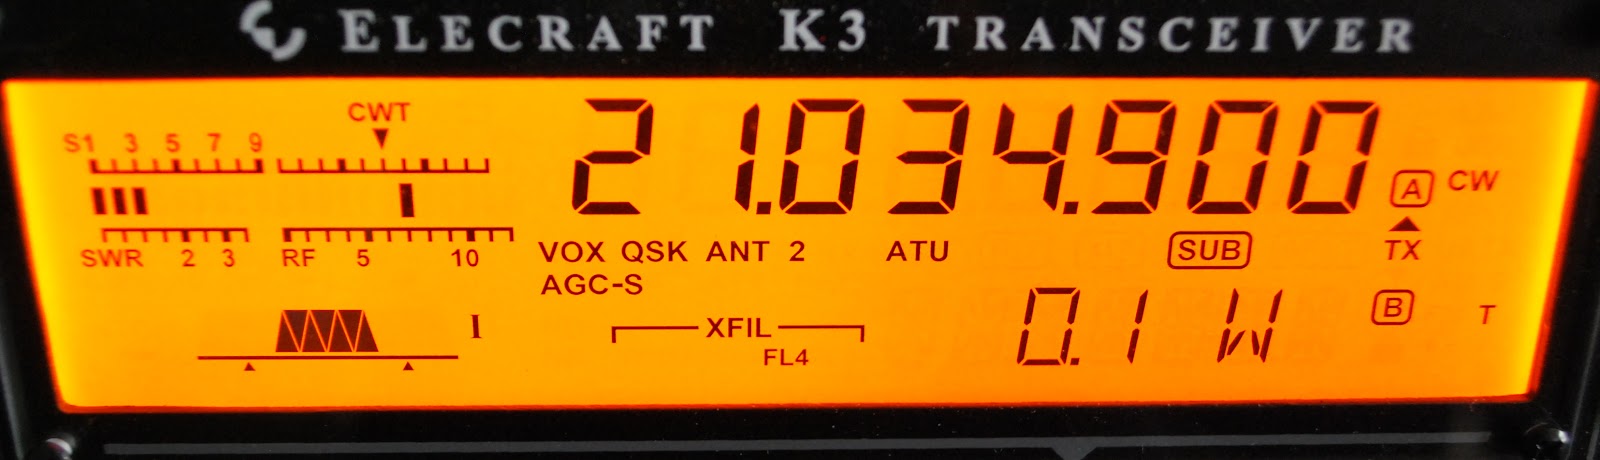 |
| The K3 is ready to go at 100mW's |
To make things interesting as I was not "contesting" in the true sense I started to drop my power as I gave out contest points. I started at 1.5 watts to CR1X in Finland that worked out to 2755 miles per watt. Update....Thanks to PE4BAS my distance to CR1X who is in the Azores not Finland is 2417 miles per watt, thanks Bas for the info! He had no problem copying me so down went the power. I leveled out at 100mW's just for the reason this is as low as the K3 will venture.
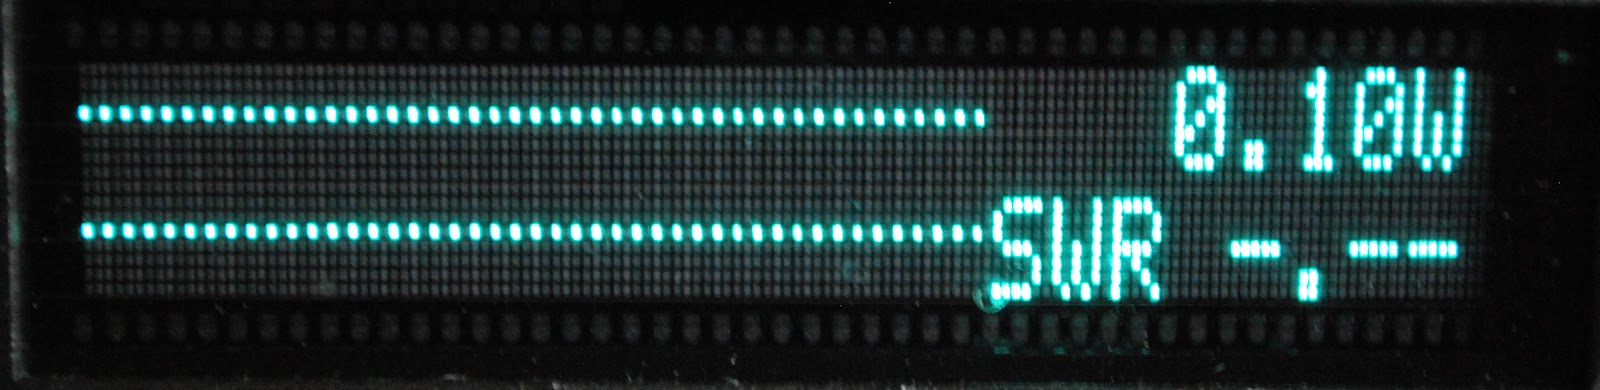 |
| Proof 100mW's is on it's way...no SWR showing |
1. HA8JV 45,868 miles per watt
2. IR9Y 44,558 " "
3. 9A1A 44,187 " "
4. OL7C 42,496 " "
Until this contest my personal best Miles per watt 16,737 miles per watt when making contact with ZS4TS at 500mW's. Even at 100mW's being copied was easy and I was very surprised. I did not want to drop my power to the point were the contest station was spending his valuable time trying to make contact with me, but that never happened. I am now in the market for an attenuator do get my power output to below 100mW's and see what happens. I was looking at the Hendricks 41db attenuator. It's a kits and looks like a very nice unit.
Mike Weir, VE9KK, is a regular contributor to AmateurRadio.com and writes from New Brunswick, Canada. Contact him at [email protected].
 Ham Radio Deluxe |
 W5SWL Electronics |
 Ham Radio Prep |
 KB3IFH QSL Cards  Hip Ham Shirts  HamRadioAuctions HamRadioAuctions Reliance Antennas Reliance Antennas Enigma Shop Enigma Shop |  morseDX  Ni4L Antennas  R&L Electronics R&L Electronics antennas.us antennas.us QRV QRV |
- Matt W1MST, Managing Editor
