Archive for the ‘icom’ Category
 RadCom and the IC7300
My RadCom arrived by post today. Unlike in the recent edition of PW, the advertisers were publishing details of the new ICOM radio and were keen to take deposits. Perhaps they have got later data? I quite like the look of the new IC7300 radio, but feel the price will soon fall to £799 or less. I can wait. I may wait to see what the FT817 replacement looks like. A 5W (or maybe 10W) radio would suit my needs better.
The latest RadCom has a review of ICOMs latest flagship radio, the IC7851, selling for around £9000. Does anyone really spend this sort of money on amateur radio gear? With PSU, tower, big beam and big rotator this implies over £10000 on amateur gear. I suppose some people must spend this sort of money. My FT817 has served me for over 14 years now. To me, this was an investment and I had to give it careful thought. I wonder how many XYLs are happy for their husbands to spend over £10000 on a hobby?
Each to their own. If you really have that kind of disposable income how you spend it is your decision.
Where is the IC7300?
Today, through the post, I got my November 2015 copy of Practical Wireless. Suspiciously I could find no pictures or mention of the ICOM IC7300 transceiver in any advert at all. It is almost as if all the dealers have been told in no uncertain terms to sell the current products and, on pain of death, do not under any circumstances mention the IC7300. I am not saying this as fact, but it is all rather odd. A month ago everyone was full of the news and products were expected to ship by the year end. Perhaps ICOM have had second thoughts or were losing sales of current products?
There were plenty of adverts for the Yaesu FT991, although even the best published prices have since been bettered. No, I am very suspicious about why there is no mention of the IC7300. Just one dealer OK, this I could believe, but all of them tight-lipped???
ICOM what is behind this? Is there a story we are not being told?
FT991 price dropping
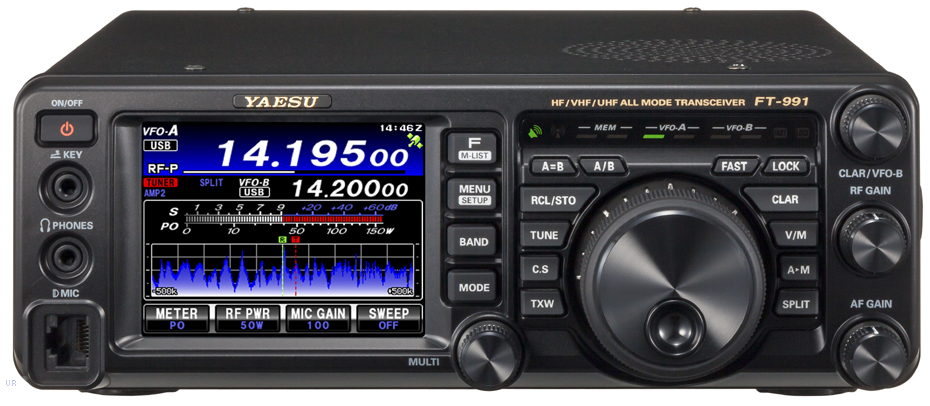 |
| Yaesu FT991 |
MLS are advertising a time limited offer of the FT991 and a bundled SMPSU at £1149.95. Now there will soon be an ICOM competitor albeit with no 2m/70cm but with 4m in the European version (and arguably a better radio?) at less than £1000 in the form of the IC7300.
No, I confidently predict the FT991 will sell for less than £1000 before the year is ended. If you are in the market for a 100W radio it is a toss-up between the IC7300 (SDR based) and the FT991. At the moment, the IC7300 looks better value.
Yaesu may announce a (long awaited) FT817 replacement at Dayton next spring but don’t expect to see units in Europe before autumn 2016 or later, is my bet. The Yen exchange rate has vastly improved (making Japanese goods less expensive to buy) and now the FT991 has a serious rival – result is Yaesu has to drop its price for the FT991 or they lose out. My advise is wait a few months.
2m SSB history
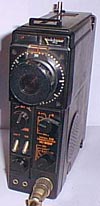 |
| IC202 |
For me, 2m SSB began with the purchase of a 10W pep Belcom Liner 2, which opened up 2m SSB to the masses. Before then, people used homebrew transverters and HF rigs to get on VHF SSB.
After that I owned the IC202 from ICOM which had a very good VXO but less power (3W pep). Later, the first digital synthesised rigs appeared and 2m SSB really took off.
In the last 20 years or so, certainly here in the UK, VHF/UHF SSB took a nosedive and what little VHF/UHF activity there is is mainly using FM. Here in the UK there is good SSB activity in contests and in good lifts, but little casual use of the SSB/CW modes, which is a pity. Ranges on SSB can be much greater than FM for similar power levels.
When I first used my Liner 2 I was amazed how far I could reach in flat conditions, even with 10W and a small indoor antenna.
Icom IC703
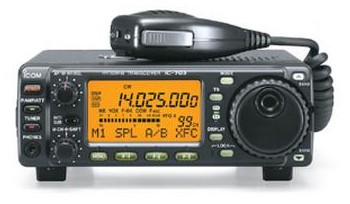
One of the best rigs I once owned was the 10W Icom IC703. This was a well equipped QRP radio with a decent receiver, DSP and auto ATU. I sold it to a local amateur who was a poor pensioner but I regret selling it now! No fan needed at 10W. Just a first class rig.
User Hostile! Radios that you love to hate!

Three band HT Radio, 2 Meters, 70 CM and 6 Meters
“I hate this radio”
Have you ever said this?
I certainly have. Some radios are a joy to use. They are intuitive, easy to use and you don’t ‘NEED THE MANUAL’ every time you want to change something!
HT’s seem to be the most ‘user hostile’ radios available to hams. I know! All HT radios should have certain things, VFO, on off knob/button, volume control and keypad, and in my opinion, they should not be so difficult to use that you need to read the manual every time you want to do, what should be a simple task; change CTCSS tone of a repeater, for example!
When HT’s were reduced in size, they became more complicated to use. Menu systems were instituted. They were further reduced in size and menus were multi-layered! How many times have I yelled at my HT after holding button a for 1 second, then within 4 seconds, tried to press button 2, for 1 second but no more than 2.5 seconds, while doing 3 pirouette turns on my left foot, only then, can I use my radio. That same button has 3 functions now a days. Press it once for one thing, press it again within a specified number of seconds and you get another function. Press and hold it and you get yet another option.
Enter the English Translation, manual! Poorly translated from Japanese, but at least its in English! (With many pertinent things omitted!)
Why do manuals go to great lengths to tell you in great detail everything that you ‘don’t want to know’ and will most likely never use or use very seldom?
But tell you want you NEED TO KNOW, naw! Tell you how to ‘undo’ something? That would make it too easy!
Actually, I really like this VX5-R HT from Yaesu. It’s a love/hate relationship, however! So very handy, it fits in the palm of my hand, has lots of memories, and many many nice features. Accessing those features is not always easy, especially without the manual right in front of you. If you ever push the wrong button, and send it into ‘never-never-land’, its hard to un-do what you just did! One thing that was left out of the VX 5 is a memory clear feature! That omission makes life with this radio difficult at best!
You cannot return a designated memory channel to its ‘no data’ state. The only thing you can do from the radio itself is to overwrite that particular memory with another frequency!

2 Meter IC V8000
I’m not picking only on Yaesu!
This Icom V 8000 is the most ‘User Hostile’ radio that I have ever owned.
Not only is it difficult to use, but it has problems as well. The mic is notorious for a mechanical problem with the PTT button, and the external speaker jack does not work well. Unfortunately, the external speaker jack is where you have to plug the programming cable in to program the radio. The Icom program for doing this is also ‘user hostile’ BTW!
Editing and Cloning Software RT Systems I bought software and cable from RT systems to program and manage the Icom T 70-A. The HT and its programming software arrived yesterday.

IC T 70 programming software and cable

Icom T70 A with spare battery, left, drop in charger, and speaker mic
The Icom T-70-A, is the replacement radio for the Yaesu VX 5
It will replace the VX5 as my ‘go to’ HT. Just last night, I picked up the Yaesu VX5 the wrong way, mashed some buttons on its face and sent it into never-never-land! Try as I may, I could not undo it with normal button press. Since the radio has an RT Systems program and cable on its way, I went nuclear, and reset the processor. Finally, the radio was operational once more. It needs programming of course but the display is no longer stuck!
It programmed the Icom T 70-A radio to my specifications with only a cursory reading of the manual. The radio is intuitive, easy to use and has some great features. RT Systems Programming Software and Cable

IC 7100 with Touch Paddles
Funny, I just installed an Icom 7100 mobile HF/VHF/UHF/MF radio in my truck. That radio was ‘done right’ by the manufacturer! Its easy to program and use, so there is no need to keep the manual handy for simple tasks. I run mobile CW/SSB and VHF repeaters with it. If there were any UHF in the area, I’d have that programmed in there too. Its a joy to use!
This photo shows the IC 7100 on a modified clip board held in place with bungee cords. So far, I have not seen the need for programming software. That said, there is an SD card on board this radio. It can save the settings to the SD card. I have not explored this avenue yet. It would be nice to keep a copy of the settings on an SD card and on my laptop for future use. Something unexpected can happen. Spare radio data would come in very handy then. Replacing all the settings would be very easy with the programming/clone software. RT systems sells that one too.
Do you have a radio that you love to hate?
HF Mobile, A Different Kind of Radio Shack
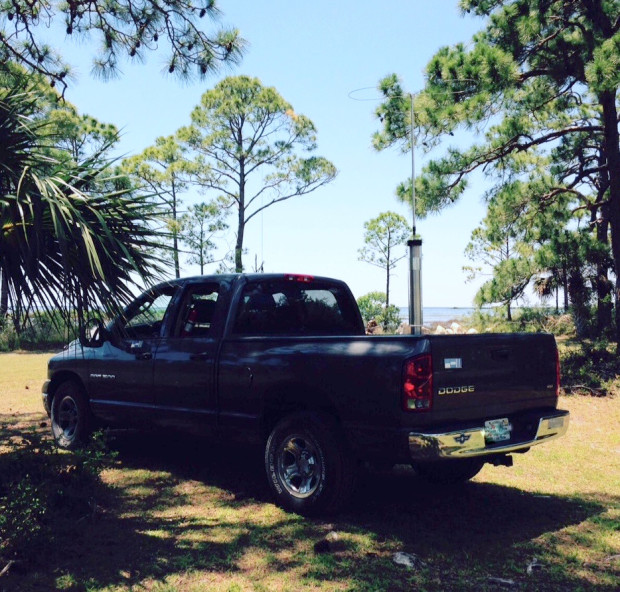
The Scorpion Antenna is mounted in a good spot in the rear of my pickup truck bed. Seen here at Hagen’s Cove in Perry Florida on the Gulf of Mexico in the ‘big bend area’!
Going Mobile, Rag Chews, Nets, CW, its all available and very doable when you are on the road!
Mobile HF radio adds yet another dimension to Ham Radio. This is my second go, at HF Mobile operation.
Years ago, when ‘real life’ happened to me, I had no home QTH to operate from so I bought a new (at that time) Icom 706 M II G radio. It was a great choice. A DC to daylight rig, and its still working 15 years later. This next episode of HF mobile is greatly improved over my previous one. A good antenna at the time, was made by High Sierra. It was a screwdriver type. (the original mobile antenna’s were nick named ‘screwdriver’ because they used an electric screwdriver for moving the coil)
High Sierra no longer makes mobile antennas, but the good news is there is a good company making them in Arizona, Scorpion antennas!
The Scorpion antenna is a heavyweight, at 18 pounds and it needs a very robust base to hold it. Breedlove Mounts
Its the Rolls Royce of Mobile screwdriver type antennas, and not just because I bought one, it is indeed, a very rugged and carefully crafted antenna.
I’m primarily a CW op so I incorporated a touch sensitive paddle to do CW on the move or sitting still in a local park like this one at Hagen’s Cove, on the Gulf of Mexico in the ‘big bend area of Florida!’

The cap hat ‘whip’ is a 3 foot rod of solid aluminum. It shortens the overall whip. This is nice for parking my truck in the breezeway without hitting the roof.
A motorized coil is moved up or down electrically! Listening for the greatest noise, depending on the band of choice, puts me in the ball park for checking the SWR. A 1:1 ratio is easily obtainable if care is taken during installation. Bonding straps are a must. All the parts of the truck body, door, tailgate, hood, fenders and truck bed, must be bonded together to from a good RF ground. Not a DC ground, mind you, but an RF ground plane. (The ‘other half’ of the antenna’)

All the body parts of the truck must be bonded together with straps. RF flows on the surface not the cross section of a conductor, so the wider the better. Copper flashing best carries RF current but a compromise is make for braid due to continuous flexing while opening and closing doors, and tail gates.
Bonding is one of the things that separates a good installation from a poor one. I had fun with the first truck and radio set up back in 2001 but I learned a lot about mobile HF radio since then and did things differently this time.
Location, location, location! It sells real estate and its very important for HF Mobile Antennas!
What makes a good location on a vehicle?
I’ve seen many examples of HF radio antenna installations that work, but some work much better than others. Besides bonding, another good trick for a good installation is to use a very good location; the main mass of metal must be Directly under, not near, the base of the antenna. Will a bumper mounted antenna work? Yes, but one with a mass of metal directly beneath the antenna will work better.
Its simply a case of, more bang for the buck!

Positioning the bottom of the movable coil above the truck side wall is best.
The Scorpion antenna movable coil still has the protective bubble wrap on it in this picture.
Clearance is important!
The bottom of the coil must have clearance from metal objects like the side wall of the truck.
Detailed installation instructions come with the scorpion antenna. This is very important. A good installation will insure good operation. Skimping on installation will only hurt you in the long run.
I installed an auxiliary battery in the back set compartment of the truck. Its a sealed lead acid 75 Ah battery made by Optima. I bought it trough Apex Battery.
Optima Blue Top from Apex Battery co.

Optima Blue Top 75 Ah Auxilliary Battery
I can use either the auxiliary battery or the truck battery or both at the same time, thanks to a marine dual battery manual switch.
See its picture below.
I used #4 wire to connect the truck battery in parallel with the auxiliary battery in the back seat area. This large gauge wire greatly reduces voltage drop between the batteries. For extended stays in one place, I can operate on the auxiliary battery, without running the engine. This insures that the separated truck battery will start the truck when I’m done operating.
I have not yet mounted this switch on a back board, but that is coming. I need both hands to operate the switch now and I want to be able to do it with only one hand!

Dual Battery Switch in the -Both-Battery- Position
The business half of the IC 7100 is mounted to the floor of the truck on the hump. The battery box can be seen with a power pole connection box on top.
The control box for the IC 7100 rides up front on the center console as does the touch sensitive paddle. The microphone hands on the cup holder.
I have a Warren Gregoire headset for SSB. It features a noise cancelling microphone. Warren Gregoire Headset (no relation to me)
(Special note here; its illegal to have both ears covered with a headset in Florida while you drive.)
Its a stupid law because you can legally drive in Florida even if you are stone deaf! So that kills the reasoning for ‘listening to sirens’ on emergency vehicles!
Okay, that rant is done! Back to the Mobile installation.

Battery Box, with Power Pole Box,-top, IC 7100-bottom

AA1IK, Using Warren Gregoire Headset 2
Join me on a new Yahoo Group for HF Mobile ops.
New HF Mobile Yahoo Group
Here I am using the Warren Gregoire headset. This headset has a noise cancelling mic so its a good fit for mobile HF radio. SSB is a new thing for me. I’ve been a CW op, for most of my ham life. I’m having a great time meeting new folks all around Florida on 40 Meter SSB. Ham radio has lots to offer and I’m glad I have not yet exhausted all the possibilities. I have not forsaken CW, but SSB is a fun mode, as I’m sure many of you already know.
The IC 7100 is a two part radio. You saw the ‘business end’ in a previous photo. This photo shows the control head and the touch sensitive paddles Touch Sensitive Paddles They are held in place with a bungee cord. The black plate that you see here is a small plastic clipboard with the clip removed. It is glued in place to the light brown plate, and that is also a clipboard with the clip removed. Both clipboards are held in place with bungee cords. This allows me to remove the control head and the paddles for security reasons.
IC 7100 and Touch Paddles

Remote Switch-top, SWR/RF PWR Meter-left, Speaker-right
The remote switch for moving the antenna up and down to tune in each band is show in the little cubby hole. The SWR/PWR meter is stuffed into a hole where the ‘never has been used-ashtray’ was. The speaker is mounted just above the cup holder.

Remote Switch Moves Antenna Up and Down to Tune Each Band
This photo shows the remote switch. It is hand held, and easily put away after the antenna is tuned.
So! That is pretty much the end of a walk through in my new mobile ham radio shack. So far, I’ve listened to CW on the road but have not called CQ or talked to anyone while driving. I became interested in CW Mobile early in my ham radio career.
The first requirement for operating CW Mobile, according to an article that I read on the subject, said to ‘become a dynamite CW operator! Its been almost 25 years since then and I’m still working on that first requirement.
I’ll keep trying!
De AA1IK
Ernest Gregoire


