Archive for the ‘antennas’ Category
 It was a good week
of lunchtime QRP sessions. I did not get skunked all week, unless you count yesterday, when I had to work through lunch and didn’t get a chance to get outside. The bands seemed decent and this is the week’s tally:
Apologies
for not posting all week. Whew! What a week! It was so busy this week, that I only managed to get one lunch time QRP session in. The other days, I ended up either working through lunch, or got saddled with “must attend” conference calls during lunch hour.
Last Monday, I had to serve out a jury duty summons. Here in Middlesex County, you are summonsed for “either one trial or one day”. You report to the county courthouse with your juror badge, which is mailed to you ahead of time. The badge has your name and a juror number. People are randomly picked throughout the day in groups of 20 or 30 or more. If your number gets called, you go into a courtroom as part of a “panel” where you may or may not be selected to serve on that jury. If your number isn’t selected for any panels and you’re not picked from a panel to be on a jury that day – you go home. My number wasn’t selected for any panels, so I came home and now I don’t have to concern myself for reporting for jury duty for another three years.
Since the week was so busy, I rewarded myself this morning by attending the OMARC Fall Hamfest, down in Wall Township, NJ. I attended their Spring Hamfest, which was held on Dayton weekend. I liked it enough to go back. Again, it’s a small event, but it’s very nice, nonetheless. Attendance was decent and the people there were really nice, and the weather was absolutely gorgeous, so it made for a pleasant morning. (Great job, folks from OMARC! I’ll be back next year, for sure.) My only purchase was a 25 foot length of RG-8X coax with a male PL259 on each end. This will be used to connect my PAR ENDFEDZ when it is sufficiently high up in a tree.
But, I was given a great idea by two guys who were selling military surplus fiberglass antenna masts. In particular, I really like this:
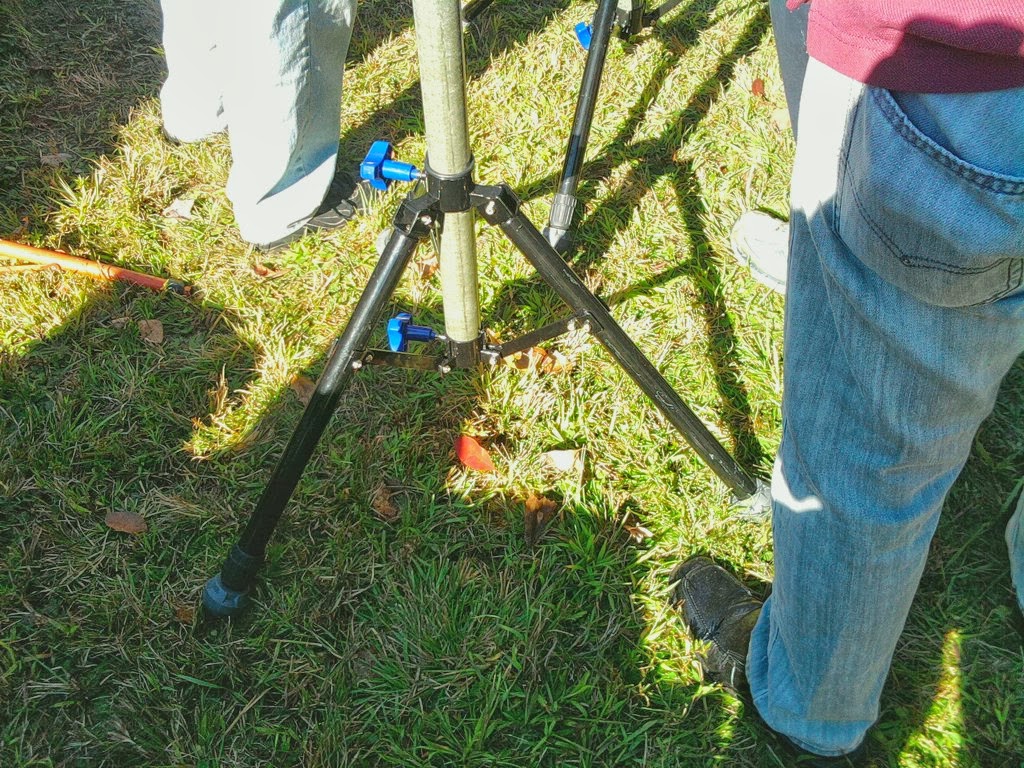
They anchored the bottom section of mast in these tripods. I asked them if they were selling them, as one of these puppies would be just perfect for holding my Jackite pole. They informed me that they don’t sell them, and they acquired theirs at Lowe’s. They are the tripods used to support quartz work lights. Perfect! I have to look into getting one of these. The two gentlemen had 26 feet worth of mast being held by this particular tripod. It was slightly breezy and yet it was anchored like a rock. Looks like a promising concept.
The other thing I noticed at the Hamfest was just a personal observation. Something that to me, is one of the marked differences between CW and Phone operation. A little background – you all know that many times I have stated that I am not a big VHF/UHF talker. I have my handheld mounted in my Jeep because I do enjoy listening to the local repeaters on the way to work and on the way back. If you’re like me and you do mostly listening, you get accustomed to “the regulars” on the different repeaters and you get to know voices and the personalities behind the voices – and after a while, you form a picture in your mind of what you think the face must look like that goes with the voice you are hearing.
I was walking around this morning and amongst the various conversations going on, I heard some familiar voices – some of the guys I listen to each morning and each afternoon. I looked up and, Wow! In each case, the face that I had mentally pictured looked absolutely NOTHING like the actual person!
Then I realized, that this is not something that happens while operating in the CW Mode …… at least for me. Conversing with a guy in code does not cause me to conjure up the face behind the fist. I love looking at QRP Quarterly and the photos from FDIM and the various QRP “Cons” because I can finally see the faces behind the fists. But for some reason, I am never taken aback by seeing a photo of some QRP op, or other CW op and saying to myself, “He just doesn’t look the way I pictured him”. The only thing that I can think of that may be the reason behind this (for me at least) is because voices are distinctive in tonal quality, while CW fists are distinctive in rhythm and pattern.
Crazy, huh? These are some of the thoughts that run through my head while mowing the lawn. Maybe I should see someone about this! 😉
Oh, before I forget …… tomorrow is the inaugural Peanut Power QRP Sprint. Hope to catch you all on the air tomorrow afternoon!
72 de Larry W2LJ
QRP – When you care to send the very least!
WooHoo – a new one via QRP!
Subtitle – It pays to know your prefixes!
My lunchtime QRP session today looked like it was going to be no big deal. 15 Meters seemed to be dead as a doornail. I heard some activity on 20 Meters, but not much to write home about.
So I popped on over to 17 Meters, where there seemed to be some activity. The first station that I heard and worked was EC7CW from Seville, Spain. After I nabbed him, I tuned around the band and heard a huge pileup.
Lots of times when you hear a pileup, the station that is the quarry is very weak. Today that was not the case. The station that everyone was chasing was JW/LY2KW, and he was very loud. A quick look at the IARU prefix list told me that JW is Norway, but something didn’t seem quite right. Such a huge pileup for Norway?
Well, since the DX was loud, and I had time to kill, I figured, “Why not?” I figured out the split rather quickly, and this time, luck and the good ears of JW/LY2KW were on my side. After about a half dozen calls or so, the DX station came back to W2LJ.
I always feel great when a DX station comes back to me, but it’s even more special when I’m using the KX3 and Buddistick at lunchtime. And it’s even better when that combination helps me bust a pileup. So I went back to work a very happy camper, knowing that I got Spain and Norway in the log.
But as I was walking back in, I was wondering….. why the massive pileup? It’s not like Norway is the rarest of the rare DX, after all. So I decided a Google search was in order. Unbeknownst to me, JW is indeed issued to Norway, but for Svalbard. Holy cow, this was a brandy new DXCC entity via QRP for me! I am constantly amazed by the performance of the Buddistick on the top of my Jeep. A compromise antenna for sure, but a compromise that I can seem to live with.
72 de Larry W2LJ
QRP – When you care to send the very least!
I guess it is working!
My mag mount, I mean. After working on it on Sunday, I gave it the shakedown cruise yesterday and today at lunchtime. Unfortunately, the bands seemed to be in less than stellar condition – thanks Ol’ Sol! But yesterday netted me a contact with XE1XR, David in Mexico and KG9HV, John in Indiana.
Today, I heard even less on the bands. After perusing 15 and 17 Meters and not hearing much of anything, I decided to go to 20 Meters to see if I could hear any SOTA stations. Pfft! Nada in New Jersey. So then I made the decision to call CQ.
I was answered by Burke N0HYD, who hails from Wichita, KS. Turns out that he’s a reader of this blog and has started blogging himself. I have added his blog to the blogroll. His blog is entitled “N0HYD – QRP & Portable Exploits”. Sounds like Burke is a man after my own heart! Burke describes himself as a “QRP Addict”. How could I not add the blog to the blogroll when a guy describes himself like that? Anyway, it was a great but all too short QSO. I hope we have the chance to hook up again, soon. It was not only a 2X QRP QSO, but also a 2X KX3 QSO – thanks for the QSO, Burke, Oh, and by the way, your rig sounded superb!
I have also done a little bit of blogroll maintenance tonight. Any blogs that haven’t been updated within the last 12 months have been moved to the “Gone but not forgotten” area. That includes Chas, W5PG’s blog. Gosh, it’s just a little over a year now that Chas became a silent key. He was a good blogger friend, and even though he’s gone, I just can’t bring myself to delete his blog – so as long as it’s on the Web, the link will remain.
Just a reminder – this Sunday is the Skeeter hunt! Don’t wait until the last second to get your Skeeter number.
72 de Larry W2LJ
QRP – When you care to send the very least!
Yagi-Uda the III.
No, this is not the name of another royal baby… it’s about my third attempt to build a 2m antenna for my SOTA activations. In my earlier iterations I was unable to strike the balance between size/weight and usability.
What happened so far:
 My first attempt to build a Yagi-Uda antenna was based on a design by Paul/KD5IVP. It worked, but had some crucial flaws for my endeavors. It was a 3-element antenna made out of piano wire and a carbon fiber arrow as a boom. Very small and lightweight indeed but in high winds/gusts the elements were flapping like a seagull during take-off. It’s demise came on it’s second outing… the arrow broke in half while bushwhacking up a mountain and I lost some of the piano wires in the woods. To read more about it and to see it in action check out this post.
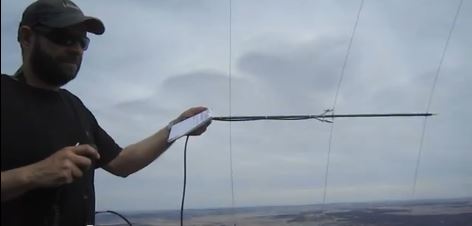
 I then moved on to a tape measure 3-element antenna based on a design by Joe/WB2HOL. It worked well and accompanied me on several activations – even a few 14ers (Summits higher than 14’000 ft / 4267m). My main gripe with this antenna is that it is delicate to transport as well. The steel tape gets kinked easily since the antenna is strapped to the outside of my backpack. It’s rather easy to replace the director and reflector, but soldering the coax to the steel radiator is another story. It turned out that this design is also vulnerable to high winds and your arms start to feel the weight after a few minutes without support. You can see the antenna in action in this video, around 3:30 into the clip.
The one?
I continued my research for a suitable 2m Yagi-Uda which would fit my requirements:
- Lightweight (but sturdy enough to withstand high winds)
- Easy and save to transport
- Easy to build (even for me)
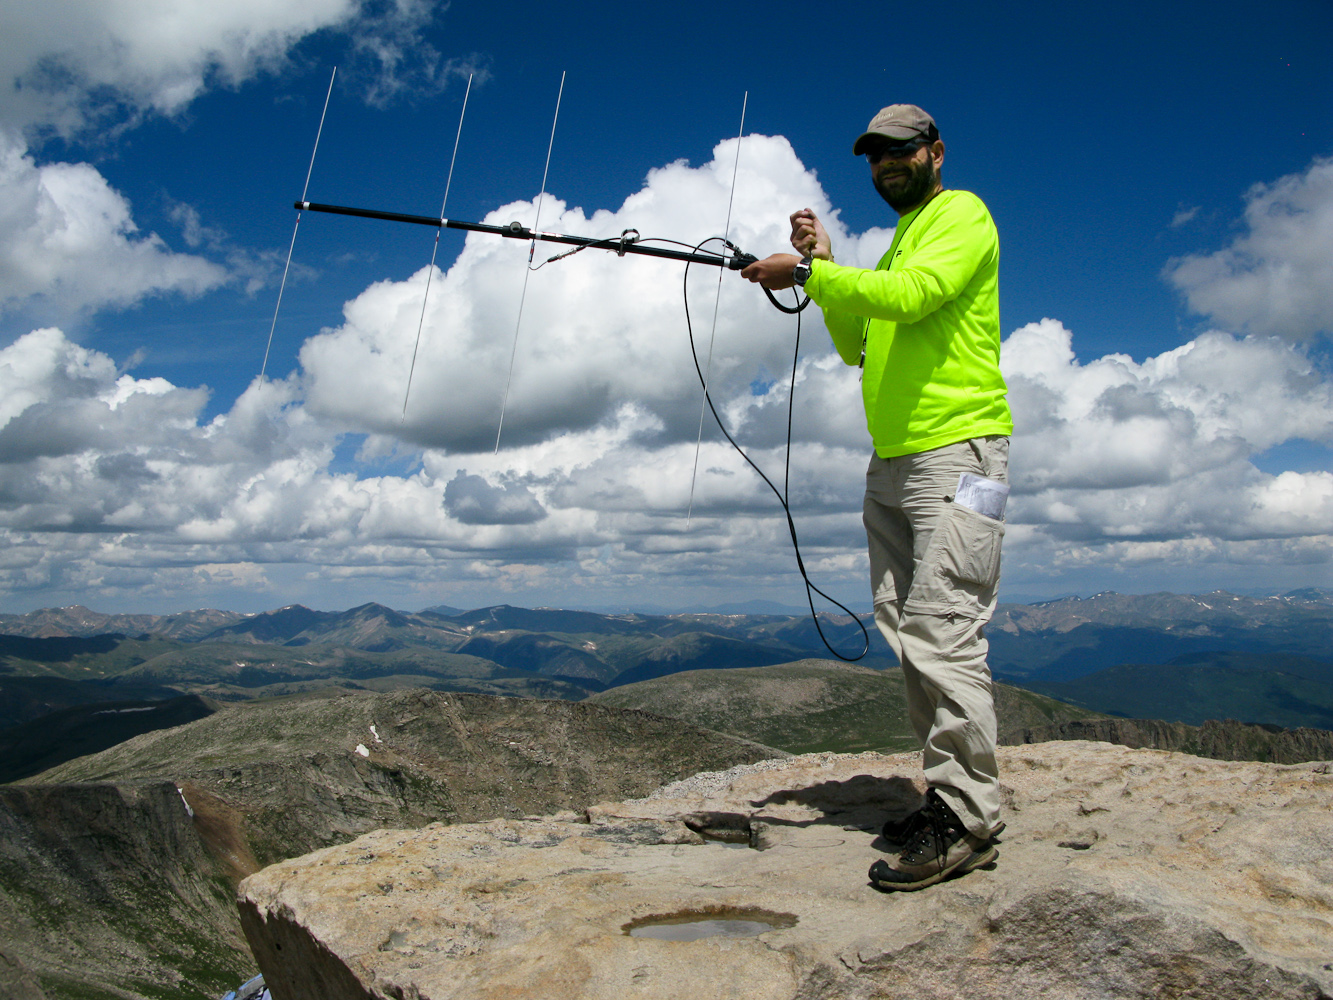
I eventually stumbled onto IZ2UUF’s Website – an Italian radio amateur who enjoys hiking and playing with radios as well. He designed an 4-element Yagi-Uda weighing only 80 grams (~2.9 ounces)!! All elements fit into the fiberglass boom (fishing rod) for easy transport with no matching network necessary. The description to build the antenna focused on the critical parts with excellent pictures to support the instructions.
Davide/IZ2UUF modeled the antenna with 4NEC2, a free antenna modeling software package. Since he shared his input file with me, I took the opportunity to download the free SW and to learn more about antenna modelling. After a few more e-mail exchanges with him I was convinced by his design and started to source all the parts.
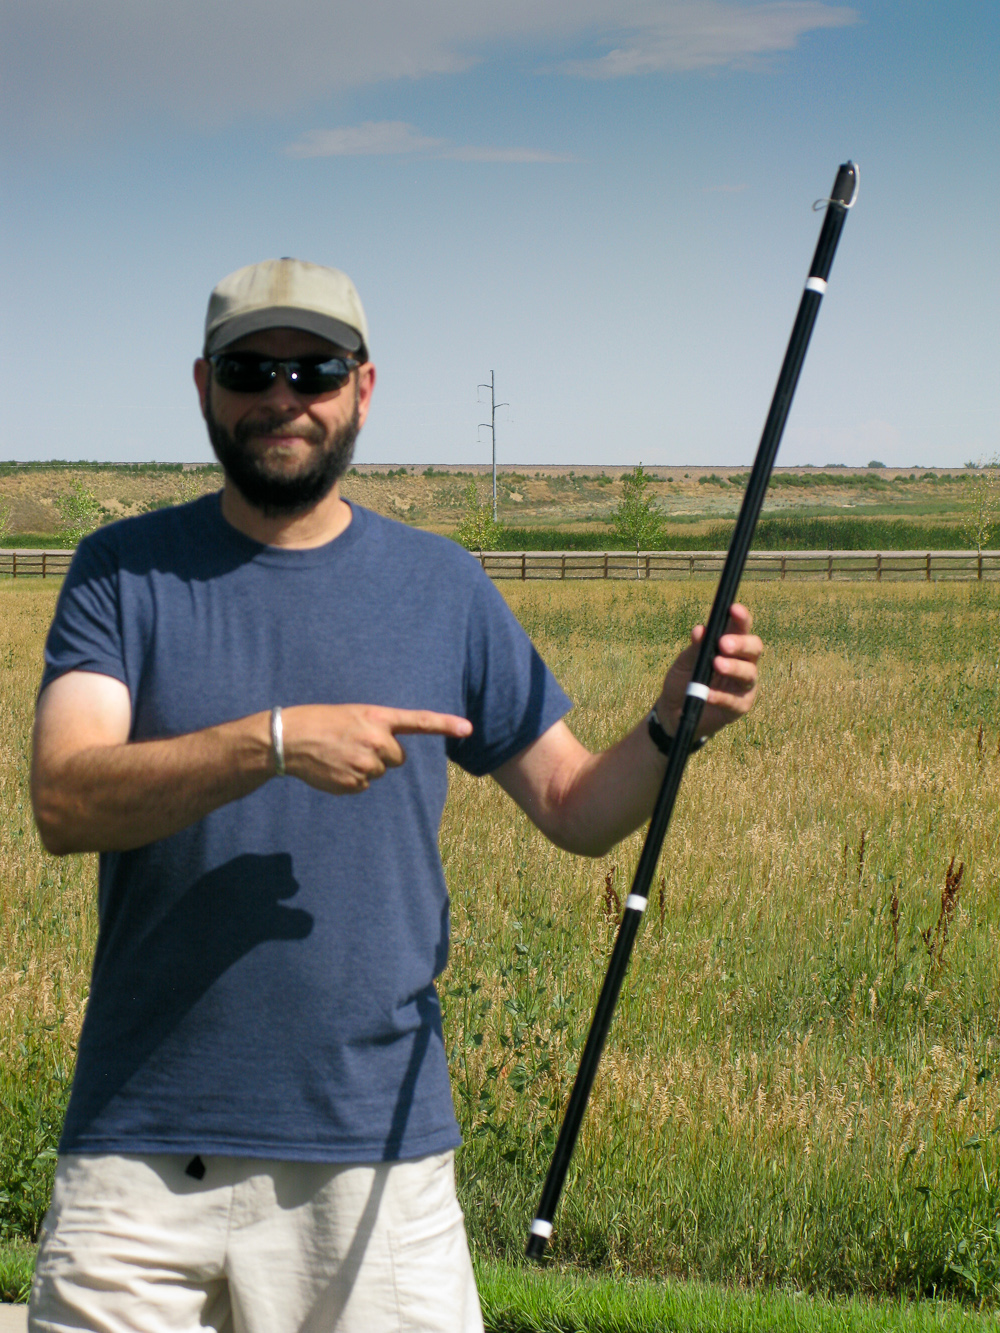 I did not have afiberglass fishing pole available and opted to use a plastic one I had lying around. Davide is using aluminum welding rods for his elements which I could not find at the desired length/diameter here in the US. I therefore ordered aluminum alloy 6061 rods instead (1/8″ x 6′ ) from a supplier in IL (for details see the resource section below). My build also differs in the connector (BNC instead SMA). All these changes resulted in a slightly heavier (194 g / 6.8 ounces) first version compared to Davide’s antenna. My boom alone is heavier than Davide’s complete antenna (96 g / 3.4 oz). However, I am planning to improve/reduce the weight in version two.
I had a chance to use the antenna over the week-end during the CO-14er event. All I can say so far is that it worked well and that the weight is not an issue at all… huge improvement to the tape-measure version.
For more pictures, a weight comparison and resources head over to my blog.
73, Matt/KØMOS
Emory Peak Activation
For those not familiar with the Summits on the Air (SOTA) program there are bonus points added for activating a summit either during the winter in cold climates or during the summer in hot climates. West Texas is definitely a hot climate. Emory Peak is a 10 point summit (maximum), but activating in the summer months is worth 3 extra bonus points. On the drive from Mt. Locke to the Big Bend area temperatures hovered between 99 F to 101 F. The temperatures would moderate a little at the Chisos basin where we were staying, although not a lot. The Chisos Mountain Lodge is around 5500 feet in elevation, but the high temperatures during this time of year are in the low 90's.
The Chisos Mountain range within Big Bend National Park is a beautiful place. Emory peak may be the only peak that is climbable, but even then, you must climb the last 35 feet using some, not so easy, rock climbing techniques. I would not recommend it if you aren't experienced.
The trail to the summit of Emory Peak is a very nice trail. It is well marked and maintained. The only issue is that the round trip is 9.4 miles and there is 2,500 feet of elevation gain. Given that distance the elevation gain is not particularly difficult, if you are accustomed to mountain hikes, but it is a long way.

 |
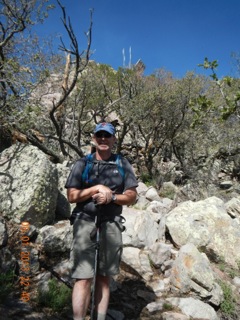
| Cris, my XYL, just below the summit |
 |
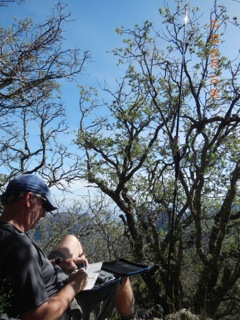
| AD5A just below the Summit VHF Antenna above are on the Summit |
 |
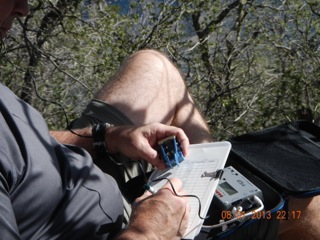
| Emory Peak Shack You can see the Buddi-stick if you look closely |
I guess it works – but not the best design!
I had a little more trouble when I went to the Jeep on Friday for my lunchtime QRP session. I just wasn’t hearing anything! I know the bands can get that way, but the past few days had been relatively decent. Like any other Ham Radio operator, my mind immediately went to “There’s something wrong with the radio!”
As I disconnected the coax from the KX3, I noticed that the radio’s BNC post turned a little bit as I removed the coax fitting. I knew that by itself wasn’t the problem, but I didn’t like the fact that it was a tad loose. I broke out the tools and did some field surgery on my KX3 right in the back of the Jeep! I felt like Hawkeye Pierce, BJ Hunnicut or Trapper John from MASH. I opened the KX3, removed the auto tuner board, and with a pair of needle nose pliers, I snugged up the nut that holds the BNC post against the inside housing of the radio. Then I put everything back together and turned the radio back on ….. still nothing.
I just recently replaced the PL259, so I twiddled that around, thinking that perhaps I didn’t do as good an installation as I had thought. Nope, no difference – that wasn’t the problem either. So even though I had taken the magmount assembly apart the previous night, I decided to look again there – a mistake on my part there? Once again, all was good there. But I did notice that as I twirled the cable around, I was getting signals to appear, disappear and then re-appear. A break in the coax cable!
So I brought the magmount back in the house once again. I decided that I was going to take it apart, cut back about 8 inches of coax and then put it all back together. In the process of taking everything apart again, I just happened to pull on the center conductor of the cable and a six inch piece came out with my fingers. It had indeed broken, back in the main part of the cable, and my plan to cut it back by a foot and reassemble turned out to be a good plan.
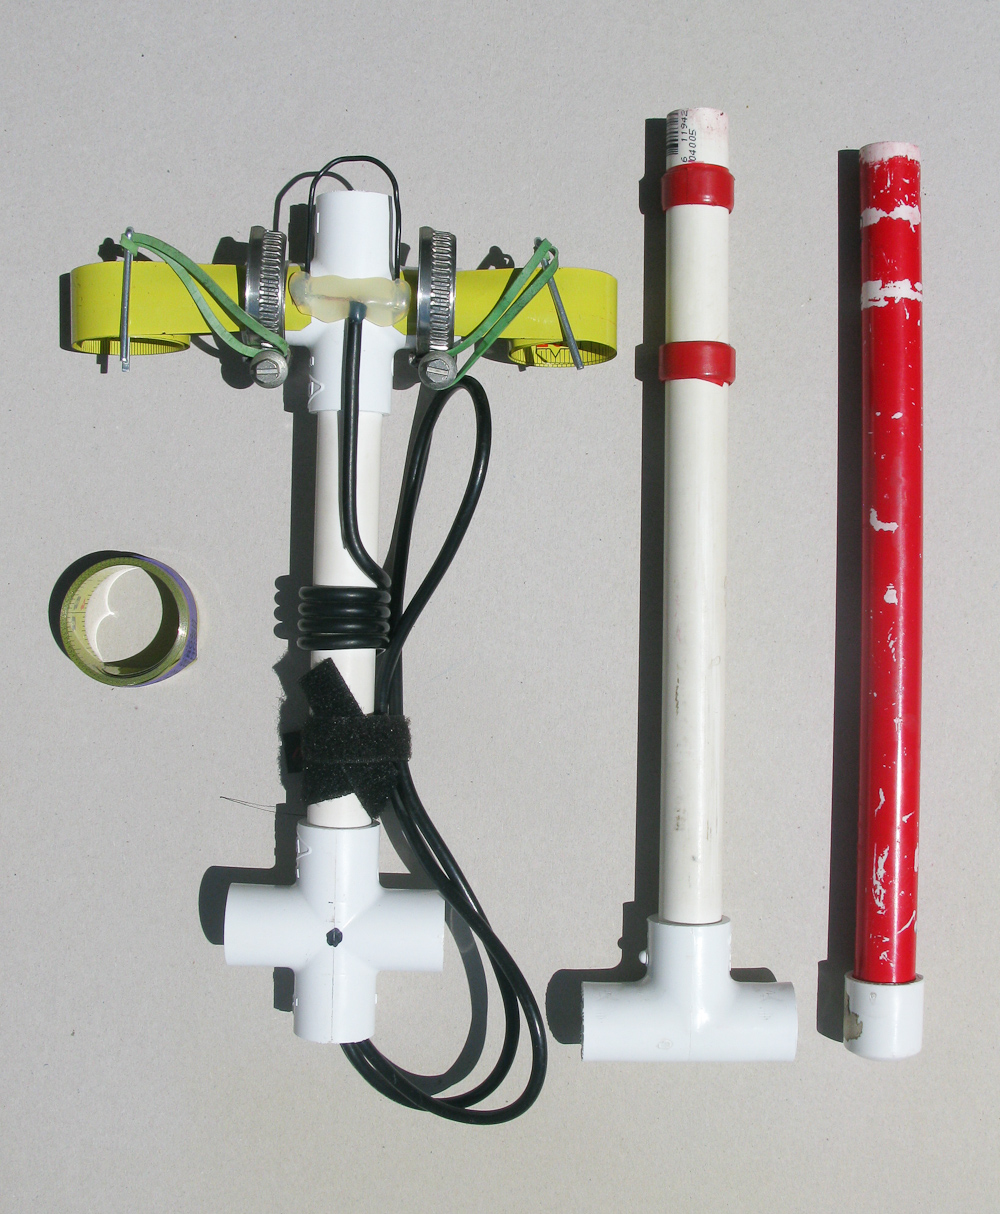
But I have to tell you, after working on this, I’m not really impressed with the design of this magmount. I hope you can figure out what I’m trying to describe. The coax goes into a plastic housing. This plastic housing is roughly the diameter of a quarter and is maybe a 1/4 inch thick. Each half has a hole. The shield of the coax (which has been pigtailed) goes through the bottom hole, while the center conductor (which is kind of flimsy) goes through the upper hole. There are channels or depressions on each side for the wire to sit.
The is the order in which it all goes back together – from the bottom working towards the top.
1) Through bolt
2) Plastic insulator, so that the through bolt does not touch the magmount body (ground).
3) Magmount body
4) Coax housing with the braid sandwiched down, between the coax housing and the magmount body.
5) Metal washer. The center conductor lays in a channel and is pointing up, to be sandwiched between the coax housing and the washer.
5) Threaded hex sleeve for the radiator.
Everything is held in place by the holding pressure created by screwing the through bolt into the threaded hex sleeve! The center conductor is NOT soldered or otherwise electrically connected to the metal washer underneath the threaded hex sleeve, as I had previously thought. And as I noted before, the braid is simply sandwiched between the plastic coax sleeve and the magmount body. I made sure all metal surfaces were clean and shiny and used plenty of Deoxit to help ensure good electrical contact (there really are no true connections!) as best possible.
It seems to me that it would have been better for the coax to be soldered or otherwise connected to the metal sleeve and the magmount body other than just using physical contact and screw pressure to hold everything together. But then I suppose that would have increased the cost of the product significantly.
In the near future,I think I am going to upgrade the quality of the coax, too.
72 de Larry W2LJ
QRP – When you care to send the very least!


