Archive for the ‘antenna’ Category
 Yagi-Uda the III.
No, this is not the name of another royal baby… it’s about my third attempt to build a 2m antenna for my SOTA activations. In my earlier iterations I was unable to strike the balance between size/weight and usability.
What happened so far:
 My first attempt to build a Yagi-Uda antenna was based on a design by Paul/KD5IVP. It worked, but had some crucial flaws for my endeavors. It was a 3-element antenna made out of piano wire and a carbon fiber arrow as a boom. Very small and lightweight indeed but in high winds/gusts the elements were flapping like a seagull during take-off. It’s demise came on it’s second outing… the arrow broke in half while bushwhacking up a mountain and I lost some of the piano wires in the woods. To read more about it and to see it in action check out this post.
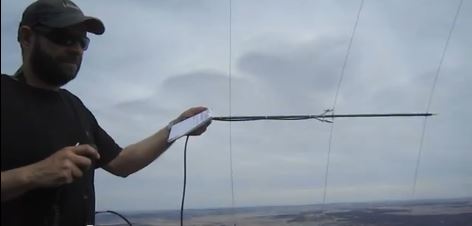
 I then moved on to a tape measure 3-element antenna based on a design by Joe/WB2HOL. It worked well and accompanied me on several activations – even a few 14ers (Summits higher than 14’000 ft / 4267m). My main gripe with this antenna is that it is delicate to transport as well. The steel tape gets kinked easily since the antenna is strapped to the outside of my backpack. It’s rather easy to replace the director and reflector, but soldering the coax to the steel radiator is another story. It turned out that this design is also vulnerable to high winds and your arms start to feel the weight after a few minutes without support. You can see the antenna in action in this video, around 3:30 into the clip.
The one?
I continued my research for a suitable 2m Yagi-Uda which would fit my requirements:
- Lightweight (but sturdy enough to withstand high winds)
- Easy and save to transport
- Easy to build (even for me)
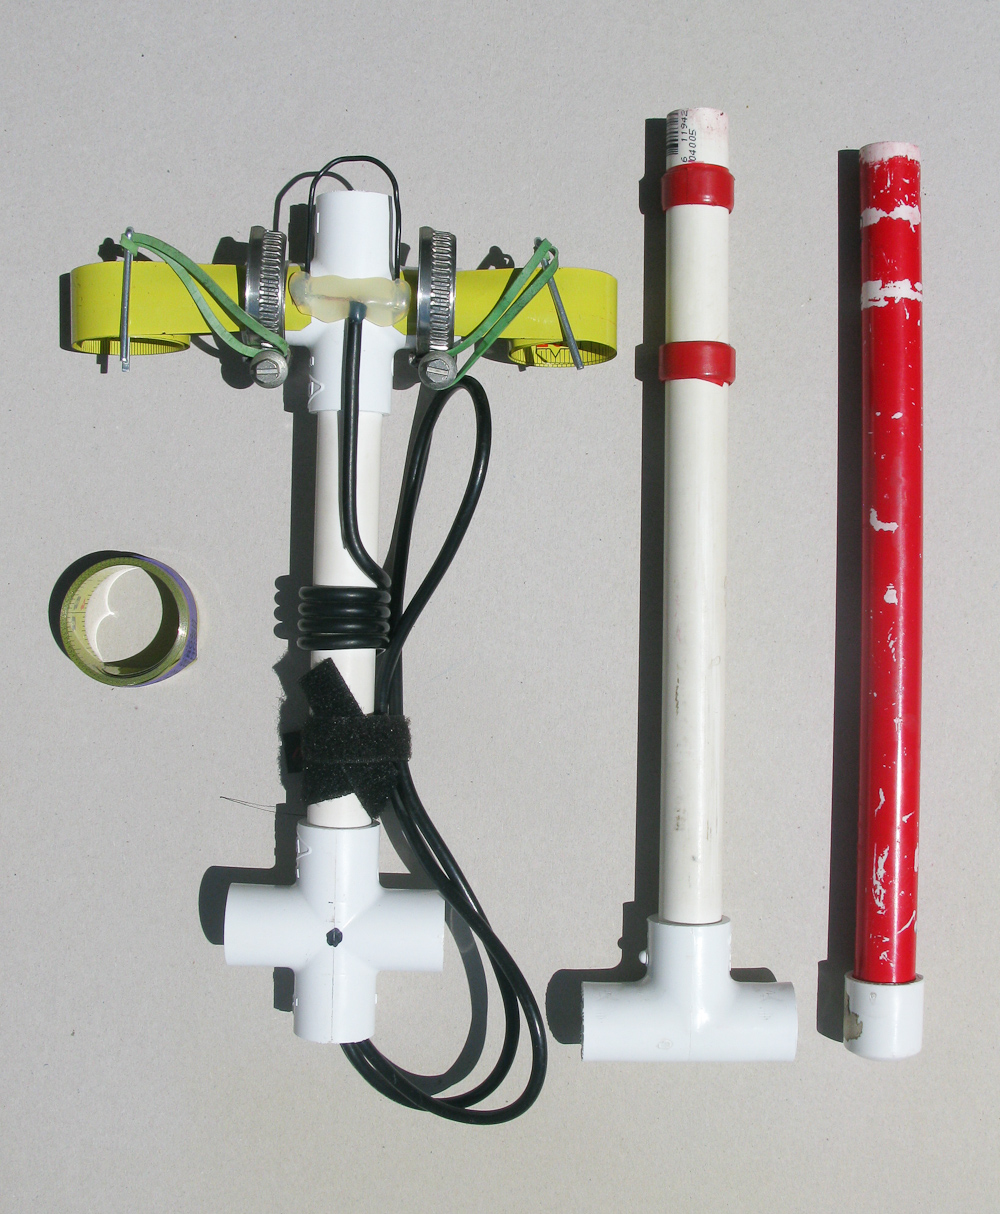
I eventually stumbled onto IZ2UUF’s Website – an Italian radio amateur who enjoys hiking and playing with radios as well. He designed an 4-element Yagi-Uda weighing only 80 grams (~2.9 ounces)!! All elements fit into the fiberglass boom (fishing rod) for easy transport with no matching network necessary. The description to build the antenna focused on the critical parts with excellent pictures to support the instructions.
Davide/IZ2UUF modeled the antenna with 4NEC2, a free antenna modeling software package. Since he shared his input file with me, I took the opportunity to download the free SW and to learn more about antenna modelling. After a few more e-mail exchanges with him I was convinced by his design and started to source all the parts.
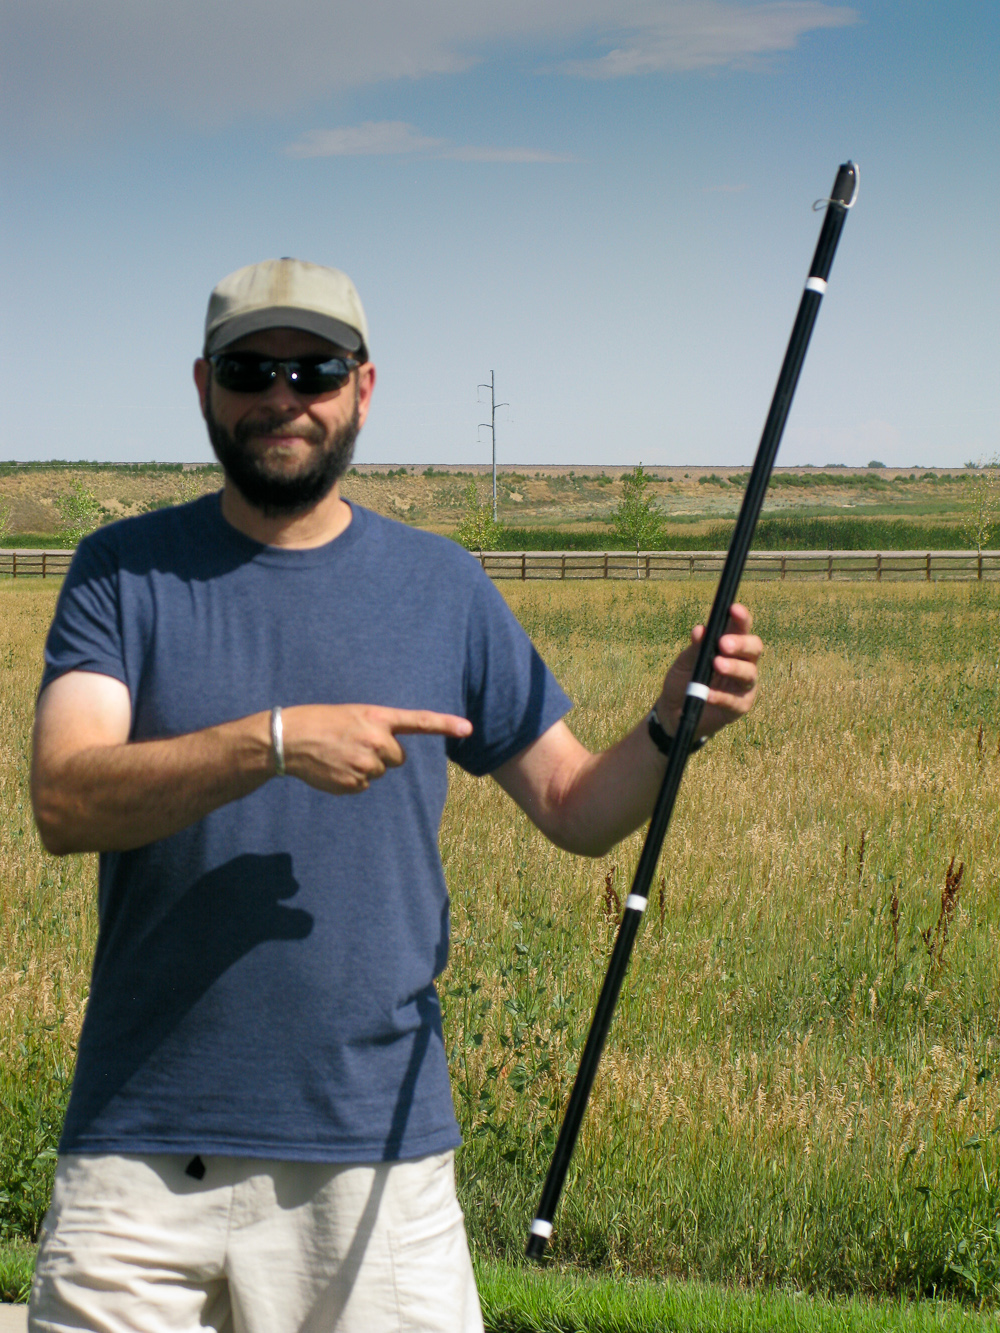 I did not have afiberglass fishing pole available and opted to use a plastic one I had lying around. Davide is using aluminum welding rods for his elements which I could not find at the desired length/diameter here in the US. I therefore ordered aluminum alloy 6061 rods instead (1/8″ x 6′ ) from a supplier in IL (for details see the resource section below). My build also differs in the connector (BNC instead SMA). All these changes resulted in a slightly heavier (194 g / 6.8 ounces) first version compared to Davide’s antenna. My boom alone is heavier than Davide’s complete antenna (96 g / 3.4 oz). However, I am planning to improve/reduce the weight in version two.
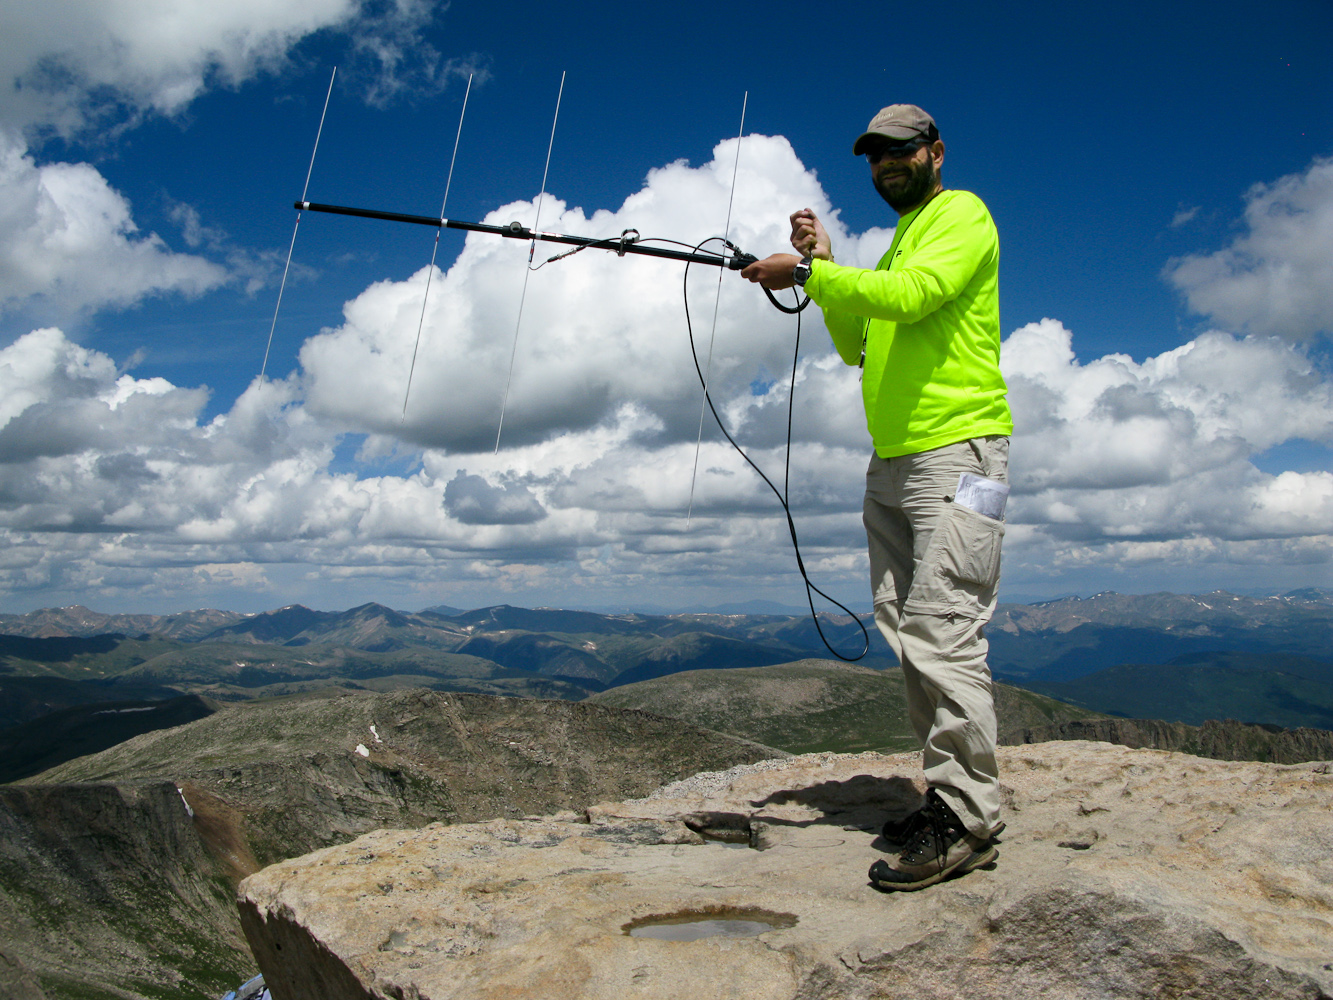
I had a chance to use the antenna over the week-end during the CO-14er event. All I can say so far is that it worked well and that the weight is not an issue at all… huge improvement to the tape-measure version.
For more pictures, a weight comparison and resources head over to my blog.
73, Matt/KØMOS
Six Meter Summer

My Buddipole Antenna, Configured as a 2 Element Yagi for 6 Meters
The ribbons are to keep me from poking my eyes out on the end of the whips.
Here, I’m trying the antenna out in my driveway before I take it to the beach.

Kx3 QRP Radio
Six Meter Summer!
 This pavilion is my favorite operating spot at Hagen’s Cove.
It overlooks Dead Man’s Bay, on the Gulf of Mexico in Perry Florida.
I’m going to spend the summer playing around with my Kx3 on 6 meters. The antenna here is a Buddipole, configured as a 2 element Yagi. Its easy to assemble in the field, so I’ll take it to the beach (Hagen’s Cove) and try to make some contacts with it. I’ve been a ham for 22 years but have never done much with 6 meters. This will be a 6 meter summer for me. Join me, I’d love to have a ham radio buddy to share the adventure with.
de AA1IK, 73
Multi-Band 4 Foot Magnetic Loop with Gamma Match

4 Foot Diameter Magnetic Loop In Operation
As my mag loop projects progress, I’m learning a lot about building them and using them. This antenna works on 17, 20, and 30 meters, with the best bandwidth on 20 meters. The bandwidth on 17 and 30 is quite small but usable. There is a 20 KHz bandwidth on 20 meters. I used a vacuum capacitor to build this particular loop for 100 watt operation. The air capacitors are good for QRP but will arc over using much power over QRP levels.

4 Foot Magnetic Loop Antenna with Gamma Match
This photo was taken before I trimmed the Gamma Match.
I didn’t know how long the Gamma Match should be, so I made it long enough to allow for trimming after the match to 50 Ohms was made.
This is the first mag loop that I made with a Gamma match. I like this match better than the usual Faraday feed loop that is featured in my previous mag loop antennas. Matching is easy and building the Gamma match is not difficult. I’m planning to build other smaller loops that will also feature the Gamma match. The smaller loops will target 10, 12, and 15 meters. Loop size determines which band its best suited too. Although it is possible to get more bands on one loop, the bandwidth is small and the tuning ‘dip’ is very sharp. I found it better to limit the number of bands in favor of wider bandwidth and antenna efficiency.
Please look up my previous posts for more details on parts and plans.

Here is a good close up of the clamp.
(Before Trimming)
Gamma Match After Trimming. This enables a 50 Ohm Match for all three bands.

Gamma Match on the left, PL 259 in the center and, Tuning Aid Stick (PVC) pipe , on the right.
The vacuum capacitor is ‘tuned’ by twisting the PVC pipe that is attacked to it with a cotter pin.
Tuning the cap to the ‘loudest noise’ on the air will put you in the ball park for operating.
You can also use an antenna analyzer if you want to know the exact SWR, and RR of the antenna.
Tuning with a radio attached is fast and easy.

Making the clamp for the Gamma Match

Soldering The Back Plate and PL 259

Removing The Oxidation Before Soldering
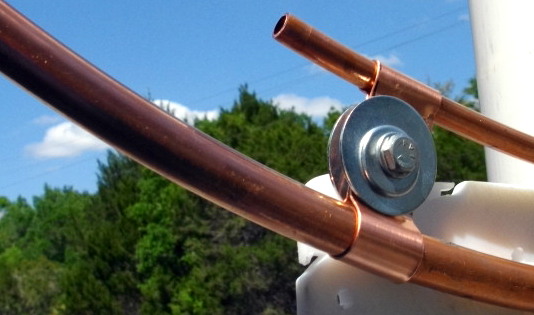
The main loop is 5/8 inch, soft copper tubing.

Close Up of PL 259 to Gamma Match Joint
The center of the PL 259 had a #10 solid copper wire inserted and soldered in place.
The Gamma match is 3/8 inch soft copper tubing.
This part of the job was done with a soldering iron, the rest was done with a plumbers torch.

Handy ‘third hand’. A clamp to hold the Gamma match in place while I soldered it.
My town was going to hire a ‘Mad Scientist’ but it couldn’t afford one, so they settled for a ham radio operator instead. Me!
73 de AA1IK
Ernest Gregoire
5 Foot Diameter Magnetic Loop Antenna

A bonus picture here. The one on the left is a 3 foot in diameter loop.
Note: The little box at the bottom of the small one contains an air variable capacitor for tuning.
Compare it to the 5 foot in diameter loop on the right. ‘

5 Foot Mag Loop
I made a QRP CW contact with this mag loop from right where it stands in my drive way.
 Small Loop Feeds the Big One

Home Made Capacitor Clamps.
Home made cap clamps. The clamps are soldered to keep the contact resistance low.
This is very important with High Q antennas.

5 to 150 Pfd capacitor
Russian capacitor. It is available at E-Bay for about $150

Easy to Make PVC Pipe Stand
Where would hams be without PVC pipe!
This stand is made from 2 1/2 inch sewer pipe.
This is a fun antenna to build and use. I made my first contact with W9GY this afternoon on 20 meters. I used 5 watts, he used 10. RST out was 459, RST in was 579. The antenna was in my drive way in front of the garage that you see here. And Jeff was in Indiana. What a hoot! Making contacts on a home made antenna is great fun. The parts are readily available and with a little planning and shop time you can have a Magnetic Loop antenna to play with.
This is my second Mag Loop. The first one is 3 feet in diameter and covers from 20 through 15 meters. I’m planning another for 17 meters through 10 meters. Mag Loop calculator is available at http://aa5tb.com/index.html
Yahoo has Mag Loop groups that are very helpful to get you started. http://groups.yahoo.com/group/MagLoop/
and http://groups.yahoo.com/group/MagneticLoopAntenna/
Copper foil or strapping is available at http://stormgrounding.electrical-insulators-and-copper-ground-bars.com/copper-foil-2.html
If you’d like more information about Mag Loops, please feel free to contact me. [email protected]
73 De AA1IK
Ernest Gregoire
News from the shack
The end of this month see’s the end of work based madness so I’m getting a few bits and bobs sorted out.
With the demise of the trusty (read rusty…or at least corroded in the special way that aluminium does) vertical I have order a hardware kit for a Cobwebb to go outside. it may get here by the weekend. I’ve been given a rather sorry looking mast that will polish up into a rather staely looking mast once I’ve spent some time on it and a few plastic bits and pieces from Seeedstudio for some of my bits and bobs that need tidying up.
Hopefully this Saturday it won’t be freezing cold or raining, although I’m told the time I’ll be running my part of our Red Nose Day 24 hour relay it will be chucking it down, so I can assess what needs to be done to get myself back on the air on HF and get my 50Mhz yagi up and ready for the season. Looking forward to some time on the rig Excellent!
Show Notes #097
Introduction:
- Welcome to another episode of Linux in the Hamshackedness, where the Chocolate Shake Fairy visits Richard.
Announcements:
- LHS now accepts micropayment donations via Flattr. It’s been successful for the Linux Outlaws guys, so we’re giving it a try here.
- We now have a countdown timer on the Web site that shows the time remaining until the next live recording. Of course, now that we’re recording on Wednesdays, we’ve decided to move back to Tuesdays. That will happen in January. Keep an eye on the web site for the dates. (Tuesday, January 8, 2013, as of this moment.)
- We also have a Google Community for Linux in the Ham Shack. It’s a great method for leaving feedback, show suggestions, questions, hate mail or anything else.
- The Dayton Hamvention 2013 will be coming up soon, so we’ve added the donation thermometer to the website. Please make a donation and help send LHS to Dayton again in 2013.
- Sign up for the LHS mailing list, too.
- Gnorman has a bio on the LHS About Us page.
Topics:
- Raspberry Pi in the Ham Shack
- Russ has been working on getting an Echolink node running on his Raspberry Pi.
- He’s chosen Raspbian as the operating system, which is based on Debian Wheezy.
- Installation consists of downloading the iso, using dd to copy it to a secure digital card (SD flash memory card), booting the Raspberry Pi with the SD card, and following the prompts to install.
- VK2MEV has posted instructions for configuring a Raspberry Pi as an Echolink node.
- So far, Russ has Raspbian installed, as well as svxlink and qtel, but has not yet connected it to the usb sound card or attached it to his Rascal GLX interface to control the radio. Another option would be to use the Pi’s GPIO bus to control the radio instead of a digital mode interface.
- VK2MEV also has a page describing WSPR on a Raspberry Pi. (Another page is VK2MEV’s blog on WSPRnet.)
- Ted, WA0EIR, says he thinks some folks have his PSK31LX program running on a Raspberry Pi.
- Russ mentions that there is a Slackware build for the Raspberry Pi.
Feedback:
- Cory, KD0QEA, asks if there are any “hangout” radio frequencies for LHS hosts and listeners. Well, Cory, there are none due to lack of time for the hosts to get on the radio. However, perhaps our listeners would like to establish an LHS net. Email your suggestions for bands, frequencies and times and we’ll announce them on the podcast. When Russ gets his Echolink node/Raspberry Pi running, he’ll be there more often. The node number will be 54711 (LHS11 on the telephone pad).
- Doug, N6LMX, left a voice mail about the Raspberry Pi. He has one and wonders which ham radio apps can be used on the Pi. He’s also using Raspbian as the operating system. Doug will be attempting to create a media center with his, as well as ham radio applications. Russ suggests running the Pi headless and using ssh from a smartphone or tablet to access it. That would avoid having to carry a monitor and keyboard around with the Pi. It’s likely that most of the popular Linux ham applications, such as fldigi, would work fine with the Pi, though you may need to compile them yourself. As for the media server idea, the Pi may not be quite powerful enough. Raspbmc is based on XBMC, and might be the best option. Ted, WA0EIR, has several Linux ham radio applications that should work quite well on the Pi. Richard also wonders if there are folks running APRS on the Pi, and there’s at least one. Thanks for the voice mail, Doug. We appreciate it.
- Dave, M0DCM, has been catching up on the show, and responds to episodes 95 and 96. He uses 75-ohm coax as a feedline with a 1:1 balun to horizontal and vertical dipoles, and is able to bypass his tuner on 21 and 24MHz. He goes on to describe his Linux and radio activities. Thanks, Dave.
- Thanks to everyone who sent happy birthday messages to Russ.
- Gorkon, aka Joel, says there may have been a problem with the ogg version of episode 96. Russ will take care of it if he finds the problem.
- Mike, from Sugarland, TX, has been trying to use N3FJP’s Amateur Contact Log (ACLog) program for logging, presumably under WINE, but it crashes and he wonders if anyone else has had any experience with this. If any of our listeners have tried ACLog under Linux, let us know, or respond on the Google+ LHS community. Russ suggests forcing WINE into 16-bit compatibility mode.
Contact Info:
- Contact Richard at [email protected], Russ at [email protected], or both at the same time at [email protected].
- Listen to the live stream every other Tuesday at 8:00pm Central time. Check the LHS web site for dates.
- Leave us a voice mail at 1-909-LHS-SHOW (1-909-547-7469), or record an introduction to the podcast.
- Sign up for the LHS mailing list.
- Sign up for the MAGNetcon mailing list.
- LHS merchandise is available at the Merch link on Web site. Check out the Badgerwear or buy one of the other LHS-branded items at PrintFection.com/lhs or Cafe Press. Thanks!
- Thanks to Dave from Gamma Leonis for the theme music.
Music:
- None this episode.
Show Notes #091
Introduction:
- It’s Second Spring in Texas, and Autumn is beginning in Arkansas, so sit back and enjoy another exciting episode of LHS.
Announcements:
- Paid subscribers to LHS may have noticed the web site certificate had expired. That problem is fixed.
- Welcome new subscribers Michael S., Michael C., and Bill A. Thank you!
- Sign-up for the LHS mailing list.
- Our LHS Ambassador to Ohio LinuxFest will be Scott, N8VSI. Thanks, Scott, and we look forward to hearing all about it.
- Please donate to the podcast and click on the affiliate links on the website.
Topics:
- HF Antennas, Horizontal vs. Vertical
- Tonight, our hosts discuss the pros and cons of horizontally and vertically polarized HF antennas.
- One thought is that once the RF radiation hits the various layers in the ionosphere, the polarization doesn’t really matter much as it gets reflected to and fro.
- Richard offers the practical reason for preferring horizontal antennas for HF: it’s easier to build and erect the long antennas necessary for these frequencies. However, for chasing DX, those long-distance contacts, many hams prefer vertical antennas as they tend to have lower angles of radiation.
- Also mentioned: GAP antennas and the G5RV antenna.
- Wire horizontal dipoles are inexpensive and easy to construct. Verticals are a good choice when space is limited and can have a lower take-off angle, providing a good ground radial system is installed beneath them.
- Horizontal antennas can be more directional. A dipole wire running north and south will have a better propagation east and west. A vertical is omnidirectional, radiating equally in all directions. To complicate matters, a horizontal antenna lower to the ground will radiate at higher angles than the same antenna that is higher. This can be useful for communicating with stations that are close to you.
- A new section of the podcast: Russ’ Rant!
- Russ has a Yaesu FT-7900R, a dual-band UHV/VHF mobile radio. It has a removable front panel, allowing the main part of the radio to be hidden and the display can be easily mounted on the dash. However, the speaker is on the body of the radio, so you can’t hear it if it’s hidden under the seat or in the trunk! Russ thinks the head unit should also contain a speaker, perhaps a very small one like in an mp3 player. Or put the speaker in the microphone.
- Returning to antennas, Richard recommends that KD8SZG (in the chat room), should try building his own wire antennas for HF. Any of the antenna books written by Doug DeMaw, W1FB, are good resources. His Antenna Notebook is one. (I also like the various ARRL antenna books, like the Simple and Fun Antennas for Hams. -Ed.)
Contact Info:
- Contact Richard at [email protected], Russ at [email protected], or both at the same time at [email protected].
- Listen to the live stream every other Tuesday at 8:00pm Central time. Check the LHS web site for dates.
- Leave us a voice mail at 1-909-LHS-SHOW (1-909-547-7469), or record an introduction to the podcast.
- Sign up for the LHS mailing list.
- Sign up for the MAGNetcon mailing list.
- LHS merchandise is available at the Merch link on Web site. Check out the Badgerwear or buy one of the other LHS-branded items at PrintFection.com/lhs or Cafe Press. Thanks!
- Thanks to Dave from Gamma Leonis for the theme music.
Music:
- “A Little Time” by Not From Georgia, from their album Love & Umbrella, courtesy of Jamendo.
- “Metal Heart” by Zamza, from their album Songs for Jukebox, courtesy of Jamendo.


