Author Archive
 Hunting For NDBs In CLE187
 |
| VR-266 Vancouver Int'l (50W) - heard as far east as NC |
These listening events serve several purposes. They:
- determine, worldwide, which beacons are actually in service and on-the-air so the online database can be kept up-to-date
- determine, worldwide, which beacons are out-of-service or have gone silent since the last CLE covering this range
- will indicate the state of propagation conditions at the various participant locations
- will give you an indication of how well your LF/MF receiving system is working
- give participants a fun yet challenging activity to keep their listening skills honed
Days: Friday 24th October - Monday 27th October
Times: Midday on Friday to Midday on Monday, your LOCAL time
QRG: Normal LF/MF frequencies (190 - 1740 kHz)
NDBs: Normal DX and 'HOME' ones (not DGPS, Navtex or Amateur)
DX:
Please try to log NDBs that are over 2,000 km / 1,250 miles from you.
If you have a wall map in your shack, you could draw a circle on it.
It will be accurate if it is a great circle map centred on your location.
(There are other easy and very good ways to find which NDBs qualify
for you - I will describe them in the Final Details email)
HOME:
Please also try to log NDBs in YOUR OWN radio country. For listeners
in AUS, CAN and USA, that means your State or Province.
It will be trivial for a few of us in tiny radio countries, very challenging
for a listener in, e.g., RUS (Eu). Most of us should have a fair list to
try for.
If we also mention any of our home regulars NOT heard, it will help
others to know about NDBs that are not currently active.
If you report on both parts, DX and HOME, I suggest you put them in
separate parts of your log. As usual, any UNIDs that you come across
will also be of interest - in a third part of your log.
Final details can be found at the NDB List website, and worldwide results, for every participant, will be posted here a few days after the event.
The very active Yahoo ndblist Group is a great place to learn more about the 'Art of NDB DXing' or to meet other listeners in your region. There is a lot of good information available there and new members are always very welcome.
If you are contemplating getting started on 630m, listening for NDBs is an excellent way to test out your receive capabilities as there are several NDBs located near this part of the spectrum.
You need not be an ndblist member to participate in the CLEs and all reports, no matter how small, are of much value to the organizers.
Reports may be sent to the ndblist or e-mailed to either myself or CLE co- ordinator, Brian Keyte (G3SIA). It was very exciting to see two new reporters to last month's event after reading about the CLE right here. Hopefully there will be more first-time reporters for upcoming CLE187.
Please...don't be shy and do give the CLE a try....then let us know what NDB's can be heard from your location! Your report can then be added to the worldwide database.
’29 Style Transmitters…What To Build? – Part 1
 Most hams in the late 20's and early 30's seemed to be using simple transmitters...one or two tubes at the most. No doubt the poor economics of the time made it difficult to build anything really elaborate but it didn't seem to stop them from getting on the air with whatever they could put together.
New rules for amateur radio signal stability came into effect in 1929, making that a pivotal year for amateurs, resulting in several new ideas for 'modern' transmitters hitting the publications of the day.
All of the simpler, one-tube transmitters, were self-excited oscillators capable of pretty good sounding signals when operated correctly and when the wind wasn't blowing the antenna around. Being directly-coupled to the antenna meant that any variations in antenna impedance caused by antenna wire movements, would result in the note rising or falling in frequency by several hertz with the resultant 'musical-sounding' note. You can usually hear lots of these during the windy winter BK Party!
From what I can determine, the most popular first-time transmitter was the one-tube TNT (Tuned-Not-Tuned) style as it could usually be built with parts stripped from an old broadcast receiver.

With a low parts-count, it was easy on the pocketbook. The grid coil was broadly resonant near the plate circuits frequency, resulting in enough feedback to sustain oscillation. The grid coil really needs to be optimised (a simple procedure) for peak efficiency and note quality. You can listen to the note quality on my own TNT while transmitting on 40m.
The Hartley oscillator is just as easy on the pocketbook as the TNT, and in the opinion of most, capable of an even better-sounding note once properly optimized.
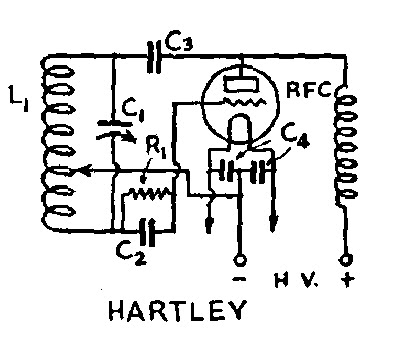
This transmitter is optimized for best note-quality and plate efficiency by finding the correct tap point on L1. Hear my own Hartley's tone while transmitting on 160m.
The third common transmitter of the early 30's was the TPTG (Tuned-Plate-Tuned-Grid).

The TPTG style is a step-up from the TNT and similar in design. Although the added expense of a second variable capacitor made it less popular than the previous two styles, optimizing performance was somewhat easier since the grid circuit could be more readily adjusted for the oscillator's 'sweet-spot' without having to add or remove turns on the grid coil.
All of the triodes mentioned in my previous blog will work well in the above circuits. Keying is normally accomplished as shown below, by connecting the balanced filament resistor on the directly-heated cathode to ground.

It is important to know that construction need not be fancy to get on-the-air for the BK and there is no reason why modern components cannot be used, along with the era-appropriate tube. If you're still undecided, I'll give you some building details to consider next.
Today’s Blog
I'm presently on the high seas...well not too high...off the coast of Oregon and using the ship Internet system...if the video links in today's blog do not show up, because of limited bandwidth uploads, they may be found on a YouTube search for W0VLZ and for N2OUV.....hopefully they show up and this won't be required!
Building …. ’29 – Style

Initially this might seem a difficult task, and that was my first reaction when first learning of the vintage operating event. Once I had learned more about these types of transmitters and actually listened to the BK action, I knew that it was something that I really wanted to do. After seeing several inspiring videos from Neil (WØVLZ) and Joe (N2OUV), demonstrating their homebuilt '29 TNT transmitters, I knew it was something that I really had to do! Perhaps the videos will grab you as well:
One of the first things that might seem impossible to obtain would be a suitable tube that was available in 1929. Most of the tubes used in transmitters back then were designed for receivers, usually audio tubes that were pressed into RF oscillator or amplifier service. In the dirty-thirties, larger RF tubes were expensive and beyond the reach of most amateurs unless they had deep-pockets.
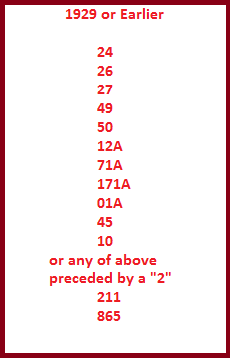
Tubes commonly found in BK transmitters are the type 10, 210, 45, 245, 27 and the 227. All of these types are still available today with some being more costly than others.
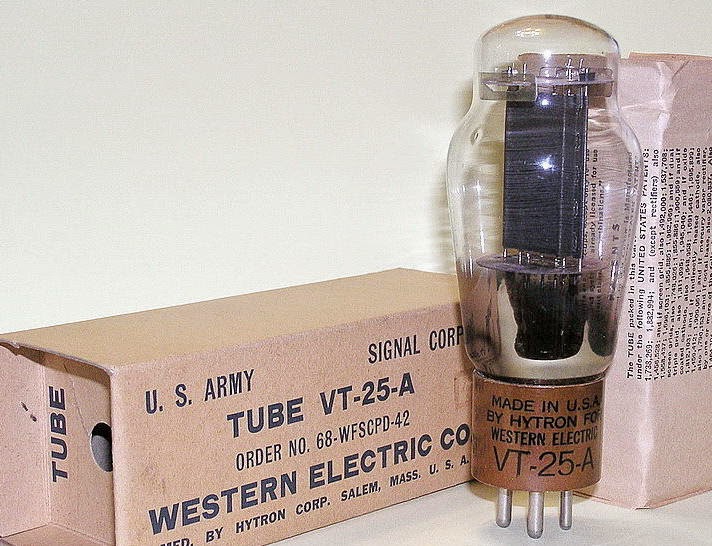 The most common tube is the type 10 or 210 which is also available in a military format, still NIB, as the VT-25. This is the same tube used in the WØVLZ transmitter.
This tube can easily handle the 10W power requirements imposed by the BK and then some.
Typical prices range from $50 and up.
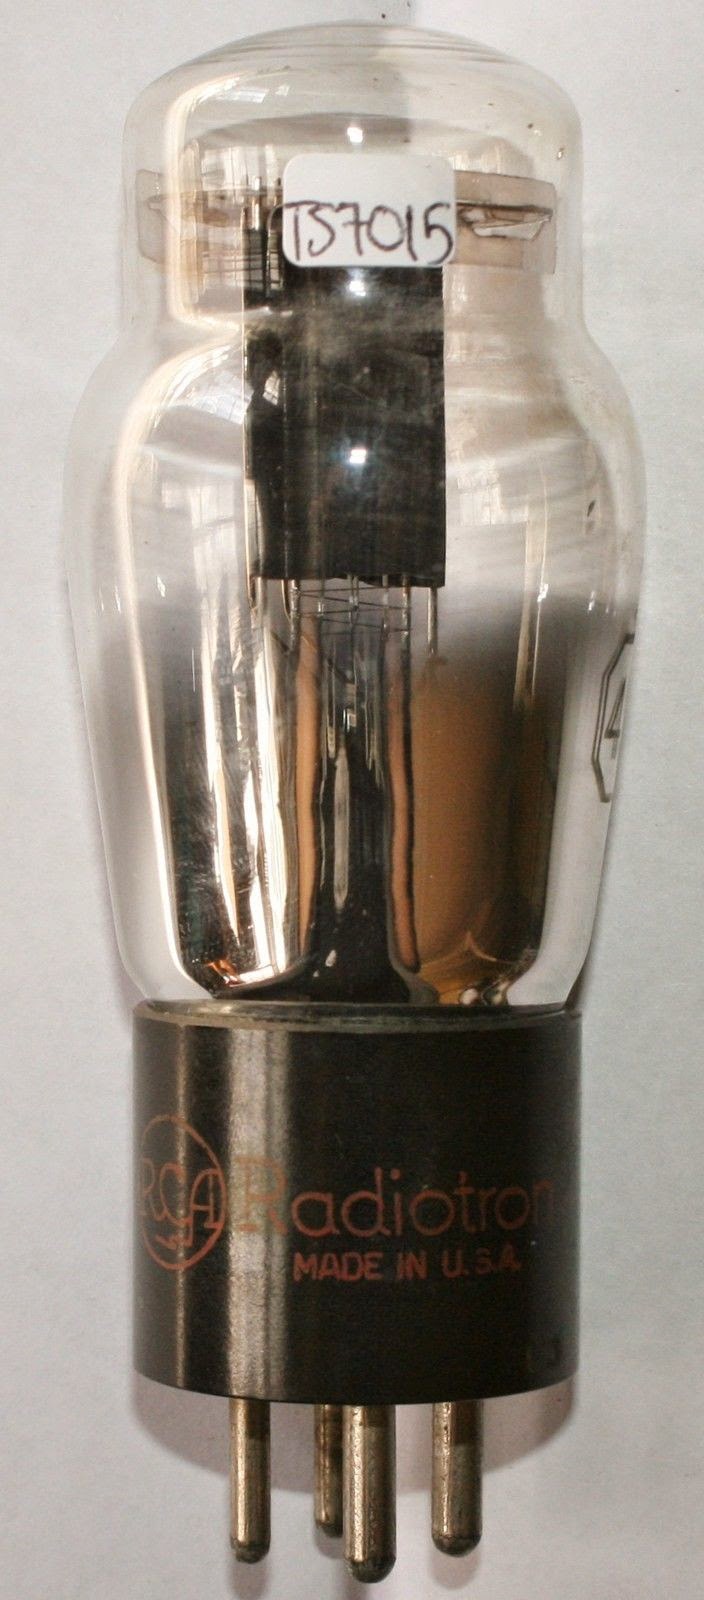
The next most popular is the 45 or 245, which is pretty well maxed-out at around 5-7 watts. The cost of a 45 is about half that of a VT-25.
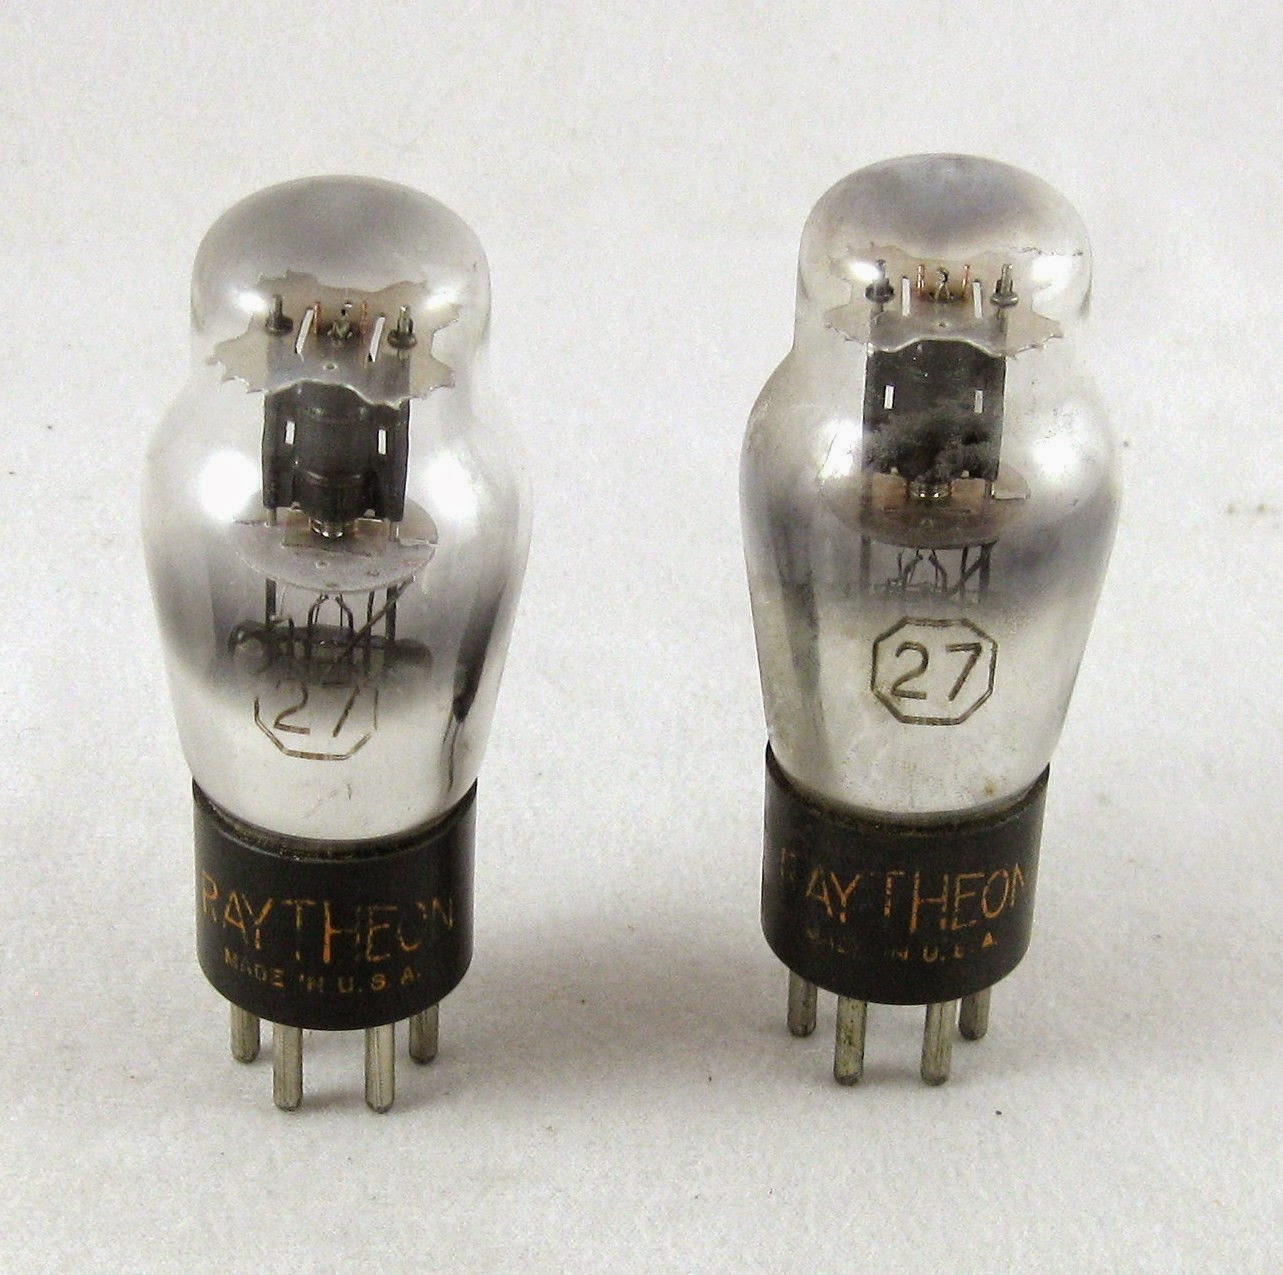
The widely available and inexpensive 27 / 227 will produce 2-3 watts of output...more than enough to work across the continent under normal conditions. The low cost (around $5) makes these particularly attractive for the first-time builder as a transmitter using a pair of these (or more) in parallel is an easy way to get started.
Here is a list of popular tubes that could be used for BK-eligible '29-style transmitters. There are probably more but these are the ones seen most often:
Suitable tubes are always available on e-Bay and from dedicated online tube-sellers. A quick Google-search will turn up several sellers, with prices and condition. Of course, one of the first places to look should be any of your ham friends with deep junk-boxes, especially those that have been building or amassing parts for many years. Check out the next ham fleamarket...especially those dusty old boxes under the seller's table. And...there are probably several hundreds of basements still filled with suitable old parts, just waiting to be liberated....seeking them out is all part of the '29 building fun.
Once a decision has been made to go forward with a '29 project, the first thing is to decide on the type of transmitter to build. There were three popular designs back in the late 20's, each with their own pro's and con's. I'll tell you more about these next and give you a few suggestions for getting started.
In the meantime, see what your 'oldest' ham acquaintance might have in his basement and keep an eye-out for any ARRL Handbooks from the early 30's as they are full of valuable building ideas....and you may wish to check-out K7JPD's ideas for finding old parts.
Perseus Video Recording
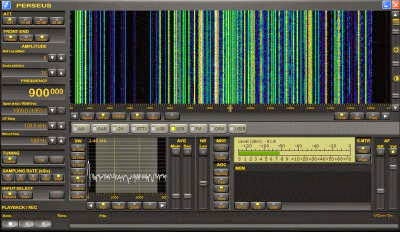
I asked a few of the folks that had been posting high-quality captures, what method they were using, and learned a bit about "screen recording" software. These programs allow you to capture, in reasonable definition video, exactly what is appearing on your computer screen....in this case, the Perseus user interface.
I ran across several freeware offerings, all requiring downloading and installation but reviews of most showed problems ranging from excessive malware along with the software, embedded viruses and glitchy performance issues.
I then came upon an online screen recorder called "Screenr" which required no downloading, no sign-up and had rave reviews from several sources. Screenr allows you to capture up to five minutes of video per file and then to either save it on your own system in .mp4 format for editing, upload it to a host of social media sites or directly to YouTube.
I fired-up Perseus and then Screenr to gave it a try. The first thing that popped-up was an adjustable frame that allows you to size your video so that just the wanted subject is visible and any additional screen clutter is not included.
As a test, I made two recordings and uploaded them to YouTube. To my delight, it all worked quickly and seamlessly although it seems that I need to do further experimenting with my audio level settings.
The first video shows two new broadcast band catches that were logged this week, using the new loop pointed to the east. KRJO in Monroe, Louisiana (1 kW) and CHTO in Toronto (1 kW) both in the top-end of the band.
The second video shows my two favorite NDB-band propagation indicators... AA (365 kHz) near Fargo on the ND/MN border as well as little 25-watter, YLJ (406 kHz) in Meadow Lake, Saskatchewan. Either of these make fine prop indicators for the 630m as well and can be heard from both the east and the west parts of the country.
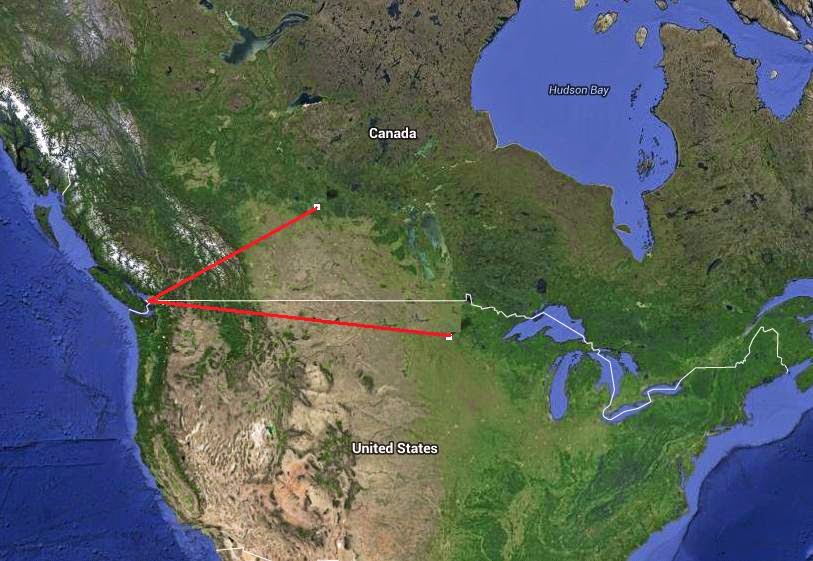 |
| Courtesy: https://maps.google.ca |
Planting New Radials
 |
| Courtesy: http://www.picgifs.com |
The procedure I follow is fairly easy but does take time and I usually just add four or five each year. Although I haven't kept an accurate count, I know the system now has fifty or more radials varying from 30' to 70', fanning out in various directions from the base of my main tower.

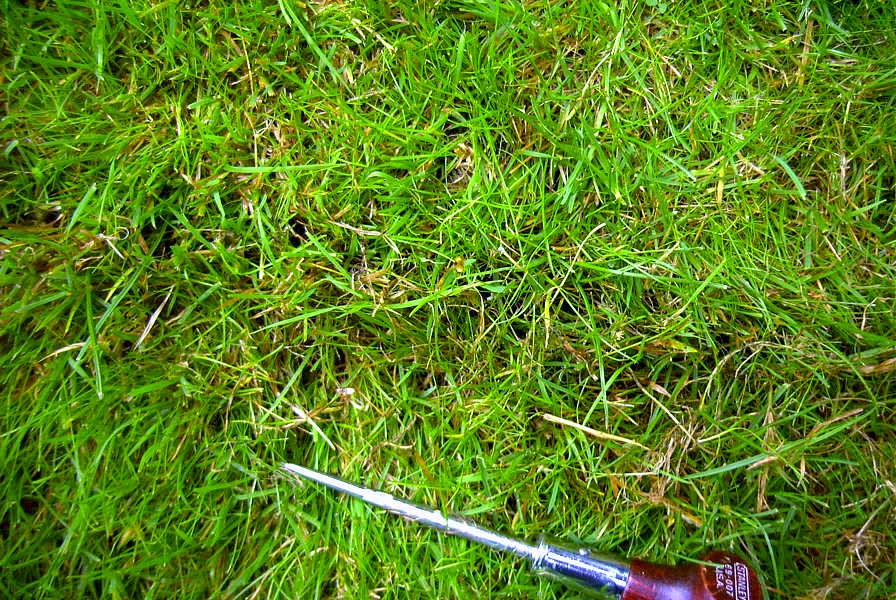
The terminated end of the radial is first pinned-down using a U nail or a longer 3 1/2" galvanized finishing nail that has been bent over in the vise, with the height of the grass determining which one I use. Shorter grass lets you get away with the smaller U nails, which can be found in most building supply stores.
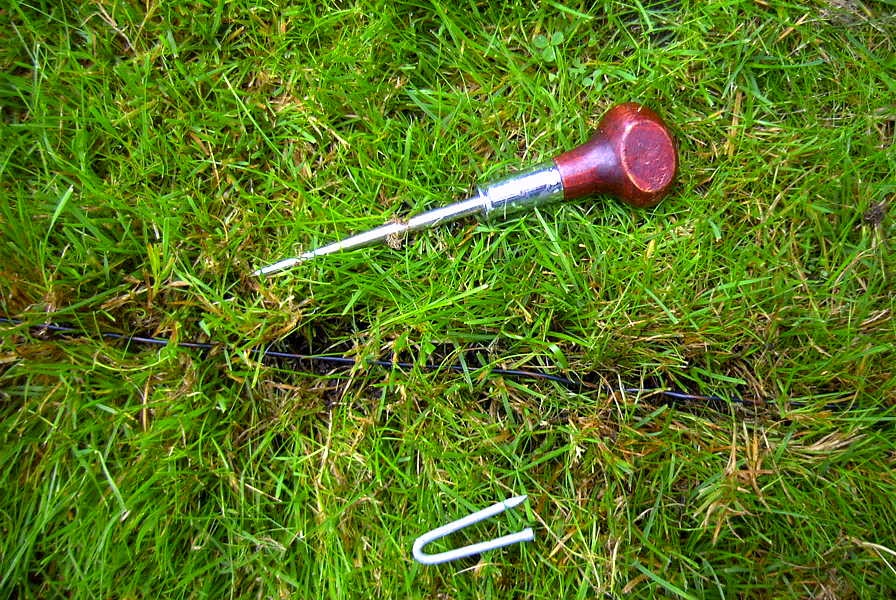
Once pinned, the grass is parted using a stick, knife or awl, to produce a shallow gap for the radial to sit in. I try and do a 3-foot section at a time before placing the wire into the opened-up area. Another way that is effective, especially if the grass is short and the soil dry, is to run the blade of a knife through the grass to actually slice a shallow slit which the wire can be pushed into. This allows the wire to be almost completely buried immediately. Both methods require pinning, with the nails, every few feet.
Once pinned in place, the grass can be quickly ruffled back into place, covering the radial. When done in the fall or in the spring, the grass will very quickly completely overgrow and incorporate the radial into the lawn, never to be seen again.
An interesting product that I have recently learned of may also be of interest - "Ground Staple Pins" by RossRadio. Details may be viewed at their website.
 |
| Courtesy: http://www.rossradio.net |
With the winter DX season just around the corner and the pleasant fall weather, it couldn't be a better time to plant a new crop of radials in the backyard!
630m Crossband Activity Night Reminder
Just a reminder about the 630m Activity Night coming up at the end of this month. You may recall the details in an earlier blog. I think the most exciting thing about this evening will be the opportunity to try to make a crossband CW contact between one or more of the three participating Canadian stations, hopefully covering both ends of the country:
- VO1NA - Joe, in Torbay, Newfoundland. Joe will transmit on 477.7 kHz starting at 2130Z Oct 31 and will continue until 0130Z Nov 1. He will listen for callers on 3562 kHz and 7062 kHz.
- VE7BDQ - John, in Delta, B.C. John will transmit on 474.0 kHz starting at 0100Z and will continue until 1000Z on Nov 1. He will listen for callers on 3536 kHz.
- VE7SL - Steve, on Mayne Island, B.C. I will transmit on 473.0 kHz starting at 0200Z and will continue until 0600Z on Nov 1. I will listen for callers on 3566 kHz and 7066 kHz.

Joe should have pretty good coverage of the east coast with his fine antenna system, shown above.
Please note that, at present, the 'crossband activity' is planned for Friday evening only since Saturday night's CW Sweepstakes Contest will make HF listening more difficult.
All stations will either call CQ or run “VVV” marker beacons while listening on their respective HF receive (QSX) frequencies, which will be included in the CQ or marker beacon message.
Also know that it is completely legal for U.S. and VE amateurs to contact Canadian amateurs via the crossband mode. Unfortunately, it is not possible to contact those stations that may be operating in the Experimental Service and not using an amateur radio callsign.
For additional information, please see the ARRL's description of the event.
Remember that you don't need a fancy antenna to listen on 630m. One of your HF antennas, fed as a 'longwire', will probably do the job....even better if you can tune it to resonance.
I will blog another reminder just before the event. We all hope that you can be there!


