 |
 Series Seven Episode Fifteen – Programming with Chirp (27 July 2014)
Series Seven Episode Fifteen of the ICQ Amateur / Ham Radio Podcast has been released. The latest news, Martin (M1MRB & W9ICQ) and Colin (M6BOY) discuss the joy of working and operating a special event station as GA214CG comes live and Martin (M1MRB & W9ICQ) reviews Programming with Chirp.
- Thai hams get special permission for 6 metres
- UK CubeSail Amateur / Ham Radio Satellite
- Wirral Grammar School for Girls launch 434 MHz balloon
- Top Ten finish for UK Team in WRTC
- Spanish 5 MHz experimental period extended
- Andorra joins 5MHz allocations
- New Zealand Amateur / Ham radio Brass Monkey Contest
- Communicate with 'walkie talkie' dongle
- New Amateur / Ham radio Licences in Ireland
- 144 MHz channels to be used for the Commonwealth Games
- 20th Commonwealth Games, Galsgow 2014 Special Event
Colin Butler, M6BOY, is the host of the ICQ Podcast, a weekly radio show about Amateur Radio. Contact him at [email protected].
More JT65 QSOs
This evening I went on 20m JT65 again and managed a couple of European QSOs in reply to the CQs of others. I am using JT65-HF software that is very simple to use. So far I have used the FT817 at either 2.5 or 5W.
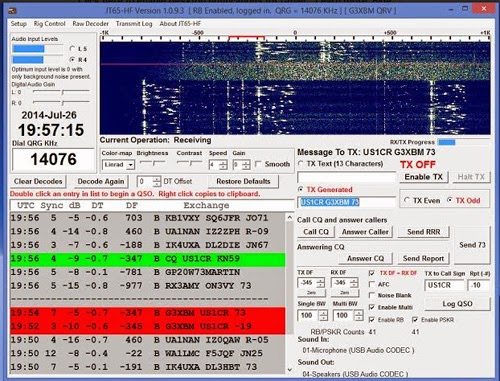 |
| JT65-HF screenshot |
If you see a station calling CQ (shows up in green) you just click on it to start a QSO with that station. If he copies you and replies then the started QSO shows up in red – all very simple. Wonder if there is a similar (easy) package for JT9-1 on HF?
Looking on PSK Reporter I see plenty of USA stations were copying me too, so it should not be too hard to work DX with just a little effort even with my compromise antenna. When 10m and 6m are open, DX should be easier still.
With JT65-HF and JT9-1, I have to be in the shack, but at least there is no speaking, saving my poor voice.
Roger Lapthorn, G3XBM, is a regular contributor to AmateurRadio.com and writes from Cambridge, England.
Long Shadows of Summer
When I got home from work last night I quickly mowed the lawn because the weatherman said there was a sixty percent chance of rain on Saturday and Sunday and I wanted to get ahead of the game. After working in the yard I plopped down in the shack to see if I couldn’t make quick work of the W1AW/1 and W1AW/9 portable stations.
Worked them both within a whisker of each other on 40 meter CW then worked them both again later on 80 meter CW for insurance. I didn’t think the Indiana station would be difficult, but I wasn’t quite as confident about Rhode Island but all’s well that ends well and both are logged and another week of the QSO Party is behind us.
Given that the weatherman said it would probably rain, I shouldn’t have been surprised to wake up this morning to sunshine and blue skies. I swear the weather prognosticators are getting worse at their jobs even as technology has delivered into their hands unfair advantage over the elements.
Brenda says it’s because the weather has become “news” and all of them want to be the first to report a bad storm using giant touch-screens powered by super, frappa, chappa, slappa doomsday doppler radar systems.
She might be right…

Anyway, with the sun shining we hit the local farmers market early this morning and picked up more sweet corn, tomatoes, and a great big melon. And get this, the guy who was selling from the back of his melon truck, told everyone who would listen that he would be back in two weeks — with apples.
Yep, the days are ticking away and the orchards around here are near to busting with autumn goodies. Another cold snap is due to arrive here on Monday and it looks like the first few nights of August could break a few records.
Not to worry though, I’m certain there remains yet a few more days of blistering heat before Summer yields to Fall, but we’re on the backside of 2014 with school days and sweet apple cider coming up fast.
Filed under: Ham Radio, Life Tagged: cw, hr, qso


Jeff Davis, KE9V, is a regular contributor to AmateurRadio.com and writes from Indiana, USA.
Weller
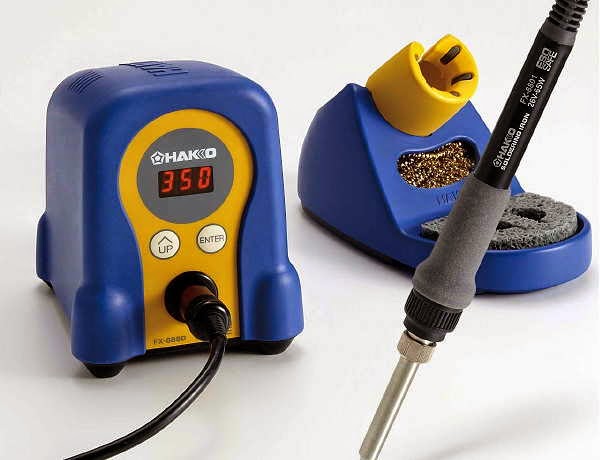
The pride and joy in my shack is a Weller WECP-COD3 soldering iron. It is the only professional piece of equipment I have.

Weller soldering iron
 Even though Weller is a world-class brand, after 26 years of use it is no surprise that even their equipment starts acting up. That doesn’t matter, because a world-class brand has world class service and so I ordered a new sensor (50 Euro) which my ever so nice QSL manager Wouter sent to me. I could have ordered it locally, but then they still would have ordered it from Europe with a 45 day lead time. Here in Taiwan Weller is not sold any more, because Japanese stuff is cheaper. My iron is too old to be interesting any more. Well, I am old too, but quality still shines and Weller remains top quality.
So now I wonder: how old is the soldering iron in your shack? Do you go for quality or buy low price and throw it out after a while? Leave a comment if you please. It will surely be fun to read.
Hans "Fong" van den Boogert, BX2ABT, is a regular contributor to AmateurRadio.com and writes from Taiwan. Contact him at [email protected].
YOTA UK Event
 The weekend of July 19th & 20th saw the 1st YOTA UK event take place in Wolverhampton UK. This event was to run along side the main YOTA event in Finland for those who couldn’t make the trip to the main event.
YOTA is a fantastic initiative to promote amateur radio within young people. The European event has been running for some years now, but the RSGB was invited to take part for the first time this year.
On Saturday we had young amateurs complete antenna construction (Available here). Complete the intermediate practical’s and examinations. In the afternoon we also hosted the buildathon with the hugely successful PSK receiver. Throughout the day we had talks, presentations and a special event station (GB1YOTA) running alongside the indoor activities. It was a bit warm I can assure you and with constant rain, thunder & lightening it was a great day.
Sundays activities took place outdoors. While the special event station still carried on- many of the participants took part in some ARDF, a spot of operating and testing their newly constructed antennas. You can see a small snapshot of the Sundays events in this video.
A big thank you to Wolverhampton ARS who are based at The electric club at Wolverhampton – who were amazing hosts, Camb Hams for supporting and supplying the Special Event Station and of course all the participants who’s enthusiasm and technical ability was simply astounding.
Dan Trudgian, MØTGN, is a regular contributor to AmateurRadio.com and writes from Wiltshire, England. He's a radio nut, IT guru, general good guy and an all round good egg. Contact him him here.
YOTA UK Event
The weekend of July 19th & 20th saw the 1st YOTA UK event take place in Wolverhampton UK. This event was to run along side the main YOTA event in Finland for those who couldn’t make the trip to the main event.
YOTA is a fantastic initiative to promote amateur radio within young people. The European event has been running for some years now, but the RSGB was invited to take part for the first time this year.
On Saturday we had young amateurs complete antenna construction (Available here). Complete the intermediate practical’s and examinations. In the afternoon we also hosted the buildathon with the hugely successful PSK receiver. Throughout the day we had talks, presentations and a special event station (GB1YOTA) running alongside the indoor activities. It was a bit warm I can assure you and with constant rain, thunder & lightening it was a great day.
Sundays activities took place outdoors. While the special event station still carried on- many of the participants took part in some ARDF, a spot of operating and testing their newly constructed antennas. You can see a small snapshot of the Sundays events in this video.
A big thank you to Wolverhampton ARS who are based at The electric club at Wolverhampton – who were amazing hosts, Camb Hams for supporting and supplying the Special Event Station and of course all the participants who’s enthusiasm and technical ability was simply astounding.
Dan Trudgian, MØTGN, is a regular contributor to AmateurRadio.com and writes from Wiltshire, England. He's a radio nut, IT guru, general good guy and an all round good egg. Contact him him here.
More SMT Talk
 |
| Hakko FX-888D Soldering Station |
Jack was a NASA level B instructor for 26 years with Bristol Aerospace in Winnipeg, Manitoba. During that time he was instructing on an 'as required basis' but mainly working as an instructor and designer for the SCISAT-1 satellite. Worked involved all electrical systems, harnessing, manufacturing, designing of PC boards and all NASA hand-soldering and SMT soldering processes. That also included writing all the documentation for all the NASA processes used for the manufacturing and testing of the satellite electrical systems.
Although my first and only SMT experience several years ago resulted in the successful completion of a simple 40m transceiver, I found the process tedious and less than enjoyable. Jack suggested that my laborious technique was not the way to do it and was probably to blame for my negativity towards future SMT work. He gave me a wealth of encouraging suggestions for a more 'enjoyable' outcome:
Yes I agree our old eyes are not the same, but a good 6" magnifier ~2.25X lens with light (preferably incandescent IMHO), this is what I use plus a loop if needed for closer-up inspection. An alternate is a binocular magnifier with ~ 2.25X or better, they are widely used by inspectors, jewellers or home hobbyists.
 This is what I think I'll invest in next. Without these you haven't a hope or chance of doing the job as well, it is next to impossible. Sorry, not going to talk you out of building with SMT parts, We've gone from tubes to transistors and now to SMT, time to make the change :-)
 BTW, not sure what that instrument is that you have on the blog, looks something like a tool that may be used to hold down the chip while soldering. You don't need it.
Helpful hints if you so decide to go with SMT:
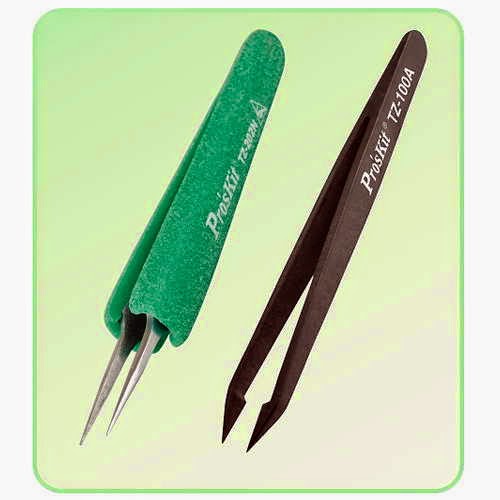
First purchase a good sharp pointed long ESD type plastic or metal tweezers.
Tack solder one side only, then go to the other side of the chip and solder it correctly, THEN go back to the 1st side and re-solder that side correctly, keep your dwell time to <3-4 seconds. Start with using a tooth pick and apply a small drop of solder paste on each side of the chips pads. If soldering a large 14-16 pin chip, tack solder one corner then the opposite corner first being careful to have the correct alignment/position. Now apply solder paste down the length of each side, don't worry if you apply paste between the pads as the heat will draw it away once you apply the tip. Slowly draw the long soldering iron tip down each pad starting from any corner, allow a few seconds to cool, then repeat for the opposite side. Fine solder will also work but it's slow and far more time consuming.
Use liquid paste SN63/PB37 eutectic solder {no plastic state} for best application, use sparingly as it's too easy to get some under the chip which can easily cause a short cct.
Hope that helps you and convinces you to give it a try.
 Personally, I prefer just 63/37 liquid paste in a syringe, far less cleaning up with IPA. Besides, using IPA means cleaning it 100% with a stiff bristle brush. Once the flux is exposed to IPA or rubbing alcohol, there is a chemical action that slowly takes place and it is quite corrosive if the area is not thoroughly washed. Besides, you can't afford to expose certain parts like pots that are not hermetically sealed, once the flux gets inside the pot is contaminated and becomes useless. It's OK to not clean your board, as long as you don't attempt to use any alcohol in a half-ass method. We used total immersion baths and not just one but three separate ones. Even then...I had to slowly pour pure distilled water over the board, capture it in a clean beaker then take it over to our chemical lab where they tested it for any flux residue. Those were required mainly for building all the satellite boards though. Most commercial manufacturers don't bother to clean their boards, a) one less manufacturing step, b) added cost and less chance of contamination. There are some no-clean solder pastes out there now, something to look into, see Digikey for examples. Don't worry about expiry date later down the road, mine expired in 2009! These paste manufacturers mainly deal with big companies that have a tight criteria to meet in order to comply with a wide range of standards imposed on them. Mine still works beautifully, I keep rotating it so the flux inside doesn't settle to just one side. Keeping it in a fridge can even extend the life, but don't worry about that, besides the xyl may not like the idea.
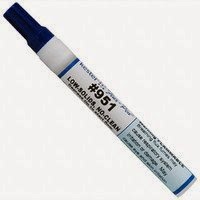
Yes, there have been many attempts back in the mid 70-80s to come up with a simple solution for a simple problem of having a third hand to hold the part in place while you hold the soldering iron with the other hand. NASA, ESA (European Space Agency) and IPC have never used anything like that since the very beginning. Although most hams probably wouldn't want to go to the trouble of learning NASA standards as it's a bit overkill, but it's far better than what some are portraying on the web as the right way to do it.
There are tons of YouTube videos out there that actually show the wrong process of soldering these small parts, but you can't blame them, they were not trained to know any better, but it gets them by as far as they are concerned. I've written many soldering processes on the correct methods on soldering SMT and regular through-hole parts over the years. I still have copies of all these documents which I could send you but they are huge documents.
Many thanks Jack...your encouraging response has definitely given me new hope to tackle some future SMT work!!
Steve McDonald, VE7SL, is a regular contributor to AmateurRadio.com and writes from British Columbia, Canada. Contact him at [email protected].
 Ham Radio Deluxe |
 W5SWL Electronics |
 Ham Radio Prep |
 KB3IFH QSL Cards  Hip Ham Shirts  HamRadioAuctions HamRadioAuctions Reliance Antennas Reliance Antennas Enigma Shop Enigma Shop |  morseDX  Ni4L Antennas  R&L Electronics R&L Electronics antennas.us antennas.us QRV QRV |
- Matt W1MST, Managing Editor
