 |
 The Spectrum Monitor — October, 2015

Stories you’ll find in our October, 2015 issue:
It Can Still Be Done! Kit Building is Alive and Well
By Kevin O’Hern Carey WB2QMY
Kit building is as old as amateur radio and as popular as ever. The attraction to kit building comes from the learning experience of building an electronic project, the pride of knowing how components work and the money saved by doing it yourself. A longtime kit builder himself, Kevin shows us that kits for all kinds of radio projects are readily available today, but that it’s also a fun experience to do with your children or grandchildren.
Digitally Speaking: The Original Digital Conversation
By Cory GB Sickles WA3UVV
This month our digital guru goes old school as he examines the original digital conversation: Morse code. The attraction of CW is multilevel: it’s a mode available to all license classes, an efficient use of bandwidth, and a natural for low power DIY ham stations. Furthermore, savvy CW operators can put together a small, capable station at a fraction of the cost of voice mode stations. Despite the fact that the Morse requirement for amateur licenses was dropped in early 2007, CW operating is a popular as ever.
Build a Rugged, Copper Pipe J-Antenna for VHF-UHF
By Richard Fisher KI6SN
Explore the myths and magic of the J-antenna and get yourself “de-polarized.” Richard explains that some of the things you thought you knew about the J-antenna just aren’t right. And, that with a quick trip to your nearest home-improvement store, you can find all the parts and all the tools you need to build one of the most popular VHF-UHF antennas for scanning or amateur radio applications. You’ll even find out how to put this antenna on your bike for some on-road and off-road bicycle/mobile fun.
TSM Reviews: Manhattan DJ-1997 FTA Satellite Receiver
By Ken Reitz KS4ZR
The new Manhattan DJ-1997 receiver is smaller and less expensive than its predecessor and yet more capable. It goes a long way toward blurring the lines between traditional cable and satellite TV services and the new direction consumers are inevitably migrating toward: Over the Top TV. We’ve seen similar activity with services offered by new TV sets: direct access through apps to Netflix, Hulu, Pandora and a host of other non-cable/satellite video and audio services, including direct access to Web content. This is disruptive technology in the best sense of the word.
The Norden Broadcasts: America’s Ace in the Hole
By J. Wandres
While British forces in WWII had mounted successful radio-based propaganda campaigns, the US had no such program until 1942 when the US Office of Naval Intelligence put together an unlikely trio, which included a doctor, a lawyer and a Hungarian émigré. They created a fictitious character named Commander Norden and broadcast what they said was the truth in German aimed at German warships. But, how successful was the program?
Scanning America By Dan Veenaman
Counties Weigh a Combination of Radio System Options
Federal Wavelengths By Chris Parris
Programming Federal Interoperability Channels
Utility Planet By Hugh Stegman NV6H
US Coast Guard Consolidates HF Services
Digital HF: Intercept and Analyze
By Mike Chace-Ortiz AB1TZ/G6DHU
A Few Easy Digital Catches for the Beginner
HF Utility Logs
By Mike Chace-Ortiz and Hugh Stegman
Amateur Radio Insights By Kirk Kleinschmidt NT0Z
Are You Up for the Challenge of 60 Meters?
Radio 101 By Ken Reitz KS4ZR
Ramsey AM Broadcast Transmitter Kit: $45 of Pure Radio Fun
Radio Propagation By Tomas Hood NW7US
The Chromosphere (Continuing our Look at the Sun)
The World of Shortwave Listening By Andrew Yoder
Tales of Pirate Radio Woe and Intrigue
The Shortwave Listener By Fred Waterer
Spy Stations, Canadian Elections, Central European Crisis and More
Maritime Monitoring By Ron Walsh VE3GO
Marine Radio Technology Sails On
The Longwave Zone By Kevin O’Hern Carey WB2QMY
Adventures in Through-Ground Radio
Adventures in Radio Restoration By Rich Post KB8TAD
From Aristocrat to Royalty: First Look at a Zenith Trans-Oceanic G-500
The Broadcast Tower By Doug Smith W9WI
Go West, Young Man!
Antenna Connections By Dan Farber AC0LW
The Modern Underground: Stealth
The Spectrum Monitor is available in PDF format which can be read on any desktop, laptop, iPad®, Kindle® Fire, or other device capable of opening a PDF file. Annual subscription (12 issues, beginning with the January 2015 issue) is $24. Individual monthly issues are available for $3 each.
Ken Reitz, KS4ZR, is publisher and managing editor of The Spectrum Monitor. Contact him at [email protected].
Acorn II – Buildathon instructions
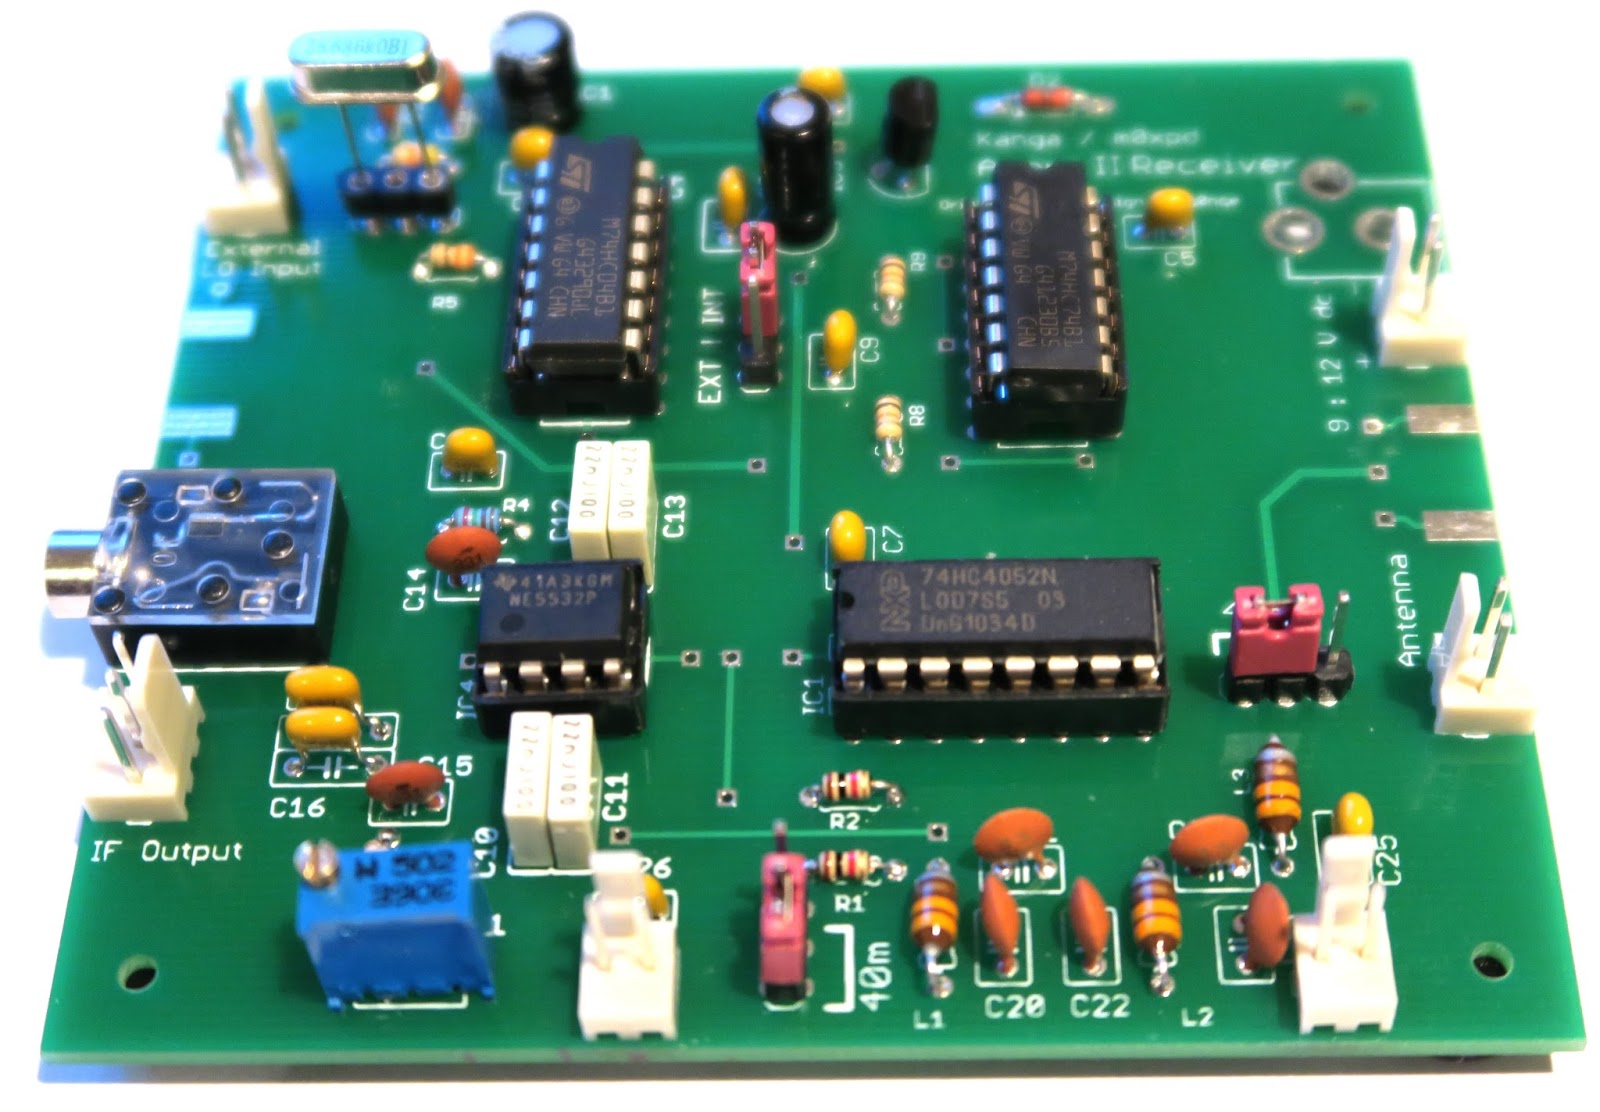
For those who have not seen the Arcorn II SDR kit, you can now purchase the complete kit for just £29.95 from www.kanga-products.co.uk The kit is an excellent entry into SDR receivers and we will be featuring this kit as a a part of the 2015 buildathon at the RSGB convention.
To aide the construction, I have created a set of instructions that may help with anyone who is building this little kit. You can download the PDF here, There are significantly more pages than the Kanga instructions, but for a group construction project we find that lots of space and easy to follow instructions are a great help.
And if you haven’t seen the construction video – here it is again.
Dan Trudgian, MØTGN, is a regular contributor to AmateurRadio.com and writes from Wiltshire, England. He's a radio nut, IT guru, general good guy and an all round good egg. Contact him him here.
Acorn II – Buildathon instructions
For those who have not seen the Arcorn II SDR kit, you can now purchase the complete kit for just £29.95 from www.kanga-products.co.uk The kit is an excellent entry into SDR receivers and we will be featuring this kit as a a part of the 2015 buildathon at the RSGB convention.
To aide the construction, I have created a set of instructions that may help with anyone who is building this little kit. You can download the PDF here, There are significantly more pages than the Kanga instructions, but for a group construction project we find that lots of space and easy to follow instructions are a great help.
And if you haven’t seen the construction video – here it is again.
Dan Trudgian, MØTGN, is a regular contributor to AmateurRadio.com and writes from Wiltshire, England. He's a radio nut, IT guru, general good guy and an all round good egg. Contact him him here.
Texas QSO Party Fun
 I spent a few hours, yesterday and today, playing in the Texas QSO Party. As annual QSO Parties go, this one must be one of the best.
 With Texas being such a large state, there seemed to be a correspondingly large amount of activity. As well, Texas is a nice single-hop from here on HF and most signals, even from the numerous mobiles, were loud.
I entered in the low-power, single- operator, CW-only class and without spending huge amounts of time, ended up with 185 contacts in 117 counties. There was a very active fleet of mobile operators as well, moving from county to county and sometimes setting-up on county borderlines to provide two, three or even four counties at a time. Thanks to the dedicated mobilers ... you fellows really add a lot of interest to the contest.
Mobile stations also provide extra 'bonus' points, with 500 additional points gained each time you work the same mobile in 5 different counties. Two of them were worked in more than 15 counties, while five were worked in 10 counties. Two were worked in 9 counties, missing the extra thousand points by one more from each.
My weekly QSO Part activity has been a good way for me to ease back into contesting and an aid in improving my ear-brain-keyboarding skills ... it's been helping a lot. One area that doesn't get a lot of practice is in the 'run' mode, since most of these QSO party contacts are in the 'search and pounce' (S&P) mode. Hopefully something will come up soon where I can get more 'run' practice as this requires a higher level of alertness compared with S&P. In reality, either mode is a great way to keep your CW skills honed.
The old laptop, running Windows XP, continues to work well as does the N1MM logging software driven by the K1EL USB keying interface. Further scrubbing of the laptop's unneeded files and start-up programs has sped boot-time to about 90 seconds. Quite an improvement over the eight minutes it was taking before tackling the cleanup!
If you are interested in getting started in contest work, or getting back into it, the WA7BNM Contest Calendar is probably the best source of information ... descriptions of all of the major contests (and some not so major), as well as links to contest-sponsor pages, may be found there. As well, the same site provides the '3830' board, a place where contesters can share their claimed score totals and discuss the event immediately following a contest. It's always fun to see how you compare with other submissions in the same category.
Steve McDonald, VE7SL, is a regular contributor to AmateurRadio.com and writes from British Columbia, Canada. Contact him at [email protected].
Ham College 9
Ham College episode 9 is now available for download.
In episode 9 we discuss the different types of resistors and potentiometers. Deciphering the resistor color code. More questions and answers from the Technical class question pool. Learn how you can win an Icom T-shirt and cap.
1:05:30
George Thomas, W5JDX, is co-host of AmateurLogic.TV, an original amateur radio video program hosted by George Thomas (W5JDX), Tommy Martin (N5ZNO), Peter Berrett (VK3PB), and Emile Diodene (KE5QKR). Contact him at [email protected].
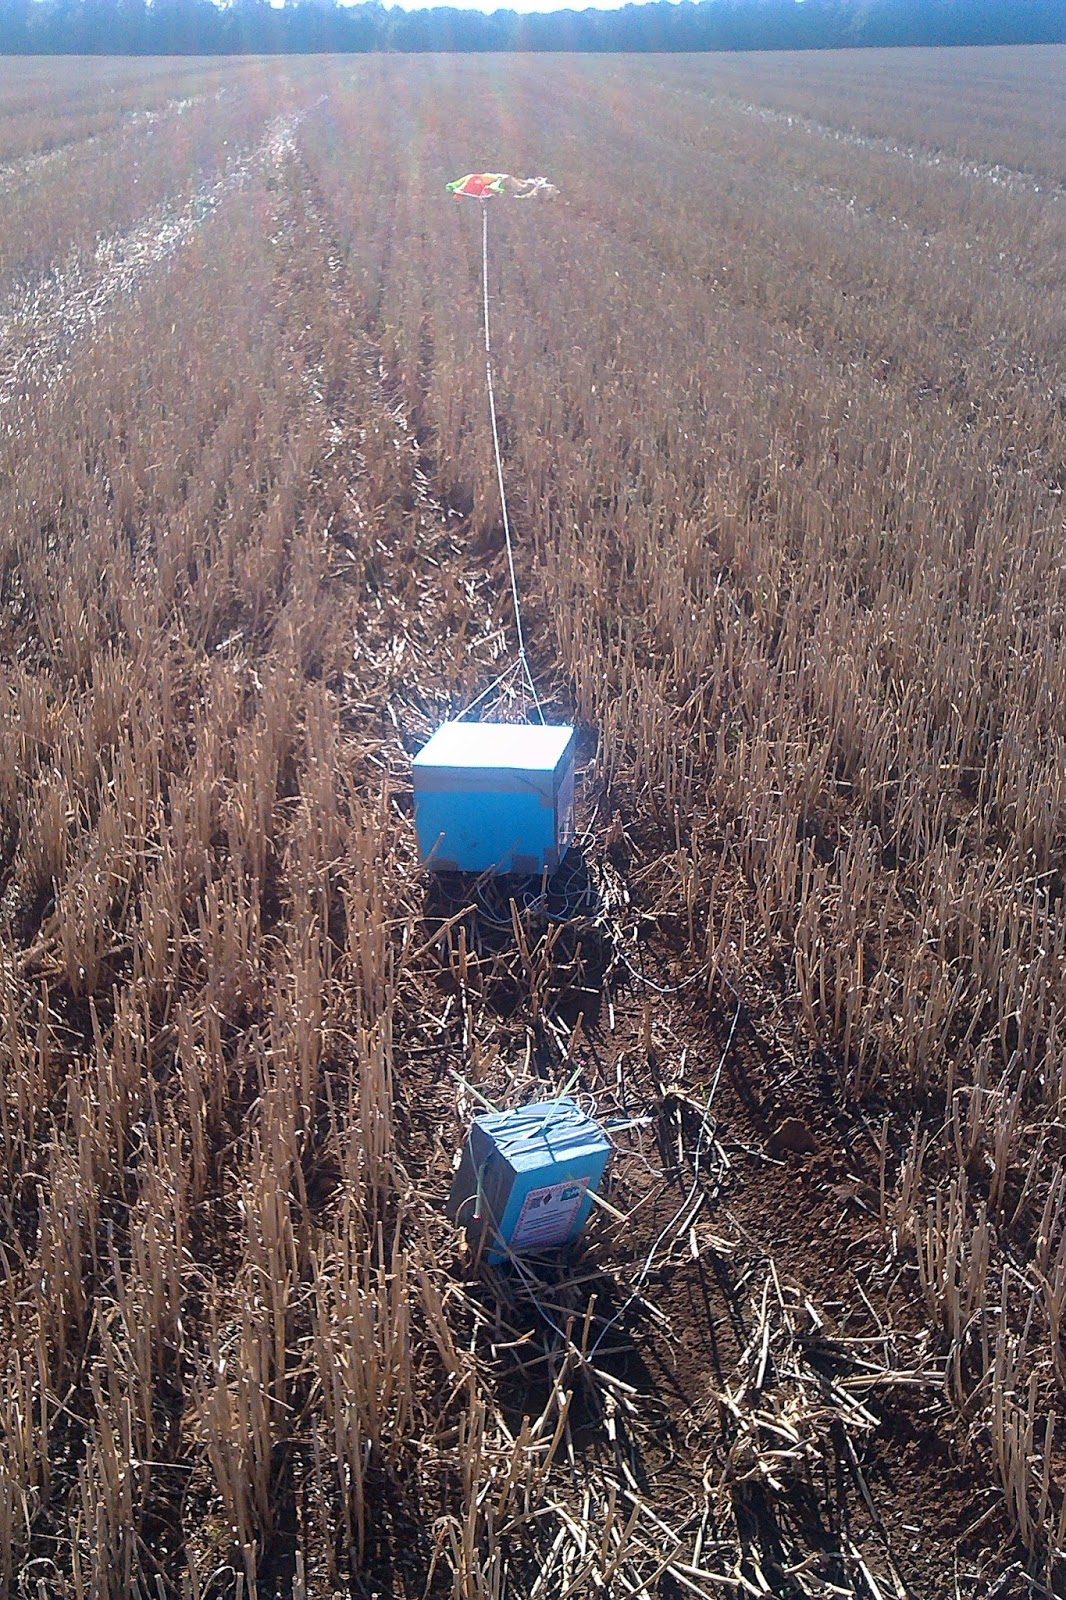
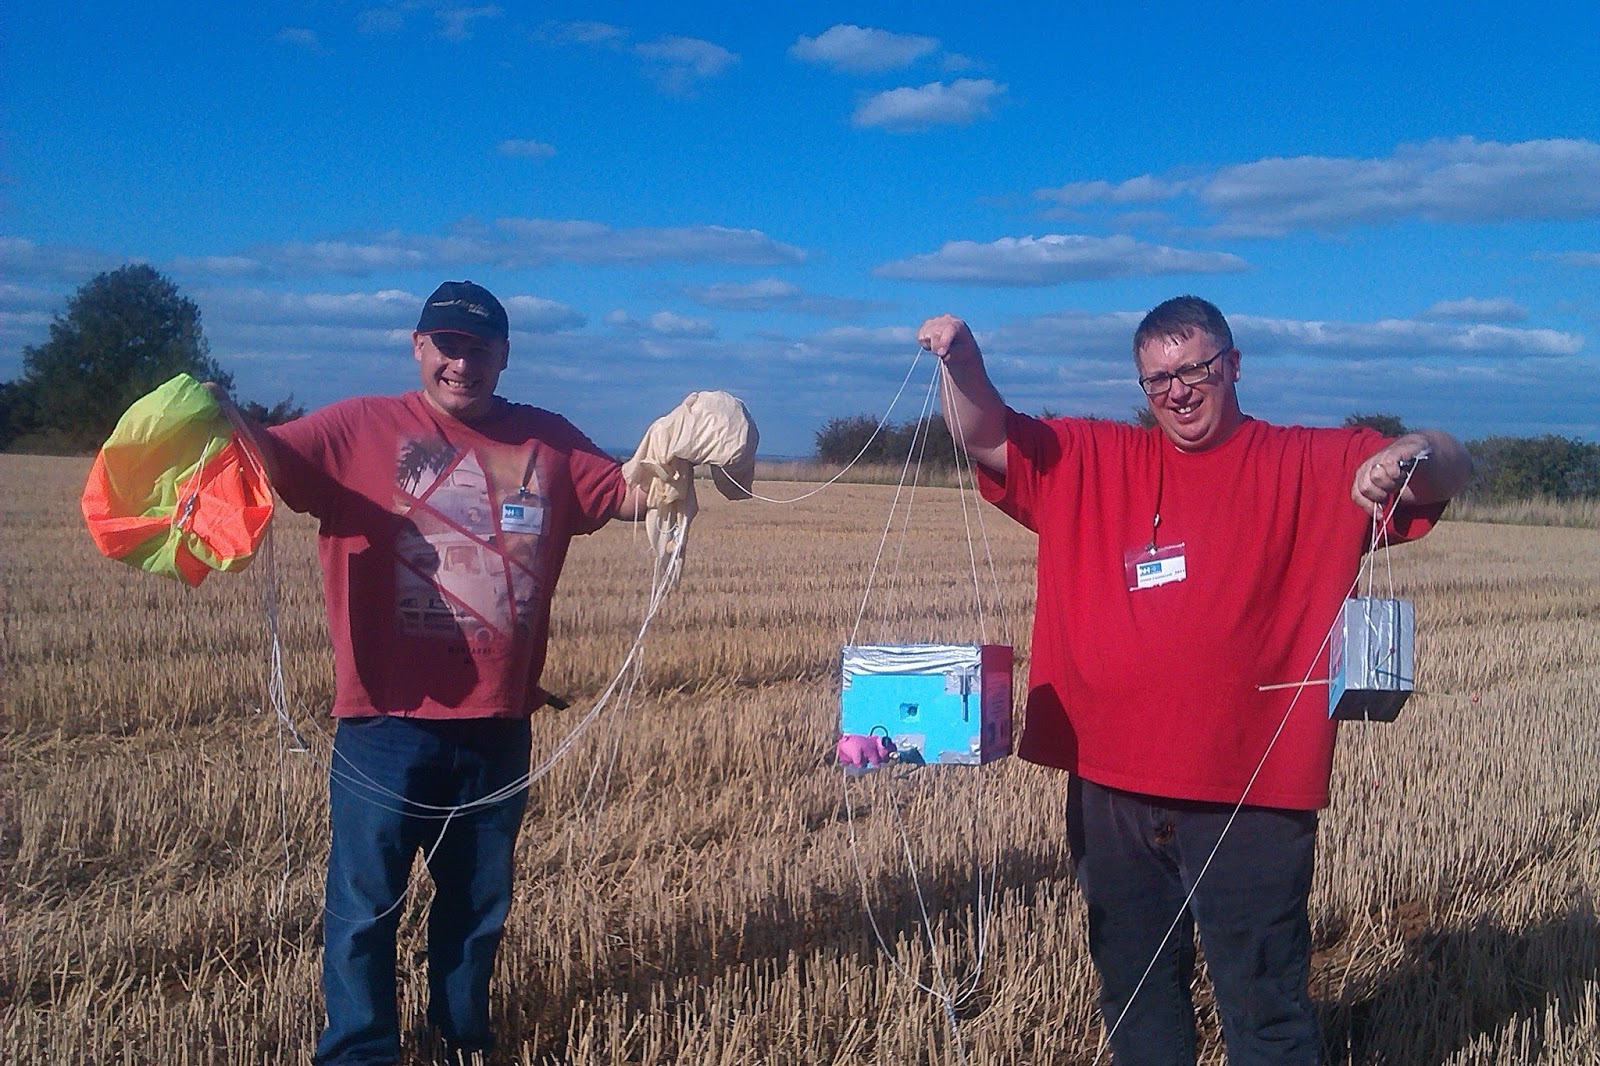
Hamfest HAB Flight – Mission Debrief

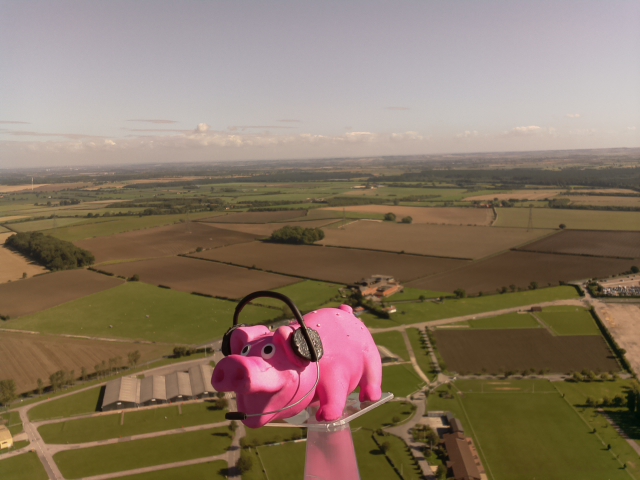
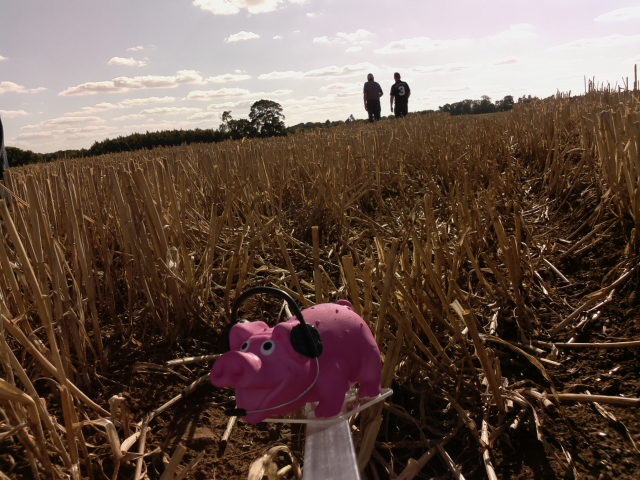
The National Hamfest high altitude balloon flew on Saturday and Pinky Pig reached a maximum altitude of nearly 26km (25,927m / 96,873 feet) as pictured above.
The flight originally planned for Friday had to be postponed due to wind direction and restrictions but I had sort approval for both days and was able to fly on Saturday. The conditions were perfect on launch day, clear blue sky with little cloud and almost no wind. Flight prediction put it landing around 25km away.
Both payload trackers worked flawlessly, PINKY the high speed RTTY successfully sent SSDV as well as telemetry and the backup tracker PIGLET sent the slow speed RTTY telemetry. Trackers from all over the UK as well as France, Holland and Poland received data and uploaded data to the UKHAS website.
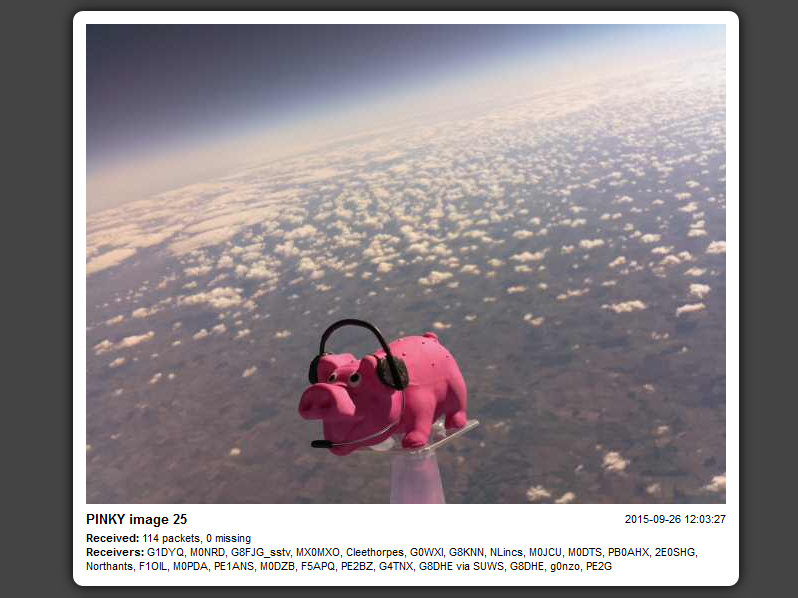
The received SSDV images can be seen at http://ssdv.habhub.org/PINKY
The flight path can be seen below
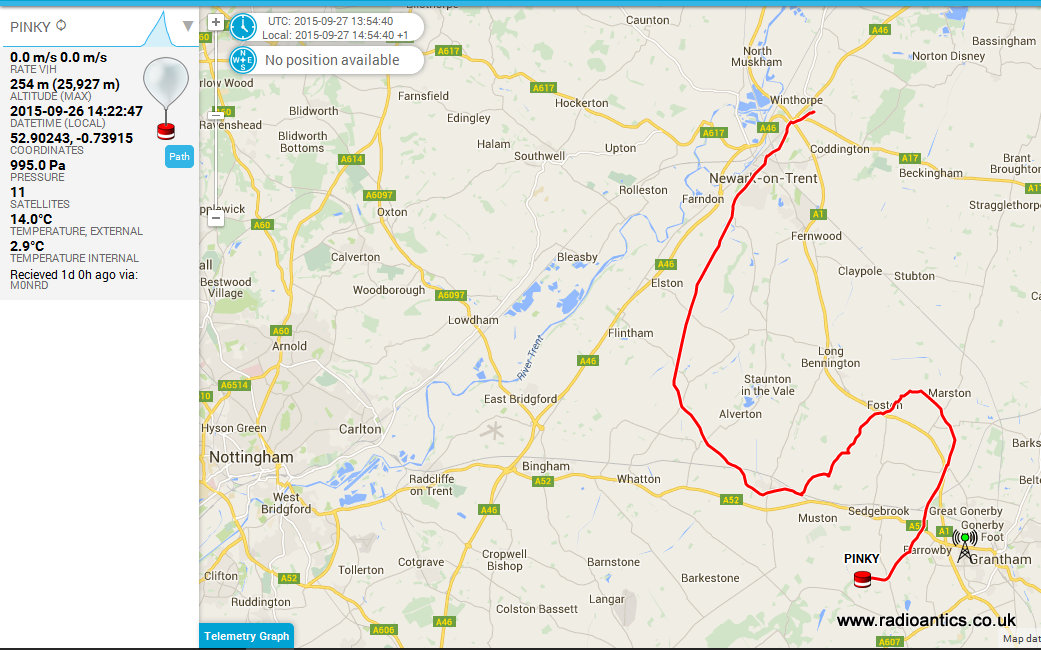
The flight can be seen visualised in Google Earth below and while the 26km altitude was impressive it was around 4km less than I'd planned.

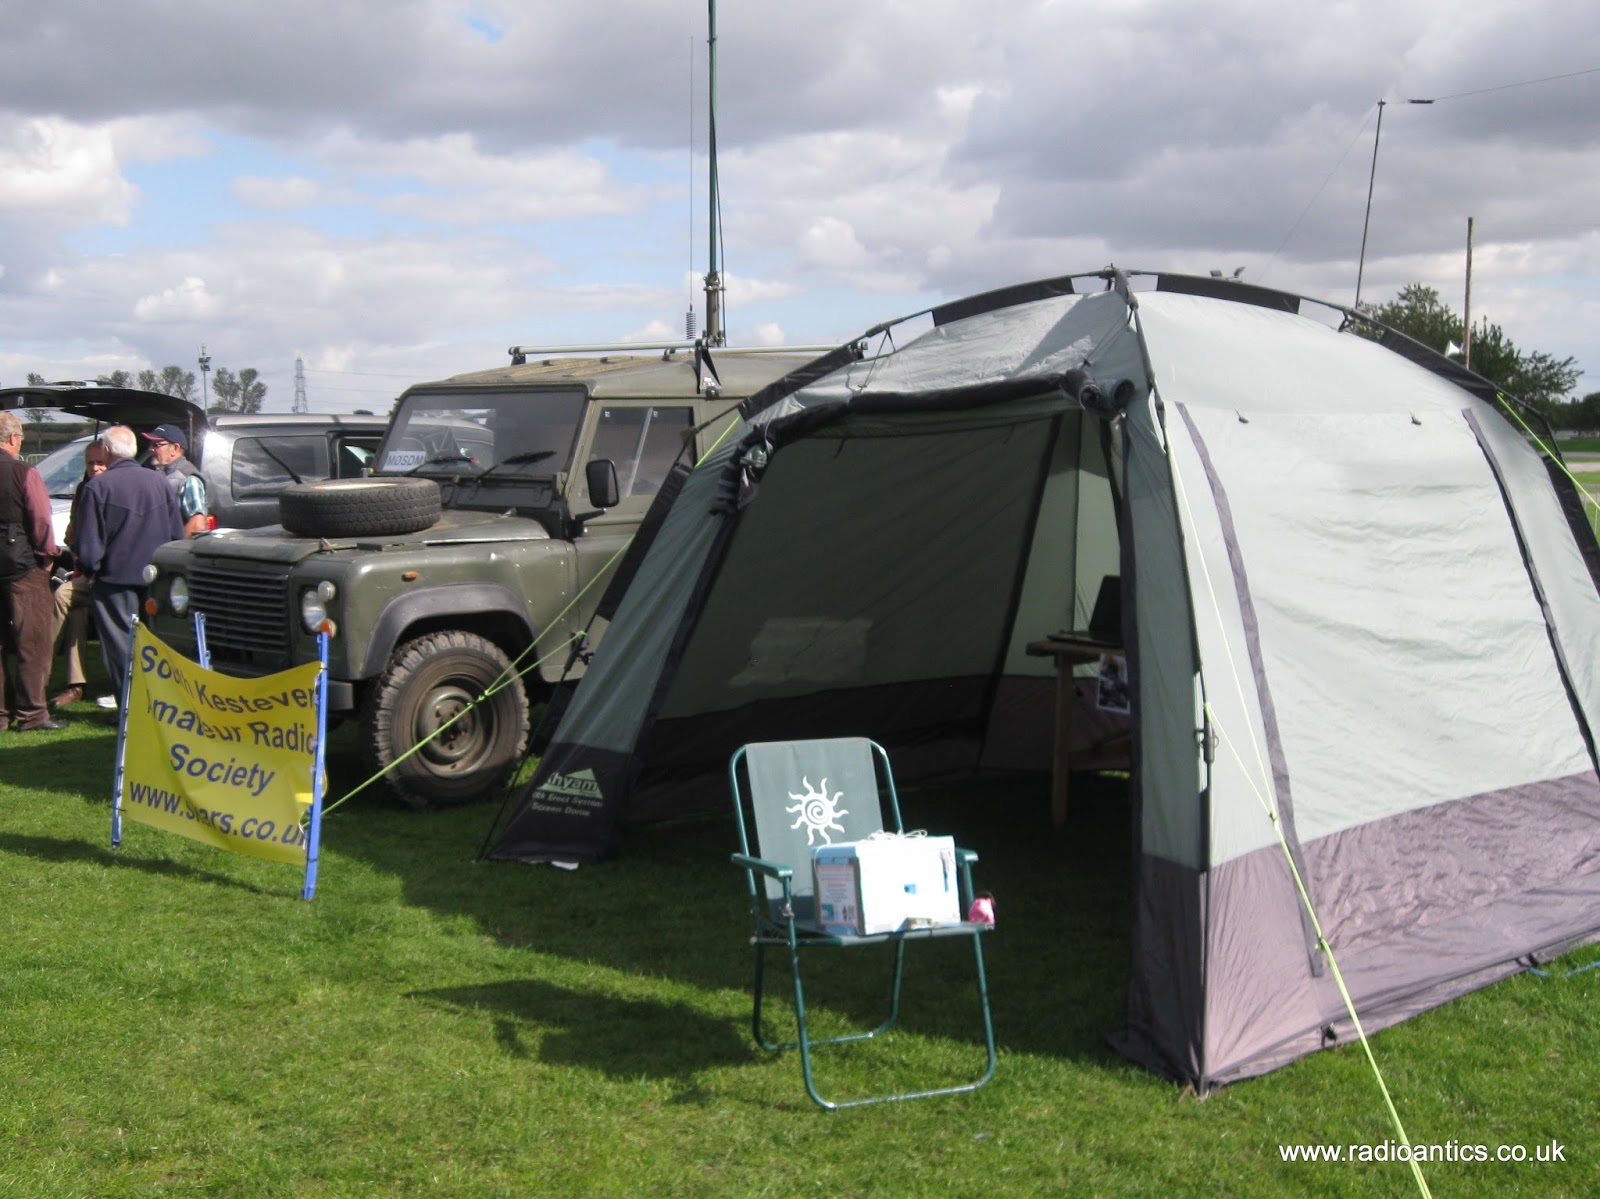
The launch certainly created a great deal of interest at the Hamfest, on the Friday we setup the club tent for South Kesteven ARS with a tracking station and demonstrated the payloads to interested visitors. Stewart (M0SDM) used his Land Rover with a push up mast for a pair of collinear X-50s so we could receive and decode. The mast and the Land Rover generated just as much interest.

 |
| Picture by Dave M0TAZ |


Andrew Garratt, MØNRD, is a regular contributor to AmateurRadio.com and writes from East Midlands, England. Contact him at [email protected].
Hamfest HAB Flight – Mission Debrief
The National Hamfest high altitude balloon flew on Saturday and Pinky Pig reached a maximum altitude of nearly 26km (25,927m / 96,873 feet) as pictured above.
The flight originally planned for Friday had to be postponed due to wind direction and restrictions but I had sort approval for both days and was able to fly on Saturday. The conditions were perfect on launch day, clear blue sky with little cloud and almost no wind. Flight prediction put it landing around 25km away.
Both payload trackers worked flawlessly, PINKY the high speed RTTY successfully sent SSDV as well as telemetry and the backup tracker PIGLET sent the slow speed RTTY telemetry. Trackers from all over the UK as well as France, Holland and Poland received data and uploaded data to the UKHAS website.
The received SSDV images can be seen at http://ssdv.habhub.org/PINKY
The flight path can be seen below
The flight can be seen visualised in Google Earth below and while the 26km altitude was impressive it was around 4km less than I'd planned.
The launch certainly created a great deal of interest at the Hamfest, on the Friday we setup the club tent for South Kesteven ARS with a tracking station and demonstrated the payloads to interested visitors. Stewart (M0SDM) used his Land Rover with a push up mast for a pair of collinear X-50s so we could receive and decode. The mast and the Land Rover generated just as much interest.
|
| Picture by Dave M0TAZ |
Andrew Garratt, MØNRD, is a regular contributor to AmateurRadio.com and writes from East Midlands, England. Contact him at [email protected].
 Ham Radio Deluxe |
 W5SWL Electronics |
 Ham Radio Prep |
 KB3IFH QSL Cards  Hip Ham Shirts  HamRadioAuctions HamRadioAuctions Reliance Antennas Reliance Antennas Enigma Shop Enigma Shop |  morseDX  Ni4L Antennas  R&L Electronics R&L Electronics antennas.us antennas.us QRV QRV |
- Matt W1MST, Managing Editor
