 |
 June’s EME Moonrise Window

With the QSL's from spring's EME activity gradually showing up in the mail, June's EME moonrise action should keep the postman busy next month as well.
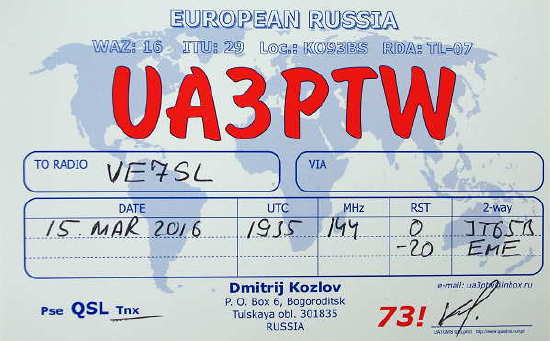 |
| Dmitrij - UA3PTW - Initial #60 |
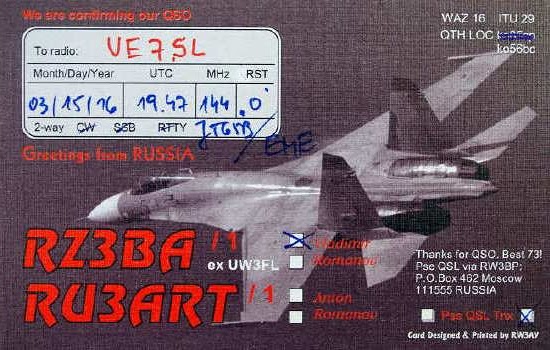 |
| Vlad - RZ3BA/1 - Initial #61 |
 |
| Oleg, UX5UL - Initial #72 |
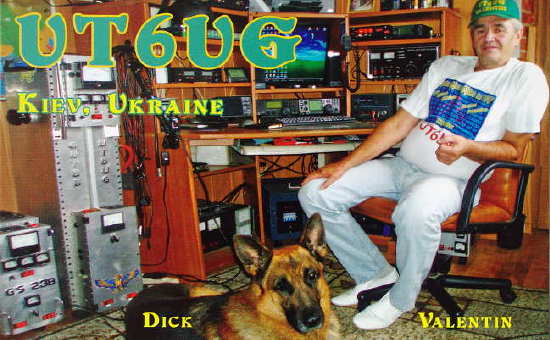 |
| Val - UT6UG - Initial #73 ...both Oleg & Val are in the same city |
 |
| Jorg - DK3WG - Initial #74 |
 |
| Bernie - ZS4TX - Initial #75 |
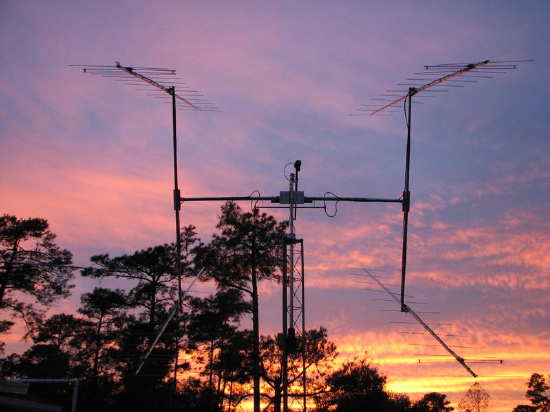
I have about five days of favorable moonrises directly over the ocean in front of my antenna (9el m2 Yagi), and a couple of hours each day before the moon gets too high for my antenna as it lacks any elevation control. After five days the moonrises usually move too far to the south and I am pointing into too many RF-absorbing Douglas Firs on my neighbor's property.
I started on Tuesday morning, which according the EME data graph shown below, should have been the best of the week since the moon was as close as it would get and the skynoise was low but unexpectedly, no signals at all were heard!
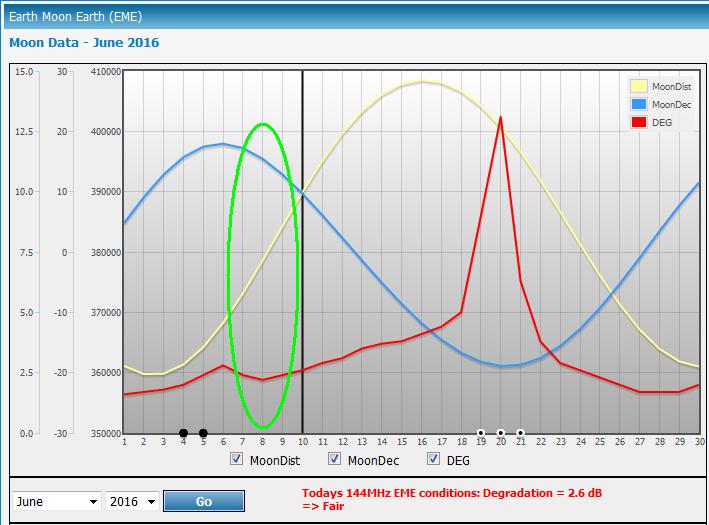 |
| courtesy: http://www.mmmonvhf.de/eme.php |
On Wednesday, things should not have been as favorable since the moon was another 5000 miles further away, but the magic of radio did not disappoint ... my first CQ, with the moon barely 1 degree high, brought something that has never occurred here before ... three replies!
I soon completed three new initials with my QRP (140 watts) station ... RW1AY (# 76 ), DK3BU (#77 ) and DK5SO (#78 ). I have no idea why Tuesday was so poor or why Wednesday was so good, but I'll take it.
Today's conditions were also good again, with my first CQ being answered by N2CV in Florida, for #79.
 |
| Barry - NC2V - Initial #79 4 x 20 el array |
About an hour later, the strong CQ of YU7AA was heard who responded to my first call. After that his signal faded for some time and eventually returned to speaker quality level and the contact was completed for #80 ... I keep wondering if or when I'll run out of stations large enough to work.
 |
| Jozef - YU7AA - Initial #80 |
Who knows what tomorrow will bring, but as the moon climbs further away and rises further to the south, working anyone will be a nice surprise. I've usually avoided summer EME work, as often the best moonrises are very close to the sunrise, making it difficult for bigger stations to hear me when pointing near the sun. After June's good luck, it seems that summers might require more attention ... the next few months might be more interesting than I had thought.
Steve McDonald, VE7SL, is a regular contributor to AmateurRadio.com and writes from British Columbia, Canada. Contact him at [email protected].
2016 Ham Nation Forum at Dayton
This is the full length video of the 2016 Dayton Hamvention, Ham Nation forum.
George Thomas, W5JDX, is co-host of AmateurLogic.TV, an original amateur radio video program hosted by George Thomas (W5JDX), Tommy Martin (N5ZNO), Peter Berrett (VK3PB), and Emile Diodene (KE5QKR). Contact him at [email protected].
80 Meters Was out of Reach…
 I have a pal who lives a stone’s throw away from me. He kept telling me about a group that he chatted with most nights on 80 meters. The closest I could get was 40 meters with my multiband inverted vee. I could hear those guys clear as anything, all 300 miles away. Try as I might, my 40, which tuned for 80 just couldn’t make the trip with my barefoot 100 watts.
It took me a while to figure out how to get such a long antenna in my rented back yard. I did a lot of measuring and drawing in Autocad to make absolutely sure I could put this up back there. When I was finally convinced, I told my pal Lloyd, that I was going to do it. I told him I’d get it as soon as I ordered and received some more wire. Being the great guy he is, he told me he had wire for me to just come and get it. I was more than appreciative.
Wire in hand, I knew I’d need a balun to bring it in from my 450 ohm line that I would use from the feed point to near my window. I ventured onto the Internet and found an outdoor electronic project box. It was about 3.5×5. Perfect for the toroids I had already purchased. Parts in hand, I began work.
Greg Walters, KK4TIX, is a special contributor to AmateurRadio.com and writes from Kentucky, USA.
TX Factor Episode 11 is Here!
In this episode we complete the story of one Devon school in their attempt to be one of the ten UK schools to take part in the recent amateur radio link-ups with Tim Peake aboard the International Space Station.
We go behind the scenes with the ARISS team to meet the members and see the technology that made the link-ups such a great success.
We hope you enjoy the show!
TX Factor Team
Nick Bennett 2EØFGQ co-hosts TX Factor with Bob McCreadie GØFGX and Mike Marsh G1IAR. Contact the team at [email protected]
Weekly Propagation Summary – 2016 Jun 06 16:10 UTC

Here is this week’s space weather and geophysical report, issued 2016 Jun 06 0156 UTC.
Highlights of Solar and Geomagnetic Activity 30 May – 05 June 2016
Solar activity ranged from very low to low levels. Low activity was observed on 30 May with a pair of C1/Sf flares observed from Region 2550 (N15, L=114, class/area Cro/020 on 31 May). Very low levels were observed on 31 May and 01-05 Jun. Of note, the first spotless day since 17 Jul 2014 was observed on 03 Jun.
No proton events were observed at geosynchronous orbit.
The greater than 2 MeV electron flux at geosynchronous orbit was at high levels on 30 May – 04 Jun with moderate levels observed on 05 Jun.
Geomagnetic field activity ranged from quiet to minor storm (G1-Minor) levels. Quiet to active levels were observed on 30-31 May due to negative polarity coronal hole high speed stream (CH HSS) influence. During this time frame, wind speeds peaked at about 575 km/s early on 30 May while the Bz component of the interplanetary magnetic field reached a maximum southward of extent of -6 nT late on 31 May. Quiet conditions were observed on 01 Jun through midday on 05 Jun. Active to G1 storm levels were observed through the remainder of 05 Jun due to effects from another negative polarity CH HSS. Late on 05 Jun, wind speeds approached 650 km/s, total field reached 19 nT while the Bz component briefly hit a maximum southward extent of -15 nT.
Forecast of Solar and Geomagnetic Activity 06 June – 02 July 2016
Solar activity is expected to be at very low levels with C-class activity possible throughout the outlook period.
No proton events are expected at geosynchronous orbit.
The greater than 2 MeV electron flux at geosynchronous orbit is expected to be reach high levels on 07-09, 12-16, 26-30 Jun and 01 Jul. Normal to moderate levels are expected throughout the remainder of the outlook period.
Geomagnetic field activity is likely to reach G1 (Minor) levels on 06 Jun and 02 Jul with unsettled to active levels expected on 12-15, 17-18, 23-24 and 26-27 Jun, all due to the influence of multiple recurrent CH HSSs. Quiet to unsettled conditions are expected throughout the remainder of the outlook period under a nominal solar wind regime.
Don’t forget to visit our live space weather and radio propagation web site, at: http://SunSpotWatch.com/
Live Aurora mapping is at http://aurora.sunspotwatch.com/
If you are on Twitter, please follow these two users: + https://Twitter.com/NW7US + https://Twitter.com/hfradiospacewx
Get the space weather and radio propagation self-study course, today. Visit http://nw7us.us/swc for the latest sale and for more information!
Check out the stunning view of our Sun in action, as seen during the last five years with the Solar Dynamics Observatory (SDO): https://www.youtube.com/watch?v=zXN-MdoGM9g
We’re on Facebook: http://NW7US.us/swhfr
Visit, subscribe: NW7US Radio Communications and Propagation YouTube Channel
Deceptive Sun
 |
| courtesy: http://sdo.gsfc.nasa.gov/data/ |
A quick glance at Sunday's sun reveals a spotless environment, something we will likely be seeing more often in the years to come as the Solar Minimum arrives around 2020. The last minimum in 2009 saw a total of 260 days of spotless suns and long periods of very little geomagnetic activity.
Incredibly, during the minimum in the 28 year period between 1672 and 1699 there were 50 sunspots total. That's not a week or a month but two 11 year cycles worth. The normal expectation would be 40,000 - 50,000 spots within a 28-year period.
But the present, apparently quiet-looking sun, is not all as it appears as a look at today's satellite data and magnetometer readings indicate we are in the midst of a pretty good disturbance, driving the planetary K-index to level 5.
 |
| courtesy: http://www.swpc.noaa.gov/ |
| courtesy: http://sdo.gsfc.nasa.gov/data/ |
With the vast array of solar instrumentation available to us online, much of the mystery involving propagation has been removed, making the tracking and even the predicting of geomagnetic activity, very much easier nowadays.
 |
| Kiruna Magnetometer: http://www.irf.se/maggraphs/ |
From my location on the west coast of North America, my main 6m interest over the past several summer seasons has been focused on the short-lived and exciting sporadic-e openings over the pole to Europe ... but today's sun is not helping. Most of these fleeting openings seem to require undisturbed fields in the polar regions ... geomagnetic quiet. Once CH738 rotates out of view, hopefully the polar activity will subside and maybe, just maybe, the magical 6m polar path to Europe will tease us once again.
 |
| The July 8th, 2014 magic - West Coast to Europe on 6m |
Steve McDonald, VE7SL, is a regular contributor to AmateurRadio.com and writes from British Columbia, Canada. Contact him at [email protected].
LHS Episode #170: Invasion of the Random Dog
 It's our post-Hamvention episode and it's packed with great information. We start off with a look at hams in the news, special event stations for all Canadian operators, the legalities and procedures for proper third-party operation. Then we move into a comparison of Linux live update procedures and the latest news about Raspberry Pi Zero boards. Then we take a tour of the JT9 and JT65 digital modes using WSJT-X. And there's so much more. Thanks for listening!
73 de The LHS Crew
Russ Woodman, K5TUX, co-hosts the Linux in the Ham Shack podcast which is available for download in both MP3 and OGG audio format. Contact him at [email protected].
 Ham Radio Deluxe |
 W5SWL Electronics |
 Ham Radio Prep |
 KB3IFH QSL Cards  Hip Ham Shirts  HamRadioAuctions HamRadioAuctions Reliance Antennas Reliance Antennas Enigma Shop Enigma Shop |  morseDX  Ni4L Antennas  R&L Electronics R&L Electronics antennas.us antennas.us QRV QRV |
- Matt W1MST, Managing Editor
