 |
 More Travelling

"Radio was born here" sign in an old CBC building
Once again, I am travelling because of work. This time it is the other side of North America, I am currently in St John’s Newfoundland.
While Ontario has had a heat wave the weather in St John’s has been cool and foggy. The fog has been almost continuous since I arrived on Sunday and it even caused one aborted attempt at landing when flying in from Ottawa. The conference has been good and in the evening we have visited Kelly’s Bar which has great fish and chips as well as live music. For vegetarian food I recommend the Sprout too, great curry! (Just realized, showing my British origins with my eating habits – fish n’ chips and curry).
The fog lifted a little today and gave an opportunity to see more of the painted ‘jelly bean’ houses that St John’s is famous for.

One of the 'jelly bean' houses in St John's NF
The conference is now over and I fly back tomorrow afternoon. However, in the morning I plan on visiting Signal Hill the receiver site of Marconi’s first trans-Atlantic radio transmission. I will report on the visit in a later post.


![]()
Alan Steele, VA3STL, is a regular contributor to AmateurRadio.com and writes from Ottawa, Ontario. Contact him at [email protected].
An Honest Report
Some may just jump to the conclusion that I’m recycling articles from QST, but I’m not — I promise! Having said that, on with the show…
A few months ago there was a nice two-month series in QST about signal reports. The author concentrated on what the numbers actually mean and how to use the reports. The first installment was about voice signals, the second about digital signals along with a suggestion of a tweaked system for digital signal reports.
I enjoy a nice cross section of our hobby: rag chewing, traffic handling, EmComm, some contesting, DX’ing, nets, and digital work. Of all those aspects there is one thing that stands out that seems pointless. Every signal report is a 5 by 9. Now I understand that during the peak or activity in a contest, it may be easiest to give the same report to everyone, especially if you can have your logging program pre-fill the signal report. But is this helpful? Is it ‘honest’? The signal report system was designed to give a signal report. An honest evaluation of how you can copy the other station. It wasn’t conceived to be an autopilot tool to speed along a contest or QSO.
If someone is stuck in autopilot with 5 by 9 reports, what’s the point of even giving them? There are times where it’s beyond obvious that I was hard to pull out, yet I’m told I’m 5 by 9. If they we’re honest about my report, I could tweak my antenna or processor or if I have an amp, turn up my power a little to improve my signal. If I’m only giving out a 5 by 9 report, the same holds true, it’s of no help whatsoever to the other station.
I refuse to just give 5 by 9 reports. I don’t care if it’s a contest or a rare DX station. If they are not an honest 5 by 9, I will not give them a 5 by 9 report. I’ve made a few contesters mad. One even chewed me out about it. One even tried to ‘teach me’ to only give 5 by 9 reports. But I refuse. I want to use the system properly!
I challenge others to join me, give an honest signal, even when it catches the other station off guard. Maybe if enough of us do that we’ll start getting honest reports back and be able to actually use the reports as they were intended!
Handiham World for 08 June 2011
Welcome to Handiham World!
Troubleshooting 101: Your toolkit
Having the right tool for the repair at hand is important. Life being what it is, you never know what you might be called upon to fix, and being an amateur radio operator most definitely opens up possibilities that the average homeowner will not encounter! While a typical household toolkit will include hand tools like a few sets of pliers, a hammer, perhaps a wood saw and a hacksaw, screwdrivers and some wrenches among other simple tools, the ham’s toolkit will add a few tools related to electronics.
When I was growing up, my dad made a living by selling and repairing office machines, particularly typewriters. That work was mostly dealing with mechanical devices, and dad had plenty of tools specific to the job. There were lots of screwdrivers, specialty pliers and other hand tools designed to get at small parts in tight places. Typewriters of the day were both mechanical and electric. Mechanical calculators were such an amazing conglomeration of cogs and tiny moving parts that I still stand in amazement when I think of how the clattering devices could come up with solutions to math problems! Anyway, dad had collected and organized all of his tools and his workspaces to complete diagnoses and repairs on these machines as efficiently as possible.
It takes time and experience to build a workshop and collect the right tools for an activity like amateur radio. I started decades ago with some of my own hand tools, like wrenches, which I needed to do antenna work. I didn’t want to have to borrow my dad’s tools. Not having much to spend as a teenager, I bought a set of “Globemaster” wrenches. They were stamped “Made in India” and I still have some of them today. I couldn’t even begin to guess how many miles they have on them just going up and down towers! Of course I acquired a multimeter from Radio Shack when I felt that I could really afford to splurge. A cheap SWR bridge of the type used with CB radios worked for my antenna needs, and dad helped me choose a soldering pencil and showed me how to correctly heat and flow the solder over a clean joint to make a solid connection. Dad used a propane torch for some of his parts soldering, so I learned how to use that to make outdoor connections, soldering my antenna wires.
Over the years I have collected lots of tools. I have a frequency counter, an oscilloscope, a transistor tester, several multimeters – both analog and digital, SWR meters, a logic probe, a frequency generator with selectable waveforms, lots of hand and power tools, and those old Globemaster wrenches. It’s worth noting that most of these tools really are not what I call “core” tools. Using an oscilloscope is a rare thing for me, but the small hand tools like side cutters and screwdrivers get used all the time. That’s partly because they have to do service in the repair of typical household items. You can get started building your tool collection logically by getting a good set of screwdrivers, nut drivers, and pliers, including needle nose pliers. You will need a couple of side cutters, probably a miniature pair and a larger pair for cutting and stripping wires. A multimeter is a definite plus as an early purchase, because you will use it for household repairs as well as for radio work. Many of them include an audible continuity tester, something that really comes in handy when checking coaxial cables for shorts and open circuits. Good quality electrical tape, such as that made by 3M, is a useful item to have in your toolbox. And speaking of a toolbox, you might want to have several of those as well. I like the smaller plastic ones with a couple of trays to help keep things sorted out. A bigger metal one may be the best bet for tools like hammers, saws, and plumbing tools.
One thing you will learn by experience is which tools to put in a small toolbox to take along on most of your projects. When you get good at doing simple repairs, you likely have gotten the hang of grabbing the right tools before setting out for the garage or back yard, or the Field Day site. If you have ever been working on a Field Day antenna and needed a wrench that you forgot to bring, you know how frustrating a poorly-stocked toolbox can be. Going to Field Day? Why not start a checklist so that you are sure you’ll have all the tools you need?
Don’t forget about safety! Whether you are working on projects around the house or yard or at the Field Day site, you will still sometimes need gloves or eye protection – and yes, even if you are blind you do need eye protection. Some basic safety gear to consider as you build your tool collection might be:
 | Safety glasses or goggles – use for lots of stuff around the house, and for antenna work or during soldering.
|
| Gloves – great for hand protection while gardening or installing masts!
|
| Extension cords with third wire for ground – help to prevent electric shock when using power tools.
|
| Hearing protection – perfect for saving your hearing while vacuuming the carpets or while using power tools.
|
| Hard hat – protects your noggin while trimming trees or while working on a tower project when someone drops a wrench from 30 feet up.
|
| Ground fault interrupters – excellent shock protection!
|
Proceed logically with your tool collecting. Acquire the usual household tools and safety gear first, then add the meters and other less often used gear later on. If your capabilities in tool use are limited, start simple and learn what works for you and what doesn’t. Asking for help through your local radio club is usually an option, and actually makes a lot of sense for anyone, because there will be times when you only need some esoteric and expensive tool once, so why not ask a fellow club member who owns one to help you out? Everyone should have at least one pair of hearing protectors around the house, but it is perfectly understandable if you don’t care to own a chain saw or an oscilloscope.
Know your limitations. If you cannot see to use some power tools safely, you can concentrate on building a collection of hand tools that you can use independently. If you are unable to lift and climb, you are not going to need a climbing harness. This is not rocket science, but it does bear mentioning because we don’t always know our own limitations without trying something first. This is a very individual thing, so I recommend keeping an open mind and trying new things – but with someone experienced in operating that new power tool or doing soldering. Having a spotter available during a project like using a table saw or climbing a tower is essential. I recall one of my ham radio friends who severed his fingers with a power saw. Thankfully there was help nearby! Using tools when you are tired or not feeing well, or – heaven forbid – when you have been drinking alcohol, is a prescription for disaster.
Having a good, basic set of tools that you are comfortable using should be your goal. Now, let’s get out there and fix something!
Send your ideas about troubleshooting for possible inclusion in this column to:
Patrick Tice [email protected] Handiham Manager
Letters

Looking for a TS-480SAT? Here’s your chance!

Tom Behler, KB8TYJ, writes:
I think I’m just about ready here to take the plunge and order a Kenwood TS-590S HF transceiver. Before doing so, however, I am going to have to sell one of my TS480’s. You know: It’s the old “radio in, radio out” principle.
So, here’s what I’ve got, and what I’m proposing:
TS-480 SAT, which includes the mobile mounting bracket and all original accessories plus the VGS1 voice guide, and a 500 HZ CW filter. I also have a number of Braille and electronic documentation files on the radio, including the manual, a key-chart, menu list, and other assorted goodies. I bought this TS480 slightly used back in the Spring of 2008, and it has served me well. It is in good working order, and I’ve never had a problem with it.
I’m asking $900 for the entire package, and that will include shipping within the USA. If the VGS1 is not needed, I’ll take it out of the unit, and drop the price down to $850. I would prefer payment in the form of either a postal money order, or certified cashier’s check. I have advertised the rig in other places, but really would prefer it to go to a fellow blind ham, or other Handiham member who could take full advantage of its great accessibility. If you have questions, or want more specifics, please e-mail me personally at: [email protected]
Blind users: Call for assistance with Elecraft K3 screenreader project

The Elecraft K3 has earned a reputation as an excellent, high-performance 160 through 6 meter rig. Wouldn’t it be great if there was a software program to collect data from the radio and return it in a blind-accessible format? Well, listen to what Mike, NF4L, says:
Dear Handihams,
I’m Mike Reublin NF4L. I have written a program that collects the responses that an Elecraft K3 can return, and puts it on the computer screen, so a user’s screen reader can say it. I’m in late testing, and it was suggested that some of the Handiham members might be interested in helping me test. And to use it when it’s released.
If this is of interest to you, how can I make the request to the sight impaired community?
This has the backing of Elecraft, and it’s free.
73, Mike NF4L
Can you help Mike with this project? If so, he would like to hear from you. Contact him via email at nf4l at nf4l dot com.
Please feel free to share this story with the blind ham community. Let’s get the word out to as many potential beta testers as we can!
Pat Tice, WA0TDA, is the manager of HANDI-HAM and a regular contributor to AmateurRadio.com. Contact him at [email protected].
2010 ARRL June VHF QSO Party (yes, 2010)
When I came home today, I found a large envelope from the ARRL waiting for me in the mail, and opened it up to find this:

It turns out that I won the 6m category for the 2010 ARRL June VHF contest and I didn’t even know it! It may be a little difficult to read, but the fine print towards the center left says “Winner 50 MHz”. That was definitely a nice surprise.
The 2011 ARRL June VHF QSO Party (link goes to the rules for the contest) is coming up this weekend, the 11th – 13th of June. I have some family coming in from out of town and some other commitments so I probably won’t be spending as much time on the air as I did last year, but I will try to get on the air and operate as much as I can.
ICQ Podcast S04 E12 – BHI Noise Cancellation (05 June 2011)
Series Four Episode Twelve of the ICQ Podcast has been released. News Stories include :-
- Radio Show about Amateur / Ham Radio
- Is USA 420-440 MHz safe?
- National Amateur / Ham Radio Club of the Year winners
- London Olympic 70cm tests
- 6C8G Amateur / Ham Radio valves (tubes) wanted
- Out-of-this-world communications for Children and the Pope
- P3-E and P5 Amateur Radio satellites update
- No more morse in Japan test
- Australian top Amateur / Ham Radio DXCC’rs
- Radio Nord Revival back on 603 kHz
- 2011 70 MHz Sporadic-E season has opened
- Sun becomes more active again
- RSGB to sell Luso radio tower
- Long-distance ham radio bicyclist rides from Alaska to Texas
Your feedback and Graham Somerville (M3ZGS) joins us to discuss BHI Noise Cancellation products.
Colin Butler, M6BOY, is the host of the ICQ Podcast, a weekly radio show about Amateur Radio. Contact him at [email protected].
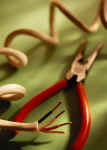
Recycling LMR crimp connectors

A while back, I came upon about two dozen Times Microwave Systems TC-600-NM connectors that had been improperly installed and cut off. Knowing that LMR-600 type cable is commonly available, I stashed them for later use. These connectors cost between $8 and $15 each, so the ability to recycle could offer a substantial savings. I endeavored to see just what it would take to do so.

The first step is to remove the heatshrink tubing (if installed). These connectors employed a relatively easy-to-remove heatshrink, which I was able to get off with a sharp knife. (That probably means that they would have filled with water if they had been used.)

Twist off the old crimp ring with two pair of Channel-Lock-type pliers.

Presto! (Be sure to do this in a work area where it is easy to vacuum up the small strands of braid that will invariably fall everywhere.)

A butane torch gets the pin off in no time.

Unfortunately, I did not have enough hands to take a photograph and demonstrate the proper technique. Place the tip of the flame on the widest (diameter) part of the pin and rotate the cut-off coax with the pin hanging down. The solder will melt and the pin will drop. Reinstallation can be performed in the exact opposite sequence with the pin sitting on top of the coax.

The secret to this whole operation is the replacement crimp rings. I originally was going to make them but since I did not know the dimensions, I was searching around the Web. And, I discovered that Times Microwave offers them individually (part #CR-600). So, I contacted Joel at The RF Connection and he sold me a bunch of them (second from right below) at an attractive price.

The three rightmost components—connector body, crimp ring, and solder pin, form a complete connector. You just need to add heatshrink, which is also available from the RF Connection and many other vendors. The trick to getting a correct installation on the connectors is to be sure that the pin seats (clicks) into the body before crimping the ring. The whole process of disassembly takes about as long as assembly (minus the stripping step)—just a few minutes.
I recently obtained about 250 ft (80 m) of LMR-600 pieces from various places for about what it costs to fill the gas tank in my Escort. So, this should be a relatively attractive cable for use at K8GU.
Ethan Miller, K8GU, is a regular contributor to AmateurRadio.com and writes from Maryland, USA. Contact him at [email protected].
 Ham Radio Deluxe |
 W5SWL Electronics |
 Ham Radio Prep |
 KB3IFH QSL Cards  Hip Ham Shirts  HamRadioAuctions HamRadioAuctions Reliance Antennas Reliance Antennas Enigma Shop Enigma Shop |  morseDX  Ni4L Antennas  R&L Electronics R&L Electronics antennas.us antennas.us QRV QRV |
- Matt W1MST, Managing Editor
