 |
 W0/FR-107 (Green Mountain) 2085m / 6841ft
 29 November 2011 | by
 To say I’m hooked on SOTA might be an understatement. My second SOTA activation was completed on 27 November, just eight days after my first. Yes, I’m hooked.
As mentioned in recent blog updates, I had ordered a few items from Buddipole which didn’t arrive in time for my first activation of Mt. Herman (W0/FR-063). Let me be clear that this was no fault of Buddipole. I just simply didn’t order the items early enough for them to arrive in time.
So with my new items including the Buddipole shockcord whip, the Buddipole A123 nanophosphate battery pack and the Buddipole mini-coil and the lessons learned from activation #1, I set out for Green Mountain. Before I continue any further. I just want to say that of the list of things I just identified. The “lessons learned” were truly the most important. But new toys are always fun to have and certainly fun to play with.
As I mentioned in my activation alert blog post I chose Green Mountain due to its proximity to my home QTH and very honestly its relatively easy climb. The elevation gain is approx. 1000’ over about 1.9 miles. I was still a little sore from the Mt. Herman trip the weekend before, but couldn’t pass up the great weather which was forecasted for the area. Plus I had some turkey and dressing to work off. 

I arrived at the Green Mountain trailhead just before 8 AM (1500z). This would allow me plenty of time to hike to the summit and get everything setup to start calling CQ at 1700z. There are several trails leading to the top of Green Mountain. I had my APRS beacon on and this is how my trek looked as I hiked to the top.

The Green Mountain trail is a well maintained and an easy to follow trail. As a matter of fact, if you live in the Greater Denver area, I would highly recommend Green Mountain as a good starter SOTA summit. It’s close to Denver and the metro area and like I said it is both an easy trail to follow and not difficult either. As I stated previously, there are several trails that make up the Green Mountain Park area. All are clearly marked as shown to the right.

Like many of the foothills that dot the landscape around the Denver metro area, Green Mountain does have a transmitter site and tower. The transmitter site and tower is not the summit. But as I approached the trail that passes near the site, I saw what I thought was a little boy or girl sitting on a rock. It was still early and there was no one else around. This little boy or girl continued to just sit there on the rock. I began looking around to see if anyone else was around and once I got within about 25 yards I realized was just a rock with a pipe sticking out. Other hikers had placed a sweater, scarf, gloves and a cap. It sure fooled me.

I made it to the summit from the trailhead in just a little over 45 minutes and began setting up the Buddipole Versatee vertical. I used an older hiking staff which has a removable knob handle. Under this knob is a 1/4 stud for mounting a camera. Buddipole provides a machined brass connector which is 1/4” threads inside, with 5/8” threads outside. This allows you to stand the Buddipole Versatee on one end and easily connect it to the monopod or hiking staff. I then guyed it from just below the Versatee and used large rocks to secure it all in place. If you remember from my first activation, the wind really caused problems with the way I setup the vertical. Thanks to Steve wG0AT for this idea.

If you’re not familiar with the Buddipole versatee vertical setup, all it consists of is the Buddipole versatee adapter, Buddipole coil and either the arms and whip from the dipole kit or the new Buddipole shockcord whip. I’m using the mini-coil and the shockcord whip. The final important element to the vertical setup is a single, elevated wire counterpoise. Buddipole sells an inexpensive lightweight counterpoise kit that works great. One end of the wire counterpoise attaches to the versatee adapter and the other I keep elevated off the ground with my other hiking pole.

The other main addition to my SOTA setup is the fantastic Buddipole A123 nanophosphate battery packs. I decided to go large and I purchased the largest pack they offer. This is the 4S4P and is rated at 13.2 volts/9.2Ah and weighs just over 3 lbs. The SLA I packed up to Mt. Herman weighed over 5.5 lbs and was only 7.5Ah. This little battery pack is truly amazing and I’m 100% comfortable with the investment I made.
Weather conditions were early fall like. When I left home the temperature was around 30 F and just in the short 30 minute drive, the temperature at the trailhead was around 38 F. The sun was shining bright and summit temperatures during my two hour stay were in the 50’s with a very light breeze.
But how did it all perform? Well…I began calling CQ at just before 1700z and logged my first contact on 20m at 16:58z. I worked 21 contacts on 20m (including a summit to summit contact with wG0AT) and finished up with another 18 QSO’s on 17m for a total of 49 QSO’s in just under two hours. While band conditions weren’t as good as last weekend, I still had a lot of fun and truly look forward to activation number three.
Speaking of my next activation. It may actually be a few weeks (or longer) before I have the opportunity to do another SOTA activation. My wife and I are planning to travel to Texas in about 10 days and then the Christmas holidays are just around the corner. Also, winter weather will surely arrive at some point and bring snow covered trails and much, much colder temperatures. I’ve said several times that I don’t consider myself to only be a fair weather SOTA activator, but I also like playing it safe.
Regarding my possible next activation. The Colorado Front Range weather can be cold and snowy one day and a few days later all visible signs of snow have melted away. With that said, there are dozens of SOTA summits just in my backyard ranging in elevation from 6,800 – 9,500 feet with good, solid trails. I plan to just start at the bottom of the list and work my way up (at least during winter). This is sure to keep me busy for a while.
Until next time….
73 de KD0BIK (Jerry)
Jerry Taylor, KD0BIK, is a regular contributor to AmateurRadio.com and writes from Colorado, USA. He is the host of the Practical Amateur Radio Podcast. Contact him at [email protected].
Low-profile 2-meter mobile suggestions
A fellow blogger, Brick O’Lore, wrote me with a question that I don’t have a good answer for. Would anyone care to weigh in on this?
I’d like to add a 2M mobile rig in my wife’s car. Sounds simple enough, but the trick is that I need something that is as small as possible and will have a really neat installation. I’d prefer to have a mobile rig that I can wire in (power and an antenna) and see the display (versus cobbling together something with an HT). A detachable faceplate/remote would be fine. I want 2M to hit the repeaters – any other bands or advanced features would be a bonus, but not required. The car is a 7 year-old Audi A4 and there is very little room in the footwells. It does have a neat feature – a drawer under each of the front seats. So what’s small and installs such that it will score well on the WAF (Wife Acceptance Factor) scale?
My suspicion is that there are a lot of good choices — and none are going to be particularly “affordable.” If you have a photo of your creative radio installation that might help others, send it to me (editor at amateurradio dot com) and I’ll attach it to this post. I think that would be especially helpful. If not, your insight and tips via comments are always very much appreciated!
Matt Thomas, W1MST, is the managing editor of AmateurRadio.com. Contact him at [email protected].
Great Cheap Toy for those of us over 40!
OK.. I’ve been debating about getting one of these for over a year.

USB "2.0 Megapixel" Web-cam based Microscope
I finally decided to “risk it”…
At about $30 from China on e-bay (look for “joinnew”) .. they are cheap.. but are they good enough for electronics work?
Lets see. Most claim to be 2.0 MP but like mine the are really noisy above 640×480 resolution because the sensors really are 640×480 webcam sensors. They are backlit with 8 white “high brightness” LEDs.
There are issues with the setup, and are not good enough for a true scientific instrument. But a true scientific instrument would be too much for surface mount work, anyway. So one of the “20x-200x” variants would be better for electronics than a “50x-500x” unit, anyway.
Here are the results:
Highest magnification of a offset print catalog that came in the mail:

Printing press color image at max usable resolution
BATC Digilite board– various parts shot at differing magnifications. The IC is a TSSOP, so it’s pretty small. This shows that I about have hand SMT soldering down.. this is what it should look like at magnification, BTW. (See My other blog for some tips IMHO on how to SMT solder!)

TSSOP I/Q Modulator at "medium" magnification

Chip Tantalum and leads from TSSOP at "low" magnification

Leads on TSSOP at medium magnificaion, but higher magnification than IC package picture
As you can see, it’s quite adequate for board inspection. As the magnification setting increases, the unit needs to be closer to the board. At low (20x or less) magnification the unit can be a couple of inches away from the board. It *may* be possible to actually mount and solder the part on the board when using the USB Microscope at a low magnification setting.. but I’ll have to experiment.
The units come with a poor quality stand, but I plan on getting a stand off a spring loaded arm lamp (I saw a neat one on a small little lamp at IKEA the last time I was in Chicago.. maybe if I ever get back to visit mom).. I suspect if a stand could be fabricated to keep the beast out of the way of the soldering iron, it could actually be used when soldering.. especially with the protective lens cap it comes with on. I’ll figure it out later and post somewhere.
For $30, it’s adequate for electronics use and I actually recommend it as a tool for construction. The only “rip-off” part is that it’s not really usable above 640×480– the higher “res” modes overtax the capabilities of the sensor and are very noisy. (Dont believe the 1.3 or 2.0 MP claims!) Despite this, as you can tell it’s about right for circuit board work.
I used to laugh when someone told me that “right at age 40” you get presbyopia — but I literally woke up one morning 6 months after my 40th birthday, looked down at my (out of focus through my glasses) watch and thought… “oh crap!”…It literally happened to me overnight!… Now I have to take off my glasses to do close in work. I suspect as I further deteriorate with age that it will even get worse.
This seems like an inexpensive tool to cope.
Recommended for the price. Shipping was only one week from China during the “holiday rush” time. Great deal.
Fred Spinner, WØFMS, is a regular contributor to AmateurRadio.com and writes from Iowa, USA. Contact him at [email protected].
CQWW CW at 500mW’s
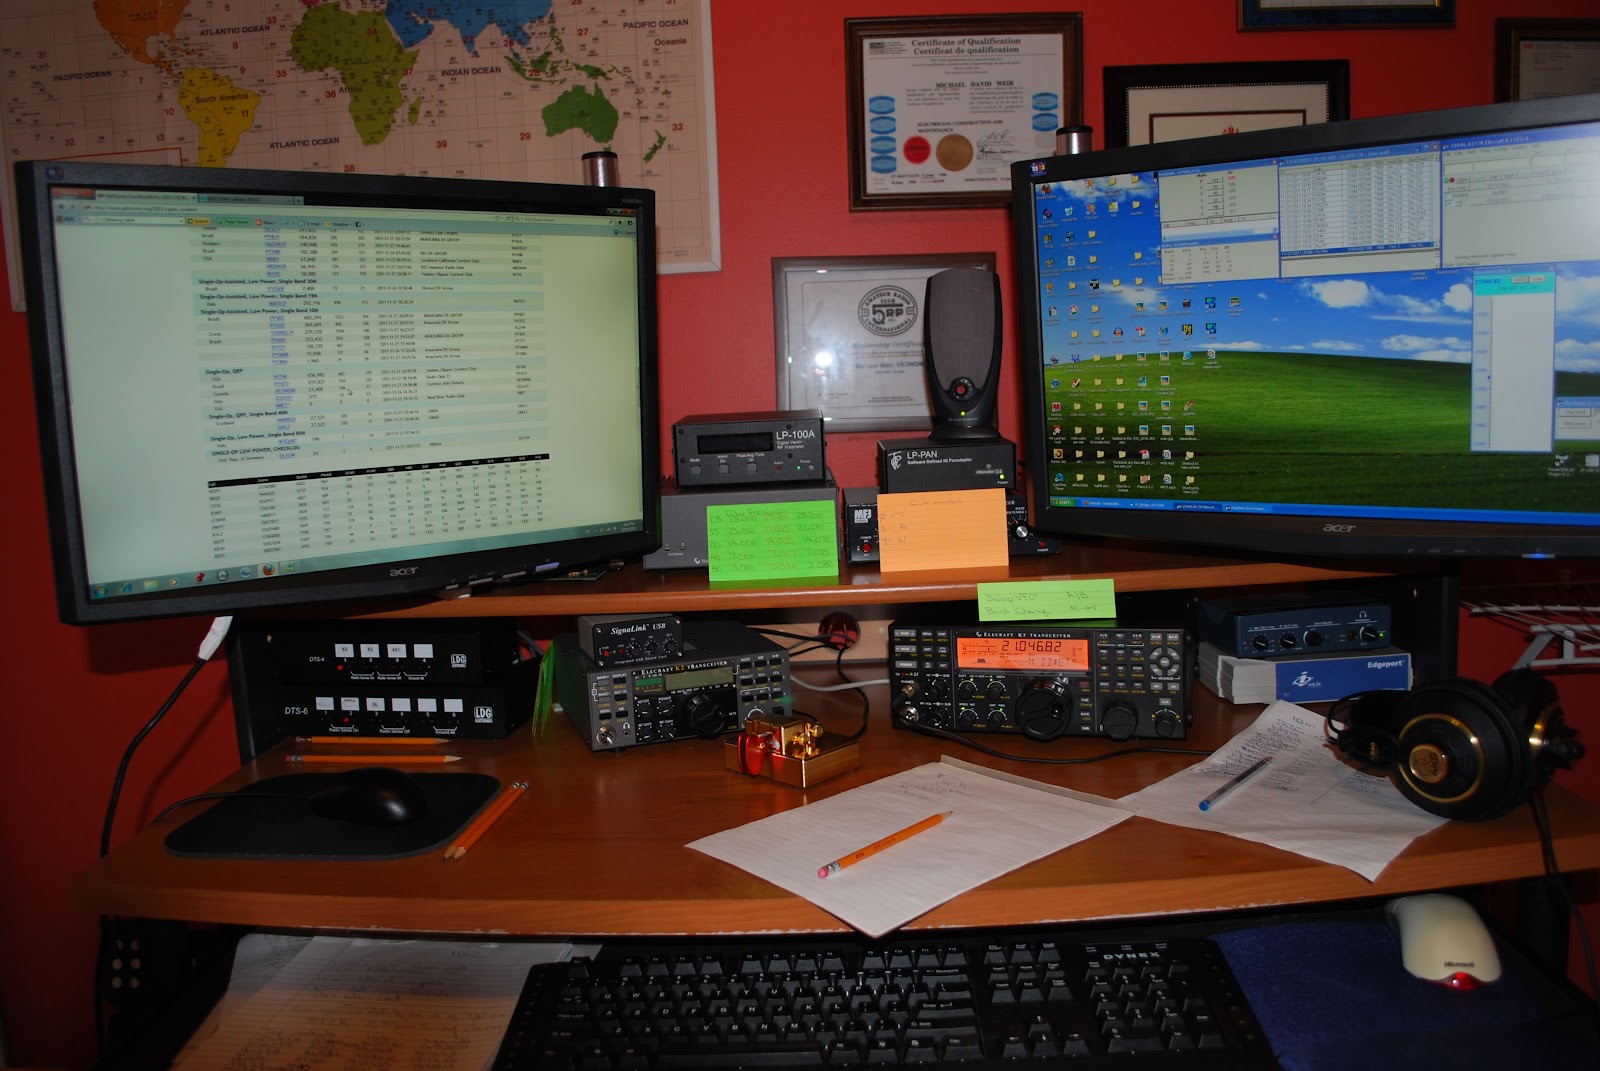 |
| Contest time |
1. Relax and have fun contacting hams all over the world.
2. Run most if not all the contest QRPp at 500mW's.
3. As I finish a contact check out the ham on QRZ.COM and learn about them and their station as I cruz for another contact.
4. Beat my miles per watt record of 8325 miles per watt.
5. Try to beat the 300 contact wall.........never stood a chance as I was doing to much of goal number 1 and 3!!!
contact Miles Miles per watt (.5 watts) Kilo's
1. ZS4TX 8368 16737.20 26935.91
2. EM2T 4742 9484 15263.91
3. 4O3RR 4695.2 9390.32 15112.26
4. IR8C 4568 9137.34 14705.12
5. HG1S 4415 8831.18 14212.41
6. 9A1P 4360.22 8721.85 14036.46
7. S50K 4358.0 8717.05 14028.74
8. IR8C 4290.22 8580.43 13808.86
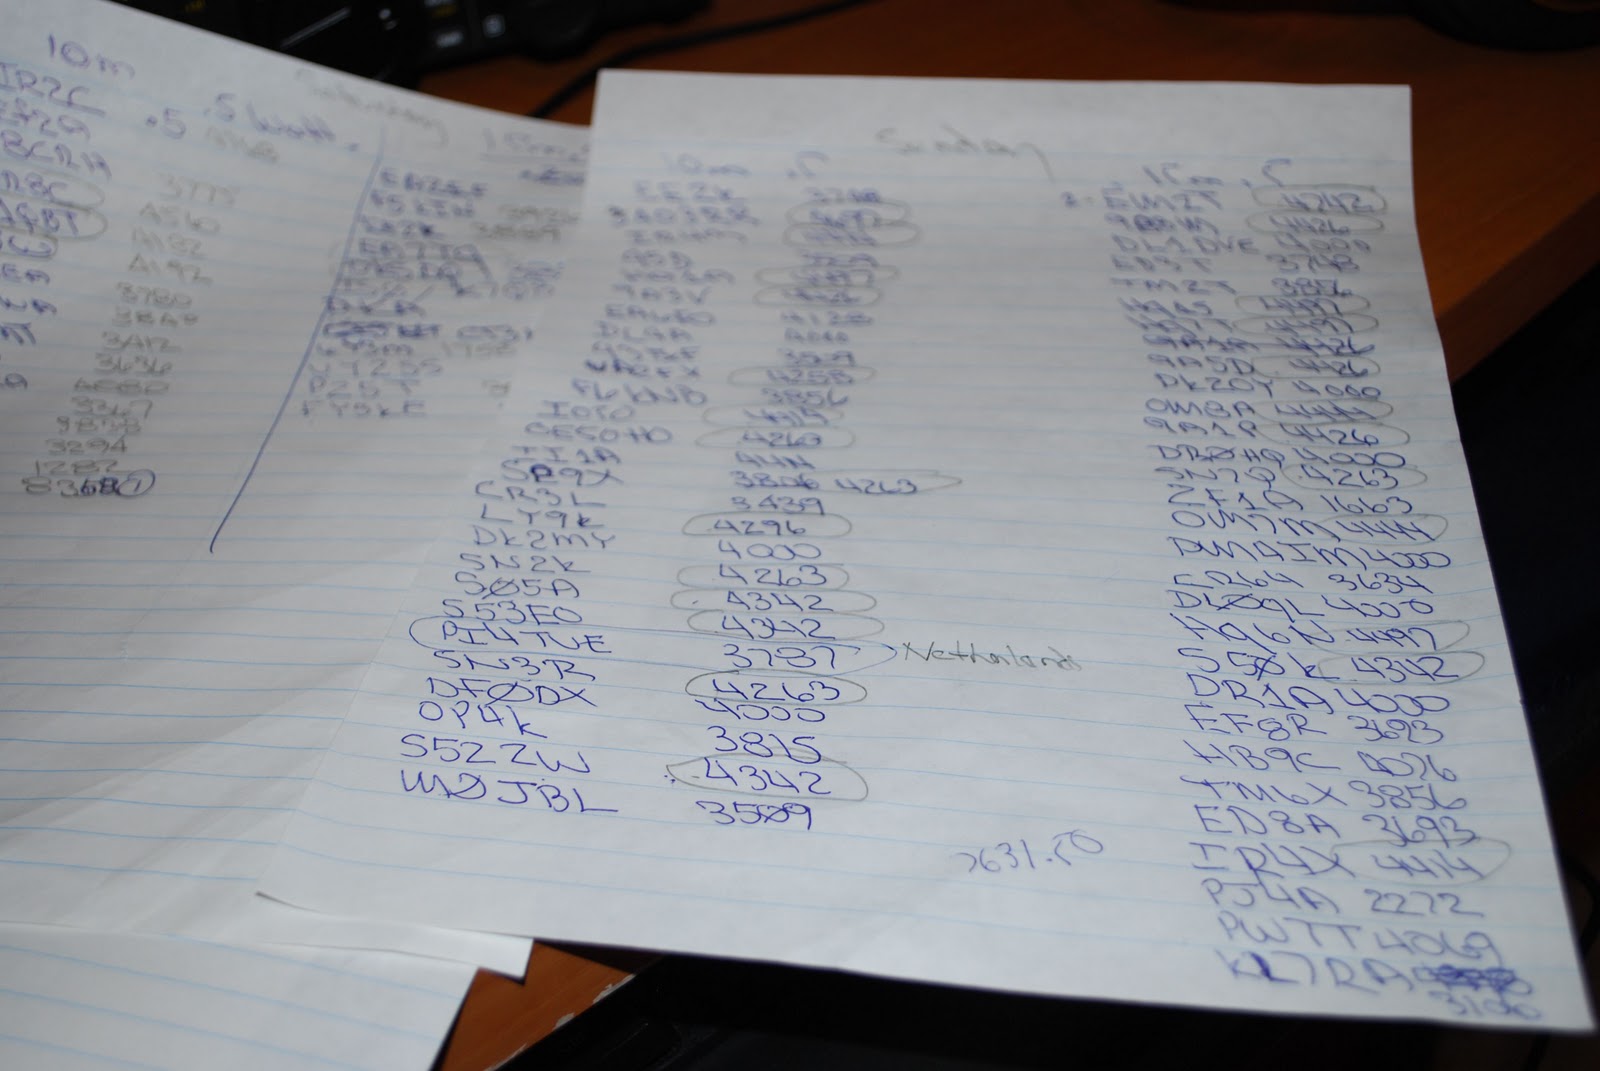 |
| Keeping track of mileage |
Over all I made 106 contacts out of that 84 contacts were made with 500mW's 21 with 5 watts and one contact on 40 meters with 50 watts. It seems that on 40m I just was not cutting it and to make a contact I had to raise the power to 50 watts. So that was the last contact on 40 meters. As for beating records I was thrilled to contact ZS4TX which got me 16737.20 miles per watt!!!!! Not only that in this contest I was able to make 30 contacts that topped my 8325 watt per mile record. Now running 500mW's did bring my QSO count down as there was lots of repeats I had to do. I just want to thank the op's out there who stuck with me and asked over and over again for my call instead of just moving on.
Earlier I did say that I was never going to win a contest but in closing I have said this before in the blog..............there should be a QRPp category. There is QRP but running 5 watts is different from pumping out Milli-watts. Well change does take time and maybe in time there will be a spot just for QRPp.

Mike Weir, VE9KK, is a regular contributor to AmateurRadio.com and writes from New Brunswick, Canada. Contact him at [email protected].
Last Chance for ARISSat-1 is coming up!
Did you know that you’re running out of time if you’ve been planning on working ARISSat-1? Why do you ask? Well, it’s estimated to be re-entering in January or February 2012. So now is the time to use the on board repeater or get an SSTV pic.

Photo Courtesy of AMSAT
The satellite was deployed back in August and since then has lost about 60km of altitude, and is estimated to be losing 1.5km per day. This is due to increased drag on the craft from increased solar activity on the atmosphere. From Southgate ARC:
The orbit period changes about 30 seconds per day, and that will increase steadily. Be certain to update your tracking program Keps from Space-Track or CelesTrak before each pass. They issue revised versions 3-5 times daily.
That’s a lot of revisions, so make sure to stay on top of them if you want to work it. Plus any telemetry data the engineers can get from the satellite will help in future flights. If you want more information on ARISSat-1 feel free to check the related stories below or you can check out these stories done here for more info.
73.
Rich Gattie, KB2MOB, is a regular contributor to AmateurRadio.com and writes from New York, USA. Contact him at [email protected].
First Digital-Mode QSO!
Tonight I made my first digital-mode contact! Using PSK-31, I worked special event station VE3FRST (“UN International Year of Forests”) on 40 meters. Michael, VE3NOO, kindly emailed me this screenshot of the moment:

A few things had me fumbling around, but over the next few contacts I started to get the hang of it. After VE3FRST I went on to work another station in Ontario, one in Alabama, and one in France with PSK-31 before retreating to my key and working Costa Rica with CW.
I highly recommend the DigiMaster PRO PLUS! It comes with a USB soundcard and was very easy to hook up and get going with Ham Radio Deluxe/Digital Master 780. It performs both as a CAT interface and as a data interface, and works great.
I learned the hard way that not all CAT cables are worth buying. Buy cheap, and you’ll buy twice like I did. My first one was a cheap cable from “affordableradio” on ebay. It uses the Prolific chipset for the serial-to-USB interface. Stay away from Prolific! The only thing prolific about it was the prolific number of spontaneous disconnections and “Blue Screen of Death” crashes. I tried everything — every driver I could get my hands on, I/O buffer adjustments, etc. but it was junk. I couldn’t bring myself to sell it to another ham, so I returned it. No refund yet, but here’s hoping.


Todd Mitchell, NØIP, is a regular contributor to AmateurRadio.com and writes from Minnesota, USA. He can be contacted at [email protected].
The Zen of Arduino
Well, I shoulda gotten out into the detached garage this weekend and worked DX.. but the weather was nice on Thanksgiving and the day after (when I had to do family stuff thankfully) and freaking cold and windy the rest. (I can heat it but it takes some planning…)
So instead, I decided to catch up on building/hacking projects from the past and ones on a weird tangent to my current construction project the BATC DigiLite.
The past project is rebuilding my ORIGINAL 1998 Dallas Semiconductor “iButton” WS-1 One Wire weather station w/humidity and the tipping rain gauge (it’s been ten years since I had it up and running last– it took me several hours to find it!). I plan on stripping all of the one-wire garbage (sorry, it never worked reliably with any cable length at all) except for the temp sensors out of both units and embedding an AVR and running RS-485 to the units.. and connecting to an Ethernet connected Arduino to report to APRS and/or Weather Underground. My kids are interested and I’m also adding a Real Time Clock and a Barometric Pressure sensor (to the inside unit since my house isn’t pressurized) and having a fairly complete station. No PC will be required and the little 8-bit processors are misers when it comes to power usage!
I want to get my older boys interested in the systems engineering aspect and the coding and the weather station is starting to peak there interest a bit. Keeping my fingers crossed!
This is actually connected to the BATC project in that I want to use the Arduino development system and the extensive library of code instead of taking time I don’t have and writing everything from scratch on a PIC or AVR (non-Arduino). I discovered that except for the bootloader and the sometimes bloated code in some of the libraries (most are very good) that it is not that much less efficient than straight-C on the AVR’s. (The Arduino environment conceals a full open source GCC C++ complier and yup, you can write in C and C++.. you actually are even under the “sketch” environment– but they conceal that well to beginners.) Yes they are small, and slow.. but at $2.50-$6 a pop for DIP IC’s that you can hack together in a hurry.
Here is a picture of some of the AVR based toys I’ve bought and put together over the years. The “real” Arduino shields are recent.. for prototyping your own stuff they suck (since one header isn’t on 0.1″ centers.. DUH!).. but since they are a standard certain modules are cheap (at least the non-Italian “bad labor condition” clones from China) and readily available. You can put together relatively inexpensively and quickly since most of the core code can be borrowed from libraries.
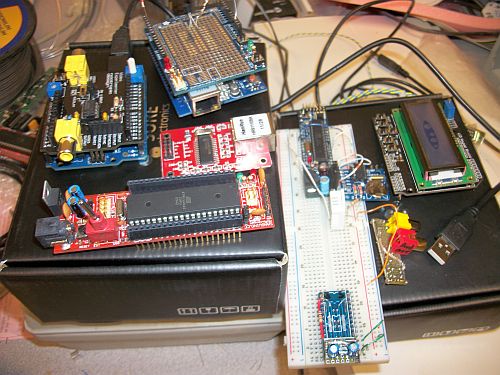
Some AVR based "Arduino" toys-- Arduino 2009 clone with a Nootropic Designs Video Experimenter's Shield, a Sanguino board, an Ethernet module, a Adafruit Proto shield on top of a Clone W5100 Ethernet/SD card shield, a "Boarduino" board with a humidity/temp sensor DHT-22 on it, and a DS1307 Adafruit RTC board attached.. and a homemade video/audio out and a e-bay "DFRobot" LCD Shield 16x2 -- "Unknown" proto card at bottom will be a 5V to 3.3V bidirectional 8-bit I/O board with a 3.3V regulator on it for prototyping.
In relearning the coding, I wrote a lot of odd stuff. Here is an example of a ATMega644 (in an Sanguino PCB) doing a bunch of stuff.. talking to a LCD (via the library in 4-bit mode) and shifting data to a 74HC595 driving the LED’s in a row.. reading from a Dallas (yes, one-wire) Temperature Sensor (those are great units if not parasite powered!) with two debounced switches… doing math for the PLL synth (the numbers in the left bottom corner).. Here is a video:
Sanguino board doing all sorts of stuff
Anyway.. I am going to use the ShiftOut function on the Arduino to program the "Ultram Technologies" PLL board (That I bought preset to 1255 MHz) for the DigiLite LO on the DVB-S modulator. I was going to use that Arduino 2009 / "DFRobot" (clone) LCD Shield to do a GUI. But most of the time the little AVR will be idle. So sad. So I came across the Nootropic Designs Video Experimenters Shield and I thought… really since the BATC project needs the real time MPEG-2 chip in the Hauppage PVR-150 board.. I might as well also do a callsign overlay.
Since the Arduino 2009 has a FTDI chip on it.. it has USB to Serial functionality on it. I can poll the UART at the Vertical Blanking interval and if it receives a PLL tune command, that can be sent to the PLL and displayed (for a short time?!?) on the Video overlay as well. For now, the video overlay shows a callsign message and the system timer in ms for debugging.
Here’s a shot of that too:
Arduino/Nootropic Designs Video Experimenter Shield Overlay Example Video
The video callsign overlay is done with this "sketch":
#include <TVout.h>
 #include <fontALL.d>
 #define W 136
 #define H 104
 TVout tv;
 char s[32];
 unsigned int n = 0;
 int index = 0;
 int messageLen = 34;
 char message[] = "...W0FMS Digital Amateur Television";
 char saveChar;
 void setup()  {
 tv.begin(NTSC, W, H);
 initOverlay();
 tv.select_font(font6x8);
 tv.fill(0);
 }
 // Initialize ATMega registers for video overlay capability.
 // Must be called after tv.begin().
 void initOverlay() {
 TCCR1A = 0;
 // Enable timer1.  ICES0 is set to 0 for falling edge detection on input capture pin.
 TCCR1B = _BV(CS10);
 // Enable input capture interrupt
 TIMSK1 |= _BV(ICIE1);
// Enable external interrupt INT0 on pin 2 with falling edge.
EIMSK = _BV(INT0);
EICRA = _BV(ISC11);
}
 // Required to reset the scan line when the vertical sync occurs
 ISR(INT0_vect) {
 display.scanLine = 0;
 }
 void loop() {
 saveChar = message[21];
 message[21] = '\0';
 for(int x=6;x>=0;x--) {
 if (x<6) {
 tv.delay_frame(3);
 }
 tv.print(0, 92, " ");
 tv.print(x, 92, message);
 }
 message[21] = saveChar;
 saveChar = message[0];
 for (int x=0; x<messageLen; x++)
 message[x] = message[x+1];
message[messageLen] = saveChar;
 sprintf(s, "%dms    ", millis());
 tv.print(0, 0, s);
 }
Assuming that you’ve downloaded the Enhanced TVOut Library into the \arduino\libraries directory.. the code above is how simple something like this can be with Arduino and the libraries. This compiles to less than 10K or 1/3 of the ATMega328P (on the Arduino 2009, or 1/6 of the ATMega644 on the Sanguino).
This is why I like Arduino. It took me less than an hour to build the shield and write the example code. I am not easily impressed and even that isn’t that impressive.. but the Closed Captioning decoder example is impressive. It works really well.. and is so simple really for what it is.
I know that hopefully some day the TV input portion of the BATC project will go from SD analog to SD/HD full digital and a little hack like this won’t be appropriate anymore. But I’ve had a blast with it and I really hope I can leverage it into a learning experience for the kids also.
Pick up a few of these Arduino gadgets (now you can buy them at Radio Shack if you are in a hurry– and want to pay 3x the clone price from e-bay/China) and give it a try– it’s quick fun experimentation and I can now see the ZEN.
73, Fred W0FMS
Fred Spinner, WØFMS, is a regular contributor to AmateurRadio.com and writes from Iowa, USA. Contact him at [email protected].
 Ham Radio Deluxe |
 W5SWL Electronics |
 Ham Radio Prep |
 KB3IFH QSL Cards  Hip Ham Shirts  HamRadioAuctions HamRadioAuctions Reliance Antennas Reliance Antennas Enigma Shop Enigma Shop |  morseDX  Ni4L Antennas  R&L Electronics R&L Electronics antennas.us antennas.us QRV QRV |
- Matt W1MST, Managing Editor
